
Popular categories
Looking for a yarn?


Comments / Questions (25)
![]() Sue wrote:
Sue wrote:
I am confused by Row 5 (bottom up) on M2. M2A (4 st) and M2C (5 st) are included only as a border on each row with M2B (6 st) to be repeated numerous times between M2A and M2C. Yet on Row 5 in the diagram, the two stitch combinations on the diagram include stitches from the two borders - A & C.
08.07.2020 - 00:02DROPS Design answered:
Dear Sue, on row 5 you work k3, YO (= 4 sts for M.2A), then work the last st of M.2 tog with the first stitch on M.2B (= first st in M.2B) and finish M.2B with a YO, the last stitch in M.2B will be worked tog with the first stitch next M.2B and then M.2C. Happy knitting!
08.07.2020 - 08:19
![]() Maria Rieg wrote:
Maria Rieg wrote:
Das Modell finde ich wunderschön. ich weiß nur nicht, wann ich welche Wolle verarbeiten soll.
17.06.2020 - 18:29
![]() Maria Rieg wrote:
Maria Rieg wrote:
Woran erkenne ich wenn ich das Garn wechseln soll- von Alpaka zu Brushed Alpaka Slk? Vielen Dank
17.06.2020 - 18:26DROPS Design answered:
Liebe Frau Rieg, die ganze Jacke wird mit 1 Faden Alpaca + 1 Faden Brushed Alpaca Silk gestrickt, dh 2 Fädig. Viel Spaß beim stricken!
18.06.2020 - 09:33
![]() Lucia wrote:
Lucia wrote:
Buongiorno, potrei realizzare questo modello con 2 capi di Fabel o di Delight con ferri 7, naturalmente previa verifica del campione? Grazie❣
15.05.2020 - 16:22DROPS Design answered:
Buongiorno Lucia, può sostituire il filato verificando che il suo campione corrisponda a quello indicato nel modello. Buon lavoro!
15.05.2020 - 16:44
![]() Lynette Coqui wrote:
Lynette Coqui wrote:
If use a double knit yarn how many sts for XL
04.08.2019 - 19:39DROPS Design answered:
Dear Mrs Coqui, we are unfortunately not able to adjust every pattern to every single request. For any further individual assistance please contact the store where you bought the yarn. Thanks for your comprehension. Happy knitting!
07.08.2019 - 10:01
![]() Margo wrote:
Margo wrote:
The knitting gauge for this cardigan does not correspond with the gauge recommended for this yarn. Just wanted to make sure that this is correct. Would this just be a very loose knit?
25.04.2019 - 09:35DROPS Design answered:
Dear Margo, you will work here with 1 strand Alpaca + 1 strand Vivaldi or Brushed Alpaca Silk = 2 strands together with a quite loose tension to give you 13 sts x 19 rows = 10 x 10 cm - make sure to get the correct tension, change needle size if required. Happy knitting!
25.04.2019 - 09:56
![]() Caroline Desterbecq wrote:
Caroline Desterbecq wrote:
Ik doe de M3 anders, want het lukt mij niet, ik doe 1KT, 3 tricotsteek, 24 M3, 3 tricotsteek, 1 KT. want ik krijg geen mooie rechte lijn aan de zijkant.
22.05.2012 - 20:35
![]() Caroline Desterbecq wrote:
Caroline Desterbecq wrote:
Moet ik nu tot 11cm breien met mijn M1 bij mijn voorpand?
22.05.2012 - 16:41DROPS Design answered:
Ja - net zoals op het achterpand
23.05.2012 - 13:10
![]() DROPS Design NL wrote:
DROPS Design NL wrote:
Dus de laatste keer brei je 1 omslag en de st 5 en 6 r: haal 1 r st van de nld, 1 r en haal de afgeh st daarover.
22.05.2012 - 16:34
![]() Caroline Desterbecq wrote:
Caroline Desterbecq wrote:
1 kantst, 3-3-0-0-3 tricotst, M.3 over de volgende 30-30-30-30-40 st, 3-3-0-0-3 tricotst, 1 kantst: klopt niet, M3 24 steken!
22.05.2012 - 16:05DROPS Design answered:
Het klopt! M.3 = 12 st per herhaling, 30 st = 2,5 keer herhalen. 2 x volledig en laatste keer de eerste 6 st van het motief.
22.05.2012 - 16:32
|
||||||||||||||||||||||
DROPS 94-6 |
||||||||||||||||||||||
 |
 |
|||||||||||||||||||||
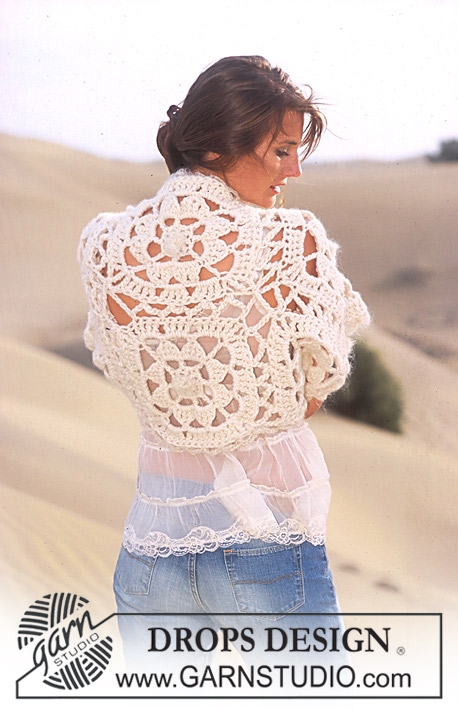
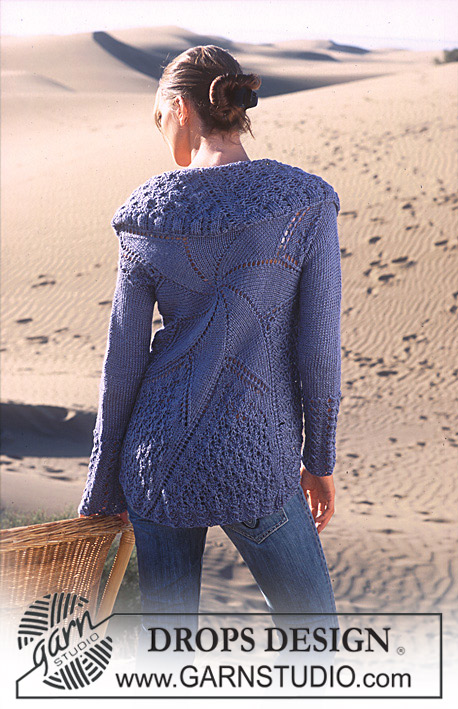
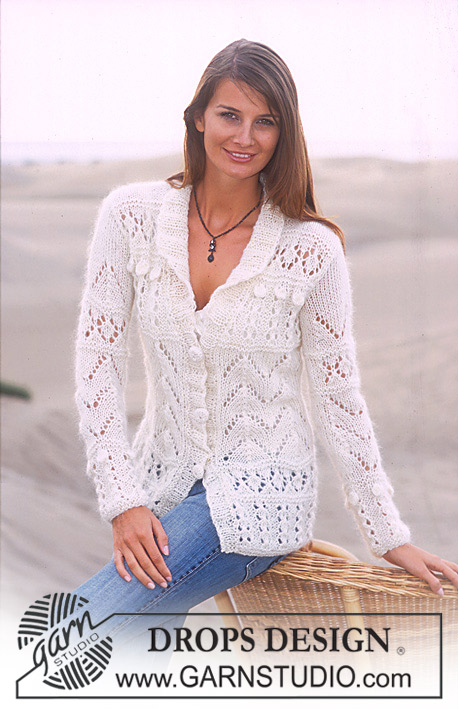
DROPS Jacket in Alpaca and Vivaldi with pattern
DROPS 94-6 |
||||||||||||||||||||||
|
Knitting gauge: 13 sts x 19 rows with 1 strand of each yarn quality on needle size 7 mm / US 10 ½ = 10 x 10 cm / 4" x 4" Garter stitch: Knit all rows Rib: *K3, P3*, repeat from *-* Pattern: See diagrams M.1 to M.4. The diagrams show the pattern from the right side. Decreasing tips (applies to armhole): Decrease within 1 edge st from the right side. Dec as follows after 1 edge st: slip 1 st as if to knit, K1, psso. Dec as follows before 1 edge st: K2 tog. Back piece: Loosely cast on 59-65-71-77-83 sts (includes 1 edge st each side, edge sts are knitted in garter st throughout) on needle size 7 mm /US10½ with 1 strand of each yarn quality (= double strand). Knit 4 rows garter st (1st row = right side) Read all of the following section before continuing: Work diagram M.1 as follows: 1 edge st, M.1A over the first 54-60-66-72-78 sts, M.1B (= 3 sts), and 1 edge st. Continue like this in pattern until piece measures 11 cm / 4½" (stop after 1 full repeat of M.1). Knit 4 rows garter st. Then work M.2 as follows: 1 edge st, M.2A (= 4 sts), M.2B over 48-54-60-66-72 sts, M.2C (= 5 sts), 1 edge st. After 1 repeat of M.2 work 1 row of stockinette sts and continue with M3 as follows: 1 edge st, 4-1-4-1-4 sts in stockinette st, M.3 over 48-60-60-72-72 sts, 5-2-5-2-5 sts in stockinette st, 1 edge st. Work 4-4-4-5-5 repeats of M.3. After M.3 the piece measures approx 41-41-41-46-46 cm / 16"-16"-16"-18"-18". Now purl 1 row from the wrong side and then knit 4 rows in garter st. Continue in M.1, at the same time when piece measures 47-48-49-51-53 cm / 18½"-19"-19¼"-20"-21" bind off for armholes each side on every other row as follows: 3 sts 1 time, 2 sts 0-1-1-3-4 times and 1 st 3-4-4-3-4 times = 47-47-53-53-53 sts – work sts not fitting into pattern in stockinette sts. When piece measures 52-54-54-56-60 cm / 20½"-21¼"-21¼"-22"-23½" (stop after 1 full repeat of M.1), work M.4 and then 4 rows in garter st. Then work M.2 as follows: 1 edge st, M.2A (= 4 sts), M.2B over 36-35-42-42-42 sts, M.2C (= 5 sts), 1 edge st. After M.2, finish the piece in stockinette st. Neckline: At the same time when piece measures 64-66-68-71-74 cm / 25¼"-26"-26¾"-28"-29⅛", bind off the middle 11-11-13-13-13 sts for neck and work each side separately. Continuing dec 1 st at neckline on next row = 17-17-19-19-19 sts left on shoulder. Bind off when piece measures 66-68-70-73-76 cm / 26"-26¾"-27½"-28¾"-30". Right Front: Loosely cast on 32-32-38-38-44 sts (includes 1edge st at side) on needle size 7 mm/US10½ with 1 strand of each yarn quality (= double strand). Knit 4 rows garter st (1st row = right side). Read all of the following section before continuing: Work M.1A with 1 edge st each side. After M.1 knit 4 rows in garter st. and continue in M.2 as follows: 1 edge st, 3 sts in stockinette st, M.2A (= 4 sts), M.2B over 18-18-24-24-30 sts, M.2C (= 5 sts), 1 edge st. After 1 repeat of M.2 work 1 row of stockinette sts and then continue with M.3 as follows: 1 edge st, 3-3-0-0-3 sts in stockinette st, M.3 over 24-24-36-36-36 sts, 3-3-0-0-3 sts in stockinette st, 1 edge st. Work 4-4-4-5-5 repeats of M.3. Then purl 1 row from the wrong side and knit 4 rows in garter st. Continue in M.1A, at the same time when piece measures 47-48-49-51-53 cm / 18½"-19"-19¼"-20"-21" bind off for armhole as described for back piece – work sts not fitting into pattern in stockinette sts. When piece measures approx 52-54-54-56-60 cm / 20½"-21¼"-21¼"-22"-23½" (stop after 1 full repeat of M.1), work M.4 (make sure P is over P), then 4 rows in garter st, then M.2 and then stockinette st until finished measurements Neckline: At the same time, when piece measures 43-44-45-46-47 cm / 17"-17¼"-17¾"-18"-18½", dec 1 st towards mid front – see Decreasing tips – 9-6-10-7-10 times as follows: Size S – L – XXL on every 4th row, size M and XL on every 6th row. Work sts not fitting into pattern in stockinette sts. After all decreases are complete for armhole and neckline there are 17-17-19-19-19 sts left on shoulder. Bind off when piece measures 66-68-70-73-76 cm / 26"-26¾"-27½"-28¾"-30". Left front piece: As right front piece, but mirrored. Sleeve: Loosely cast on 32-32-38-38-38 sts (inclusive of 1 edge st each side) on needle size 7 with 1 strand of each yarn quality (= double strand). Knit 4 rows garter st (1st row = right side). Read all of the following section before continuing: Work M.1 as follows: 1 edge st, M1.A over 30-30-36-36-36 sts, 1 edge st. Continue in pattern like this until sleeve measures 14 cm / 5½" (stop after 1 full repeat of M.1). After M.1 work M.4 and then 5 rows in garter st. Then work M.3 as follows: 1 edge st, 3-3-0-0-0 sts in stockinette st, M.3 over 24-24-36-36-36 sts, 3-3-0-0-0 sts in stockinette st , 1 edge st. After 3 repeats of M.3, purl 1 row from the wrong side and knit 4 rows in garter st, and work M.2 - work sts not fitting into pattern in stockinette sts. After M.2, work 1 row of stockinette sts and then work 1 repeat of M.3 and finish the sleeve in stockinette st. Increases: At the same time, when sleeve measures 18 cm / 7" inc 1 st each side and repeat on every 4.5-3.5-4-3-2.5 cm / 1¾"-1¼"-1½"-1⅛"-⅞" a total of 7-8-7-9-10 times = 46-48-52-56-58 sts – work the new sts in stockinette sts until they fit into pattern. Sleeve cap: when piece measures 49-47-47-45-44 cm / 19¼"-18½"-18½"-17¾"-17¼" bind off for sleeve cap each side on every other row as follows: 3 sts 1 time, 2 sts 2-1-1-1-1 times, 1 st 2-6-5-6-7 times, and then 2 sts each side until piece measures 56 cm / 22", now bind off 3 sts each side and then bind off when sleeve measures approx 57 cm / 22½" Assembly: Sew shoulder seams. Border: Pick up approx 189 to 219 sts (dividable by 6 + 3) along right front piece, along neckline at back piece and along left front piece using circular needle size 7 mm / US 10 ½ and 1 strand of each yarn quality (= double strand). K1 row from wrong side and K1 row from the right side. Continue in Rib with 3 sts in garter st and 3 K sts each side (seen from the right side). When border measures 1.5 cm / ½", make 3 buttonholes on right front band by K 2 tog, yo (make buttonholes in a purled report), the top buttonhole approx 1 cm / ⅜" from neckline, the lower approx 20 cm / 8" from bottom edge. When border measures 3 cm / 1⅛", bind off sts on both front pieces up til just above top buttonhole (make sure to bind off a full P or K report). Continue the Rib over the remaining sts for collar, at the same time putting the outermost 3 sts each side on a holder on every other row a total of 6-6-7-7-7 times. The Rib now measures 9-9-10-10-10 cm / 3½"-3½"-4"-4"-4" where widest. Put sts from holders on both sides back on needle and bind off in rib. Crochet button covers: Use crochet hook size 5 mm/ H/8 and 1 strand of each yarn quality. 1st round: ch 2, 6 sc in the first of the 2 ch just crochet, finish with 1 sl st in the first sc = 2nd round: 2 sc in each sc and finish with 1 sl st in first sc from beginning of round 3rd and 4th round: 1 sc in each sc and finish with 1 sl st in first sc form beginning of round 5th round: 1 sc in every other sc and finish with 1 sl st in first sc form beginning of round Put button in cover, sew round the opening and pull tight. Set in sleeves. Sew sleeve and side seams within 1 edge st and sew on buttons. |
||||||||||||||||||||||
Diagram explanations |
||||||||||||||||||||||
|
||||||||||||||||||||||
 |
||||||||||||||||||||||
Have you finished this pattern?Tag your pictures with #dropspattern or submit them to the #dropsfan gallery. Do you need help with this pattern?You'll find 24 tutorial videos, a Comments/Questions area and more by visiting the pattern on garnstudio.com. © 1982-2026 DROPS Design A/S. We reserve all rights. This document, including all its sub-sections, has copyrights. Read more about what you can do with our patterns at the bottom of each pattern on our site. |
||||||||||||||||||||||


With over 40 years in knitting and crochet design, DROPS Design offers one of the most extensive collections of free patterns on the internet - translated to 17 languages. As of today we count 324 catalogs and 12290 patterns - 12280 of which are translated into English (US/in).
We work hard to bring you the best knitting and crochet have to offer, inspiration and advice as well as great quality yarns at incredible prices! Would you like to use our patterns for other than personal use? You can read what you are allowed to do in the Copyright text at the bottom of all our patterns. Happy crafting!
Post a comment to pattern DROPS 94-6
We would love to hear what you have to say about this pattern!
If you want to leave a question, please make sure you select the correct category in the form below, to speed up the answering process. Required fields are marked *.