
Popular categories
Looking for a yarn?


Comments / Questions (90)
![]() Conni Mortensen wrote:
Conni Mortensen wrote:
Jeg er faldet pladask for denne hat, men garn og hæklenål passer ikke sammen, vil I prøve at løse problemet for mig. På forhånd tak. Venligst Conni Mortensen
30.04.2025 - 14:28DROPS Design answered:
Hej Conni, jo det stemmer, denne sommerhat er hæklet ret fast, så for at få 16 fm på 10 cm med 2 tråde Bomull-Lin eller 2 tråde Paris, skal du bruge en tyndere hæklenål :)
30.04.2025 - 14:40
![]() Regine Licher wrote:
Regine Licher wrote:
Wie soll das gehen? Garngruppe C doppelt mit Nadelstärke 3
02.07.2024 - 08:44DROPS Design answered:
Liebe Frau Licher, so wird das gehäkelt, um die gewünschte Textur zu haben, dh ganz fest gehäkelt. Viel Spaß beim Häkeln!
02.07.2024 - 10:28
![]() Debbie wrote:
Debbie wrote:
Can this pattern be adapted for a baby size?
14.02.2022 - 14:03DROPS Design answered:
Dear Debbie, probably - we are unfortunately not able to adjust every pattern to every single request, you are welcome to contact your DROPS store -even per mail or telephone- for any further individual assistance. Thanks for your comprehension.
14.02.2022 - 15:27
![]() Chris Kramer wrote:
Chris Kramer wrote:
I’d like to try this pattern with Rewind tape yarn from Lion brand. How do I convert it?
19.07.2020 - 16:16
![]() Esther Foley wrote:
Esther Foley wrote:
Thank you for just letting me print it rather than having to download those extensions. I will always comeback to your site .thanks again . Esther Foley
12.07.2020 - 21:22
![]() Sabina Weinfurter wrote:
Sabina Weinfurter wrote:
Betreffend der Zunahme für Krempe: genau so, wie oben? Oder 'unregelmäßig? Ist mir nicht ganz klar!
10.06.2019 - 19:43DROPS Design answered:
Liebe Frau Weinfurter, die Zunahmen für die Krempe werden gleichmäßig verteilt zugenommen - hier lesen Sie wie man regelmäßig verteilt zunimmt. Viel Spaß beim häkeln!
11.06.2019 - 12:04
![]() Patmartin45 wrote:
Patmartin45 wrote:
How can I order all of the yarn for this piece for $24.90?
07.05.2019 - 19:57DROPS Design answered:
Dear Patmartin45, the yarn cost is calculated from the materials needed to make the pattern in its smallest size. Some yarns, like DROPS Paris, have different prices for different colors or types - in this case, DROPS Paris recycled Denim is cheaper than Paris uni and we calculate the pattern costs from the cheapest of all the different prices. You can also check out the "DROPS Deals" under the "Yarns" menu nd get this yarns for even less. Happy crocheting!
07.05.2019 - 21:15
![]() Fabienne Jaulin wrote:
Fabienne Jaulin wrote:
Bonjour, J'ai fait mon échantillon avec deux fils Paris et un crochet de 3 mais j'obtiens seulement 15 ms et 15 rangs. J'ai pensé tenter avec un crochet de 2.5 mais j'ai peur que ce soit trop petit. Qu'en pensez-vous? Merci!
06.05.2019 - 14:14DROPS Design answered:
Bonjour Mme Jaulin, vous pouvez réessayer avec le crochet 3 en crochetant un peu plus souple - juste ce qu'il faut pour avoir l'échantillon, ou bien/et essayer avec un crochet 2,5 pour voir la différence, utilisez celui qui se rapproche le plus de la bonne tension. Bon crochet!
06.05.2019 - 14:59
![]() Janni wrote:
Janni wrote:
Kommer man stivelse i hatten for at holde faconen, ellers den fast nok i sig selv. Ville være lidt træt af, at skyggen dækker øjnene. Men rigtigt elegant hat
11.06.2018 - 09:07DROPS Design answered:
Hej Janni, det skal ikke være nødvendigt hvis man hækler i DROPS Bomull-Lin og overholder hæklefastheden. God fornøjelse!
12.06.2018 - 11:22
![]() Marta wrote:
Marta wrote:
Ik vraag me af hoe het mogelijk is om garen wat geschikt is voor een haaknaald van 5mm te haken met dubbele draad op een haaknaald van 3 mm?
22.05.2018 - 10:34DROPS Design answered:
Dag Marta, Het is de bedoeling dat de hoed vrij strak wordt gehaakt, zodat hij mooi stevig wordt. Vandaar de kleine naald, maar je moet misschien wel de haaknaald aanpassen, zodat je je de juiste stekenverhouding hebt.
23.05.2018 - 11:09
|
|
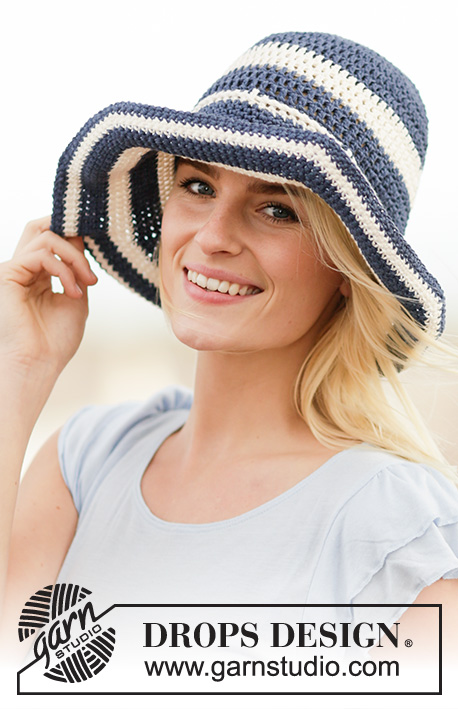
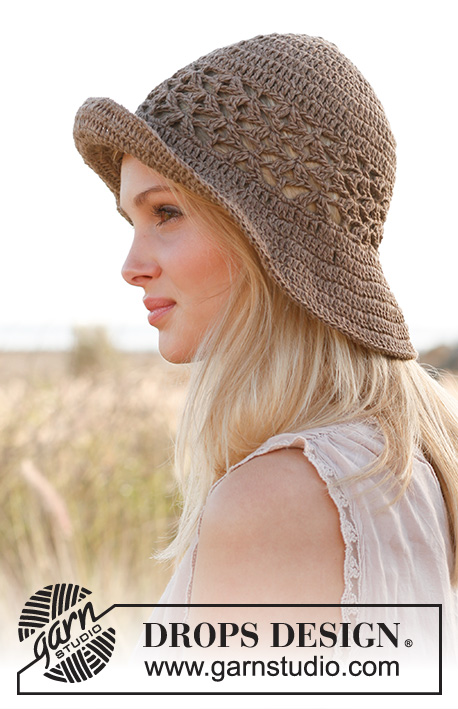
Marlene#marlenehat |
|
 |
 |
Crochet DROPS hat in 2 threads "Bomull Lin" or 2 threads "Paris".
DROPS 146-32 |
|
|
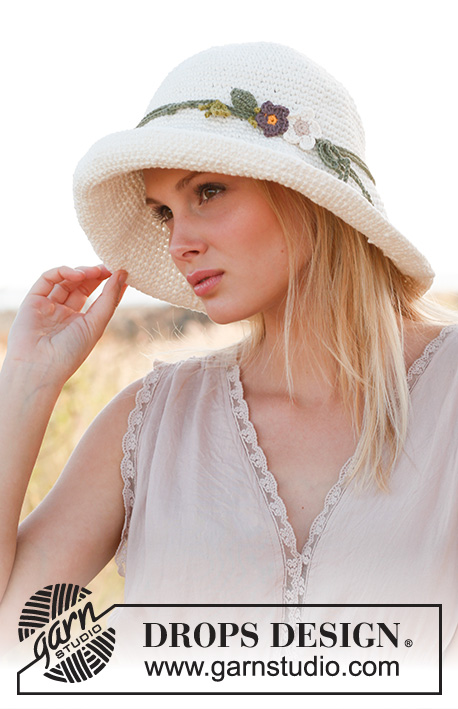
CROCHET INFO: After last dc on the round, continue to next round with 1 dc in next dc (= 1st dc from previous round). NOTE: Insert a marker at the beg of round between last dc and first dc on the round, move the marker upwards when working. --------------------------------------------------------- HAT: The hat is worked top down. Crochet 4 ch on hook size 3 mm with 2 threads Bomull-Lin or 2 threads Paris and form a ring with 1 sl st in first ch. REMEMBER THE CROCHET TENSION! ROUND 1: Work 1 ch, 5 dc in ch-ring – READ CROCHET INFO! ROUND 2: Work 2 dc in every dc = 10 dc. ROUND 3: * 2 dc in first dc, 1 dc in next dc *, repeat from *-* = 15 dc. ROUND 4: * 2 dc in first dc, 1 dc in next dc, 1 dc in next st *, repeat from *-* = 20 dc. Insert 1 marker at the beg of round. Then inc 5 dc on every round, inc the same place as on previous round, i.e. 1 dc more between every inc on every round. The circle will become a pentagon. Continue like this until 16-17 rounds in total have been worked = 80-85 dc on round. Then work in the round with 1 dc in every dc until piece measures 15-16 cm from the centre. Continue to crochet the brim as follows: ROUND 1: Work 1 dc in every dc while at the same time inc 8 dc evenly = 88-93 sts. ROUND 2: Work 1 dc in every dc. ROUND 3- 19: Continue as 1st and 2nd round by inc 8 dc on uneven rounds and working dc in every dc on even rounds. ROUND 20: Work 1 dc in every dc, finish with 1 sl st in first dc = 160-165 dc. Cut and fasten the thread. TIE: Work ch with Safran colour no 26 on hook size 3 mm until tie measures approx. 180 cm, cut and fasten the thread. SMALL FLOWER: Work as follows: 4 ch with Safran colour no 11 on hook size 3 mm and form 1 ring with 1 sl st in first ch. ROUND 1: Work 1 ch, 5 dc in ch-ring, 1 sl st in first ch from beg of round. ROUND 2 (switch to colour no 23): In every dc work: * 3 ch, 2 tr, 1 ch, 1 dc *, repeat from *-* the entire round and finish with 1 sl st in 1st ch from beg of round (= 5 leaves). Cut and fasten the thread. LARGE FLOWER: Work as follows: 4 ch with Safran colour no 21 on hook size 3 mm and form 1 ring with 1 sl st in first ch. ROUND 1: Work 1 ch, 5 dc in ch-ring, 1 sl st in first ch from beg of round. ROUND 2 (switch to colour no 18): In every dc work: * 4 ch, 3 dtr, 1 ch, 1 dc *, repeat from *-* the entire round and finish with 1 sl st in 1st ch from beg of round (= 5 leaves). Cut and fasten the thread. LEAF: Work the leaf with sts on both sides of a ch-row. Work 2 leaves with colour no 26 and work 1 leaf with colour no 14. Work as follows: 8 ch, turn and skip first ch, continue with 2 dc, 3 tr, 2 dc. Work 1 ch at the end of row, continue on the other side of row with 2 dc, 3 tr, 2 dc, finish with 1 sl st in 1st dc. Cut and fasten the thread. BRANCHES: Work 1 branch with colour no 26 and work 2 branches with colour no 14. Work as follows: 8 ch, 1 dc in tie where you want to place the branch, 8 ch, cut the threads and tie 1 knot at the bottom in beg and end of ch-row. Crochet 2 more branches. ASSEMBLY: Fasten the flowers and leaves on the tie. Place the tie 2 times around the hat before tying a bow. |
|
Have you finished this pattern?Tag your pictures with #dropspattern #marlenehat or submit them to the #dropsfan gallery. Do you need help with this pattern?You'll find 6 tutorial videos, a Comments/Questions area and more by visiting the pattern on garnstudio.com. © 1982-2026 DROPS Design A/S. We reserve all rights. This document, including all its sub-sections, has copyrights. Read more about what you can do with our patterns at the bottom of each pattern on our site. |
|


With over 40 years in knitting and crochet design, DROPS Design offers one of the most extensive collections of free patterns on the internet - translated to 17 languages. As of today we count 324 catalogues and 12272 patterns translated into English (UK/cm).
We work hard to bring you the best knitting and crochet have to offer, inspiration and advice as well as great quality yarns at incredible prices! Would you like to use our patterns for other than personal use? You can read what you are allowed to do in the Copyright text at the bottom of all our patterns. Happy crafting!
Post a comment to pattern DROPS 146-32
We would love to hear what you have to say about this pattern!
If you want to leave a question, please make sure you select the correct category in the form below, to speed up the answering process. Required fields are marked *.