
Popular categories
Looking for a yarn?


|
|
Meet the Sun |
|
 |
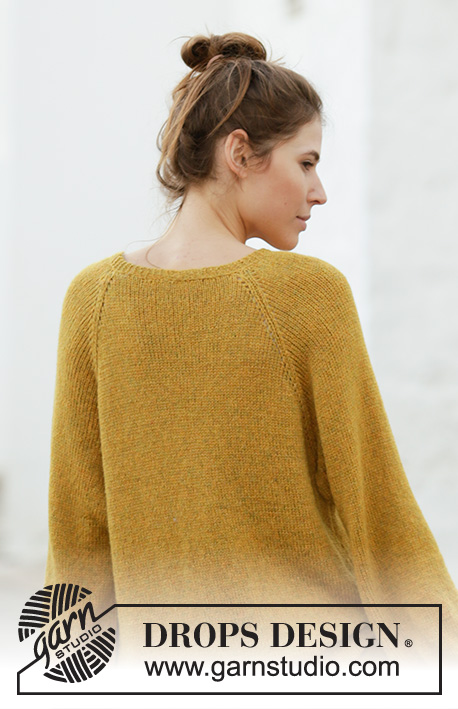 |
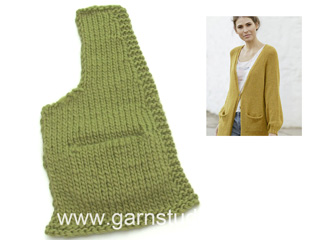
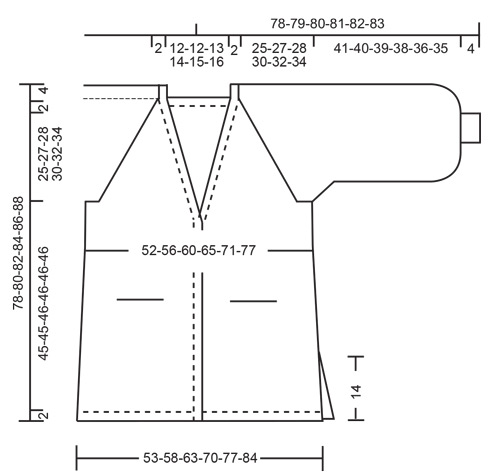
Knitted long jacket with balloon sleeves and raglan in DROPS Sky. The piece is worked top down with V-neck, pockets and split in sides. Sizes S - XXXL.
DROPS 200-6 |
|
|
------------------------------------------------------- EXPLANATIONS FOR THE PATTERN: ------------------------------------------------------- RIDGE/GARTER STITCH (worked back and forth): Knit all rows. 1 ridge in height = Knit 2 rows. INCREASE/DECREASE TIP (evenly spaced): To work out how to increase/decrease evenly, count the total number of stitches on needle (e.g. 72 stitches), minus bands (e.g. 10 stitches) and divide the remaining stitches by the number of increases/decreases to be made (e.g. 4) = 15.5. In this example, increase by making 1 yarn over after alternately each 15th and 16th stitch. On the next row (wrong side) purl the yarn overs twisted to avoid holes. Do not increase on bands. When decreasing, work alternately each 14th and 15th stitch and each 15th and 16th stitch together. RAGLAN: All increases are worked from the right side! Increase to raglan in each transition between body and sleeves as follows: Work until there is 1 stitch left before the marker thread, make 1 yarn over, knit 2 (marker thread sits between these 2 stitches), make 1 yarn over (= 2 stitches increased). On the next row (wrong side) purl the yarn overs twisted to avoid holes. Then work the new stitches in stocking stitch. A total of 8 stitches increased on each increase-row. V-NECK: All increases are worked from the right side! Make 1 yarn over inside the 5 band stitches and knit 1 stitch (= 1 stitch increased). On the next row (wrong side) purl the yarn over twisted to avoid a hole. Then work the new stitch in stocking stitch. A total of 2 stitches increased on each increase-row. BUTTONHOLES: Work buttonholes on the right band (when garment is worn). Work from the right side when there are 4 stitches left on the row as follows: Make 1 yarn over, knit 2 together and knit 2. On the next row (wrong side), knit the yarn over to leave a hole. The first buttonhole is worked when the increases for the V-neck are finished. Then the second buttonhole is worked after 9 cm in all sizes. INCREASE TIP (for sides of body): Work until there are 2 stitches left before the marker thread, make 1 yarn over, knit 4 (marker thread sits in the middle of these 4 stitches), make 1 yarn over. On the next round work the yarn overs twisted to avoid holes. Then work the new stitches in stocking stitch. KNITTING TIP (for bands/neck): Knit up from the right side 62-62-66-66-68-70 stitches along the whole neck (not over bands) with a new needle. When working the bands, knit together 1 stitch from the band and 1 stitch from the new needle until half the stitches have been worked (= mid back). Work the remaining stitches together with the band on the opposite side. ------------------------------------------------- START THE PIECE HERE: ------------------------------------------------------- JACKET - SHORT OVERVIEW OF THE PIECE: Yoke and body are worked back and forth with circular needle from mid front, top down. One half of both pockets are worked before the yoke so that they can be worked into the piece. Pockets worked back and forth. Sleeves are worked in the round with short circular needle/double pointed needles, top down. Then the bands/neck are worked back and forth and sewn on to finish. POCKETS (first half): Cast on 28-28-30-30-32-32 stitches (including 1 edge stitch in each side) with double pointed needle/circular needle size 4 mm and Sky. Work stocking stitch with 1 edge stitch in GARTER STITCH – read description above, on each side. REMEMBER THE KNITTING TENSION! When the piece measures 12-12-13-13-14-14 cm cast off the edge stitches = 26-26-28-28-30-30 stitches. Place stitches on 1 thread and work 1 more pocket in the same way. Lay the pockets to one side and work yoke. The other half of the pocket is worked and assembled when the jacket is finished. YOKE: Cast on 72-74-76-76-78-80 stitches (including 5 band stitches on each side towards mid front) with circular needle size 3.5 mm and Sky. Purl 1 row from the wrong side with 5 band stitches in garter stitch on each side towards mid front. Knit 1 row where you increase 4-4-4-4-8-8 stitches evenly spaced – read INCREASE/DECREASE TIP = 76-78-80-80-86-88 stitches. Change to circular needle size 4 mm and purl 1 row from the wrong side with 5 band stitches in garter stitch on each side towards mid front. Insert 4 marker threads in the piece (without working the stitches) as follows: First marker thread is inserted after the first 7 stitches (= front piece), second after the next 16 stitches (= sleeve), third after the next 30-32-34-34-40-42 stitches (= back piece) and the fourth marker thread is inserted after the next 16 stitches (= sleeve). There are 7 stitches left after the last marker thread (= front piece). Continue with stocking stitch and 5 band stitches in garter stitch on each side – AT THE SAME TIME on the first row from the right side increase to RAGLAN in each transition between body and sleeves – read description above. Continue to increase to raglan every 2nd row (i.e. each row from the right side) until you have increased a total of 30-34-35-39-41-44 times on each side of the 4 marker threads. AT THE SAME TIME on row 6 (i.e. 3rd row from the right side) increase to V-NECK on each side towards mid front – read description above, as follows: Increase every 6th row a total of 13-14-13-15-10-9 times and then every 4th row a total of 0-0-2-0-8-10 times (= a total of 13-14-15-15-18-19 stitches increased in each side towards mid front). After the last increase to raglan the piece measures approx. 21-24-25-28-29-31 cm from the cast-on edge. Continue working without further raglan increases until the piece measures 25-27-28-30-32-34 cm, but continue to increase to V-neck as before. The next row from the right side is worked as follows: Work as far as the first marker thread, work 5-4-5-6-7-8 stitches after the marker thread (= front piece), place the next 66-76-76-82-84-88 stitches on 1 thread for sleeve, cast on 10-10-12-12-14-16 new stitches on the needle (= in side under sleeve), work 100-108-114-124-136-146 stitches (= back piece), place the next 66-76-76-82-84-88 stitches on 1 thread for sleeve, cast on 10-10-12-12-14-16 new stitches on the needle (= in side under sleeve), work as far as the fourth marker thread (= 5-4-5-6-7-8 stitches) and work to end of row (= front piece). Body and sleeves are continued separately. THE PIECE IS NOW MEASURED FROM HERE! BODY: Insert 1 marker thread in each side, in the middle of the 10-10-12-12-14-16 stitches cast on under each sleeve. Allow the marker threads to follow your work onwards; they will be used when increasing in the sides. Continue with stocking stitch, 5 band stitches in garter stitch on each side and increasing to V-neck as before. When the increases to V-neck are finished there are 230-246-262-282-310-334 stitches on the needle. The piece measures approx. 3-3-3-2-1-0 cm from the division (V-neck measures approx. 28-30-31-32-33-34 cm from the cast-on edge). Now work the first BUTTONHOLE on right band, read description above. When the piece measures 5 cm from the division increase 1 stitch on each side of both marker threads – read INCREASE TIP = 4 stitches increased. Increase like this every 0-20-12-7-5-4 cm a total of 1-2-3-5-6-7 times = 234-254-274-302-334-362 stitches. AT THE SAME TIME, when piece measures approx. 16-16-17-17-17-17 cm from the division, work next row from the right side as follows: Work the first 17-17-19-19-21-21 stitches, place the next 26-26-28-28-30-30 stitches on 1 thread (other half of the pocket will be worked here later), work the 26-26-28-28-30-30 stitches from the thread on the one pocket (make sure you continue from the right side of the pocket), work until there are 43-43-47-47-51-51 stitches left on the row, place the next 26-26-28-28-30-30 stitches on 1 thread (other half of the pocket will be worked here later), work the 26-26-28-28-30-30 stitches from the other pocket (make sure you continue from the right side of the pocket) and work the last 17-17-19-19-21-21 stitches on the row. Continue with stocking stitch and 5 band stitches in garter stitch on each side until the piece measures 32-32-33-33-33-33 cm from the division. Now divide the piece at the marker threads in the sides. BACK PIECE: = 112-122-132-146-162-176 stitches. Work stocking stitch with 4 edge stitches in garter stitch on each side until the piece measures 45-45-46-46-46-46 cm from the division. Change to circular needle size 3.5 mm and work 3 ridges. Loosely cast off; to avoid the cast-off edge being tight you can cast off with needle size 4 mm. The jacket measures approx. 76-78-80-82-84-86 cm from the shoulder. RIGHT FRONT PIECE: = 61-66-71-78-86-93 stitches. Work stocking stitch with 5 band stitches in garter stitch towards mid front and 4 edge stitches in garter stitch towards the side. Work until the piece measures 45-45-46-46-46-46 cm from the division. Change to circular needle size 3.5 mm and work 3 ridges. Loosely cast off; to avoid the cast-off edge being tight you can cast off with needle size 4 mm. The jacket measures approx. 76-78-80-82-84-86 cm from the shoulder. LEFT FRONT PIECE: Work as for the right front piece. SLEEVE: Place the 66-76-76-82-84-88 stitches from the thread on the one side of the piece on short circular needle/double pointed needles size 4 mm and knit up 1 stitch in each of the 10-10-12-12-14-16 stitches cast on under the sleeve = 76-86-88-94-98-104 stitches. Insert 1 marker in the middle of the 10-10-12-12-14-16 stitches under the sleeve; this is the beginning of the round. Start here and work stocking stitch in the round. When the piece measures 41-40-39-38-36-35 cm from the division (shorter measurements in larger sizes due to longer yoke) work 1 round where you decrease 32-38-36-42-42-44 stitches evenly spaced – remember INCREASE/DECREASE TIP = 44-48-52-52-56-60 stitches. Change to double pointed needles size 3.5 mm. Work rib (= knit 2 / purl 2) for 4 cm. Loosely cast off with knit over knit and purl over purl, but to avoid the cast-off edge being tight you can cast off with a needle size 4 mm. Work the other sleeve in the same way. BAND/NECK: Knit up from the right side 1 stitch in each of the 5 band stitches on the right front piece with needle size 3.5 mm. Work the 5 band stitches in garter stitch back and forth. If you wish the band can be worked together with the neck – read KNITTING TIP. When the band measures approx. 14-14-15-15-16-16 cm cast off. Work the band on the left front piece in the same way. Sew the 2 bands together mid back and then sew them to the neck of the jacket. POCKETS: Work back and forth with circular needle. Place the 26-26-28-28-30-30 stitches from the thread on the right front piece on needle size 4 mm. On the first row cast on 1 edge stitch on each side = 28-28-30-30-32-32 stitches. Work stocking stitch with 1 edge stitch in garter stitch on each side until the pocket measures 12-12-13-13-14-14 cm; loosely cast off. Work the pocket on the left front piece in the same way. ASSEMBLY: Sew the pockets inside the 1 edge stitch around the whole pocket. Then fasten to the inside of the jacket with one small neat stitch in each of the bottom corners (the stitches should not show on the right side of the jacket). Sew buttons onto left front piece. |
|
|
|
|
Have you made this or any other of our designs? Tag your pictures in social media with #dropsdesign so we can see them! Do you need help with this pattern?You'll find tutorial videos, a Comments/Questions area and more by visiting the pattern on garnstudio.com. © 1982-2024 DROPS Design A/S. We reserve all rights. This document, including all its sub-sections, has copyrights. Read more about what you can do with our patterns at the bottom of each pattern on our site. |
|


With over 40 years in knitting and crochet design, DROPS Design offers one of the most extensive collections of free patterns on the internet - translated to 17 languages. As of today we count 304 catalogues and 11422 patterns - 11422 of which are translated into English (UK/cm).
We work hard to bring you the best knitting and crochet have to offer, inspiration and advice as well as great quality yarns at incredible prices! Would you like to use our patterns for other than personal use? You can read what you are allowed to do in the Copyright text at the bottom of all our patterns. Happy crafting!
Comments / Questions (56)
Hallo, wohl eine peinliche Frage ;-(), jedoch habe ich noch nie exakt nach einer Anleitung gestrickt. Ich frage mich, ob z.B. bei den Taschen die Randmaschen nun dabei sind, wenn in Klammer „einschliesslich Randmaschen“ steht. Vielen Dank
22.03.2020 - 22:49DROPS Design answered:
Liebe Yvi, wenn es "(einschließlich je 1 Rand-Masche beidseitig)" geschrieben ist, bedeutet es, die Rand-Maschen brauchen Sie nicht extra anzuschlagen, sie sind damit eingezählt. Gleichfalls für die Blenden: "einschließlich je 5 Maschen beidseitig für die vorderen Blenden" bedeutet, diese 10 Maschen sollen Sie nicht extra anzuschlagen. Viel Spaß beim stricken!
23.03.2020 - 11:15Do you maybe have a video for this description? : Knit up from the right side 62-62-66-66-68-70 stitches along the whole neck (not over bands) with a new needle. When working the bands, knit together 1 stitch from the band and 1 stitch from the new needle until half the stitches have been worked (= mid back). Work the remaining stitches together with the band on the opposite side.
25.01.2020 - 11:10DROPS Design answered:
Dear Oksana, we do not have such a video sorry, but that's the same idea as when you knit a edge to the diagonal sides of a shawl (see this video), ie you will work the outermost stitch on neck together with 1 st picked up on the band (on both sides of neck band). Happy knitting!
27.01.2020 - 08:32Spett.le Drops, grazie mille per i fantastici modelli e i filati stupendi, per fare questo cardigan in Lima il campione è sempre uguale cioé 21 maglie in 10 cm. largo x 28 ferri in 10 cm. alto? Grazie per tutto, di nuovo, cc
11.11.2019 - 14:54DROPS Design answered:
Buongiorno Claudia Carolina. Sì il campione deve essere uguale a quello indicato nelle spiegazioni. Le consigliamo di usare il convertitore di filati per calcolare la quantità di filato necessaria o contattare il suo rivenditore Drops di fiducia. Buon lavoro!
11.11.2019 - 17:18Ich habe die Jacke mit Puna" gestrickt. Für die Größe XL habe ich allerdings 700 g gebraucht. Die Anleitung war gut! Danke dafür! Da ich locker stricke hätte Größe L wahrscheinlich auch ausgereicht.
09.10.2019 - 19:26En el video que aparece en los comentarios sobre como colocar los bolsillos la explicación proporcionada es tejiendolos de abajo hacia arriba y este patrón se teje de arriba hacia abajo... hay algún otro video que nos sea útil? Gracias
08.07.2019 - 00:48DROPS Design answered:
Hola Silvia. El vídeo es correcto, se trabaja de arriba abajo y está especificamente hecho para este patrón.
10.07.2019 - 23:32¿Alguien me puede ayudar con los bolsillos? No consigo hacerlos Muchas gracias
22.05.2019 - 13:38DROPS Design answered:
Hola Oroitz. Este vídeo te podría ayudar:
25.05.2019 - 18:51Hej, Jeg har lidt problemer med at strikke lommerne i denne trøje. Lige nu prøver jeg at sætte lommerne på pinden igen, men jeg ved ikke hvilken del af lommen jeg er i gang med at strikke, så det ville være dejligt med lidt hjælp. På forhånd tak.
07.05.2019 - 12:39DROPS Design answered:
Hei Emma. Lommen strikkes som en egen liten bag, og kommer i tillegg til selve genseren. Den delen av lommen du allerede har strikket er den ytterste delen, altså den som ligger mellom selve genseren og baksiden av lommen. Du strikker over disse maskene, slik at lommen blir en slags "flapp" (se for deg at lommen er vrengt og henger på utsiden av plagget). Maskene du satte på en tråd er den delen av lommen som er nærmest kroppen når du har på genseren. Etter at denne er srikket skal "flappen" dyttes ned i hullet, slik at de 2 delene kan syes sammen, før hele lommen festes til genseren (på innsiden) i hver av de nederste hjørnen. God fornøyelse
07.05.2019 - 13:33Robię sweter w rozmiarze S. Skoro na rękaw jest 76 oczek to jak to mżliwe, że na schemacie 1/2 rękawa ma 31cm, skoro 21 o. to 10 cm?
04.05.2019 - 20:49DROPS Design answered:
Witaj Doroto, te 31 cm na rysunku to jest jeszcze karczek, ponieważ sweter jest przerabiany od góry do dołu. Po przełożeniu rękawa na osobne druty i nabraniu oczek pod rękawem masz 76 o. co daje jakieś 36 cm obwodu rękawa. Pozdrawiamy!
06.05.2019 - 08:07Hallo, welche Größe trägt Model? Mit wie viel Bewegunsfreiheit muss man rechnen? Danke im Voraus
10.04.2019 - 15:24DROPS Design answered:
Liebe Olga, das Model auf dem Foto trägt eine Größe M - um die beste passenden Größe zu finden, messen Sie eine ähnliche Jacke und vergleichen Sie die Maßen mit den in der Maßskizze - mehr über Größen lesen Sie hier. Je nach dem Sie etwas enger/locker möchten, wählen Sie die gewünschte Größe. Viel Spaß beim stricken!
10.04.2019 - 16:15Jeg er igang med at strikke str. XXXL til en kunde og er nået til deling af arbejdet, hvor jeg ikke kan få maskeantallet til at passe, det ville være dejligt hvis der i opskriften stod det nøjagtige maskeantal. Jeg har ialt 478 m. ( 88 m til en start - 38 m udt til v-hals - 352 m til raglan) . Jeg har 70 masker til første markør derefter passer det med 8 + 88 + 8 til markør til ryggen i begge sider, men så er der kun 130 m til ryg - og ikke som i opskriften 150m.
06.04.2019 - 15:43DROPS Design answered:
Hej Annette, jeg forstår hvad du mener, vi skal se på det og skal få lagt en rettelse ud. Tak for info :)
08.04.2019 - 09:30