
Popular categories
Looking for a yarn?


|
|
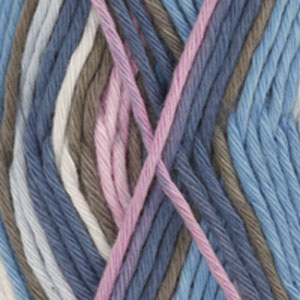
Paint the Desert |
|
 |
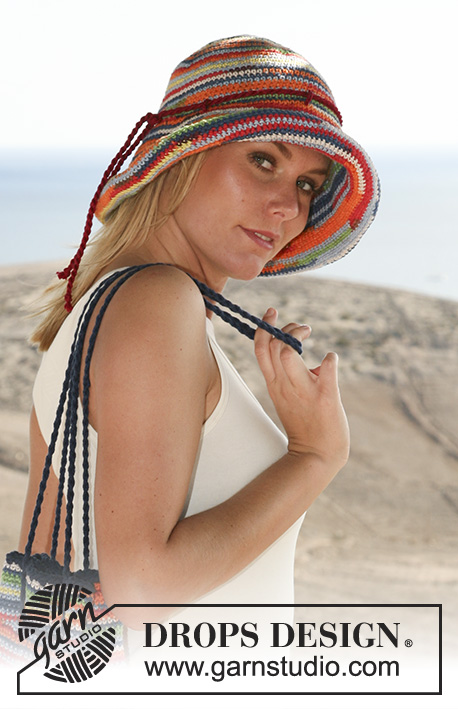 |
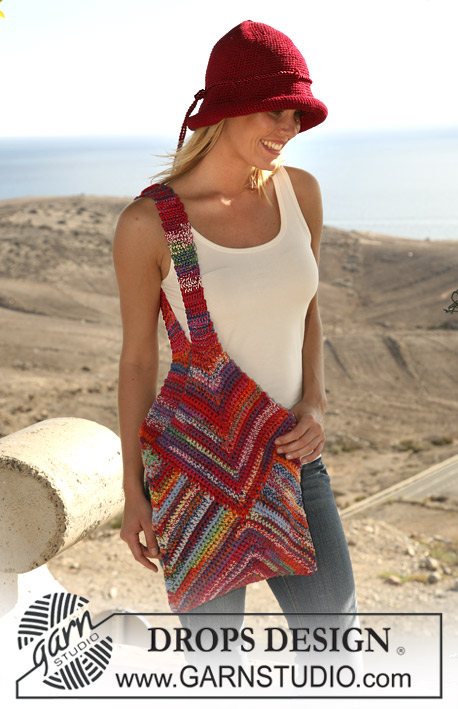
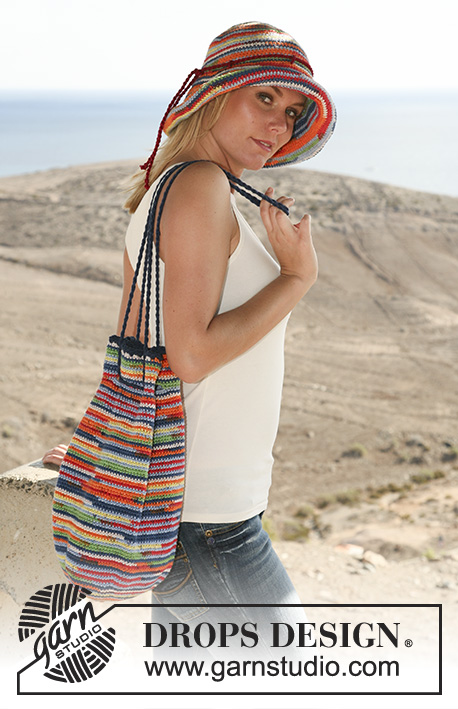
Crochet DROPS hat and bag in “Muskat Soft”.
DROPS 107-36 |
|
|
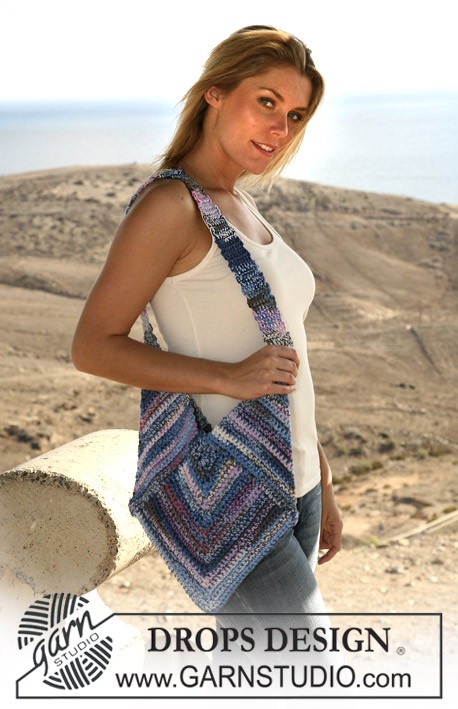
Decreasing tip: Dec 1 dc as follows: work 1 dc, but wait with the last pull-through (= 2 sts on hook), work next dc and now pull thread through all 3 sts on hook. Hat: Crochet 4 ch with crochet hook size 3.5 mm and Muskat Soft and form a ring with a sl st in first ch. Round 1: 5 dc in ring. Finish with 1 sl st in first dc from beg of round. Round 2: 2 dc in each dc = 10 dc. . Finish with 1 sl st in first dc from beg of round. Round 3: *2 dc in first dc, 1 dc in next dc*, repeat from *-* = 15 dc. Finish with 1 sl st in first dc from beg of round. Round 4: *2 dc in first dc, 1 dc in next dc, 1 dc in next dc*, repeat from *-* = 20 dc. Finish with 1 sl st in first dc from beg of round. Insert a marker/marking thread (MT) at beg of round and now continue in the round with 1 dc in each dc (do not finish each round with a sl st). At the same time inc 5 dc evenly on each round. Inc in the same place as the previous round, i.e. 1 additional dc between each inc per round. The circle will gradually become a pentagon. Continue like this until there are a total of 17-18-19 rounds = 85-90-95 dc on round (piece measures approx 8-9-10 cm). Continue in the round with 1 dc in each dc until piece measures 16-17-18 cm from the centre. Remember the crochet tension! Now work brim as follows: Round 1: 1 dc in each dc, at the same time inc 9-11-13 dc evenly = 94-101-108 dc. Inc by working 2 dc in 1 dc. Round 2: 1 dc in each dc, at the same time inc 9-11-13 dc evenly = 103-112-121 dc. Round 3-5 incl: 1 dc in each dc, at the same time inc 5 dc evenly = 118-127-136 dc. Round 6-13 incl: 1 dc in each dc. Round 14: 1 dc in each dc, at the same time inc 14-16-18 dc evenly = 132-143-154 dc. Round 15 + 16: 1 dc in each dc. Round 17: 1 dc in each dc, at the same time dec – see Decreasing tip – 6-8-10 dc evenly = 126-135-144 dc. Round 18-21 incl: 1 dc in each dc. Round 22: 1 dc in each dc. Finish Size S here. Round 23: 1 dc in each dc. Finish size M here. Round 24: 1 dc in each dc. Finish size L here. Twisted string: Cut 4 threads burgundy Muskat measuring approx 3 meters each. Twist them until they resist, fold double and let them twist again. Tie a knot either end. Loops: Worked separately and sewn onto hat afterwards. Make sure therefore to have enough thread either end to sew with. Crochet 5 loops with crochet hook size 3.5 mm and burgundy Muskat as follows: 6 ch, cut the thread and pull through st. Attach loops to hat evenly distributed in transition between hat and brim. Pull the twisted string through loops and tie tog the ends. Crochet DROPS bag in “Muskat Soft” with border and string in Ice. Measurements: Diameter: approx 19 cm Height: approx 33 cm Materials: DROPS Muskat Soft from Garnstudio 250 g colour no 04, rainbow mix and use: DROPS Ice from Garnstudio 50 g colour no 7, blue DROPS crochet hook size 3.5 mm - or size needed to obtain 20 dc = width 10 cm. DROPS crochet hook size 5 mm, for border Bag: Crochet 4 ch with crochet hook size 3.5 mm and Muskat Soft and form a ring with a sl st in first ch. Round 1: 6 dc in ring and finish with 1 sl st in first dc from beg of round. Round 2: 2 dc in each dc = 12 dc. Finish with 1 sl st in first dc from beg of round. Round 3: “2 dc in first dc, 1 dc in next dc*, repeat from *-* = 18 dc. Finish with 1 sl st in first dc from beg of round. Round 4: *2 dc in first dc, 1 dc in next dc, 1 dc in next dc*, repeat from *-* = 24 dc. Finish with 1 sl st in first dc from beg of round. Insert a MT at beg of round and now continue in the round with 1 dc in each dc (do not finish each round with a sl st). At the same time inc 6 dc evenly on each round. Inc in the same place as the previous round, i.e. 1 additional dc between each inc per round. The circle will gradually become a pentagon. Continue like this until there are a total of 21 rounds = 126 dc on round (piece measures approx 9.5 cm). Remember the crochet tension! Continue in the round with 1 dc in each dc until piece measures 36 cm from the centre. Now work 1 dc in each dc, at the same time inc 2 dc evenly = 128 dc. Work next round as follows: *12 dc, 4 ch, skip 4 dc*, repeat from *-* all the way round. Work next round as follows: 1 dc in each dc and 4 dc in each ch-loop = 128 dc. Work 1 dc in each dc on next round, at the same time inc 1 dc = 129 dc. Continue with 1 dc in each dc until piece measures 42 cm from the centre. Cut the thread and fasten. Border: Crochet a border with crochet hook size 5 mm and blue Ice along the top of bag as follows: 1 dc, *1 ch, skip 2 dc, 1 dc in next dc*, repeat from *-* and finish round with 1 sl st in first dc from beg of round. Twisted string: Cut 2 threads blue Ice measuring approx 4 meters each. Twist them until they resist, fold double and let them twist again. Tie a knot either end. Thread the string through all holes in border twice and hide the knots on the WS of bag. |
|
|
Have you made this or any other of our designs? Tag your pictures in social media with #dropsdesign so we can see them! Do you need help with this pattern?You'll find tutorial videos, a Comments/Questions area and more by visiting the pattern on garnstudio.com. © 1982-2024 DROPS Design A/S. We reserve all rights. This document, including all its sub-sections, has copyrights. Read more about what you can do with our patterns at the bottom of each pattern on our site. |
|


With over 40 years in knitting and crochet design, DROPS Design offers one of the most extensive collections of free patterns on the internet - translated to 17 languages. As of today we count 304 catalogues and 11422 patterns - 11422 of which are translated into English (UK/cm).
We work hard to bring you the best knitting and crochet have to offer, inspiration and advice as well as great quality yarns at incredible prices! Would you like to use our patterns for other than personal use? You can read what you are allowed to do in the Copyright text at the bottom of all our patterns. Happy crafting!
Comments / Questions (49)
Es steht in norwegisch: fünfkant
23.05.2013 - 20:32Sie schreiben: "Der Kreis wird nach und nach zu einem Viereck." Es wird aber ein Sechseck. LG
23.05.2013 - 19:50Zum Aufnehmen häkelt man 2 fM in 1 M. Es wird aufgenommen bis 21 R. gehäkelt sind.
28.09.2011 - 08:29Guten tag, wie muss ich die 6 maschen bei der tasche zunehmen? und wie lange muss ich zunehmen. Das verstehe ich nciht so ganz und geht aus der anleitung irgendwie nicht hervor. Ich hoffe sie können mir weiterhelfen
27.09.2011 - 23:45Tout à fait Mimi, merci pour votre aide, le nombre de mailles a été corrigé.
17.07.2011 - 12:24Dans les explications de la réalisation du sac, il est écrit "R 4 : *2 ms dans la 1ère ms, 1 ms dans les 2 ms suiv * répéter de * à * = 20 ms. Joindre avec 1 mc dans la 1ère ms du début du rang" Or si on fait les augmentations décrites ci-dessus, on passe de 18 ms à 24 ms.
16.07.2011 - 01:08Der Hut oder die Tasche? Halten Sie die Maschenprobe ein? Benutzen Sie das Originalgarn?
20.05.2011 - 09:46Irgendwas stimmt mit der Anleitung nicht, das wird viel zu klein!
20.05.2011 - 09:43Yea, it's finally translated!! Thank you so much. I'm gonna start on it today.
01.02.2008 - 20:21Denne så lekker ut! Gleder meg til sommer'n ;-)
29.01.2008 - 23:33