
Popular categories
Looking for a yarn?


|
||||||||||||||||||||||
DROPS 27-6 |
||||||||||||||||||||||
|
|
||||||||||||||||||||||
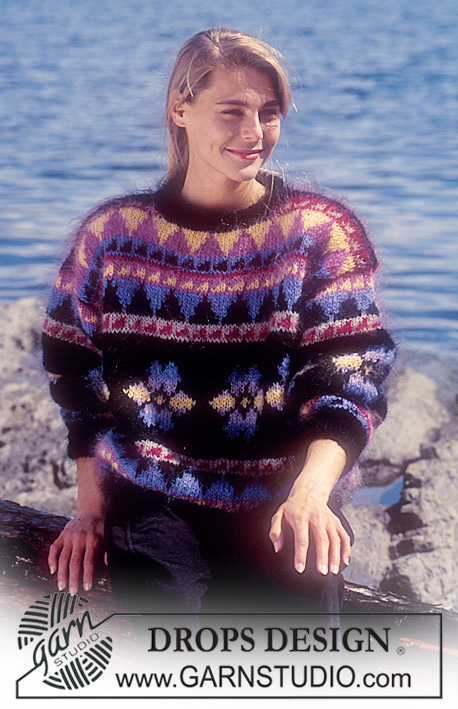
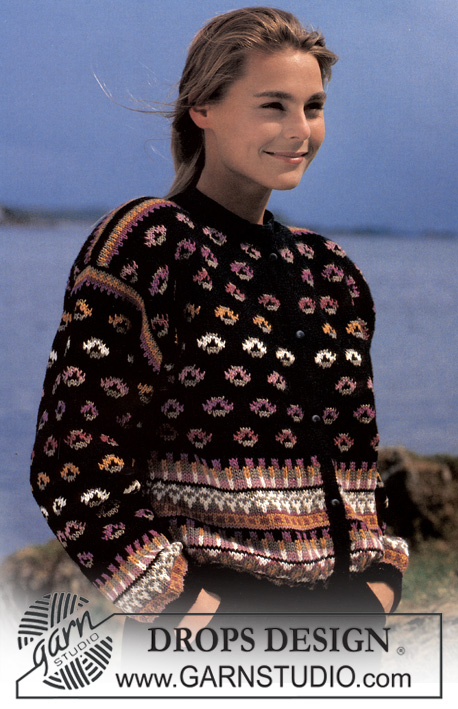
DROPS long sweater, shawl, gloves and head band in Karisma Superwash with moss stitch and cables
DROPS 27-6 |
||||||||||||||||||||||
|
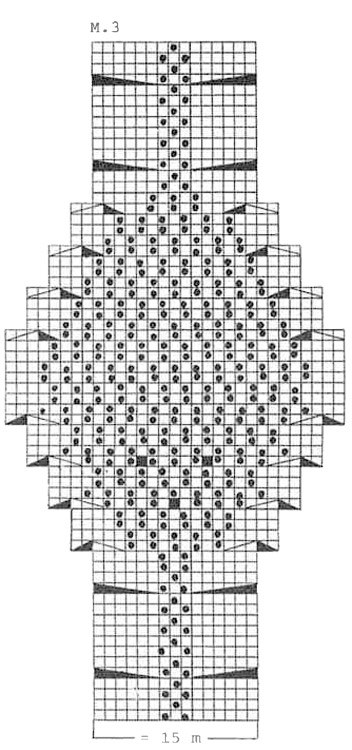
Knitting tension: 22 sts x 28 rows on needle size 4 mm and M.2. = 10 x 10 cm Bobble: Inc to 5 sts in 1 sts, knit 3 rows stocking sts on these, then pass 2nd sts over 1st sts, 3rd sts over 1st sts., 4th sts over 1st sts and 5th sts over 1st sts. Rib: * K1, P1 * Body: Cast on 210 (213-219) sts on circular needle size 2.5 mm and knit 5 rib rounds. Change to circular needle size 4 mm at the same time inc 46 (57-61) sts evenly on 1st row = 256 (270-280) sts. Knit 1st row as follows: * 1 (5-7) sts of M.2, M.4, 19 sts of M.2, M.4, 19 sts of M.2, M.4, 19 sts of M.2, M.4, 19 sts of M.2, M.4, 1 (4-7) sts of M.2 * - Repeat from *-* over back piece. Remember knitting tension. When piece measures 38 (44-50) cm cast off 1 (2-1) sts on each side for armhole and for and complete front and back pieces separately. Front piece: = 127 (133-139) sts. When piece measures 55 (61-67) cm cast off 1 sts mid front and then cast off 1 sts x 23 towards neck to shape neckline alternating on every and every other row . Cast off when piece measures 68 (74-80) cm Back piece: = 127 (133-139) sts. When piece measures 66 (72-78) cm slip middle 43 (43-43) sts onto a thread or stitch holder and then cast off 2 sts towards neck on next row. Cast off when piece measures 68 (74-80) cm. Sleeve: Cast on 48 (48-51) sts on circular needle size 2.5 mm and knit 5 cm rib. Change to circular needle size 4 mm at the same time inc 20 (20-17) sts evenly on 1st row = 68 (68-68) sts. Knit next row as follows (from mid under arm): M.4, 19 sts of M.2, M.4, 19 sts of M.2, M.4. At the same time inc mid under arm 2 sts x 32 (32-32) on every 3rd row = 132 (132-132) sts – knit the inc sts into M.2. When piece measures 45 (45-44) cm cast off 6 sts mid under arm and continuing cast off 6 sts x 5 times on each side on every other row, then cast off - piece measures approx 49 (49-48) cm. Assembly: Sew shoulder seams. Pick up 130 sts around neck on double pointed needles size 2.5 with natural and knit 14 cm rib at the same time cast off 6 sts distributed evenly from the picked up sts from thread or stitch holder on back piece = 124 m – ensure sts mid front is a stocking sts. At the same time as 1st row rib knit one bobble on every 6th sts (in one knit) – ensure one bobble is positioned mid front. Continuing cast off on every 3rd row as follows: slip middle sts onto cable needle to front of piece, knit sts before and sts after and psso mid sts over the 2 sts knit tog – cast off when to completed measurement = 14 cm, cast off. Sew sleeves onto body in outermost sts so seams are not too bulky. ________________________________________ DROPS Shawl, gloves and head band. Materials: DROPS Karisma Superwash from Garnstudio 550 g colour no 019, natural - shawl 100 g colour no 019, natural - gloves 50 g colour no 019, natural – head band _______________________________________ DROPS Shawl: DROPS Needles size 4 mm Knitting tension: 22 sts x 28 rows on needle size 4 mm and M.2. = 10 x 10 cm Bobble: Inc to 5 sts in 1 sts, knit 3 rows stocking sts on these, on 5th row pass 2nd sts over 1st sts, 3rd sts over 1st sts., 4th sts over 1st sts and 5th sts over 1st sts. Moss stitch: 1st row: K1, P1. 2nd row: knit K over P and P over K. Repeat 1st and 2nd rows continuously. Rib: * K1, P1 * Body: Cast on 99 sts on needle size 4 mm with natural and knit 3 rows moss stitch. Next row as follows: 3 sts moss stitch , M.1, 20 sts of M.2, M.3, 20 sts of M.2, M.1, 3 sts moss stitch. Continue in pattern until piece measures 2.3 to 2.4 meters – adjust finish with M.3 as started (- When M.3 get wider knit less sts from M.2 on each side) – complete with 3 rows moss stitch over all sts and cast off. ________________________________________ DROPS Gloves: DROPS double pointed needle size 3 mm. Bobble: Inc to 5 sts in 1 sts, knit 3 rows stocking sts on these, then pass 2nd sts over 1st sts, 3rd sts over 1st sts., 4th sts over 1st sts and 5th sts over 1st sts. Moss stitch: 1.9: K1, P1. 2nd row: knit K over P and P over K. Repeat 1st and 2nd rows continuously. Rib: * K1, P1 * Gloves: Cast on 60 (60) on double pointed needles size 3 mm and knit 2 rounds moss stitch then knit following needle as follows: * 4 sts moss stitch, 1 bobble * then 5 cm moss stitch, then 2 cm rib at the same time cast off 18 (16) sts evenly on 1st row = 42 (44) sts. On last row inc 2 (4) sts evenly on row = 44 (48) sts. Then knit following row as follows: 22 (24) sts moss stitch (=upper hand), 1 sts stocking sts for thumb (insert at marking thread or stitch marker), 21 (23) sts stocking sts (=inside hand)- Measure piece from here! When piece measures 1 cm inc on each side of 1 sts with marking thread or stitch marker for thumb as follows: 1 sts x 5 (6) on every 3rd row = 54 (60) sts – stocking sts the inc sts. Slip middle 11 sts over thumb onto a thread or stitche holder on next row cast on 1 new st over these = 44 (50) sts. Continue until piece measures 10 (11) cm – Now knit fingers as follows: Little finger: Pick up 4 (6) sts moss stitch and 4 (5) sts stocking sts and cast on 1 sts between fingers (stocking sts this sts) = 9 (12) sts. Knit 5 (6) cm then knit sts tog two by two, and then pull double thread through sts. Knit 3 rounds over remaining sts before knitting remaining fingers. Ring finger: Pick up 6 (6) sts moss stitch and 6 (7) sts stocking sts and cast on 1 sts between fingers (stocking sts this sts) = 14 (15) sts. Knit 6 (7) cm then knit sts tog two by two, and then pull double thread through sts. Middle finger: Like Ring finger but knit 7 (8) cm. Index finger: Pick up 6 (6) sts moss stitch and 6 (7) sts stocking sts and cast on in sts towards long finger (knit sts stocking sts) = 13 (14) sts. Knit like Ring finger. Thumb: Pick up 14 (16) sts round thumb (pick up 11 sts from holder and 3 (5) sts in the edge above), and knit 6 (6,5) cm stocking sts, cast off like Ring finger. Sew a small mattress sts between fingers. ________________________________________ DROPS Head band: DROPS needles size 4 mm Head band: Cast on 23 sts on needle size 4 mm and knit 1st row as follows: 2 sts moss stitch, M.1, 2 sts moss stitches. Continue until piece measures approx 54 cm (lightly stretched), cast off. Sew tog with mattress sts. |
||||||||||||||||||||||
Diagram explanations |
||||||||||||||||||||||
|
||||||||||||||||||||||

|
||||||||||||||||||||||
|
||||||||||||||||||||||
|
Have you made this or any other of our designs? Tag your pictures in social media with #dropsdesign so we can see them! Do you need help with this pattern?You'll find tutorial videos, a Comments/Questions area and more by visiting the pattern on garnstudio.com. © 1982-2024 DROPS Design A/S. We reserve all rights. This document, including all its sub-sections, has copyrights. Read more about what you can do with our patterns at the bottom of each pattern on our site. |
||||||||||||||||||||||


With over 40 years in knitting and crochet design, DROPS Design offers one of the most extensive collections of free patterns on the internet - translated to 17 languages. As of today we count 304 catalogues and 11422 patterns - 11422 of which are translated into English (UK/cm).
We work hard to bring you the best knitting and crochet have to offer, inspiration and advice as well as great quality yarns at incredible prices! Would you like to use our patterns for other than personal use? You can read what you are allowed to do in the Copyright text at the bottom of all our patterns. Happy crafting!
Comments / Questions (20)
Guten Tag, ich habe eine Frage. Die Strickschrift des Diagramms; ist hier Hinreihe und Rückreihe abgebildet, oder nur die Hinreihen. Falls nur die Hinreihen, wie sollen dann die Rückreihen gestrickt werden?? Vielen Dank
06.10.2016 - 20:09DROPS Design answered:
Liebe Frau Puls, im Diagram sind alle Reihe abgebildet, dh Hin- und Rückreihe. Mehr Erklärungen über Diagramme finden Sie hier.
07.10.2016 - 08:24Bonjour peut on acheter vos modeles tous pres merci
25.01.2014 - 01:37DROPS Design answered:
Bonjour Rania, n'hésitez pas à vous renseigner auprès des revendeurs DROPS sur les éventuelles possibilités d'acheter un modèle tricoté pour vous. Merci.
25.01.2014 - 17:01Sylvie Lavoie wrote:
Bonjour, j'ai débuté l'etole et j'ai remarqué que la deuxième torsade se faisait sur un rang envers. Est-ce une erreur, car je n'ai jamais tricoté de torsades sur rang envers. La plupart des motifs de torsades se réalisent sur des rangs endroit.
27.12.2012 - 03:58DROPS Design answered:
Bonjour Madame Lavoie, toutes les torsades se font bien sur l'endroit. Dans chaque diagramme 1 case = 1m x 1 rang. Dans M1, on fait une torsade aux rangs 5, 13, 21 etc...Dans M3, aux rangs 5, 13, 17 ... Bon tricot !
29.12.2012 - 18:12Sylvie Lavoie wrote:
Bonjour, On lit les diagrammes de la droite vers la gauche. Est-ce que je dois faire une maille endroit sur l'endroit et 1 maille envers sur l'envers comme la plupart des modèles. Ma question peut vous sembler ridicule, mais je veux vraiment être certaine de le réussir. Je vous enverrai une photo, car il sera dans la teinte Karisma turquoise bleu.
18.12.2012 - 20:41DROPS Design answered:
Bonjour Madame Lavoie, tous les rangs des points fantaisie sont représentés vus sur l'endroit, ainsi 1 m env sur l'end se tricote à l'end sur l'env, et 1 m end sur l'end se tricote à l'env sur l'env. Sur l'endroit, on lit les diagrammes de droite à gauche, et sur l'envers, de gauche à droite quand on tricote en allers et retours. Bon tricot !
18.12.2012 - 21:01Sylvie Lavoie wrote:
Bonjour, alors si j'ai bien compris 7 m en suivant M2, M4 c'est 1 m. end., 1 m. env., 1 m. end., 1 m. env, 2 m. env., 1 m. end. et 19 m. en suivant M2, M4, c'est bien 1 m. end., 1 m. env., 1 m. end., 1 m. env., 2 m. env., 6 m. end., 2 m. env., 1 m. end., 1 m. env., 1 m. end et 2 m. env. Ai-je bien compris les informations? J'ai fait venir votre laine des états-Unis et ce sera mon oeuvre d'art. Je vous remercie pour votre aide.
11.11.2012 - 03:28DROPS Design answered:
Bonjour Madame Lavoie, vous devez tricoter : 7 m en suivant M2 (soit les 4 m du diagramme + 3 m en le reprenant à la 1ère m = répétez au 1er rang : 1 m end, 1 m env, puis les 10 m de M4 telles qu'elles sont dans le diagramme, puis 19 m en suivant M2 = 1 m end, 1 m env sur les 19 m suivantes, puis les 10 m de M4 etc.... Bon tricot !
12.11.2012 - 09:30Sylvie Lavoie wrote:
*1-5-7 m en suivant M2, M4, 19 m en suivant M2, M4, 19 m de M2, M4, 19 m de M2, M4, 19 m de M2, M4, 1-4-7 m en suivant M2* répéter de *à* pour le dos. Que voulez-vous dire par 1-5-7 et 1-4-7, Je ne comprends pas l'explication. Merci de votre précieuse collaboration. Sylvie Lavoie
10.11.2012 - 04:21DROPS Design answered:
Bonjour Madame Lavoie, le pull est donné en 3 tailles : S, M et L. Les explications sont ainsi données dans l'ordre des tailles, le nombre de mailles de M2 à tricoter sera de 1 en taille S, 5 en taille M et 7 en taille, puis 1 en taille S, 4 en taille M et 7 en taille L. Bon tricot !
10.11.2012 - 09:33De ældre opskrifter er desværre ikke oversat til dansk endnu. Klik på det norske flag så får du den norske opskrift! God fornøjelse!
08.10.2010 - 12:30Hm, synes jeg mangler halvdelen af opskriften. Kan godt se diagrammet for mønster, men så vidt jeg kan se er der ingen decideret opskrift, med hvor mange masker der skal slås op, antal mønsterbaner mm.
08.10.2010 - 12:05The translations are right avove the title Diagram, i.e right above the diagram.
07.01.2008 - 01:31I'm trying to get the English translations for wording in the diagrams for Drops 27-6. Although I thought I have thoroughly reviewed the pattern, if it's in front of my face and I am not seeing it, please forgive me! Best wishes, Lisa :)
05.01.2008 - 22:22