Rani |
|
 |
 |
Set consist of: Crochet DROPS hat, neck warmer and mittens with fan pattern in ”Merino Extra Fine”.
DROPS 141-25 |
|
|
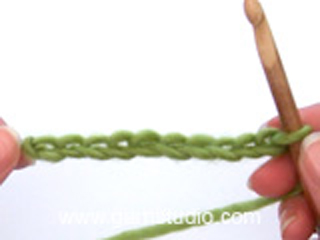
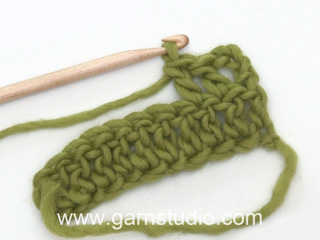
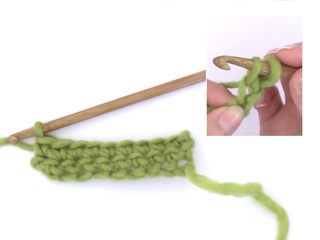
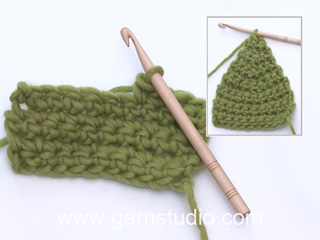
CROCHET INFO: Replace first dc at beg of every dc round with 1 ch and finish every round with 1 sl st in ch from beg of round. Replace first tr at beg of every tr round with 3 ch and finish every round with 1 sl st in 3rd ch from beg of round. INCREASE TIP: Inc 1 dc by working 2 dc in same st. Inc 1 tr by working 2 tr in same st. CROCHET 2 TR TOG: Work 1 tr but wait with last pull through (= 2 sts on hook), then work next tr but on last pull through, pull thread through all sts on hook = 1 st dec. CROCHET 2 DC TOG: Work 1 dc but wait with last pull through, work next dc and pull thread through all 3 sts on hook. -------------------------------------------------------- HAT: Worked in the round, top down. READ CROCHET INFO! Crochet 4 ch on hook size 4 mm with Merino Extra Fine and form a ring with 1 sl st in first ch. ROUND 1: Work 6 tr in ch-ring. ROUND 2: Work 2 tr in every tr the entire round = 12 tr. ROUND 3: Work * 1 tr in first tr, 2 tr in next tr *, repeat from *-* the entire round = 18 tr. ROUND 4: Work * 1 tr in each of the first 2 tr, 2 tr in next tr *, repeat from *-* the entire round = 24 tr. Continue inc like this until there are 84-96 tr on round (i.e. on every round work 1 tr more before working 2 tr in same tr so that 6 tr are inc on every round). Then work in the round with 1 tr in every tr (i.e. do not inc) until hat measures approx. 26-28 cm from the top and down. Now work 1 round with dc while AT THE SAME TIME inc 6-4 dc evenly – READ INCREASE TIP = 90-100 dc on round, do not cut the thread, turn piece and work fan edge in the round from WS as follows: FAN EDGE: ROUND 1 (= WS): 1 dc in first st, * skip 3 sts, in next dc work 3 tr + 1 ch + 3 tr, skip 3 dc, 1 dc in next dc **, 1 ch, skip 1 dc, 1 dc in next st *, repeat from *-* but finish last repetition on round after **, then work 1 ch and 1 sl st in dc from beg of round. ROUND 2: 5 ch (= 1 tr + 2 ch), 1 tr in same st from beg of round, * 3 ch, 1 dc in ch in the middle of tr-group, 3 ch **, in next ch work 1 tr + 2 ch + 1 tr *, repeat from *-* the entire round but finish last repetition after **, then work 1 sl st in 3rd ch from beg of round. ROUND 3: 3 ch (= 1 tr), 2 tr in ch-loop before next tr, 1 ch, 3 tr in same ch-loop, * 1 ch, 1 dc in next ch-loop, 1 ch, 1 dc in next ch-loop, 1 ch **, in next ch-loop work 3 tr + 1 ch + 3 tr *, repeat from *-* but finish last repetition after **, then work 1 sl st in 3rd ch from beg of round. ROUND 4: Work sl sts until ch in the middle of tr-group, 1 dc in ch in the middle of tr-group, * 3 ch, in ch between 2 dc work 1 tr + 2 ch + 1 tr, 3 ch **, 1 dc in ch in the middle of tr-group *, repeat from *-* but finish last repetition after **, then work 1 sl st in dc from beg of round. ROUND 5: 1 sl st in first ch-loop, 1 dc in same ch-loop, 1 ch, * in next ch-loop (the 2 ch between 2 tr) work 3 tr + 1 ch + 3 tr, 1 ch, 1 dc in next ch-loop, 1 ch **, 1 dc in next ch-loop, 1 ch, repeat from *-* but finish last repetition after **, then work 1 sl st in dc from beg of round. Cut and fasten the threads. Fold the fan edge out towards RS. NECK WARMER: Worked in the round, top down. Work the fan edges at the end. Crochet 90-102 LOOSE ch on hook size 4.5 mm with Merino Extra Fine and form a ring with 1 sl st in first ch. ROUND 1: READ CROCHET INFO! Work 1 tr in every ch the entire round = 90-102 tr. Then work in the round with 1 tr in every tr until piece measures approx. 16-18 cm. Now work 1 dc round with 1 dc in every tr = 90-102 dc. Work 1 more round with dc while AT THE SAME TIME inc 50-48 dc evenly - READ INCREASE TIP = 140-150 dc. Do not cut the thread, now work the fan edge in the round from RS as follows: FAN EDGE (at the bottom around the neck warmer): ROUND 1: 1 dc in first st, 1 ch, skip 1 st, 1 dc in next st, * skip 3 sts, in next dc work 3 tr + 1 ch + 3 tr, skip 3 dc **, 1 dc in next dc, 1 ch, skip 1 dc, 1 dc in next st *, repeat from *-* but finish last repetition on round after **, then work 1 sl st in first dc from beg of round. ROUND 2: 1 sl st in first ch, 5 ch (= 1 tr + 2 ch), 1 tr in same ch, * 3 ch, 1 dc in ch in the middle of tr-group, 3 ch **, in next ch work 1 tr + 2 ch + 1 tr *, repeat from *-* the entire round but finish last repetition on round after **, then work 1 sl st in 3rd ch from beg of round. ROUND 3: 1 sl st in ch-loop between 2 tr, 3 ch (= 1 tr), 4 tr in same ch-loop, 2 ch, 5 tr in same ch-loop, * 1 ch, 1 dc in next ch-loop, 1 ch, 1 dc in next ch-loop, 1 ch **, in next ch-loop (between the 2 tr) work 5 tr + 2 ch + 5 tr *, repeat from *-* the entire round but finish last repetition after **, then work 1 sl st in 3rd ch from beg of round. Cut and fasten the thread. FAN EDGE (at the top around the neck warmer): Work 1 dc in first st, * 1 ch, skip 2 sts, in next dc work 3 tr + 1 ch + 3 tr, 1 ch, skip 2 dc **, 1 dc in next st *, repeat from *-* but finish last repetition on round after **, then work 1 ch and 1 sl st in dc from beg of round. Cut and fasten the thread. MITTEN: Work first a round cuff with fan pattern, then work new sts around the opening and then work the mitten in the round until finished measurements. CUFF: Crochet 30 VERY LOOSE ch on hook size 4 mm with Merino Extra Fine and form a ring with 1 sl st in first ch. ROUND 1: READ CROCHET INFO! Work 1 dc in every ch the entire round = 30 dc. ROUND 2: Work 1 dc in every dc = 30 dc. ROUND 3: 1 dc in first st, 1 ch, skip 1 dc, 1 dc in next dc, * skip 3 sts, in next dc work 3 tr + 1 ch + 3 tr, skip 3 dc **, 1 dc in next dc, 1 ch, skip 1 dc, 1 dc in next dc*, repeat from *-* but finish last repetition on round after **, then work 1 sl st in first dc from beg of round. ROUND 4: 1 sl st in first ch, 5 ch (= 1 tr + 2 ch), 1 tr in same ch, * 3 ch, 1 dc in the middle of tr-group, 3 ch **, in next ch work 1 tr + 2 ch + 1 tr *, repeat from *-* the entire round but finish last repetition after **, then work 1 sl st in 3rd ch from beg of round. ROUND 5: 1 sl st in ch-loop between 2 tr, 3 ch (= 1 tr), 2 tr in same ch-loop, 1 ch, 3 tr in same ch-loop, * 1 ch, 1 dc in next ch-loop, 1 ch, 1 dc in next ch-loop, 1 ch **, in next ch-loop (between the 2 tr) work 3 tr + 1 ch + 3 tr *, repeat from *-* the entire round but finish last repetition after **, then work 1 sl st in 3rd ch from beg of round. ROUND 6: Work sl sts until ch in the middle of tr-group, 1 dc in ch in the middle of tr-group, * 3 ch, in ch between 2 dc work 1 tr + 2 ch + 1 tr, 3 ch **, 1 dc in ch in the middle of tr-group *, repeat from *-* but finish last repetition after **, then work 1 sl st in dc from beg of round. ROUND 7: 1 sl st in first ch-loop, 1 ch, * in next ch-loop (the 2 ch between 2 tr) work 3 tr + 1 ch + 3 tr, 1 ch, 1 dc in next ch-loop, 1 ch **, 1 dc in next ch-loop, 1 ch, repeat from *-* but finish last repetition after **, then work 1 sl st in sl st from beg of round. Cut and fasten the threads. MITTEN: READ CROCHET INFO. Start at beg of round on ch-row worked at the beg of mitten and work 1 dc in every st around the entire cuff = 30 dc. Insert 1 marker at beg of round (move the marker upwards when working) – NOW MEASURE PIECE FROM HERE. Now work tr in the round with 1 tr in every st while AT THE SAME TIME adjusting no of sts to 27-30 tr on 1st round – READ CROCHET 2 TR TOG. AT THE SAME TIME when piece measures 8-9 cm, inc for thumb on each side of 2nd st at beg of round - inc 1 tr on each side of 2nd st – READ INCREASE TIP. Repeat inc on each side of this st on every round 3-4 more times = 35-40 tr on round (thumb sts = 9-11 tr). Work next round as follows: Work 1 sl st in each of the first 10-12 tr at beg of round, 3 ch (= 1 tr), then work 1 tr in each of the next 25-28 tr, 1 ch and finish with 1 sl st in 3rd from beg of round = 26-29 tr and 1 ch on round. On next round work 1 tr in every tr and 1 tr in ch at the end of round = 27-30 tr. Then work tr in the round until mitten measures approx. 20-21 cm from marker (try the mitten on, approx. 3 cm remain until finished measurements). Continue to work as follows: ROUND 1: Work 1 tr in every tr while AT THE SAME TIME working every 2nd and 3rd tr tog - see explanation above = 18-20 tr. ROUND 2: Work 1 tr in every tr while AT THE SAME TIME working 2 and 2 tr tog = 9-10 tr. ROUND 3: Work 1 dc in every tr while AT THE SAME TIME working 2 and 2 dc tog. Cut the thread, baste it up and down through sts, pull the thread to tighten and fasten tightly. THUMB: ROUND 1: Work 1 sl st in the first of the 9-11 thumb sts, 3 ch (= 1 tr), then work 1 tr in each of the next 8-10 tr, then work 6 tr in st behind thumb while AT THE SAME TIME working these 6 tr tog 2 by 2 – see explanation above = 12-14 tr. ROUND 2 to 4: Work 1 tr in every tr = 12-14 tr. Try the mitten on, approx. 1 cm remains until thumb is done. Work if needed 1 more round with 1 tr in every tr. Continue to work as follows: ROUND 1: Work 1 tr in every tr while AT THE SAME TIME working 2 and 2 tr tog = 6-7 tr. ROUND 2: Work 1 dc in every tr while AT THE SAME TIME working 2 and 2 dc tog. Cut the thread, baste it up and down through sts, pull the thread to tighten and fasten tightly. Work another mitten the same way but reversed. I.e. inc for thumb on each side of next to last st on round (instead of each side of 2nd st on round). And work first round after all thumb inc as follows: 3 ch (= 1 tr), 1 tr in each of the next 25-28 tr, 1 ch and 1 sl st in 3rd ch from beg of round = 26-29 tr. On next round work 1 tr in every tr and 1 tr in ch at the end of round = 27-30 tr. |
|
|
Have you made this or any other of our designs? Tag your pictures in social media with #dropsdesign so we can see them! Do you need help with this pattern?You'll find tutorial videos, a Comments/Questions area and more by visiting the pattern on garnstudio.com. © 1982-2024 DROPS Design A/S. We reserve all rights. This document, including all its sub-sections, has copyrights. Read more about what you can do with our patterns at the bottom of each pattern on our site. |
|


Comments / Questions (22)
J'ai déjà fait çe modèle ,hormis les moufles, et ç'est très joli avec laine fine ...pour crochet # 3 1/2 où # 4 ..la laine drops étant difficile à trouver içi ,au Canada,j'ai utilisé laine mérinos fine..j'ai trouvé les explic simples..j'ai par contre crocheté qq rangs supplémentaires pour le tour de cou..
06.12.2023 - 05:47Fråga 1. Mössan avslutas med solfjädern enligt mönster men på bilden avslutas mössan med några varv med stolpar. Hur ska jag göra? Fråga 2. Ska solfjädern vikas över redan virkat parti av stolpar?
19.08.2022 - 15:27Hi, ich frage mich wie man die Mütze abschließt. Auf dem Bild sieht es so aus, als ob dann einfach nochmal zwei Runden Stb gemacht werden, aber die Anleitung hört nach der Muschelkante auf. Wie sind die letzten zwei Reihen? Liebe Grüße & Danke!
12.03.2021 - 21:00DROPS Design answered:
Liebe Pia, die 2 Reihen mit Stäbchen, die man auf das 3. Foto sehen kann sind die 2 letzten Runden vor der Muschelkante, Mütze wird von oben nach unten gehäkelt, am Ende wird die Muschelkante nach oben gefaltet (deshalb wird sie von "links", dh von der Rückseite gehäkelt). Viel Spaß beim häkeln!
15.03.2021 - 08:09Haii, hey er staat bij het gedeelte van de muts dat je moet doorhaken tot een lengte van 26-28 cm, dit.lijkt me een beetje wrg lang, hoort dit niet 16-18 cm te zijn ?
21.06.2019 - 21:05DROPS Design answered:
Dag Halima
Ik denk dat de lengte wel klopt. De waaierrand die je er nog om haakt, wordt nadien omgevouwen naar boven toe.
23.06.2019 - 19:59På bilde av lua er det laget 2 rekker med st etter viftemønsteret, men i oppskriften stopper det etter viftene. Hvorfor det? Hva skjer? Glemt noe?
26.09.2018 - 22:28DROPS Design answered:
Hei Charlene. Du hekler viftekanten fra vrangen, også bretter du den opp når du er ferdig - slik at nederste del av luen er dobbel. Så det du ser som nederst på luen er de siste omgangene du heklet før du begynte på viftekanten. Altså siste omgang du hekler på viftekanten er det som blir øverst på viftekanten på bildet. God fornøyelse.
27.09.2018 - 07:51Tror det er en feil i 2. omgang av viftekant. Det står "i neste fm hekles det 1 st + 2 lm + 1 st", men det skal vel være "i neste lm hekles det 1 st + 2 lm + 1 st"?
13.09.2018 - 20:29DROPS Design answered:
Hei Anita. Det har du helt rett i: det skal hekles 1 stav, 2 luftmasker, 1 stav i lufmasken - ikke i fastmasken. Dette skal vi rettet opp i snarest. Takk for beskjed og god fornøyelse
20.09.2018 - 10:29Thank you for answering so quickly. I understand. My yarn is on the way! Thx, MB~
18.05.2018 - 16:21Hi, can you please help me? Mitten directions for starting cuff:\r\nROUND 3: 1 sc in first st, ch 1, skip 1 sc, 1 sc in next sc, * skip 3 sts, in next sc work 3 dc + ch 1 + 3 dc, skip 3 sc **, 1 sc in next sc, ch 1, skip 1 sc, 1 sc in next sc, repeat from *-* but finish last repetition on round after **, then work 1 sl st in first sc from beg of round. \r\n-\r\nThe repeat is only between the **.....**, correct?
18.05.2018 - 04:36DROPS Design answered:
Dear Mary, repeat * skip 3 sts, in next sc work 3 dc + 1 ch + 3 dc, skip 3 sc, 1 sc in next sc **, ch 1, skip 1 sc, 1 sc in next st *, and finish the last repeat after **. Happy crocheting!
18.05.2018 - 09:03Salve, sto eseguendo il guanto e non ho capito : lavorare a m.a. in tondo con 1 m.a. in ogni m. e aggiustare il n° di m. a 27-30 m.a. sul 1° giro. quando il lavoro misura 8-9 cm, aumentare per il pollice da ogni lato della 2° m. all’inizio del giro – aumentare 1 m.a. da ogni lato della 2° m.Ripetere gli aumenti a ogni lato di questa m. su ogni giro altre 3-4 volte = 35-40 m.a. sul giro (m. del pollice = 9-11 m.a.). Grazie attendo vostra risposta.
03.12.2017 - 15:31DROPS Design answered:
Buonasera Sasy. Durante il primo giro, nella taglia S/M deve diminuire per avere 27 maglie. Poi quando il lavoro misura 8-9 cm, deve aumentare per il pollice da una parte e dall'altra della 2a m del giro. La prima volta che aumenta lavora così: 2 m.a nella prima m del giro, 1 maglia alta, 2 maglie alte nella m successiva. La seconda volta, aumenta così: 1 m.a nella prima m del giro, 2 m alte nella m successiva, 1 m.alta, 2 m.alte nella m successiva , è così via per gli altri aumenti. Buon lavoro!
03.12.2017 - 20:40In toer 3 van de manchet van de want wordt gezegd dat ik 3 st moet overslaan. Wat is een st? Deze heb ik in het patroon toch niet gehaakt? Moet dit wellicht een v zijn? En staat ergens op de dite ern overzicht van de afkortingen? Alvast hartelijk dank voor uw antwoord.
27.01.2014 - 22:29DROPS Design answered:
Hoi Rina. st = steken. Dus je haakt: 1 v in de eerste steken (van de vorige toer), 1 l, sla 1 v over, 1 v in de volgende v, * sla 3 steken over, haak in de volgende v enzovoort.
28.01.2014 - 11:10