
Popular categories
Looking for a yarn?


|
|||||||||||||||||||||||||||||||
Quilting Bee Cardigan |
|||||||||||||||||||||||||||||||
 |
 |
||||||||||||||||||||||||||||||
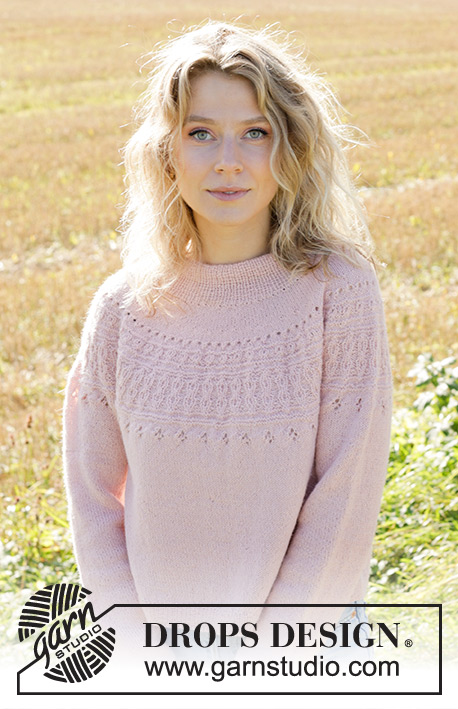
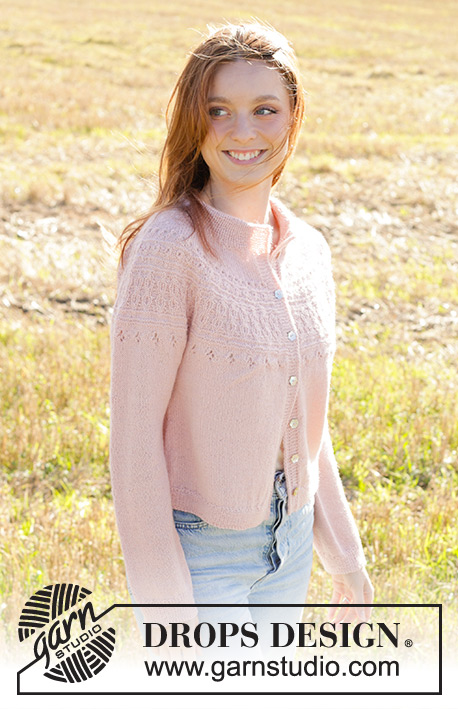
Knitted jacket in DROPS Alpaca or DROPS Flora. The piece is worked top down with double neck, round yoke, relief-pattern and I-cord. Sizes S - XXXL.
DROPS 248-25 |
|||||||||||||||||||||||||||||||
|
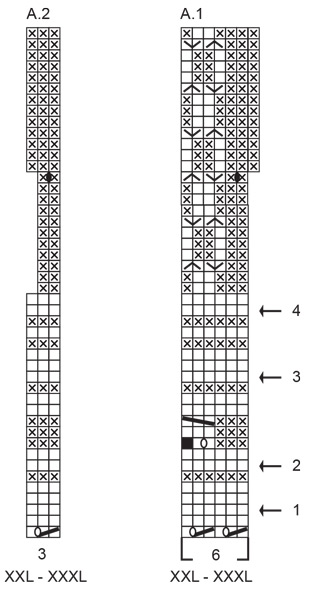
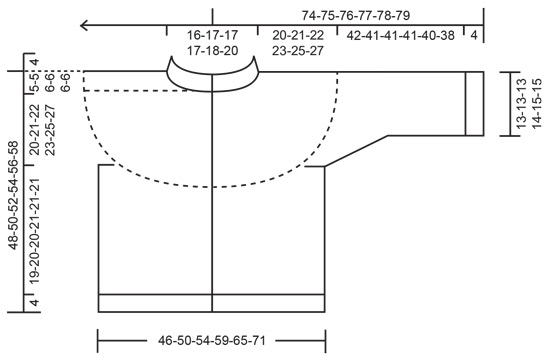
------------------------------------------------------- EXPLANATIONS FOR THE PATTERN: ------------------------------------------------------- GARTER STITCH (worked back and forth): Knit all rows. BANDS WITH I-CORD: START OF ROW: Work the band as follows: Slip 1 stitch purl-wise, with yarn in front, knit 1, work 6 garter stitches. END OF ROW: Work the band as follows: Work until there are 8 stitches left on the row, work 6 garter stitches, slip 1 stitch purl-wise with yarn in front, knit 1. PATTERN: See diagrams A.1 to A.4. Choose diagram for your size (applies to A.1 and A.2). The diagrams show all rows in the pattern from the right side. INCREASE TIP (for round yoke): Do not increase over the outermost 12 stitches on each side. To work out how to increase evenly, count the total number of stitches on the needle (e.g., 151 stitches), minus the stitches you don’t increase over (i.e., 24 stitches), then divide the remaining stitches by the number of increases to be made (e.g., 34) = 3.7. In this example, increase by making 1 yarn over after approx. each 4th stitch. On the next row work the yarn overs twisted to avoid holes. DECREASE TIP (for sleeves): Work until there are 3 stitches left before the marker-thread, knit 2 together, knit 2 (marker-thread sits between these 2 stitches), slip 1 stitch knit-wise, knit 1 and pass the slipped stitch over the knitted stitch (2 stitches decreased). BUTTONHOLES: Work buttonholes on the right band (when the garment is worn). Work from the right side, when there are 5 stitches left on the row as follows: Make 1 yarn over, knit 2 together, knit 1, slip 1 stitch purl-wise with yarn in front, knit 1. On the next row (wrong side), knit the yarn over to leave a hole. The first buttonhole is worked on the first row from the right side after the neck. The other 6 buttonholes are then worked with approx. 6½-7-7-7½-8-8 cm between each one. The bottom buttonhole is worked in the transition between stocking stitch and rib. ------------------------------------------------------- START THE PIECE HERE: ------------------------------------------------------- JACKET – SHORT OVERVIEW OF THE PIECE. The pattern uses both short and long circular needles; start with the length which fits the number of stitches and change when necessary. The neck and yoke are worked back and forth with circular needle, from mid front and top down. When the yoke is finished, it is divided for body and sleeves and the body continued back and forth with circular needle, while the sleeves wait. The sleeves are then worked in the round, top down. The neck is folded double to the wrong side and sewn down. NECK: Cast on 137-143-151-155-159-167 stitches with circular needle size 3 mm. Change to circular needle size 2.5 mm (casting on with a larger needle makes the cast-on edge elastic). Purl 1 row from the wrong side. Work as follows from the right side: 1 GARTER STITCH – read description above, * knit 1, purl 1 *, work from *-* until there are 2 stitches left, finish with knit 1 and 1 garter stitch. Continue this rib back and forth for 4 cm. Now cast on 7 stitches at the end of the next 2 rows = 151-157-161-169-173-181 stitches. Continue the rib but with the outermost 8 stitches on each side worked according to BANDS WITH I-CORD – read description above. Work until the neck measures 9 cm – finishing after a row from the wrong side The neck is later folded double to approx. 4 cm. Insert 1 marker inside the band; the yoke is measured from this marker. YOKE: Change to circular needle size 3 mm. Knit 1 row from the right side (bands worked as before) and increase 34-36-36-38-40-42 stitches evenly spaced – read INCREASE TIP. Remember the BUTTONHOLES on the right band – read description above = 185-193-201-207-213-223 stitches. Continue with stocking stitch and 8 band stitches on each side. REMEMBER THE KNITTING TENSION! When the yoke measures 3-4-5-5-5-6 cm from the marker, increase 38-42-46-46-52-54 stitches evenly spaced – remember INCREASE TIP = 223-235-247-253-265-277 stitches. Continue with stocking stitch and 8 band stitches on each side, until the yoke measures 4-5-6-7-7-8 cm from the marker. Now work PATTERN – read description above, i.e., work the first row from the right side as follows: 8 band stitches as before, work A.1 until there are 11 stitches left, work A.2 and 8 band stitches as before. Continue this pattern. AT THE SAME TIME on each row marked with an arrow in A.1, increase evenly as follows (do not increase over the bands): Arrow-1: Increase 18-18-18-24-24-30 stitches evenly spaced = 241-253-265-277-289-307 stitches. Arrow-2: Increase 18-26-24-22-25-32 stitches evenly spaced = 259-279-289-299-314-339 stitches. Arrow-3: Increase 18-22-24-32-35-34 stitches evenly spaced = 277-301-313-331-349-373 stitches. Arrow-4: Increase 23-23-29-35-35-35 stitches evenly spaced = 300-324-342-366-384-408 stitches. When A.1 and A.2 are finished there are 348-376-397-425-446-474 stitches. Now work as follows: 8 band stitches as before, work A.3 until there are 11 stitches left and increase 14-14-21-28-35-35 stitches evenly spaced (arrow-5), work A.4 and finish with 8 band stitches as before = 362-390-418-453-481-509 stitches. Continue the pattern and increase evenly on each row marked with an arrow in A.3 – remember INCREASE TIP (do not increase over the 12 outermost stitches on each side). Arrow-6: Increase 9-13-17-22-26-30 stitches evenly spaced = 371-403-435-475-507-539 stitches. Arrow-7: Increase 6-10-10-14-18-18 stitches evenly spaced – make sure to space the increases so the lace pattern is not disrupted = 377-413-445-489-525-557 stitches. When A.3 and A.4 are finished, the yoke measures approx. 19-20-21-22-24-25 cm from the marker. Continue with stocking stitch and 8 band stitches on each side until the yoke measures 20-21-22-23-25-27 cm from the marker. Now divide for the body and sleeves: Work the first 62-68-72-78-85-92 stitches (front piece), place the next 72-78-86-96-100-102 stitches on a thread for the sleeve, cast on 10-10-12-12-14-16 (in side under sleeve), work 109-121-129-141-155-169 stocking stitches (back piece), place the next 72-78-86-96-100-102 stitches on a thread for the sleeve, cast on 10-10-12-12-14-16 (in side under sleeve), work the last 62-68-72-78-85-92 stitches as before (front piece). The body and sleeves are finished separately. The piece is now measured from here! BODY: = 253-277-297-321-353-385 stitches. Continue back and forth, with stocking stitch and 8 band stitches on each side, until the body measures 19-20-20-21-21-21 cm from the division. Knit 1 row from the right side and increase 60-62-66-74-82-88 stitches evenly spaced (do not increase over the bands) = 313-339-363-395-435-473 stitches. Change to circular needle size 2.5 mm. Work rib as follows from the wrong side: 8 band stitches, * purl 1, knit 1 *, work from *-* until there are 9 stitches left, purl 1 and 8 band stitches. Continue this rib for 4 cm. Cast off. The jacket measures approx. 48-50-52-54-56-58 cm from the shoulder. SLEEVES: Place the 72-78-86-96-100-102 stitches from the thread on the one side of the piece on short circular needle/double pointed needles size 3 mm and knit up 1 stitch in each of the 10-10-12-12-14-16 stitches cast on under the sleeve = 82-88-98-108-114-118 stitches. Insert a marker-thread in the middle of the 10-10-12-12-14-16 stitches under the sleeve. Start at the marker-thread and work stocking stitch in the round. When the sleeve measures 2 cm from the division, decrease 2 stitches under the sleeve – read DECREASE TIP. Decrease like this every 4th-4th-3rd-3rd-2nd-2nd round a total of 8-10-14-18-19-20 times = 66-68-70-72-76-78 stitches. Continue working until the sleeve measures 42-41-41-41-40-38 cm from the division (There is 4 cm left; try the jacket on and work to desired length before the rib). Knit 1 round and increase 14-16-16-18-18-18 stitches evenly spaced = 80-84-86-90-94-96 stitches. Change to double pointed needles size 2.5 mm. Work rib (knit 1, purl 1) for 4 cm. Cast off. The sleeve measures approx. 46-45-45-45-44-42 cm from the division. ASSEMBLY: Fold the rib at the top of the neck to the inside and sew down to give a double neck. To avoid the neck being tight, and rolling outwards, it is important that the seam is elastic. Sew together the openings mid-front of neck with small stitches. Sew the buttons onto the left band. |
|||||||||||||||||||||||||||||||
Diagram explanations |
|||||||||||||||||||||||||||||||
|
|||||||||||||||||||||||||||||||

|
|||||||||||||||||||||||||||||||
|
|||||||||||||||||||||||||||||||

|
|||||||||||||||||||||||||||||||
|
|||||||||||||||||||||||||||||||
|
Have you made this or any other of our designs? Tag your pictures in social media with #dropsdesign so we can see them! Do you need help with this pattern?You'll find tutorial videos, a Comments/Questions area and more by visiting the pattern on garnstudio.com. © 1982-2024 DROPS Design A/S. We reserve all rights. This document, including all its sub-sections, has copyrights. Read more about what you can do with our patterns at the bottom of each pattern on our site. |
|||||||||||||||||||||||||||||||


With over 40 years in knitting and crochet design, DROPS Design offers one of the most extensive collections of free patterns on the internet - translated to 17 languages. As of today we count 304 catalogues and 11422 patterns - 11422 of which are translated into English (UK/cm).
We work hard to bring you the best knitting and crochet have to offer, inspiration and advice as well as great quality yarns at incredible prices! Would you like to use our patterns for other than personal use? You can read what you are allowed to do in the Copyright text at the bottom of all our patterns. Happy crafting!
Comments / Questions (16)
Bonjour Taille 1 Je ne comprends pas comment il peut y avoir 348 mailles à la fin de A1A2, alors qu'après la flèche 4 (dernière augmentation) il y en a 300??? Quand augmente-t-on ces 48 mailles? Merci de votre aide
13.05.2024 - 09:04DROPS Design answered:
Bonjour Muriel, on va augmenter 1 maille dans chaque A.1 et 1 maille dans A.2, donc après la flèche 4 vous avez 300 mailles et vous tricotez 47 fois A.1 en largeur pour terminer par les 2 m de A.2; vous allez ainsi augmenter 47+1 = 48 mailles et ainsi obtenir les 300+48=348 mailles. Bon tricot!
13.05.2024 - 12:27Inicio el proyecto con lana más gruesa y la talla S es grande. Con cuántos puntos debo iniciar el cuello para obtener una talla menos. Sí S son 136 p y M 143 p, una talla menos de S serían 129 p? Gracias por tu atención
14.04.2024 - 18:30DROPS Design answered:
Hola Albina, no puedes hacer una regla de 3 directa; tienes que hacer tus propios cálculos con tus medidas deseadas y tu nueva tensión. Puedes leer la siguiente lección para más información: https://www.garnstudio.com/lesson.php?id=25&cid=23
14.04.2024 - 23:24På diagram A1 skall man på v9 bara ha 5 maskor av de 6 man använt. Kan inte få antalet maskor att stämma med diagrammet på stl XL. 301 maskor, tag bort 16 kantmaskor, tag bort de 3 maskor som skall vara A2, då återstår 282 m. Kan inte fördela detta över 5 maskor som skall stickas. Hur skall jag tänka?
14.04.2024 - 08:42DROPS Design answered:
Hej, Vi kan se hvad du mener og skal få design til at se på det. Hold øje her, så vil der blive lagt en opdatering ud - tak for info :)
16.04.2024 - 07:47Volgens mij klopt de meerdering bij pijl 2 niet.Voor maat m moet je 24 steken meerderen tot 277 steken.277-16 kant steken is 261 en als je die deelt door 5 steken kom je op 52 herhalingen en hou je maar 1 steek over ipv 3 voor A2
03.04.2024 - 23:46Tak :), nu mønster A3 mangler igen.
06.03.2024 - 06:57Er det korrekt at i række nr. 11 i mønster A1 i forbindelse med “strik 3 ret, løft derefter den første maske som blev strikket over de 2 andre så den ligger rundt om de 2 andre maske”, at jeg lukker en maske af? Så der kun er 5 masker. I række 9 i forbindelse med den “sorte” maske, har lukket jeg lukker en maske af og taget en ud ved omslag lidt tidligere. Så i denne række er der 6 masker. Når jeg udtager ved pil nr 3 mangler jeg de lukkede masker i pind 11.
03.03.2024 - 00:03DROPS Design answered:
Hej Karin, tak for info - vi skal høre med design, så kommer vi tilbage med en opdatering :)
05.03.2024 - 14:54The pattern is missing A3.
27.02.2024 - 17:55The sweater quilting bee has patterns A1,A2 and A3, but A3 is not shown.
27.02.2024 - 17:47DROPS Design answered:
Hi Lieke, Pattern A.3 is bottom right, above the size-chart. Happy knitting!
28.02.2024 - 07:02Det skrivna maskantalet stämmerinte efter alla ökningar i A1 o A2 får det till 342 m. I mönstret står det 397 m Med vänlig hälsning Lena Kolmodin
25.02.2024 - 19:16DROPS Design answered:
Hej Lena. Kom ihåg att du ska öka maskor vid varje pil i diagram A.1 också enligt beskrivning. Mvh DROPS Design
27.02.2024 - 07:34I Diagram A1 ser det ut som det blir aviga maskor på rätsidan men på bilden är det räta maskor. Och det ser ut som ökning och minskning görs på avigan. Tänker jag alldeles fel. Mvh Ann-Karin
21.02.2024 - 18:52DROPS Design answered:
Hej Ann-Karin, det er vrangmasker (set fra retsiden) på billedt :)
23.02.2024 - 13:17