
Popular categories
Looking for a yarn?


|
|||||||||||||
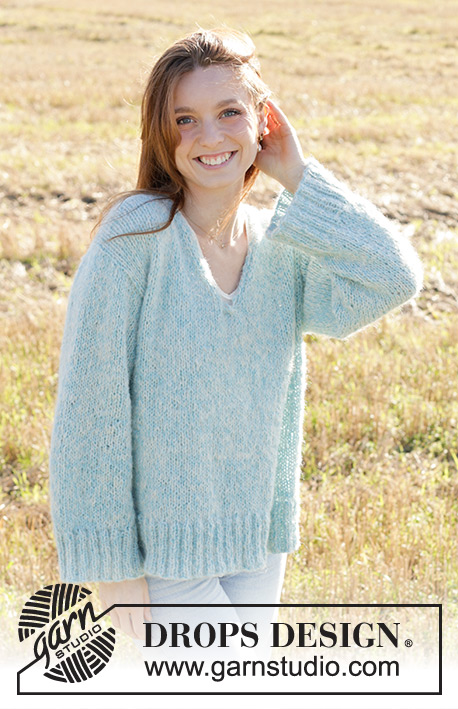
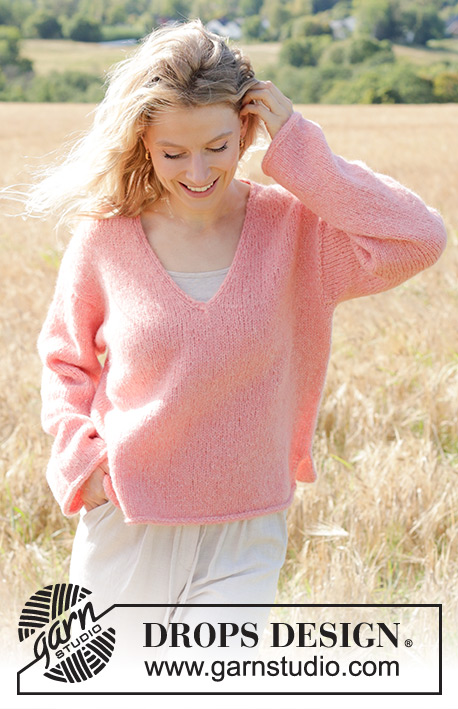
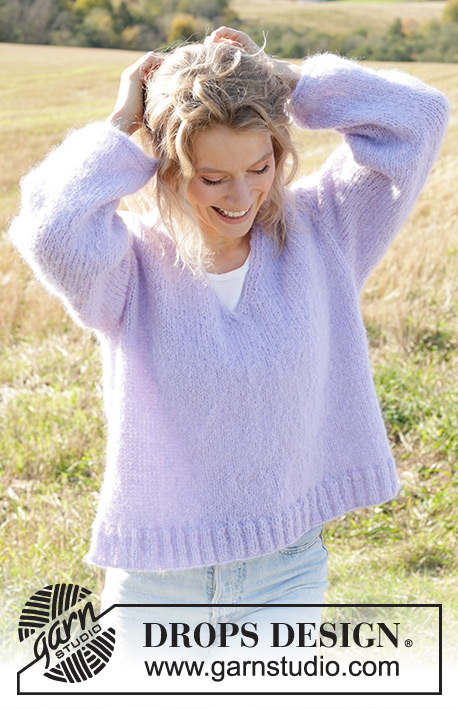
Spring Iris |
|||||||||||||
 |
 |
||||||||||||
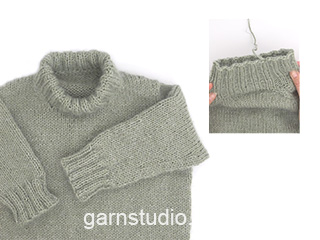
Knitted jumper in DROPS Melody. Piece is knitted top down with European shoulder / diagonal shoulder, V-neck and I-Cord. Size XS – XXL.
DROPS 250-39 |
|||||||||||||
|
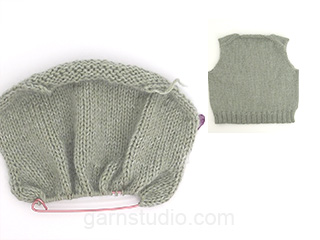
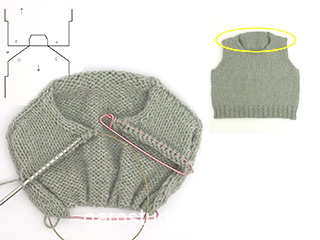
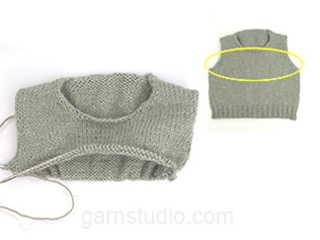
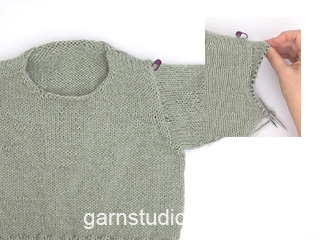
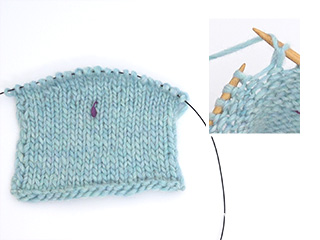
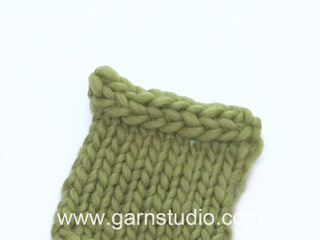
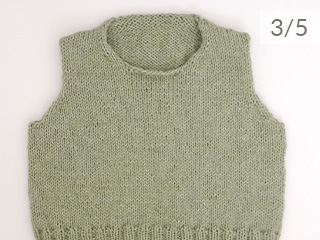
---------------------------------------------------------- EXPLANATION FOR THE PATTERN: ---------------------------------------------------------- GARTER STITCH (back and forth): Knit all rows. 1 ridge vertically = knit 2 rows. PATTERN: See diagrams A.1 and A.2. Diagrams show all rows in pattern seen from the right side. INCREASE TIP-1 (from right side): Increase 1 stitch towards the left: Use left needle to pick up yarn between 2 stitches from row below, pick up yarn from the front and knit stitch in back loop of stitch. Increase 1 stitch towards the right: Use left needle to pick up yarn between 2 stitches from row below, pick up yarn from the back and knit stitch in front loop of stitch. INCREASE TIP-2 (from wrong side): Increase 1 stitch towards the left: Use left needle to pick up yarn between 2 stitches from row below, pick up yarn from the back and purl stitch in front loop of stitch. Increase 1 stitch towards the right: Use left needle to pick up yarn between 2 stitches from row below, pick up yarn from the front and purl stitch in back loop of stitch. DECREASE TIP (applies to mid under sleeves): Decrease 1 stitch on each side of marker thread as follows: Work until 3 stitches remain before marker thread and knit 2 together, knit 2 (marker thread is between these 2 stitches), slip 1 stitch knitwise, knit 1, pass slipped stitch over stitch worked. I-CORD CAST-OFF: ROW 1 (= right side): Knit 2 , knit the next 2 stitches twisted together. ROW 2 (= right side): Slip the 3 stitches from right needle back on left needle, knit 2 , knit the next 2 stitches twisted together. Repeat ROW 2 until 3 stitches remain on right needle. Slip the 3 stitches from right needle back on left needle. Cast off. Sew a little stitch that binds beginning/end of I-cord to the garment. ---------------------------------------------------------- START THE PIECE HERE: ---------------------------------------------------------- JUMPER - SHORT OVERVIEW OF THE PIECE: In this pattern long and short needles have been used - begin with fitting length and switch as needed. Work piece back and forth on needle. Begin by casting on stitches in the back of neck. Then work back piece downwards while at the same time increasing in each side of piece until number of stitches for shoulder width is reached. Back piece has a slight diagonal shoulder. Then work down to armholes. Now put back piece aside and work the front piece. Front piece is first worked in 2 parts. Begin by picking up stitches along right shoulder, work while increasing towards the neck. Repeat on the left shoulder. Put right and left front piece together when increases for neck are done. Then work front piece down to armholes. Now slip front piece and back piece on to same needle and work body downwards in the round on circular needle before dividing it again for vents. Pick up stitches for sleeves around the armholes. First work back and forth with short rows to form a sleeve cap. Then work sleeves downwards in the round on needle. BACK PIECE: Cast on 24-24-26-28-28-30 stitches on circular needle size 7 mm with DROPS Melody. Purl 1 row from wrong side. Read INCREASE TIP-1 and work next row from right side as follows: Knit 3, increase towards the left, knit until 3 stitches remain, increase towards the right, knit 3. Read INCREASE TIP-2 and work next row from wrong side as follows: Purl 3, increase towards the left, purl until 3 stitches remain, increase towards the right, purl 3. Continue like this and increase the same way from both right side and wrong side 18-20-20-22-24-26 times in total. REMEMBER THE KNITTING TENSION! After last increase there are 60-64-66-72-76-82 stitches on needle. Insert 1 marker in the side. Now measure piece from here! Work stocking stitch back and forth until piece measures 11-12-12-13-12-13 cm, measured along the edge of armhole. Work next row as follows from right side: Knit 3, increase towards the left, work until 3 stitches remain, increase towards the right, knit 3 – remember INCREASE TIP-1. Increase like this on every row from right side 2-2-3-3-4-4 times in total = 64-68-72-78-84-90 stitches. Work until piece measures 14-15-16-17-17-18 cm, measured along armhole. Cut the yarn, slip stitches on a thread or stitch holder, and work front piece as explained below. FRONT PIECE: Begin with right shoulder (when garment is worn). Pick up 18-20-20-22-24-26 stitches inside outermost stitch along right shoulder on back piece (i.e. pick up 1 stitch in every row from edge at the top of back piece, see E on chart). All length measurements are done from here! Purl 1 row from wrong side, work next row as follows from right side: stocking stitch until 4 stitches remain, work A.1. When piece measures 6 cm, increase stitches towards the neck. Increase towards the right at the end of every row from right side, increase before A.1 - remember INCREASE TIP-1.Increase 1 stitch on every other row (every row from right side) 12-12-13-14-14-15 times in total = 30-32-33-36-38-41 stitches. Finish with a row from right side, slip stitches on a thread or needle. Then work left shoulder as explained below. Pick up 18-20-20-22-24-26 stitches inside outermost stitch along left shoulder on back piece (i.e. pick up 1 stitch in every row from edge at the top of back piece, see D on chart). All length measurements are done from here! Purl 1 row from wrong side, then work as follows from right side: A.2, stocking stitch over the remaining stitches. Continue like this. When piece measures 6 cm, increase stitches towards the neck. Increase towards the left at the beginning of every row from right side, increase after A.2 – remember INCREASE TIP-1. Increase 1 stitch on every other row (every row from right side) 12-12-13-14-14-15 times in total = 30-32-33-36-38-41 stitches. Finish with a row from right side. Work next row as follows from wrong side: Work stocking stitch over the 30-32-33-36-38-41 stitches from left shoulder, slip stitches from right shoulder on left needle and then work them in stocking stitch = 60-64-66-72-76-82 stitches. Work next row as follows - from right side: Knit 28-30-31-34-36-39, slip the next 2 stitches on a cable needle in front of piece, knit 2, knit stitches from cable needle, work the last 28-30-31-34-36-39 stitches on row. Continue in stocking stitch. Continue to work until piece measures 22-23-22-23-24-25 cm. Work next row as follows from right side: Knit 3, increase towards the left, work until 3 stitches remain, increase towards the right, knit 3 – remember INCREASE TIP-1. Increase like this on every row from right side 2-2-3-3-4-4 times in total = 64-68-72-78-84-90 stitches. Continue in stocking stitch until piece measures 24-25-26-27-29-30 cm. Now put front piece and back piece together for body as explained below. BODY: Work stocking stitch over the 64-68-72-78-84-90 stitches from front piece, cast on 4-4-6-6-8-10 new stitches at the end of this row (in the side under sleeve), work stocking stitch over the 64-68-72-78-84-90 stitches from back piece, cast on 4-4-6-6-8-10 new stitches at the end of row (in the side under sleeve) = 136-144-156-168-184-200 stitches. Work stocking stitch until piece measures 49-51-53-55-57-59 cm, measured from the top point on shoulder on front piece. Slip the 68-72-78-84-92-100 stitches from back piece on a thread or needle, and work only over stitches on front piece. FRONT PIECE: Work 1 row from right side while increasing 20-20-22-24-24-28 stitches evenly = 88-92-100-108-116-128 stitches. Switch to circular needle size 5.5 mm. Work next row as follows from wrong side: 1 edge stitch in GARTER STITCH - read explanation above, * purl 2, knit 2 *, work from *-* until 3 stitches remain, purl 2 and 1 edge stitch in garter stitch. Continue rib like this for 7 cm. Cast off. Jumper measures approx. 56-58-60-62-64-66 cm from the top point on shoulder. BACK PIECE: Slip stitches on circular needle size 7 mm. Work the same way as on front piece. SLEEVES: Place piece flat and insert 1 marker at the top of armhole (NOTE! It is not where stitches were picked up for front piece but approx. 5-6 cm down on front piece = mid on top of shoulder). All length measurements are done from here! Use circular needle size 7 mm, begin in the middle of the new stitches cast on under sleeve, and pick up 54-56-60-64-68-72 stitches along armhole - adjust to pick up same number of stitches on each side of marker along armhole. Now work stocking stitch back and forth with short rows over sleeve cap, this is done to get a better shape on sleeve. Begin mid under sleeve. 1st row (right side): work 7-7-7-8-8-9 stitches past marker, turn. 2nd row (wrong side): work 7-7-7-8-8-9 stitches past marker, turn. 3rd row (right side): 6-6-4-5-4-4 stitches past where the previous turn was, turn 4th row (wrong side): work 6-6-4-5-4-4 stitches past where the previous turn was, turn Repeat 3rd and 4th row until 25-25-23-28-28-29 stitches have been worked past marker mid on top of sleeve (4-4-5-5-6-6 turn have been done in each side). Work from right side until beginning of round (mid under sleeve). Insert 1 marker thread here, this is used when decreasing stitches under sleeve. Move marker thread upwards when working. Continue working in the round in stocking stitch over all stitches. When sleeve measures 7-7-8-8-10-10 cm, decrease 2 stitches mid under sleeve - read DECREASE TIP. Decrease every other round 2-2-3-3-4-4 times, then decrease every 5-5-4-3½-3-3 cm 5-5-5-6-6-6 times, 7-7-8-9-10-10 times in total = 40-42-44-46-48-52 stitches. Continue to work until sleeve measures 51-50-50-49-49-47 cm. At the end of round and after last stitch on round has been worked: Cast on 3 new stitches on right needle from right side. Slip the 3 new stitches from right needle to left needle so that working yarn is 3 stitches in on left needle (the working yarn tightens the piece when working to form a little tube). Cast off with I-CORD - read explanation above. Sleeve measures approx. 52-51-51-50-50-48 cm. BACK NECK EDGE: Use circular needle size 7 mm and cast on 2 stitches on needle, pick in addition up stitches along the neck edge at the back, begin at one shoulder line from right side and pick up inside 1 stitch to the other shoulder line. Pick up approx. 22-22-24-26-26-28 stitches in total. Fasten off. Begin in the side where stitches were cast on and cast off with I-CORD - read explanation above. |
|||||||||||||
Diagram explanations |
|||||||||||||
|
|||||||||||||

|
|||||||||||||

|
|||||||||||||

|
|||||||||||||
|
Have you made this or any other of our designs? Tag your pictures in social media with #dropsdesign so we can see them! Do you need help with this pattern?You'll find tutorial videos, a Comments/Questions area and more by visiting the pattern on garnstudio.com. © 1982-2024 DROPS Design A/S. We reserve all rights. This document, including all its sub-sections, has copyrights. Read more about what you can do with our patterns at the bottom of each pattern on our site. |
|||||||||||||


With over 40 years in knitting and crochet design, DROPS Design offers one of the most extensive collections of free patterns on the internet - translated to 17 languages. As of today we count 304 catalogues and 11422 patterns - 11422 of which are translated into English (UK/cm).
We work hard to bring you the best knitting and crochet have to offer, inspiration and advice as well as great quality yarns at incredible prices! Would you like to use our patterns for other than personal use? You can read what you are allowed to do in the Copyright text at the bottom of all our patterns. Happy crafting!
Comments / Questions (6)
Bonjour, serait il possible de mettre un symbole sur le dessin du patron pour indiquer le repère pour le marqueur des manches ( 5 à 6 cm en descendant le long du devant) merci
24.05.2024 - 11:55DROPS Design answered:
Bonjour Rose, posez simplement le pull à plat, les côtes du bas du dos/devant bien en face les unes des autres, la ligne des épaules va se former automatiquement, le rang des épaules va se trouver automatiquement côté dos - vous pourrez voir comment placer ce marqueur dans cette vidéo et / ou dans cette leçon. Bon tricot!
24.05.2024 - 13:31Minkä paksuisilla puikoilla testikappale neulotaan?
10.05.2024 - 08:33DROPS Design answered:
Mallitilkku neulotaan puikoilla nro 7. Vaihda tarvittaessa ohuempiin/paksumpiin puikkoihin.
10.05.2024 - 12:04Fin
04.03.2024 - 09:28Bellissimo!
22.01.2024 - 07:20Luce
19.01.2024 - 14:14Spring cloud
18.01.2024 - 22:21