
Popular categories
Looking for a yarn?


|
|||||||||||||||||||||||||||||||||||||||||||||||||||||||||||||
Hello Sunshine |
|||||||||||||||||||||||||||||||||||||||||||||||||||||||||||||
 |
 |
||||||||||||||||||||||||||||||||||||||||||||||||||||||||||||
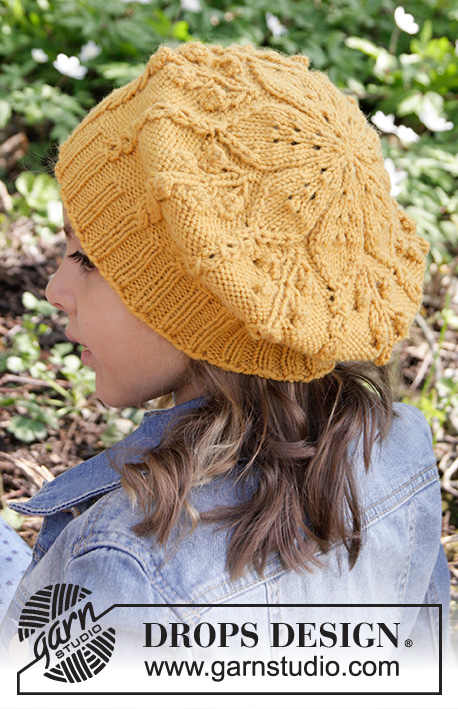
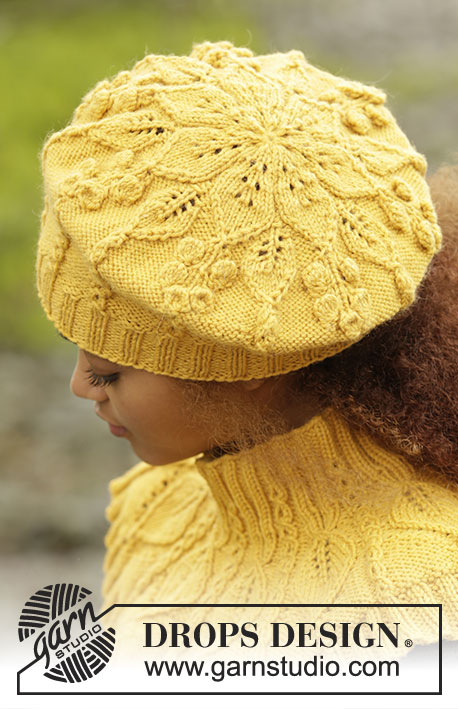
Set consists of: Knitted DROPS beret and neck warmer with leaf pattern worked top down in ”Lima” and DROPS wrist warmers with leaf pattern in “Lima”.
DROPS 173-43 |
|||||||||||||||||||||||||||||||||||||||||||||||||||||||||||||
|
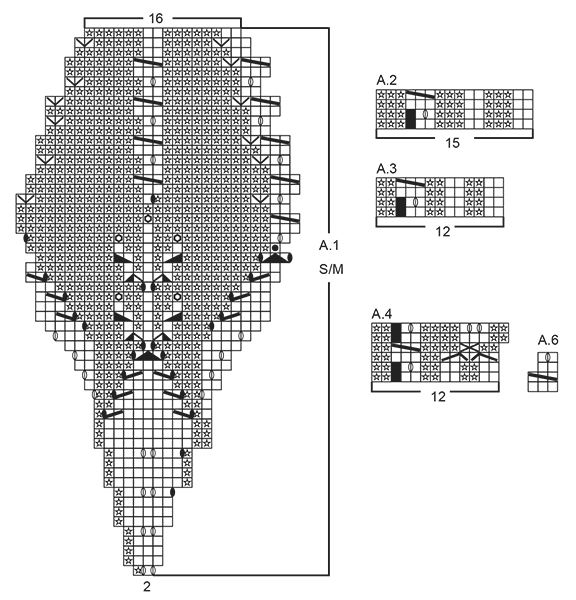
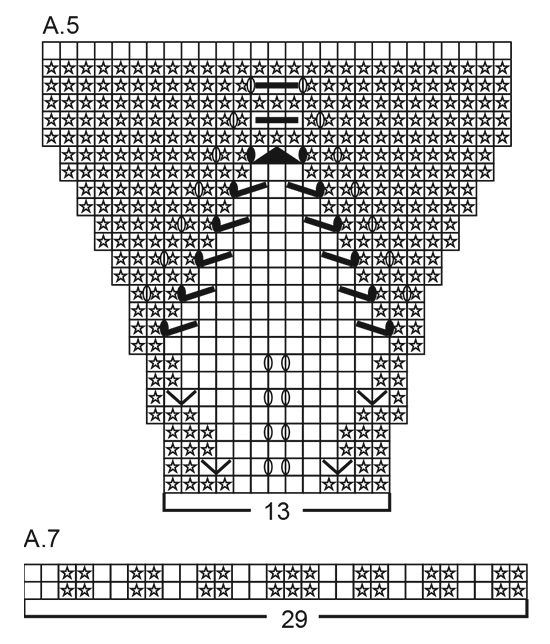
BERET: PATTERN: See diagram A.1 (choose diagram for correct size). MAGIC CIRCLE: To avoid hole in the middle beg with this technique: Hold yarn end in the left hand and make a loop around left index finger (from left to right). Hold the loop with left thumb and index finger. Insert needle through loop, get yarn from ball (i.e. place yarn 1 time over needle from you), pull yarn back through loop, 1 YO (now place yarn from the back and towards you) and pull YO through sts on needle, * insert needle through loop, 1 YO (place yarn from the back and towards you), pull YO through loop, 1 YO (from the back and towards you) and pull YO through outermost st on right needle (i.e. the last st made) *, repeat from *-* until there are 14 sts on needle. Distribute sts on 4 double pointed needles size 3.5 mm as explained in pattern. Then work as explained in pattern – AT THE SAME TIME pull yarn end so that loop is tighten tog and the hole disappears. CAST-OFF TIP: Make 1 YO after approx. every 4th st while casting off (cast off YO as a st) to make the cast-off edge more elastic. ---------------------------------------------------------- BERET: Work in the round on double pointed needles top down, switch to circular needle when needed. Beg with MAGIC CIRCLE - see explanation above and cast on 14 sts with Lima as explained above – NOTE: If you do not want to start with a magic circle cast on 14 sts on double pointed needles size 3.5 mm with Lima (when beret is done baste a yarn up and down through sts around hole at the top and tighten tog). Distribute sts on 4 double pointed needles size 3.5 mm with 4 sts on each of the first 3 needles and 2 sts on last needle. Then work pattern according to diagram A.1 (choose diagram for correct size = 7 repetitions of 2 sts). REMEMBER THE KNITTING TENSION When A.1 has been worked, there are 112 sts on needle in both sizes and piece measures approx. 19-21 cm from the top down. Switch to circular needle size 3 mm and work rib in the round (= K 2/P 2) – adjust to work 2 K over every pattern border and P 2 + K 2 + P 2 between every pattern border. When rib measures 3-4 cm (or desired measurements), cast off with K over K and P over P - READ CAST-OFF TIP. ---------------------------------------------------------- NECK WARMER: PATTERN: See diagrams A.2 to A.7. INCREASE TIP: Inc 1 st in transition between P and K by making 1 YO. On next round P YO twisted to avoid holes. ---------------------------------------------------------- NECK WARMER: Worked in the round on circular needle, top down. Cast on 120-135 sts on circular needle size 3.5 mm with Lima. K 1 round. Then work rib in the round = K 2/P 3. When rib measures 3-4 cm, switch to circular needle size 4 mm. Then work pattern in the round according to diagram A.2 (= 8-9 repetitions of 15 sts) until A.2 has been worked 2 times in total vertically – AT THE SAME TIME on last round dec all 3 P to 2 P (dec 1 st by P 2 tog = 24-27 sts dec) = 96-108 sts on needle. Now work 1 repetition vertically according to diagram A.3 the same way. After A.3 piece measures approx. 7-8 cm. Then work pattern according to diagram A.4 (= 8-9 repetitions of 12 sts). When A.4 has been worked 1 time vertically, there are 128-144 sts on needle (incl YOs in pattern) - NOTE: Finish last round when 2 sts remain on round, insert 1 marker (round beg here now). Work next round as follows: * Work A.5 (= 13 sts), A.6 (= 3 sts) *, repeat from *-* 8-9 times in total. Continue pattern like this and inc as shown in diagram. REMEMBER THE KNITTING TENSION! When A.5 has been worked, there are 232-261 sts on needle. Switch to circular needle size 3.5 mm and work rib in the round according to diagram A.7 (= 8-9 repetitions of 29 sts). AT THE SAME TIME after 2 round rib inc every other 2 P to 3 P - READ INCREASE TIP = 256-288 sts. After the next 2 round inc the remaining 2 P to 3 P = 280-315 sts. When rib measures 3-4 cm, loosely cast off with K over K and P over P. Neck warmer measures approx. 21-23 cm from top and down. ---------------------------------------------------------- WRIST WARMER: PATTERN: See diagrams A.8 and A.9. ---------------------------------------------------------- RIGHT WRIST WARMER: Worked in the round on double pointed needles. Cast on 50-55 sts on double pointed needles size 3 mm with Lima. K 1 round. Work next round as follows: * K 2, P 3 *, repeat from *-* 4-5 times in total, K 2, P 1, work pattern according to diagram A.8 (= 6 sts), P 1, repeat from *-* 4-4 times in total. Continue rib and A.8 like this until piece measures 3 cm. Now dec 3 P to 2 P the entire round = 40-44 sts. Switch to double pointed needles size 3.5 mm, work next round as follows: Work 18-22 sts in stocking st, continue A.8 and finish with 16-20 sts in stocking st. REMEMBER THE KNITTING TENSION When piece measures 8-9 cm (ending after a row like row marked with arrow in diagram), work pattern according to diagram A.9 over A.8 (work the other sts in stocking st). Continue pattern like this and inc and dec as shown in diagram. When A.9 has been worked, there are 48-52 sts on needle and piece measures approx. 15-16 cm. Work 1 round in stocking st and slip AT THE SAME TIME the middle 10 sts in A.9 on a stitch holder for thumb, in addition cast on 2 new sts on needle behind the thumb = 40-44 sts on needle. Continue in the round in stocking st until piece measures 19-20 cm (approx. 3 cm remain until finished measurements – try the wrist warmer on and work to desired measurements). Switch to double pointed needles size 3 mm and K 1 round while at the same time inc 4 sts evenly = 44-48 sts. Then work rib in the round = K 2/P 2 for 3 cm. LOOSELY cast off sts with K over K and P over P. Entire wrist warmer measures approx. 22-23 cm. THUMB: Slip the 10 sts from stitch holder back on double pointed needles size 3.5 mm and pick up 6 new sts behind the thumb = 16 sts. Work 2 rounds in stocking st (make sure to avoid a tight thumb). Then work rib in the round = K 2/P 2 for 3-3½ cm (or desired measurements). Cast off sts with K over K and P over P. LEFT WRIST WARMER: Work as right wrist warmer but reversed, i.e. work first round with rib as follows: * P 3, K 2 *, repeat from *-* 4-4 times in total, P 1, A.8 (= 6 sts), P 1, K 2, repeat from *-* 4-5 times in total. After rib work 16-16 sts in stocking st, A.8 and 18-22 sts in stocking st. |
|||||||||||||||||||||||||||||||||||||||||||||||||||||||||||||
Diagram explanations |
|||||||||||||||||||||||||||||||||||||||||||||||||||||||||||||
|
|||||||||||||||||||||||||||||||||||||||||||||||||||||||||||||
|
|||||||||||||||||||||||||||||||||||||||||||||||||||||||||||||

|
|||||||||||||||||||||||||||||||||||||||||||||||||||||||||||||
|
|||||||||||||||||||||||||||||||||||||||||||||||||||||||||||||
|
Have you made this or any other of our designs? Tag your pictures in social media with #dropsdesign so we can see them! Do you need help with this pattern?You'll find tutorial videos, a Comments/Questions area and more by visiting the pattern on garnstudio.com. © 1982-2024 DROPS Design A/S. We reserve all rights. This document, including all its sub-sections, has copyrights. Read more about what you can do with our patterns at the bottom of each pattern on our site. |
|||||||||||||||||||||||||||||||||||||||||||||||||||||||||||||


With over 40 years in knitting and crochet design, DROPS Design offers one of the most extensive collections of free patterns on the internet - translated to 17 languages. As of today we count 304 catalogues and 11422 patterns - 11422 of which are translated into English (UK/cm).
We work hard to bring you the best knitting and crochet have to offer, inspiration and advice as well as great quality yarns at incredible prices! Would you like to use our patterns for other than personal use? You can read what you are allowed to do in the Copyright text at the bottom of all our patterns. Happy crafting!
Comments / Questions (55)
Ik ben de halswarmer aan het breien en onzeker over A2, het zwarte vakje. Haal ik deze steek enkel recht af? Ik kom namelijk aan het eind niet uit met het aantal herhalingen.(9x)
06.05.2024 - 00:24DROPS Design answered:
Dag Laura,
Met het zwarte vakje hoef je niets te doen. Dit is geen steek. Als je het telpatroon uit zou knippen, dan zou je dit vlakje eruit moeten knippen en de andere vlakjes tegen elkaar aan schuiven. De eerste naald is dus steeds 2 recht, 3 averecht.
08.05.2024 - 11:23I don't get on well with wool and would like to use a substitute yarn. It must be natural fibre though, eg silk, alpaca etc. What would you recommend?
26.12.2023 - 21:28DROPS Design answered:
Dear Helen, you could use double thread of DROPS Alpaca. Happy knitting!
28.12.2023 - 23:47Heia igjen. Tusen, tusen takk for raskt og godt svar. Enn det - at jeg helt har glemt at det måtte være 7 rapporter. Jeg strikket kun slik at det ble 4 rapporter. Misforsto rett og slett første linje. Antall masker på slutten ble hos meg kun 56 masker og da ble det alt for trangt . Mange år siden jeg strikket disse sist. Herlig - nå starter jeg på nytt igjen. Igjen - tusen takk. Mvh Margareth von Ibenfeldt
18.08.2023 - 13:57Heia. Har strikket dette settet flere ganger tidligere for lenge siden - og skulle igjen strikke flere sett. Men av en merkelig grunn, så strever jeg med luen/denne gangen. Har måttet rekke opp 3 ganger nå - mulig jeg leser oppskriften feil. De 14 maskene i den magiske sirkelen, valgte jeg å hoppe over og la opp 14 masker istedet. Og strikket mønster A1 Medium. Men da blir det ikke 112 masker på slutten - skulle jeg ha lagt opp 14 x 2=28 masker ? Husker jeg så feil ? Takknemlig for svar.
18.08.2023 - 00:05DROPS Design answered:
Hej Margareth, jo du starter med 14 m, gentager A.1 (2m i rapporten) 7 gange (sæt 1 mærke imellem hver rapport, så du husker at tage ud/ind i alle rapporter), tager ud og ind ifølge diagrammet til du har 16 m i hver rapport :)
18.08.2023 - 12:08Buongiorno, quindi nella stessa maglia devo fare una maglia diritto e una rovescio? Grazie
05.12.2022 - 11:26DROPS Design answered:
Buonasera Elena, no, deve lavorare 1 volta la maglia a diritto nel filo davanti e 1 volta la maglia a diritto nel filo dietro, cioè a ritorto. Provi a vedere se questo video le può essere di aiuto. . Buon lavoro!
05.12.2022 - 19:151 m dir nel filo davanti e dietro della stessa m ( =1 aumento) Cosa devo lavorare questo punto?
02.12.2022 - 15:26DROPS Design answered:
Buonasera Elena, deve lavorare la stessa maglia 2 volte, una volta nel filo davanti e una volta nel filo dietro. Buon lavoro!
03.12.2022 - 16:18Buonasera, nella spiegazione del basco ad un certo punto dice ( = 7 ripetizioni di 2 m) cosa si intende? E come faccio a fare queste ripetizioni avendo solo 14 maglie in totale?
01.10.2022 - 21:04DROPS Design answered:
Buonasera Elena, questa parte fa riferimento al diagramma A.1, che inizia appunto con 2 maglie e che va ripetuto 7 volte sul giro (= 14 maglie). Buon lavoro!
01.10.2022 - 21:07Hallo habe es jetzt hinbekommen aber mcih würde noch sehr interessieren woher ich als leihe es selber sehen kann das die 33 Reihe mit letzten Maschen von der 32.Runde gestrickt wird. Würde mich sehr freuen wenn ihr mir das näher bringen könntet damit ich auch in zukunft bescheid weiß weil ich noch einige Anleitungen von euch machen möchte LG. Konni
26.01.2022 - 17:57DROPS Design answered:
Liebe Konni, wenn Sie das Diagram mal schauen, gibt es 1 extra Masche rechts und es fehlt eine Masche links (am Ende), deshalb, aber gerne können Sie immer hier mal fragen, ob Sie ein Diagram nicht richtig verstehen, gerne werden wir Ihnen weiterhelfen. Viel Spaß beim stricken!
27.01.2022 - 08:23Wenn ich das richtig verstanden habe dann würde sich der Rapport ja im Grunde um eine Masche verschieben da ich immer mit Maschenmarkierer gearbeitet habe bin ich ja im Grunde immer ausgekommen. Also nehme ich jetzt die letzte Masche von Reihe 32 ( rechte Mache) und fange damit jetzt die 33 Reihe an ? = rechts, Umschlag, 1 M wie zum rechtsst abheben, 2 M Re zusstr, die abgehoben M überziehen, Umschlag 8 M links und so weiter hoffe ich habe es jetzt richtig verstanden
26.01.2022 - 10:43DROPS Design answered:
Liebe Frau Plitschka, Runde 33 starten Sie so (die letzte Masche der 32. Runde ist immer noch auf der linken Nadel): 1 Umschlag, die letzte Masche 32. Rd abheben, die 2 ersten Maschen 33. Runde zusammen stricken, die abgehobene Masche über die gestrickte Masche ziehen, 1 Umschlag, A.1 weiter stricken bis die letzte Masche (= rechte Masche) übrig ist, und die letzte rechte Masche A.1 genauso mit den 2 ersten Maschen von nächsten A.1 zusammen stricken. A.1 endet jetzt mit nur linken Maschen. Viel Spaß beim stricken!
26.01.2022 - 13:21Frage zum Diagram zur Baskenmütze A1 S/M ich komme an einer Stelle einfach nicht weiter... habe auch bei mir schon einen fehler gesucht aber kann keinen finden... in der 33 Reihe in der mitte vom Diagramm ist in der 32 Reihe eine rechte Masche wenn ich nach strickschrieft dann die 33 stricke ist dann da keine rechte Masche wie aber angeben ist. Es ist schwer zu erklären aber vielleicht könnt ihr mir ja trotzdem folgen und weiter helfen LG. Aus Kempen
25.01.2022 - 21:42DROPS Design answered:
Liebe Frau Plitschka, die 33. Reihe beginnt mit der letzten Maschen der 32. Runde und die letzte Masche in jedem A.1 (die rechte Masche) wird jeweils zusammen mit den 2 ersten Maschen von nächsten A.1 gestrickt, dh A.1 endet jetzt mit nur linken Maschen. Viel Spaß beim stricken!
26.01.2022 - 09:12