
Popular categories
Looking for a yarn?


Comments / Questions (6)
![]() Vivian wrote:
Vivian wrote:
Ich würde die Weste gerne aus zweifädigem Drops Alpaca Boucle stricken, aber verstehe die Anleitung nicht, ich glaube, sie ist total falsch übersetzt: Wenn die Arb 19-20-21 misst, 1 Ndl li (von rechts gesehen) über 4 M auf der Seite stricken. Auf der nächsten Ndl 2 M auf der Seite für das Armloch abketten. Weiter für das Armloch auf der Seite alle 2.Ndl abketten – das ergibt gar keinen Sinn! Kann es sein, dass hier „Ndl“ mit Reihen vertauscht wurde? Gerne sonst auf englisch?
24.01.2026 - 11:13DROPS Design answered:
Liebe Vivian, richtig, Ndl heißt in diesem Fall Reihe. Die Anleitung ist schon recht alt und sprachlich nicht auf dem heutigen Standard. Sie wird in Kürze überarbeitet. Sofern Sie mit der englischen Anleitung zurechtkommen, versuchen Sie es damit. Viel Spaß beim Stricken!
29.01.2026 - 11:35
![]() Susanne Lutz wrote:
Susanne Lutz wrote:
Wo finde ich das Diagramm für die Weste ?
07.01.2026 - 19:51DROPS Design answered:
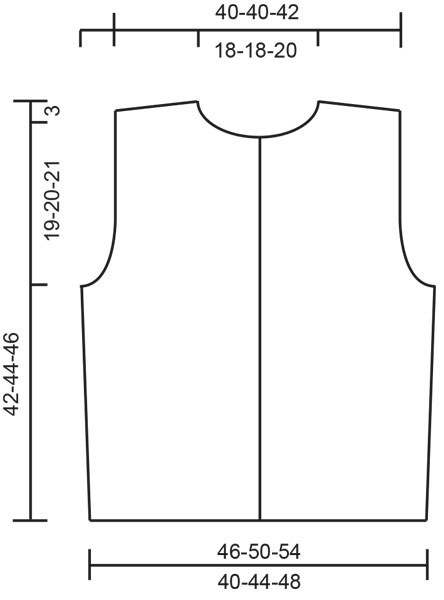
Liebe Frau Lutz, die Maßskizze für die Weste finden Sie ganz unten der Seite (nach der Maßskizze für den Pullover). Viel Spaß beim Stricken!
08.01.2026 - 09:30
![]() Talon Christiane wrote:
Talon Christiane wrote:
Comment coudre un gilet ou un pull over
06.09.2025 - 21:24DROPS Design answered:
Bonjour Mme Talon, retrouvez ici différentes vidéos pour vous aider à assembler votre ouvrage. Bon ticot!
08.09.2025 - 10:20
![]() Gloria wrote:
Gloria wrote:
Heb het vestje gebreid, maar het patroon is echt ingewikkeld geschreven? Waarom starten ze niet met het rugpand zoals met de meeste patronen? Ook de minderingen vond ik niet zo duidelijk uitgeschreven.
03.12.2023 - 20:22
![]() Janet wrote:
Janet wrote:
Hi I would like to make the vest but i have chinchilla chunky i want to use by James c Brett. Can anyone guide me on needle size and to be awkward i wondered if i could make the front wider to wrap over so it is double breasted, i simply can not find a chunky wrap over waistcoat? Grateful Thanks in advance
17.10.2018 - 09:27DROPS Design answered:
Dear Janet, We are able to provide free patterns thanks to our yarns sold throughout the world. You will therefore understand that we can only recomand you to contact your DROPS Store for any further help & assistance. Thank you for your comprehension.
17.10.2018 - 12:12DeeCA wrote:
Hi, I'm a novice knitter :) trying to knit this sweater using only puna and need help with the sleaves. I'm assumming the sleaves should start to 'taper' all the way from the bottom (unlike the straight 'cuff' line when using Puddel). Would anybody have the alternate (no puddle) pattern for the sleaves (size 's'). Thank you! Dee
18.05.2016 - 20:01DROPS Design answered:
Dear DeeCA, when working cuff with Puna you can cast on 64-68-68 sts, ie the number of sts adjusted on 1st row after cuff - adjust number of sts if you rather get a wrist somewhat tighter. Happy knitting!
19.05.2016 - 08:55
|
|
Textures of Snow |
|
 |
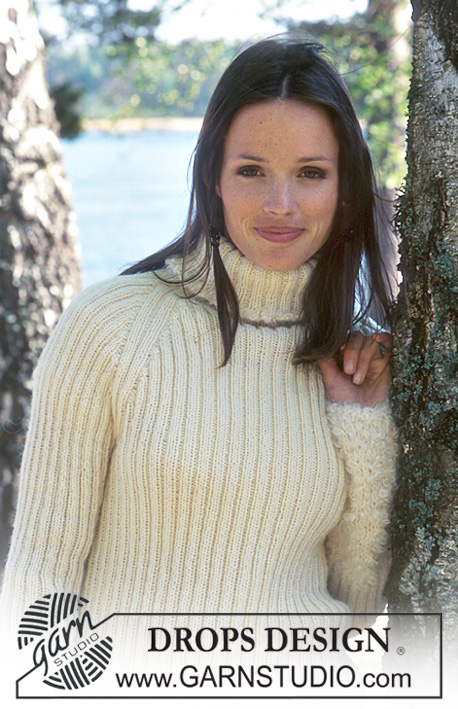 |
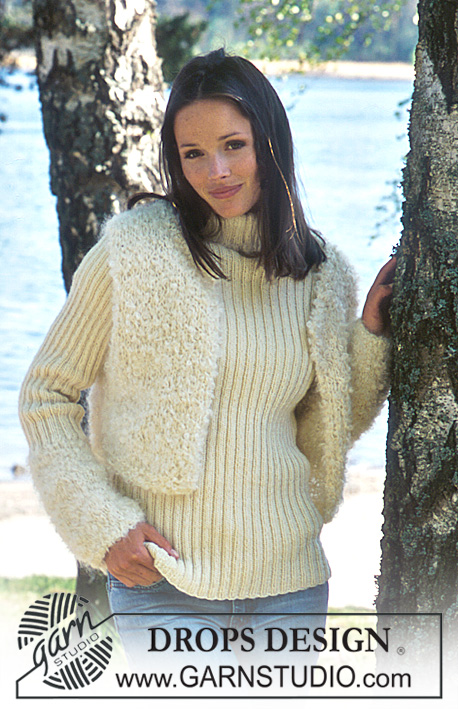
DROPS Ribbed Pullover in Karisma Superwash with long cuffs in Puddel. Short Vest in Puddel.
DROPS 67-9 |
|
|
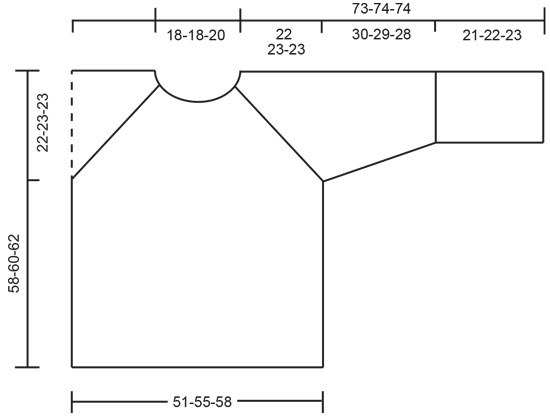
PULLOVER: Gauge: Karisma: 22 sts x 30 rows on smaller needles in stockinette st = 10 x 10 cm [4" x 4"] Puddel: 10 sts x 14 rows on larger needles in stockinette st = 10 x 10 cm [4" x 4"] Rib: * K 2, P 2 *, repeat from * - *. Garter st, when knitting flat: Knit all sts, all rows. Garter st, when knitting in the round: *Rnd 1, knit. Rnd 2, purl.* Repeat from * - *. Body: Cast on 224-240-256 sts on smaller circular needles with Karisma Superwash; join and knit rib over all sts, put 1 marker at each side - see that you put markers between 2 K sts. When the piece measures 36-37-39 cm [14⅛"-14.5"-15.25"] bind off 12 sts at each side for armhole - bind off each side of markers: K 1, P 2, K 2, P 1. Front and back each = 100-108-116 sts. Put aside and knit the sleeves. Sleeve: Cast on 32-34-34 sts on larger double-pointed needles with Puddel; join and place a marker at the join. Knit 2 rows garter st, then knit stockinette st. When the piece measures 21-22-23 cm [8.25"-8⅝"-9"] change to smaller needles and Karisma Superwash, increasing 32-34-34 sts across the row (K 2 sts in each st on needle) = 64-68-68 sts. Knit rib over all sts. After 7-7-5 rows inc 1 st each side of marker (make incs on either side of 2 K sts): 12-12-16 times: Sizes S and M: every 6 rows, Size L: every 5 rows = 88-92-100 sts. Knit the increased sts in the rib as you go along. When the piece measures 50-50-50 cm [19.75"] bind off 6 sts each side of marker (you should bind off P 1, K 2, P 2, K 1, marker, K 1, P 2, K 2, P 1) = 76-80-88 sts. Yoke: Now put the sleeves in on the same circular needles as the Body where you have bound off for armhole = 352-376-408 sts on needles. Put a marker in each transition between the sleeves and Body = 4 markers. Continue in rib over all sts and shape raglan. Raglan shaping: read this entire section before knitting. There are 8 decs per row and 10 sts at each transition between decs (on the right side these 10 sts will be P 2, K 2, P 1, marker, P 1, K 2, P 2). Make decs on the outside of these 10 sts. Dec 1 st at each side of markers: 7-6-4 times every 3 row, 20-22-24 times every other row and 5-6-8 times every row. A total of 256-272-288 sts decreased for raglan shaping. At the same time: When the piece measures 52-54-56 cm [20.5"-21.25"-22"] put the 14-14-18 sts at center front on a st holder for the neck. Bind off 2 sts at each neck edge 2-3-3 times every 4th row. After all raglan and neck shaping is complete there are 74-78-90 sts on needles. Neck: When the piece measures 58-60-62 cm [22⅞"-23⅝"-24⅜"] put sts from needles and sts from st holder on smaller double-pointed needles and pick up with Karisma Superwash: 6-6-6 sts each side of neck = 100-104-120 sts around the neck. Knit Rib over all sts so that the rib matches up with Body. When the neck measures approx. 17 cm [6.75"], bind off all sts with Puddel. Assembly: Sew underarm sts from st holders - use Kitchener st. SHORT VEST IN PUDDEL: Sizes: S - M - L Finished measurements: Bust: 92-100-108 cm [36.25"-39⅜"-42.5"] Waist: 80-88-96 cm [31.5"-34⅝"-37.75"] Materials: Garnstudio PUDDEL, 64% mohair, 20% wool, 16% viscose, 50 g./50 m./54 yards 200-200-250 g. col. no. 01, natural white. Alternate yarns: * Garnstudio HIGHLANDER, 90% wool, 10% nylon/50 g./80 m./87 yards DROPS 7 mm [US 10½] needles, or size needed to obtain correct gauge. Gauge: 10 sts x 14 rows in stockinette st = 10 x 10 cm [4" x 4"] Garter st, when knitting flat: Knit all sts, all rows. Knitting tip: Dec 1 st for armhole inside of 2 edge sts knit in garter st throughout. Before 2 edge sts: K 2 tog. After 2 edge sts: sl 1, K 1, psso. Right front: Cast on 21-23-25 sts. Knit 4 rows garter st, then knit stockinette st, keeping 1 st at side edge and 2 sts at center front edge in garter st throughout. When the piece measures 5 cm [2"] inc 1 st at the side (inside of edge st). Repeat inc every 5 cm [2"] a total of 3 times = 24-26-28 sts. When the piece measures 19-20-21 cm [7.5"-7⅞"-8.25"] P (right side row) over 4 sts at the side. On the next row bind off 2 sts at the side for armhole ad keep the 2 sts at armhole edge in garter st from now on. Dec 1 st for armhole at the side 2-4-5 times every other row - see Knitting tip = 20-20-21 sts. When the piece measures 33-35-37 cm [13"-13.75"-14.5"] bind off 4-4-5 sts at center front for neck. Bind off at each neck edge every other row: 2 sts 1-1-1 time and 1 st 3-3-3 times = 11-11-11 sts remain on shoulder. When the piece measures 39-41-43 cm [15.25"-16⅛"-16⅞"] bind off 3-3-3 sts at side edge for shoulder 1 time, then 4-4-4 sts 2 times. Bind off loosely. The piece measures approx. 42-44-46 cm [16.5"-17.25"-18⅛"].. Left front: Cast on and knit the same as the right front, reversing all shaping. Back: Cast on 42-46-50 sts and knit 4 rows garter st, then knit stockinette st, keeping 1 st at each side in garter st throughout. Inc at each side as on front = 48-52-56 sts. When the piece measures 20-21-22 cm [7⅞"-8.25"-8⅝"] shape armhole as on front = 40-40-42 sts. Continue in stockinette st, keeping 2 sts in garter st at each side. When the piece measures 39-41-43 cm bind off for shoulders as on front - after 1st bind off also bind off the center 16-16-18 sts for the neck, then dec 1 st at each neck edge on the next row. When all sts are bound off measures piece approx. 42-44-46 cm [16.5"-17.25"-18⅛"].. Assembly: Sew shoulder seams. Sew side seams using edge sts as seam allowance. Neck: Pick up approx. 42 - 48 sts around the neck. Knit 2 rows garter st, bind off loosely. |
|
 |
|
 |
|
Have you finished this pattern?Tag your pictures with #dropspattern or submit them to the #dropsfan gallery. Do you need help with this pattern?You'll find 23 tutorial videos, a Comments/Questions area and more by visiting the pattern on garnstudio.com. © 1982-2026 DROPS Design A/S. We reserve all rights. This document, including all its sub-sections, has copyrights. Read more about what you can do with our patterns at the bottom of each pattern on our site. |
|


With over 40 years in knitting and crochet design, DROPS Design offers one of the most extensive collections of free patterns on the internet - translated to 17 languages. As of today we count 324 catalogs and 12290 patterns - 12280 of which are translated into English (US/in).
We work hard to bring you the best knitting and crochet have to offer, inspiration and advice as well as great quality yarns at incredible prices! Would you like to use our patterns for other than personal use? You can read what you are allowed to do in the Copyright text at the bottom of all our patterns. Happy crafting!
Post a comment to pattern DROPS 67-9
We would love to hear what you have to say about this pattern!
If you want to leave a question, please make sure you select the correct category in the form below, to speed up the answering process. Required fields are marked *.