
Popular categories
Looking for a yarn?


Comments / Questions (24)
![]() Pernilla Dalgärde wrote:
Pernilla Dalgärde wrote:
Jag får inte diagrammet till halsvärmaren att stämma. Mellan de båda enkla dubbelstolparna får jag på varv 2 en grupp av 4 dubbelstolpar som tar 4 fasta maskor i anspråk från föregående varv. På nästa varv ger stolpgruppen 1 maska och så är det 4 luftmaskor mellan de enkla dubbelstolparna. Det blir 5 maskor mellan de enkla dubbelstolparna på varv 3, jämfört med 4 på varv 2. Då blir arbetet bredare och bredare. Antalet borde vara detsamma?
14.01.2020 - 20:41DROPS Design answered:
Hej Pernilla, du har 5 fm på första varvet och igen 5 fm på tredje varvet enligt diagrammet. Lycka till :)
11.02.2020 - 09:22
![]() Anita wrote:
Anita wrote:
The set is beautiful; however, the pattern for the hat is poorly written and very confusing, even for a very experienced advanced crocheter.
16.11.2018 - 20:31DROPS Design answered:
Dear Anita, we are sorry to hear you have had troubles with this pattern - There maybe as many ways to write patterns than there are crocheters – you are welcome to ask your questions here, or for any individual assistance reading our patterns and diagrams you are welcome to contact the store where you bought your yarn (even per mail or telephone). Happy crocheting!
19.11.2018 - 09:54
![]() Janet wrote:
Janet wrote:
I really wish you had a video on how to do the diagram, it's very confusing.
14.10.2016 - 21:31
![]() LaurieB wrote:
LaurieB wrote:
Bonjour, avec l'aide d'une amie, je suis parvenue à trouver mon erreur qui faisait que je ne comprenais pas le point. Je confondais DB (double bride) avec db (demi-bride)! Je suis encore débutante mais j'aime beaucoup les patrons que vous offrez! Merci et bonne fin de semaine!
12.02.2016 - 04:56
![]() LaurieB wrote:
LaurieB wrote:
Bonjour! Je n'arrive pas à faire le point de fantaisie de Tell Me by DROPS Design Bonnet, tour de cou et moufles DROPS avec motif ajouré, en “Nepal”. Je ne comprends pas le diagramme. Y a-t-il une vidéo explicative? Sinon, j'ai besoin d'explications claires et faciles à comprendre, je suis encore débutante. Merci beaucoup pour votre aide.
10.02.2016 - 22:37DROPS Design answered:
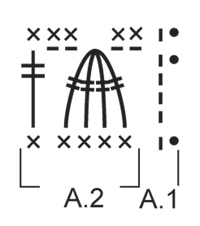
Bonjour LaurieB, il n'y a pas encore de vidéo pour ce motif, il se crochète ainsi - A.1 montre comment commencer les tours (1 ml pour 1 rang de ms, 4 ml pour 1 rang de B) et les terminer (1 mc dans la 1ère/4ème ml du début du tour). Dans A.2, tour 1: 1ms dans chaque m. Tour 2: *2 ml (on aura 6 ml au début du tour), 4DB écoulées ens, 2 ml, 1 DB* répétez de *-*. Au 3ème tour: *2 ms dans chacun des 2 arceaux de 2 ml, 1 ms dans la DB*. Bon crochet!
11.02.2016 - 10:34Nina wrote:
HI - I battled to figure out the diagram at first, but I stuck at it and figured it out. R 1: ch1 and then sc in every stitch around. R 2: ch4 (TR), *ch 2, 4TR (following explanation above diagram), ch2, TR*, repeat from *-* until end of row. ss into beginning chain remembering to leave 2 ch gap. R 3: ch1 and *2 sc in ch2 space from previous round, 2sc into next ch2 space, sc into TR*, repeat from *-* until end of round and join with ss to beginning chain.
03.02.2016 - 21:32
![]() Paula wrote:
Paula wrote:
I really like this hat, but can't do the diagram. Could you put it in words. I've got the ribbon finished but can't continue.
19.01.2016 - 19:31DROPS Design answered:
Dear Paula, there is only a diagram version to this pattern, start reading diagram from the bottom corner on the right side and read every row from the right towards the left (= in the round = from RS). You will find text to each st/group of st just above diagram. And remember your DROPS store may provide you any furter personnal assistance. Happy crocheting!
20.01.2016 - 11:45
![]() Gail Slaughter wrote:
Gail Slaughter wrote:
Sorry I meant it Did come 4x4
15.12.2015 - 20:46
![]() Gail Slaughter wrote:
Gail Slaughter wrote:
Thank youbso much for your response I did rhe gauge and it didncome to 4x4. So I attempted to do the ribbon again same result I can't figure out what it is I'm not getting Is there any way you can help me? Video or anything? 1sc in first 3 rows 2 sc next etc: I have tried just the ribbed rows facing me then I tried those front and back. What am I not getting Please help! Gail
15.12.2015 - 20:44DROPS Design answered:
Dear Mrs Slaughter, to work 1 sc in each of the next 3 rows, 2 sc in the next row, you need to have worked a total of 21 rows approx. with hdc for the ribbon - adjust number of sc worked around if necessary to get approx. 83 sc at the end of the round, then adjust to 80 sc on next row. Happy crocheting!
16.12.2015 - 09:25
![]() Gail Slaughter wrote:
Gail Slaughter wrote:
First I love this pattern but I am having a hard time with the ribbon! I did the 19 1/4 inches but when I attempt to do the 1sc in 3 rows and 2sc in next I don't get 83-90 I get much less!I then used a smaller and counted the rows to at least get the 83 but nw the ribbon is way too large PLEASE HELP! I wanted to have it ready dor Christmas. Thanking You in advance. Gail
07.12.2015 - 06:00DROPS Design answered:
Dear Mrs Slaughter, remember to check your tension, you should get 16 dc x 9 rows = 4"x4" so that 83 sc = approx. 21". Happy crocheting!
07.12.2015 - 11:44
|
||||||||||||||||
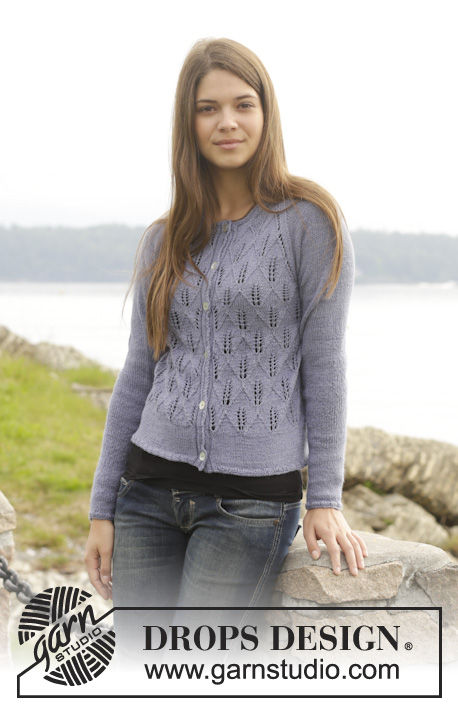
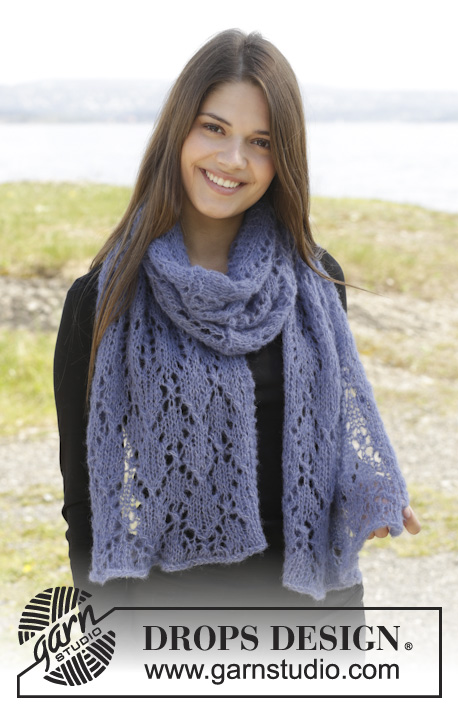
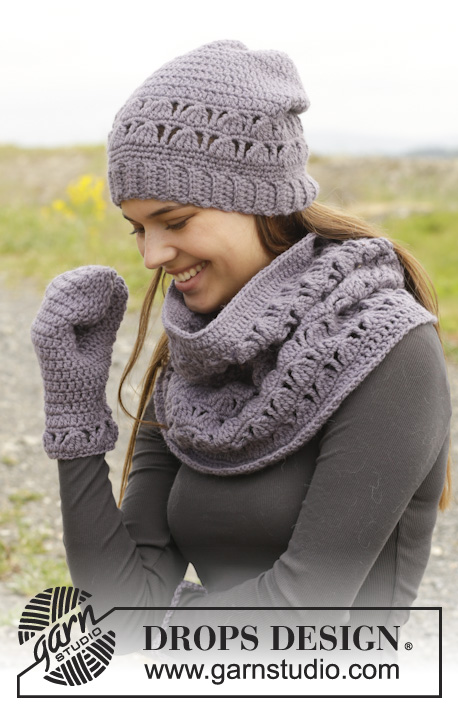
Tell Me#tellmeset |
||||||||||||||||
 |
 |
|||||||||||||||
Crochet DROPS hat, neck warmer and mitten with lace pattern in “Nepal”.
DROPS 158-41 |
||||||||||||||||
|
PATTERN: See diagrams A.1 and A.2 – work 1st row from RS. CROCHET INFO 1: Replace first hdc at beg of every hdc row with 2 ch. CROCHET INFO 2: At beg of every sc round, replace first sc with 1 ch and finish every round with 1 sl st in first ch from beg of round. Replace first dc at beg of every dc round with ch 3, finish every round with 1 sl st in 3rd ch from beg of round. DECREASE TIP 1: Work 2 sc into 1 sc: Work 1 sc but wait with last pull through (= 2 sts on hook), then work next sc but on last pull through, pull yarn through all sts on hook. DECREASE TIP 2: Work 2 dc into 1 dc: Work 1 dc but wait with last pull through (= 2 strands on hook), then work next dc but on last pull through, pull yarn through all sts on hook. -------------------------------------------------------- HAT: Work in the round but beg with a ribbon worked sideways at the bottom. RIBBON: Work 8 ch on hook size 4.5 mm/7 with Nepal, and work 1st row as follows: 1 hdc in 3rd ch from hook (= 2 hdc), 1 hdc in each of the next 5 ch = 7 hdc, turn piece. READ CROCHET INFO 1. Then work hdc back and forth but work every hdc in back loop of st (i.e. not through whole st) = rib texture. Continue until piece measures approx. 49-53 cm / 19¼"-21", cut the yarn and sew tog short sides to form a ring – ribbon measures approx. 4 cm / 1½" in width. Fasten the strand. CROWN: Now work around the edge on ribbon. Work * 1 sc in each of the next 3 rows, work 2 sc in next row *, repeat from *-* the entire round - READ CROCHET INFO 2. = approx. 83-90 sc - then work 1 round with sc AT THE SAME TIME adjust no of sts to 80-85 sc - READ DECREASE TIP 1! Now work according to 1st round in diagram as follows: A.1, A.2 16-17 times in total in width. Repeat row 2 and 3 of diagram 2 times vertically, then piece will measure approx. 11 cm / 4½" incl ribbon. REMEMBER THE CROCHET GAUGE! Continue to work in dc, AT THE SAME TIME dec as follows: READ DECREASE TIP 2! Dec 8-9 sts evenly = 72-76 dc. On next round, dec 8-7 dc evenly. Repeat dec every other round 4 times in total = 40-48 dc. Then dec 8-6 dc evenly every round 1-2 times in total = 32-36 dc. Now work sc with dec as follows: READ DECREASE TIP 1 – Work 2 and 2 sc tog = 16-18 sc. Repeat dec on next round = 8-9 sc. Cut the yarn, baste it up and down through sts, pull yarn to tighten and fasten tightly. The hat measures approx. 24-25 cm / 9½"-9¾" vertically. ---------------------------------------------------------- NECK WARMER: Worked in the round. Crochet 144-156 ch on hook size 4.5 mm/7 with Nepal and form 1 ring with 1 sl st in 1st ch. ROUND 1: READ CROCHET INFO 2 - Work 1 dc in each of the first ch 5, * skip ch 1, 1 dc in each of the next 5 ch *, repeat from *-* = 120-130 dc. ROUND 2: Work 1 dc in every dc. Now work according to 1st round in diagram as follows: A.1, A.2 24-26 times in total in width. REMEMBER THE CROCHET GAUGE! Repeat row 2 and 3 of diagram vertically until piece measures approx. 36-38 cm / 14¼"-15" – adjust after 1 whole repetition vertically - then continue as follows: 1 round with 1 dc in every sc, then 1 round with 1 dc in every dc. Fasten off. ---------------------------------------------------------- MITTEN: Crochet 30-35 LOOSE ch on hook size 4.5 mm with Nepal and form 1 ring with 1 sl st in 1st ch. Work cuff according to diagram's 1st round as follows: A.1, A.2 6-7 times in total in width. Work diagram 1 time vertically, then work 1 round with 1 sc in every sc - READ CROCHET INFO 2 = 30-35 sc. REMEMBER THE CROCHET GAUGE! Then work dc in the round with 1 dc in every st AT THE SAME TIME adjust no of sts to 27-30 dc by working 2 dc tog evenly – READ DECREASE TIP 2 - AT THE SAME TIME when 3 rounds have been worked with dc, inc 1 dc for thumb on each side of 1st st at beg of round - inc 1 dc by working 2 dc in same dc. Repeat inc on each side of this st every round 4-5 times in total = 35-40 dc on round (thumb sts = 9-11 dc). Work next round as follows: Work 1 sl st in each of the first 6-7 dc at beg of round, 3 ch (= 1 dc), then work 1 dc in each of the next 25-28 dc, 1 ch and finish with 1 sl st in 3rd ch at beg of round = 26-29 dc and 1 ch on round. On next round, work 1 dc in every dc and 1 dc in ch at end of round = 27-30 dc. Then work dc in the round until mitten measures 18-21 cm / 7"-8¼" from division at cuff (try the mitten on, approx. 3 cm / 1" remain until finished measurements). Continue to work as follows: ROUND 1: Work 1 dc in every dc AT THE SAME TIME work every 2nd and 3rd dc tog = 18-20 dc. ROUND 2: Work 1 dc in every dc AT THE SAME TIME work 2 and 2 dc tog = 9-10 dc. ROUND 3: Work 1 sc in every dc AT THE SAME TIME work 2 and 2 sc tog. Cut the yarn, baste it up and down through sts, pull yarn to tighten and fasten tightly. THUMB: ROUND 1: Work 1 sl st in the first of the 9-11 thumb sts, 3 ch (= 1 dc), then work 1 dc in each of the 8-10 dc, then work 6 dc behind thumb AT THE SAME TIME work these 6 dc tog 2 by 2 – see explanation above = 12-14 dc. ROUND 2 + 3: Work 1 dc in every dc = 12-14 dc. Try the mitten on, approx. 1 cm / ⅜" remains until finished thumb measurements. Work 1 more round with 1 dc in every dc if needed. NEXT ROUND: Work 1 dc in every dc AT THE SAME TIME work 2 and 2 dc tog = 6-7 dc. LAST ROUND: Work 1 sc in every dc AT THE SAME TIME work 2 and 2 sc tog. Cut the yarn, baste it up and down through sts, pull yarn to tighten and fasten tightly. Work another mitten but make sure to work thumb inc on each side of last st on round (instead of 1st st on round). |
||||||||||||||||
Diagram explanations |
||||||||||||||||
|
||||||||||||||||
 |
||||||||||||||||
Have you finished this pattern?Tag your pictures with #dropspattern #tellmeset or submit them to the #dropsfan gallery. Do you need help with this pattern?You'll find 12 tutorial videos, a Comments/Questions area and more by visiting the pattern on garnstudio.com. © 1982-2026 DROPS Design A/S. We reserve all rights. This document, including all its sub-sections, has copyrights. Read more about what you can do with our patterns at the bottom of each pattern on our site. |
||||||||||||||||


With over 40 years in knitting and crochet design, DROPS Design offers one of the most extensive collections of free patterns on the internet - translated to 17 languages. As of today we count 325 catalogs and 12298 patterns - 12288 of which are translated into English (US/in).
We work hard to bring you the best knitting and crochet have to offer, inspiration and advice as well as great quality yarns at incredible prices! Would you like to use our patterns for other than personal use? You can read what you are allowed to do in the Copyright text at the bottom of all our patterns. Happy crafting!
Post a comment to pattern DROPS 158-41
We would love to hear what you have to say about this pattern!
If you want to leave a question, please make sure you select the correct category in the form below, to speed up the answering process. Required fields are marked *.