
Popular categories
Looking for a yarn?


Comments / Questions (4)
![]() Jenni wrote:
Jenni wrote:
Hei! Täysi aloittelija täällä asialla niin tarkistaisin vaan että kuten kaulurin ohjeessa lukee niin merkkilangan jälkeen kudotaan vain yksi kierros vähäisillä silmukoilla ja sitten hypätään heti alkuperäiseen määrään silmukoita? Eli siis pääntie on takakappaleessa lähes suora? Kiitos!
14.10.2023 - 12:52DROPS Design answered:
Kyllä, tämä pitää paikkansa.
18.10.2023 - 16:45
![]() Lara wrote:
Lara wrote:
Ciao, ho provato a realizzare questo modello utilizzando sia il filato sia l’uncinetto indicato da Voi...ma viene molto più grande rispetto alla taglia indicata...come mai? Grazie
25.01.2020 - 11:32DROPS Design answered:
Buongiorno, ha controllato che il suo campione corrispondesse a quello indicato prima di iniziare a lavorare? Buon lavoro!
25.01.2020 - 12:52
![]() Maresch Petra wrote:
Maresch Petra wrote:
Gibt es eine spezielle Technik, die Ohren so anzunähen, dass sie , wenn man die Mütze aufgesetzt hat auch stehen? Bei mir fallen sie entweder nach hinten oder nach vorne. Habe mir auch schon das Video angeschaut, konnte aber nichts erkennen, was ich da falsch gemacht haben könnte
20.11.2015 - 00:27DROPS Design answered:
Sie lassen ja die Ohren unten offen lassen, d.h. sie werden unten nicht zusammengehäkelt. Sie können versuchen, den vorderen und hinteren Teil mit etwas Abstand zueinander anzunähen, eventuell stehen sie dann besser. Oder Sie könnten einen ganz dünnen Draht einziehen, das sollte auf jeden Fall helfen.
24.11.2015 - 22:05
![]() Bianca wrote:
Bianca wrote:
Volgens mij staat er een foutje in de beschrijving voor de halswarmer. Bij de beschrijving voor het hals gedeelte staat: haak 1 toer av en haak dan 1 toer recht. Volgens mij moet dit brei zijn ipv haak :). Groetjes Bianca
06.11.2014 - 18:49DROPS Design answered:
Hoi Bianca. Ja, je hebt gelijk. Ik heb het patroon aangepast. Bedankt voor het melden!
07.11.2014 - 12:39
|
|
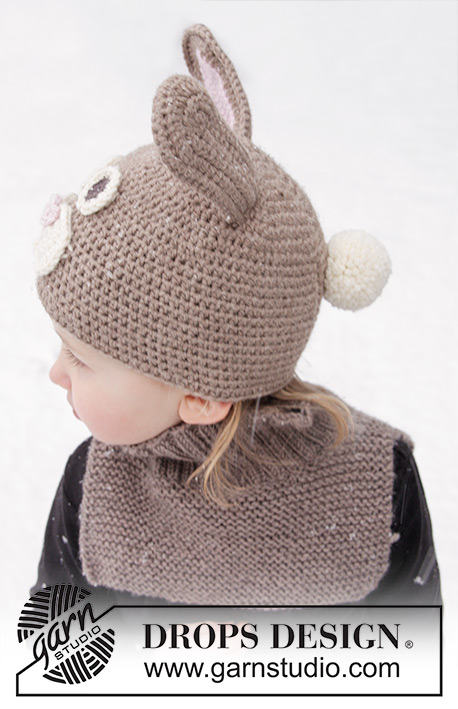
Honey Bunny#honeybunnyset |
|
 |
 |
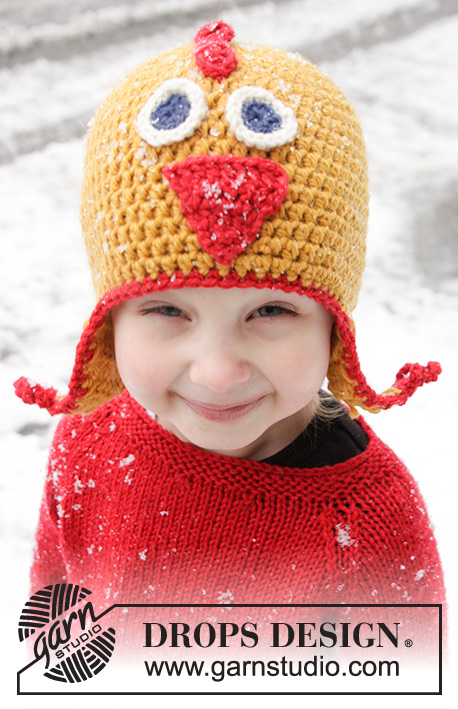
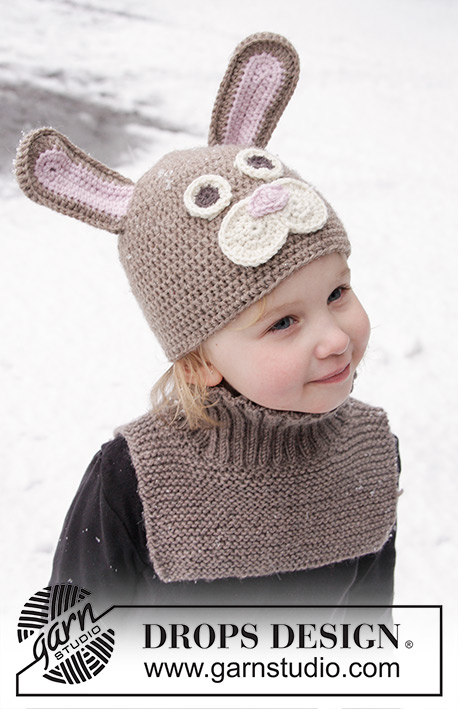
DROPS Easter: Crochet Easter bunny hat and knitted neck warmer in ”Lima”.
DROPS Extra 0-1022 |
|
|
CROCHET TIPS: Replace first hdc on round/row with 2 ch and finish every round with hdc with 1 sl st in second ch from beg of round. RIB: * K 2, P 2 *, repeat from *-*. GARTER ST (back and forth on needle): K all rows. 1 ridge = K2 rows. ---------------------------------------------------------- HAT: The piece is worked top down. Chain 4 on hook size 4 mm/G/6 with beige and form a ring with 1 sl st in first ch. ROUND 1: READ CROCHET TIP! Work 8 hdc in the ch-ring. ROUND 2: Work 2 hdc in every hdc around = 16 hdc. ROUND 3: Work * 1 hdc in first hdc, 2 hdc in next *, repeat from *-* around = 24 hdc. ROUND 4: Work * 1 hdc in each of the next 2 hdc, 2 hdc in next *, repeat from *-* around = 32 hdc. ROUND 5: Work * 1 hdc in each of the next 3 hdc, 2 hdc in next *, repeat from *-* around = 40 hdc. ROUND 6: Work * 1 hdc in each of the next 4 hdc, 2 hdc in next *, repeat from *-* around = 48 hdc. ROUND 7: Work * 1 hdc in each of the next 5 hdc, 2 hdc in next *, repeat from *-* around = 56 hdc. ROUND 8: Work * 1 hdc in each of the next 6 hdc, 2 hdc in next *, repeat from *-* around = 64 hdc. ROUND 9: Work * 1 hdc in each of the next 7 hdc, 2 hdc in next *, repeat from *-* around = 72 hdc. Now work differently in the different sizes as follows: SIZE 2 years: ROUND 10: Work 1 hdc in every hdc BUT inc at the same time 6 hdc evenly on round = 78 hdc. SIZE 3/4 - 5/6 - 7/8 years: ROUND 10: Work * 1 hdc in each of the next 8 hdc, 2 hdc in next *, repeat from *-* around = 80 hdc. ROUND 11: Work 1 hdc in every hdc BUT inc at the same time 2-4-6 hdc evenly on round = 82-84-86 hdc. There are now 78-82-84-86 hdc on round. Now work 1 hdc in every hdc every round in all sizes until piece measures 18-19-20-21 cm / 7"-7½"-8"-8½" or to desired measurements. Fasten off. EARS: Ears are worked in two pieces that are worked tog. Use hook size 4 mm/G/6 and powder pink, chain 16. ROW 1: Turn piece and work back in ch-row as follows: 1 hdc in 3rd ch from hook, work 1 hdc in each of the next 12 ch. Work 6 hdc in the last ch on row, rotate piece and work 1 hdc in underside of each of the 13 ch from ch-row = 32 hdc. Turn piece. ROW 2: Work 1 hdc in each of the next 13 hdc, work 2 hdc in each of the next 6 hdc, 1 hdc in each of the last 13 hdc = 38 hdc. Turn piece. ROW 3: Switch to beige and work 1 hdc in each of the next 15 hdc, 1 dc in next and 2 dc in each of the next 6 hdc, 1 dc in next hdc and 1 hdc in each of the last 15 hdc on row. Work another ear the same way. Then work 2 more ears BUT entirely in beige (= back of ears). Place a part with pink on top of a part with beige and with beige work 1 sc in every st around the edge through both layers. Fasten one ear on each side of hat. EYES: Chain 3 on hook size 4 mm/G/6 and brown, form a ring with 1 sl st in first ch. ROUND 1: Work 9 hdc in ch-ring, finish with 1 sl st in first ch from beg of round. ROUND 2: Switch to off white and work in back loop of st around with 2 hdc in every hdc and finish with 1 sl st in 2nd ch from beg of round = 18 hdc. Fasten off. Work another eye the same way and fasten them at the front of hat. SNOUT: PINK PIECE: Snout consists of 3 pieces that are sewn tog at the end. Use hook size 4 mm/G/6 and powder pink. Chain 10, turn and work 1 dc in 4th ch from hook. Then work as follows in every ch on ch-row: 1 tr, 1 dtr, 1 dtr, 1 tr, 1 dc and finish with ch 3 and 1 sl st in last ch on row. Fasten off. WHITE PIECE #1: Use hook size 4 mm/G/6 and off white. Chain 3 and form a ring with 1 sl st in first ch. ROUND 1: Work 9 hdc in ch-ring, finish with 1 sl st in 2nd ch from beg of round. ROUND 2: Work 2 hdc in every hdc, finish with 1 sl st in 2nd ch from beg of round = 18 hdc. ROUND 3: Work 2 hdc in first hdc, 1 hdc in next, 2 hdc in next, 1 hdc in next, 2 hdc in next. Then work 1 dc in next, 2 dc in each of the next 3, 1 dc in next and finish with 1 hdc in each of the next 5 hdc. Cut the yarn and pull it through st. WHITE PIECE #2: Use hook size 4 mm / G/6 and off white. Chain 3 and form a ring with 1 sl st in first ch. ROUND 1: Work 9 hdc in ch-ring, finish with 1 sl st in 2nd ch from beg of round. ROUND 2: Work 2 hdc in every hdc, finish with 1 sl st in 2nd ch from beg of round = 18 hdc. ROUND 3: Work 1 hdc in each of the first 5 hdc, 1 hdc in next, 2 dc in each of the next 3, 1 dc in next, 2 hdc in next hdc, 1 hdc in next, 2 hdc in next, 1 hdc in next and 2 hdc in next. Cut the yarn and pull it through st. Sew piece 1 and 2 tog as follows: Place pieces with RS up. Sts not worked on 3rd round are placed towards each other, edge to edge, sew in these sts. Then sew the small pink piece of snout on to the white piece. Finally sew the entire snout on to mid front of hat. TAIL: Make a small pompom with off white, approx. 5 cm / 2'' in diameter and sew on to mid back of hat. ---------------------------------------------------------- NECK WARMER: Beg at the bottom of front piece and bind off at the bottom of back piece, then work the collar. FRONT PIECE: Cast on 42-46-50 sts on needle size 4.5 mm / US 7 with beige and work in garter st. REMEMBER THE GAUGE! When piece measures 7-9-10 cm / 2 3/4"-3½"-4'', bind off the middle 14-16-18 sts for neck. Now finish each shoulder separately. 1ST SHOULDER: = 14-15-16 sts. Continue in garter st - at the same time bind off towards the neck every other row: 3 sts 1 time, 2 sts 1 time and 1 st 3 times = 6-7-8 sts remain on needle. When piece measures 11-13-15 cm / 4½"-5"-6", insert 1 marker (= mid on top of shoulder) - now measure piece from here. On next row cast on 2 new sts towards the neck, then slip sts on 1 stitch holder. 2ND SHOULDER: Work as 1st shoulder. BACK PIECE: Slip sts from one shoulder back on needle, cast on 26-28-30 sts and slip sts from the other shoulder on to needle = 42-46-50 sts. Continue in garter st. When piece measures 11-13-15 cm / 4½"-5"-6" from shoulder, bind off. Pick up approx. 76 to 88 sts (divisible by 4) around the neck on double pointed needles size 3 mm / US 2.5. P 1 round, then K 1 round while AT THE SAME TIME inc evenly to 92-96-100 sts. Continue with rib. When collar measures approx. 7-8-9 cm / 2 3/4"-3"-3½", bind off with K over K and P over P. |
|
Have you finished this pattern?Tag your pictures with #dropspattern #honeybunnyset or submit them to the #dropsfan gallery. Do you need help with this pattern?You'll find 24 tutorial videos, a Comments/Questions area and more by visiting the pattern on garnstudio.com. © 1982-2026 DROPS Design A/S. We reserve all rights. This document, including all its sub-sections, has copyrights. Read more about what you can do with our patterns at the bottom of each pattern on our site. |
|


With over 40 years in knitting and crochet design, DROPS Design offers one of the most extensive collections of free patterns on the internet - translated to 17 languages. As of today we count 325 catalogs and 12298 patterns - 12288 of which are translated into English (US/in).
We work hard to bring you the best knitting and crochet have to offer, inspiration and advice as well as great quality yarns at incredible prices! Would you like to use our patterns for other than personal use? You can read what you are allowed to do in the Copyright text at the bottom of all our patterns. Happy crafting!
Post a comment to pattern DROPS Extra 0-1022
We would love to hear what you have to say about this pattern!
If you want to leave a question, please make sure you select the correct category in the form below, to speed up the answering process. Required fields are marked *.