
Popular categories
Looking for a yarn?


Comments / Questions (118)
![]() Tamara Väisänen wrote:
Tamara Väisänen wrote:
Jatkoin virkkaamista 2, 5 koukulla ekan kerroksen eli kiinteät silmukat. Ympärys on 101cm vaikka piti olla 75cm. Miten tämä on mahdollista?
10.10.2025 - 16:35DROPS Design answered:
Kokeile vielä vaihtaa koukkuun nro 2. On tärkeää, että saat 26 kiinteää silmukkaa/10 cm. Kunhan virkkuutiheys on oikea, työn ympärys on aluksi n. 75-76 cm ja kaikkien lisäysten jälkeen ympärys on n. 92 cm.
10.10.2025 - 18:06
![]() Tamara Väisänen wrote:
Tamara Väisänen wrote:
Kysyin edellä työn pituudesta. Nyt kokeilin 2,5 koukulla niin 26 ks oli 11 cm enkä virkannut löysää. Tää enteilee että työ en edelleen liian pitkä. Mitä teen?
06.10.2025 - 22:50
![]() Tamara Väisänen wrote:
Tamara Väisänen wrote:
Työ ei kaventunut läheskään tarpeeksi kun jatkoin virkkaamista. Ohjeessa täytyy olla virhe. Mitä teen? Olen ostanut langat tähän ohjeeseen.
03.09.2025 - 16:33DROPS Design answered:
Oletko tarkistanut virkkuutiheytesi? Kun virkkaat kiinteitä silmukoita, sinun tulee saada 26 kiinteää silmukkaa / 10 cm. Kun työssä on 196 kiinteää silmukkaa, vyötärön ympärys on n. 75 cm. Vaihda tarvittaessa pienempään koukkuun.
05.09.2025 - 18:55
![]() Tamara Väisänen wrote:
Tamara Väisänen wrote:
Hei! Virkkaan Summer fancy shortseja ja aloitusketjusilmukkakerros on 120 cm pitkä kun olen virkannut 200 silmukkaa. Eli jos virkkaan vielä 24 niin tulee noin 130cm pitkä. Kun seur kerroksella kavennetaan noin 30 silmukkaa niin työ kapenee korkeintaan 100 cm:Iin. Tämä on siis S koon ohje ja tyttäreni vyötärö on 82cm eli S kokoa. Onko ohjeessa joku vika kun siitä on tulossa noin leveä? Tämä ei voi pitää paikkaansa.
01.09.2025 - 20:52
![]() Tamara Väisänen wrote:
Tamara Väisänen wrote:
Eka kerros eli ketjusilmukat joita tehdään 224 niin ympärysmitaksi tulee noin 140cm. Miten tää on mahdollista? Tyttäreni, jolle shortsit teen on s kokoa ja ympärys 82cm.
28.08.2025 - 18:07DROPS Design answered:
Hei, työ kapenee, kun jatkat virkkaamista, koska kiinteät silmukat eivät jousta samalla tavalla kuin ketjusilmukat.
01.09.2025 - 19:15
![]() Clara wrote:
Clara wrote:
Buongiorno, sono arrivata al punto in cui i miei pantaloncini taglia s misurano 14 cm, ora non capisco la parte "Ripetere gli aumenti ogni 2 giri in totale 7-7-7-8-8 volte e poi ogni giro 7-7-7-8-8 volte = 238-260-286-312-340 m.b." capisco che devo alternare un giro di aumenti, due giri di mb, corretto? Non capisco però per quante volte. Grazie mille
09.09.2024 - 21:17DROPS Design answered:
Buonasera Clara, il primo 7 di aumenti è ogni 2 giri, quindi 1 giro si e 1 giro no, il secondo set gli aumenti si lavorano su tutti i giri. Buon lavoro!
10.09.2024 - 22:41
![]() Mari wrote:
Mari wrote:
Furgonetas de yunmatiento y man unidad del alto palancia de Segorbe
06.09.2024 - 23:43
![]() En Carna Del Valle wrote:
En Carna Del Valle wrote:
Le puedes mandar al móvil el teléfono de la costureras de Segorbe
06.09.2024 - 23:42
![]() Mari wrote:
Mari wrote:
Poner en la página la tella de pantalones de dos años y de bebé también
06.09.2024 - 23:39
![]() Zsófi wrote:
Zsófi wrote:
Hello, I usually work on the US patterns and the last two rows of the leg are confusing. Question 1: in Row 4 it says to make treble crochet stitches, but Row 5 mentions putting picots into the double crochets of the fan - is it double or treble? Question 2: on 09.10.2014 you replied to a Hungarian question that the picots go into the 2nd, 4th and 6th treble stitches, but Row 5 instruction says first - is it first or second?
08.10.2023 - 21:22DROPS Design answered:
Dear Zsofi, it's in the first stitch of the fan, it should be a treble crochet. On the other hand, you work the picot over the 1st, 3rd and 5th stitches, skip the 2nd, 4th and 6th and work 1 sc over the 7th stitch. Happy crochetting!
09.10.2023 - 01:28
|
|
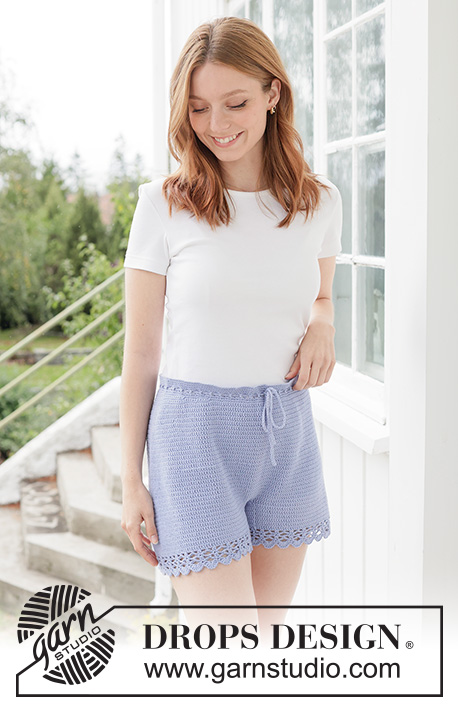
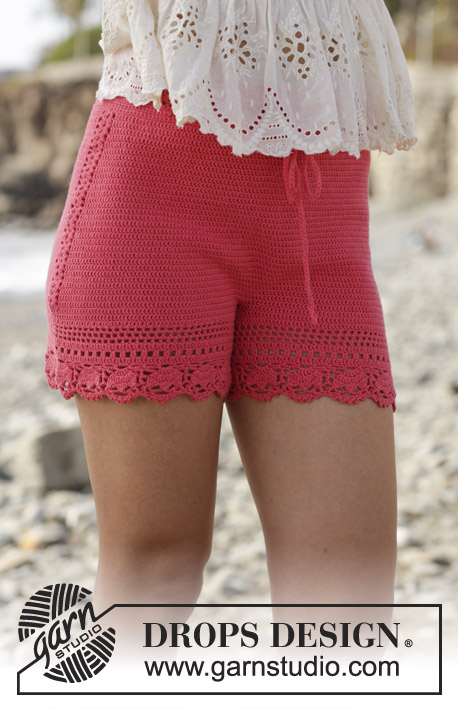
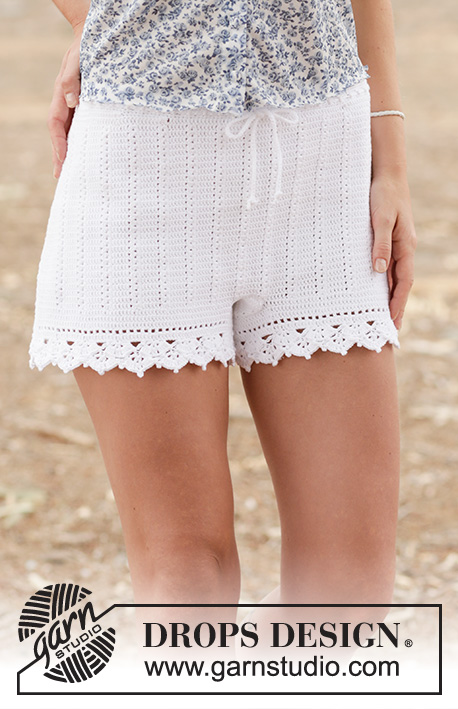
Summer Fancy#summerfancyshorts |
|
|
|
|
Crochet DROPS shorts in ”Safran”. Size: S - XXL.
DROPS 139-28 |
|
|
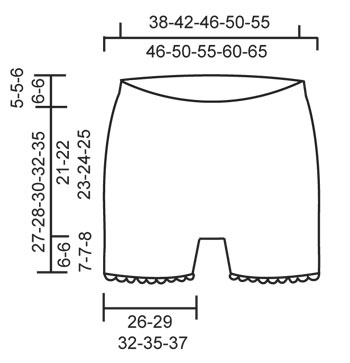
CROCHET TIP: Replace first sc at beg of every round with 1 ch and finish every round with 1 sl st in ch from beg of round. INCREASE TIP: Work until 2 sc remain before marker mid back, work 2 sc in first sc, 1 sc in each of the next 2 sc (marker is between these sts) and 2 sc in next sc (= 2 sts inc). -------------------------------------------------------- SHORTS: The piece is worked top down. Ch 224-246-274-297-326 on hook size 3 mm / C with Safran and form a ring with 1 sl st in first ch. Insert a marker at beg of round = mid back. Work first round as follows: ch 1, * skip ch 1, 1 sc in each of the next 7 ch *, repeat from *-* until 0-6-2-1-6 ch remain, work 1 sc in each of these ch = 196-216-240-260-286 sc. READ CROCHET TIP! Continue working 1 sc in every sc until piece measures 2 cm / ¾". REMEMBER THE CROCHET GAUGE! Now work 1 round with eyelet holes as follows: ch 4, skip 1 sc, * 1 dc in next sc, ch 1, skip 1 sc *, repeat from *-* the entire round, finish with 1 sl st in 3rd ch from beg of round. On next round work 1 sc in every dc and every ch. Then work the shorts higher in the back as follows: Work 10-11-12-13-14 sc past the marker mid back, turn and work 1 sl st in first st, then 1 sc in each of the next 19-21-23-25-27 sc, turn and work 1 sl st in first st, then 1 sc in each of the next 29-32-35-38-41 sts (also work in the sl st). Continue like this by working 10-11-12-13-14 sts more on every turn until a total of 140-154-192-208-224 sts have been worked. Turn again and work until marker mid back. Continue to work 1 round with sc while AT THE SAME TIME inc 14-16-18-20-22 sc evenly = 210-232-258-280-308 sc. Continue with sc in the round until piece measures 14-15-16-17-19 cm / 5½"-6"-6¼"-6¾"-7½" mid front. Continue with sc - AT THE SAME TIME inc 2 sts mid back - SEE INCREASE TIP. Repeat inc every other round a total of 7-7-7-8-8 times and then every round 7-7-7-8-8 times = 238-260-286-312-340 sc. Now piece measures approx. 21-22-23-25-27 cm / 8¼"-8¾"-9"-9¾"-10⅝" mid front and 26-27-29-31-33 cm / 10¼"-10⅝"-11⅜"-12¼"-13" mid back. Now divide for legs as follows: Work 1 sc in each of the first 5-5-6-6-7 sc on round, turn and work back over the first 10-10-12-12-14 sc (i.e. 5-5-6-6-7 sts on each side of marker mid back). These 10-10-12-12-14 sc = gusset. Work sc back and forth over these sts for 10-11-12-13-14 cm / 4"-4⅜"-4¾"-5⅛"-5½", cut the yarn. Sew gusset edge to edge to the middle 10-10-12-12-14 sts towards mid front. Then work the legs. LEG: Work 1 sc in each of the 109-120-131-144-156 sc around the leg, work in addition 26-28-31-34-36 sc along the gusset = 135-148-162-178-192 sc. Work 1 round with sc while at the same time inc 1-4-6-6-8 sc evenly = 136-152-168-184-200 sc. Continue with 1 sc in every sc for 3-3-4-4-5 cm / 1⅛"-1⅛"-1½"-1½"-2". Continue to work as follows: ROUND 1: ch 4 (= 1 dc + 1 ch), * skip 1 sc, 1 dc in next sc, ch 1 *, repeat from *-* the entire round, finish with 1 sl st in 3rd ch from beg of round (= 68-76-84-92-100 ch-spaces). ROUND 2: Work 1 sc in every ch and 1 sc in every dc = 136-152-168-184-200 sc. ROUND 3: Work as 1st round. ROUND 4: ch 1, * skip 1 ch-space, in next ch-space work 7 tr, skip 1 ch-space and work 1 sc in next ch-space *, repeat from *-* around the entire leg but instead of 1 sc work 1 sl st in first ch from beg of round (= 17-19-21-23-25 tr-groups = fans). ROUND 5: 1 sc in first dc on first fan, [* ch 3, 1 sc in first ch (= 1 picot), skip 1 dc, 1 sc in next dc *, repeat from *-* a total of 3 times (i.e. 3 picots over 1 fan), 1 sc in first dc on next fan], repeat from [-] the entire round, finish with 1 sl st in first sc. Cut the yarn. Work the same way around the other leg. TIE: Chain a band measuring 120-130-140-150-160 cm / 47"-52"-55"-59"-63" with LOOSE ch sts, turn and work 1 sl st in every ch. Thread the tie in the round with eyelet holes at the top of shorts – start mid front. |
|
 |
|
Have you finished this pattern?Tag your pictures with #dropspattern #summerfancyshorts or submit them to the #dropsfan gallery. Do you need help with this pattern?You'll find 5 tutorial videos, a Comments/Questions area and more by visiting the pattern on garnstudio.com. © 1982-2026 DROPS Design A/S. We reserve all rights. This document, including all its sub-sections, has copyrights. Read more about what you can do with our patterns at the bottom of each pattern on our site. |


With over 40 years in knitting and crochet design, DROPS Design offers one of the most extensive collections of free patterns on the internet - translated to 17 languages. As of today we count 324 catalogs and 12290 patterns - 12280 of which are translated into English (US/in).
We work hard to bring you the best knitting and crochet have to offer, inspiration and advice as well as great quality yarns at incredible prices! Would you like to use our patterns for other than personal use? You can read what you are allowed to do in the Copyright text at the bottom of all our patterns. Happy crafting!
Post a comment to pattern DROPS 139-28
We would love to hear what you have to say about this pattern!
If you want to leave a question, please make sure you select the correct category in the form below, to speed up the answering process. Required fields are marked *.