
Popular categories
Looking for a yarn?


Comments / Questions (20)
![]() Edith wrote:
Edith wrote:
Made this hat with two strands of bulky weight yarn, and worked great :-) I think this style hat is just coming into fashion, because I saw a couple in the airports during my Christmas travel.
15.01.2016 - 17:02Tatiana wrote:
Hi, if you choose to make this hat in Polaris yarn, the one skein is not enough. The conversion is only weight based (200g for 2 threads Eskimo is 100g in 1 thread Polaris) but the difference is significant in length (100m in Eskimo and 36m in Polaris ) so with 36m Polaris you will never get a piece that measures 52-54-56 cm
04.01.2016 - 12:08DROPS Design answered:
Dear Tatiana, pattern just give informations about 1 ball Polaris, ie 1 ball = 100 g and 36 m. To calculate amount of yarn in Polaris, please read here. Happy knitting!
04.01.2016 - 14:56
![]() Jamie wrote:
Jamie wrote:
This pattern is confusing, is there any way that someone to make it more understandable to me please. I really want to make this hat.
19.11.2012 - 18:05DROPS Design answered:
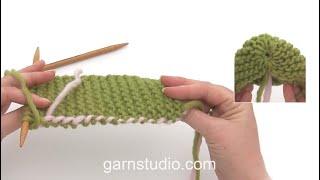
Dear Jamie, this hat is worked from side to side using short rows to get the shape. We have a video that explains short rows. Happy knitting!
20.11.2012 - 09:20
![]() Etetebeed wrote:
Etetebeed wrote:
Dimenticavo, ragazze del Galles, arrivo!!! Ci vediamo dopo... SirjiThanx for the kindness showed to us. Weiner for President right after Obama! Hi Ho Hi Ho its off to MAC I go.... you'll have more fun and do more work hi ho hi ho ugg boots hartings Hey nice stuf you got here!! congrats ugg women's boots
30.11.2011 - 11:47
![]() Karin wrote:
Karin wrote:
Hej! Vet någon hur man syr ihop kanterna vid monteringen så att det inte blir en tjock söm? Det lär finnas något smart sätt... Mvh Karin
07.12.2008 - 23:23
![]() Annie wrote:
Annie wrote:
Rows 1&2 you would knit all stitches, for rows 3&4 you would knit only 21 of those sts and turn your work. You would then knit those stitches again. Rows 5&6 you would knit only 16 sts and turn your work and knit them again. Then you start those 6 rows again. This will make the fabric longer on one end.
14.11.2008 - 18:59
![]() Lotta wrote:
Lotta wrote:
Hej Anna! Har du kollat masktätheten? När garnet inte räcker brukar man ha stickat för hårt - det stämmer ju också med att du vill att den ska vara luftigare. Byt i så fall till grövre stickor. mvh, Lotta
28.10.2008 - 08:43
![]() Anna wrote:
Anna wrote:
Hej! Har stickat om och stickat om men får inte till det. Mössan blir inte lika luftig som den ser ut på bilden och sen så räcker inte garnet enligt mönstret. Vad gör jag för fel?
24.10.2008 - 21:59
![]() Drops Design wrote:
Drops Design wrote:
Hej Katarina. Den kan næsten ikke forklares anderledes. Strik 1p over alle m og 1p tilbage, strik 21 m vend og strik de 21 m tilbage, strik 16 m vend og strik de 16 m tilbage. Sådan strikker du skiftevis over alle m, 21m og 16 m. God fornøjelse!
16.09.2008 - 10:15
![]() Katarina wrote:
Katarina wrote:
Jeg er litt forvirret over den der *2 p over alle m på p, 2 p over de første 21 m på p, 2 p over de første 16 m på p *, gentag fra *-* Kan noen gi en lett forklaring?
15.09.2008 - 22:12
|
|
DROPS 108-19 |
|
|
|
|
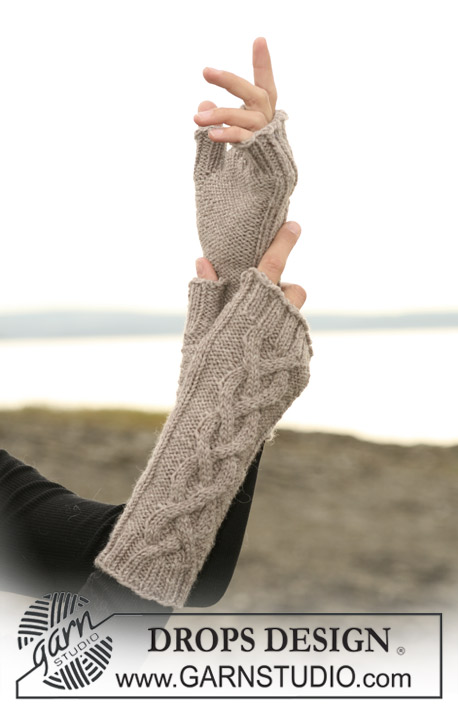
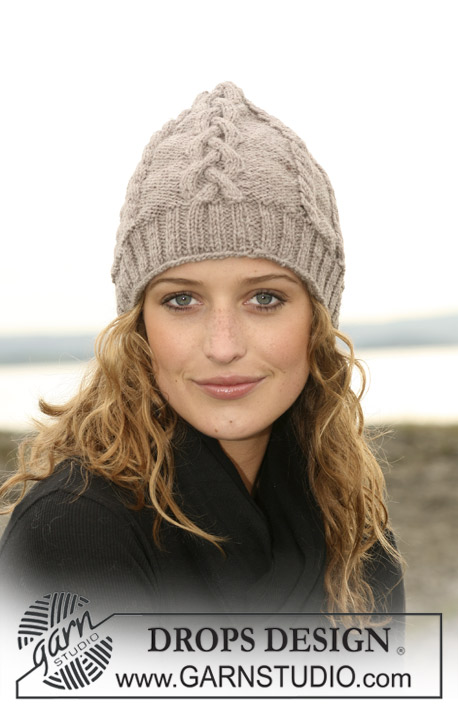
Knitted DROPS hat in 2 threads ”Snow”, worked from side to side. Yarn alternative 1 thread ”Polaris”.
DROPS 108-19 |
|
|
Garter st, back and forth on needle: K all rows. Hat: Worked from side to side back and forth on needle. Cast on 26-27-28 sts on needle size 10 mm [US 15] with 2 threads Snow. Work garter st – see above- at the same time continue as follows: * 2 rows on all sts, 2 rows on the first 21 sts, 2 rows on the first 16 sts *, repeat from *-*. Bind off when piece measures 52-54-56 cm [20½"-21¼"-22"], where longest. Assembly: Sew tog cast on row and bind off row. Sew a thread through sts at the top of hat and tighten to form the top. |
|
Have you finished this pattern?Tag your pictures with #dropspattern or submit them to the #dropsfan gallery. Do you need help with this pattern?You'll find 6 tutorial videos, a Comments/Questions area and more by visiting the pattern on garnstudio.com. © 1982-2026 DROPS Design A/S. We reserve all rights. This document, including all its sub-sections, has copyrights. Read more about what you can do with our patterns at the bottom of each pattern on our site. |


With over 40 years in knitting and crochet design, DROPS Design offers one of the most extensive collections of free patterns on the internet - translated to 17 languages. As of today we count 324 catalogs and 12239 patterns - 12229 of which are translated into English (US/in).
We work hard to bring you the best knitting and crochet have to offer, inspiration and advice as well as great quality yarns at incredible prices! Would you like to use our patterns for other than personal use? You can read what you are allowed to do in the Copyright text at the bottom of all our patterns. Happy crafting!
Post a comment to pattern DROPS 108-19
We would love to hear what you have to say about this pattern!
If you want to leave a question, please make sure you select the correct category in the form below, to speed up the answering process. Required fields are marked *.