
Popular categories
Looking for a yarn?


Comments / Questions (38)
![]() Jutta wrote:
Jutta wrote:
I can’t figure out the rise of the neckline of the bottom up sweater by the pattern from Erik/drops. Please help me. Thanks Jutta.
04.06.2025 - 18:13DROPS Design answered:
Dear Junta, to make the neck higher on back piece than on front piece you will work short rows (alternately from the right side and from the wrong side), this will create a deeper neck on front piece. Happy knitting!
05.06.2025 - 08:49
![]() Jutta Zimmermann wrote:
Jutta Zimmermann wrote:
Need help with the pattern diagram
20.05.2025 - 19:33DROPS Design answered:
Dear Mrs Zimmermann, you will find how to read diagrams here - feel free to ask your question here if you need more help. Happy knitting!
21.05.2025 - 08:13
![]() Margareta Berzén wrote:
Margareta Berzén wrote:
Hej! När ärmar och bål sätts samman ska jag på stl 7 år ha 260 maskor. Sen ska det göras 17+6 minskningar för raglan =17x8+6x8=184m. 260-184=76m kvar. Men det står att man ska ha 92 m kvar och inte 76. Vad är fel? Sen undrar jag när raglanminskningen ska påbörjas, (direkt vid hopsättning brukar det vara) då man inte hinner med alla 36 varv innan man uppnått 92 maskor. Med vänlig hälsning //Margareta
09.02.2025 - 22:44DROPS Design answered:
Hej Margareta, det er 15 minskningarx8 i din storlek (inte 17) :)
12.02.2025 - 14:56
![]() Anne Laipio wrote:
Anne Laipio wrote:
Miksi en pääse samaan tulokseen kuin Erik ohjeessa? Ohje. Kun työn korkeus on 35 cm Koko 13/14: 1 krs oikein, M.3 (= 18 krs), M.4 (= 3 krs), 1 krs oikein, M.3 (= 18 krs) ja M.4 (= 3 krs). Yht. 44 krs = 18 cm. Kavenna joka 2. krs 18 kertaa ja sitten jokaisella krs:lla 8 kertaa. (2 x 18 on 36 krs + 8 krs = 44 krs ) Kun lasken nämä yhteen saan 35 + 18 = 53 cm. Ohjeen mukaan Työn korkeus ylös olkaan asti mitattuna on n. 57 cm. Eroa on 4cm kaikissa kokomalleissa.
02.02.2025 - 18:20DROPS Design answered:
Hei, tämä mitta mitataan hihan kohdalta. Katso myös mittapiirros.
12.02.2025 - 18:51
![]() Daniela Zerosi wrote:
Daniela Zerosi wrote:
Grazie per la tempestività della risposta!
03.11.2024 - 11:40
![]() Daniela Zerosi wrote:
Daniela Zerosi wrote:
Nella legenda del diagramma si legge una m.rovescio dal dritto del lavoro e una m.dritta dal rovescio del lavoro,ma lavorando in tondo non si è sempre sul dritto del lavoro?
02.11.2024 - 17:12DROPS Design answered:
Buonasera Daniela, è corretto, ma ci sono dei punti in cui si lavora in piano. Buon lavoro!
02.11.2024 - 23:49
![]() Marisa wrote:
Marisa wrote:
Buonasera, potete spiegare la differenza fra 1 ferro a m legaccio e 1 giro a maglia legaccio? Grazie
14.09.2024 - 22:58DROPS Design answered:
Buonasera Marisa, nella lavorazione in piano la maglia legaccio si lavora sempre a diritto, su tutti i ferri; invece, nella lavorazione in tondo la maglia legaccio si ottiene lavorando 1 giro diritto e 1 giro rovescio. In questo caso abbiamo aggiornato il modello per renderlo più chiaro. Buon lavoro!
17.09.2024 - 19:47
![]() Coin wrote:
Coin wrote:
Je tricote le pull en 14 ans : je tricote 6cm de côtes + 3 cm + (5,5x5 = 27,5 cm pour les augmentations )donc au total 36,5cm; et sur les explications il faut faire les diminutions à 35cm ! Dites-moi où je fais l’erreur ! Merci de votre aide !
15.02.2024 - 21:38DROPS Design answered:
Bonjour Mme Coin, vous devez augmenter 5 fois pas 6 fois, autrement dit, vous augmentez à 9 cm, puis 14,5 cm (5,5 plus haut), puis à 20 cm, puis à 25,5 cm et enfin à 31 cm, vous tricotez encore 4 cm avant de rabattre les mailles des emmanchures. Bon tricot!
16.02.2024 - 07:49
![]() Angie Elliott wrote:
Angie Elliott wrote:
How many yards of yarn for size 13/14 please?
18.01.2024 - 16:38DROPS Design answered:
Dear Mrs Elliott, you will. find requested amount of yarn for each size under the header, so in 13/14 years you need 450 g DROPS Alpaca/50 g a ball = 9 balls - read more about the yarn and its yardage on its shade card here. Happy knitting!
19.01.2024 - 08:40
![]() Kirsten Thagaard wrote:
Kirsten Thagaard wrote:
Det ville være en stor hjælp, hvis de stillede spørgsmål kunne oversættes. Det går fint med engelsk og tysk.
08.04.2023 - 10:52
|
|||||||
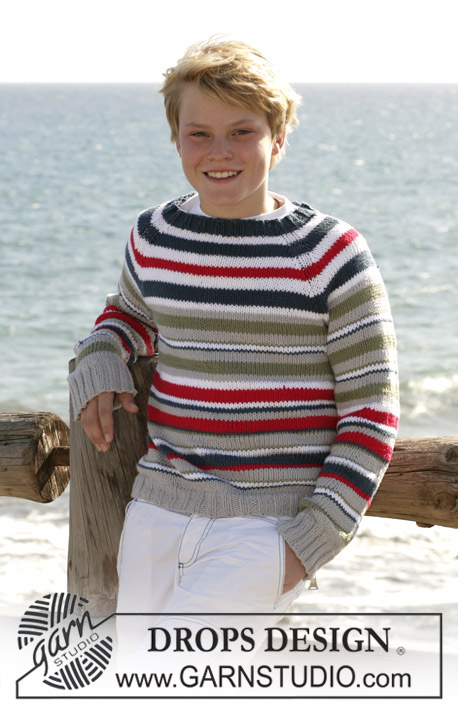
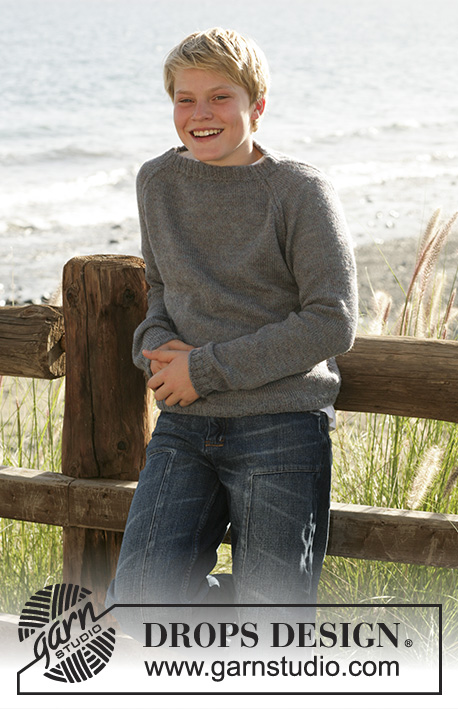
Erik#eriksweater |
|||||||
|
|
|||||||
Knitted sweater with raglan and texture pattern in 2 strands DROPS Alpaca. Size children 5 to 14 years.
DROPS Children 15-11 |
|||||||
|
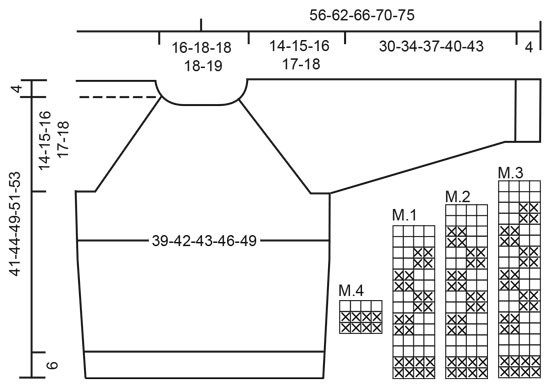
Rib 1: * P2, K4 *, repeat from *-*. Rib 2: * K3, P3 *, repeat from *-*. Decreasing tip (applies to raglan): Dec as follows from RS: Begin 3 sts from marking threads (MT): P2 tog, K2 (MT is placed in middle of these 2 sts), P2 tog. Knitting tip (applies to neck): To avoid holes when turning piece slip 1st st as if to knit when knitting back and tighten yarn slightly. Pattern: Diagram M.1 to M.4. Diagrams are showing every row in pattern seen from RS. --------------------------------------------------- Back and front pieces: Work in the round on circular needles. Cast on 132-138-144-156-168 sts on circular needle size 4 mm / US 6 with 2 strands Alpaca. K1 round. Insert a marker on beginning of round and a marker after 66-69-72-78-84 sts (= marking sides). Continue with Rib 1 – see explanation above. Work until Rib measures 6 cm / 2⅜". Continue in stockinette sts. When piece measures 9 cm / 3½" inc 1 sts on each side of markers (= 4 increases), repeat inc on every 4.5-4-5-5.5-5.5 cm / 1¾"-1½"-2"-2¼"-2¼" a total of 4-5-5-5-5 times = 148-158-164-176-188 sts. When piece measures 27-29-33-34-35 cm / 10⅝"-11⅜"-13"-13⅜"-13¾" bind off 8 sts each side for armholes (i.e. 4 sts on each side of each marker) = 132-142-148-160-172 sts left in total for front and back pieces. Leave work aside and work sleeves. Sleeve: Cast on 42-42-48-48-48 sts on double pointed needles size 4 mm / US 6 with 2 strands Alpaca. K1 round. Continue with Rib 1 – see explanation above. When piece measures 4 cm / 1½" continue in stockinette sts. When piece measures 8-8-10-10-10 cm / 3"-3"-4"-4"-4" inc 2 sts mid under sleeve, repeat inc every 2.5-2.5-3-2.5-2.5 cm / ⅞"-⅞"-3⅛"-⅞"-⅞" a total of 10-12-10-13-14 times = 62-66-68-74-76 sts. When piece measures 34-38-41-44-47 cm / 13⅜"-15"-16⅛"-17¼"-18½" bind off 8 sts mid under arm = 54-58-60-66-68 sts. Leave piece aside and make another sleeve. Yoke: Slip sleeves onto same circular needle as back and front pieces where bound off for armholes = 240-258-268-292-308 sts. K1 round (at the same time on sizes 7/8 years inc 2 sts evenly = 260 sts). Insert a marker in all transitions between back and front pieces and sleeves (= 4 markers). Start with pattern and raglan on next round as follows: Pattern: Work pattern after diagram continuously on round and as follows in height: Size 5/6: M.1 (= 14 rounds), M.4 (= 3 rounds), M.1 (= 14 rounds) and M.4 (= 3 rounds). 34 rounds in total = 14 cm / 5½". Size 7/8: K 1 round, M.1 (= 14 rounds), M.4 (= 3 rounds), K 1 round, M.1 (= 14 rounds) and M.4 (= 3 rounds). 36 rounds in total = 15 cm / 6". Size 9/10: K 1 round, M.2 (= 16 rounds), M.4 (= 3 rounds), M.2 (= 16 rounds) and M.4 (= 3 rounds). 39 rounds in total = 16 cm / 6¼". Size 11/12: K 1 round, M.3 (= 18 rounds), M.4 (= 3 rounds), M.2 (= 16 rounds) M.4 (= 3 rounds). 41 rounds in total = 17 cm / 6¾". Size 13/14: K 1 round, M.3 (= 18 rounds), M.4 (= 3 rounds), K 1 round, M.3 (= 18 rounds), M.4 (= 3 rounds). 44 rounds in total = 18 cm / 7". Raglan: Dec 1 sts on each side of 4 markers (= 8 dec) – read Decreasing tips. Dec on every other row 15-15-17-16-18 times and then on every row 4-6-5-9-8 times. There are 88-92-92-92-100 sts left after all dec for raglan. Leave sts on needle and leave markers in piece. Cut yarn. Piece measures approx 45-48-53-55-57 cm / 17¾"-19"-21"-21⅝"-22½" up to shoulder. Rise on back of neck: Work a rise over shoulders and back of neck to ensure neck sits well. Work rise as follows: Start at marker in the back of left sleeve (start by knitting in 1st st on sleeve). Knit sts over sleeve to marker on left sleeve front. Turn piece – read Knitting tip. Knit back over sts on left sleeve, continue over back piece and right sleeve to marker in the front of right sleeve. Turn piece. Knit back over right sleeve and continue over back piece to marker in the back of left sleeve. Turn piece. Continuing working diagram M.4 back and forth over sts on back piece (from marker in the back of left sleeve to marker in the back of right sleeve). When M.4 is worked 1 time in height turn piece and K 1 round (from RS) over all sts at the same time dec 10-8-8-8-10 sts evenly on round = 78-84-84-84-90 sts. Neck: Continue in the round. Work Rib 2 – see explanation above. When rib measures 6 cm / 2⅜" bind off loosely, K over K and P over P. Assembly: Fold Rib on neckline double towards WS and sew on inside. Sew openings under arms. |
|||||||
Diagram explanations |
|||||||
|
|||||||
 |
|||||||
Have you finished this pattern?Tag your pictures with #dropspattern #eriksweater or submit them to the #dropsfan gallery. Do you need help with this pattern?You'll find 17 tutorial videos, a Comments/Questions area and more by visiting the pattern on garnstudio.com. © 1982-2026 DROPS Design A/S. We reserve all rights. This document, including all its sub-sections, has copyrights. Read more about what you can do with our patterns at the bottom of each pattern on our site. |
|||||||


With over 40 years in knitting and crochet design, DROPS Design offers one of the most extensive collections of free patterns on the internet - translated to 17 languages. As of today we count 324 catalogs and 12284 patterns - 12274 of which are translated into English (US/in).
We work hard to bring you the best knitting and crochet have to offer, inspiration and advice as well as great quality yarns at incredible prices! Would you like to use our patterns for other than personal use? You can read what you are allowed to do in the Copyright text at the bottom of all our patterns. Happy crafting!
Post a comment to pattern DROPS Children 15-11
We would love to hear what you have to say about this pattern!
If you want to leave a question, please make sure you select the correct category in the form below, to speed up the answering process. Required fields are marked *.