
Popular categories
Looking for a yarn?


Comments / Questions (12)
![]() Pia wrote:
Pia wrote:
Vad betyder * i era mönster? Är det multiplicera som menas? Bättre att ni skriver ut i stället för att använda förkortningar. Tex OMG etc..
02.01.2023 - 15:37DROPS Design answered:
Hei Pia. När vi använder *-* i texten, stickar man det som står mellan stjärnorna och stickar denna repetition det antal gånger som står i mönstret. Så når det står i oppskriften: * Stick in nålen i nästa m, hämta tråden *, upprepa *-* en gång till, så gjør du det som er markert mellom stjernene en gang til. Les gjerne mer om hvordan du leser en DROPS oppskrift under: Tips & Hjälp - DROPS lektioner - Läs ett mönster. Les også under: Tips & Hjälp - Ordbok. mvh DROPS Design
06.01.2023 - 08:22
![]() Maria Eriksson wrote:
Maria Eriksson wrote:
Hej, jag har beställt garn till Petrine-vest och fått mönster på norska. Skulle om möjligt vilja ha det på svenska. Mvh Maria
31.03.2022 - 20:07DROPS Design answered:
Hej Maria, Är det ett DROPS mönster? I så fall är det bara att ändra språk till svenska under bilden :)
04.04.2022 - 11:41
![]() Eve Woods wrote:
Eve Woods wrote:
I would like the pattern of Odin Bunny. How do I get that?
11.02.2021 - 00:37DROPS Design answered:
Dear Mrs Woods, you will find our bunny patterns here if this can help. You are welcome to contact your DROPS store for any further individual assistance. Happy crocheting!
11.02.2021 - 06:50
![]() Jane wrote:
Jane wrote:
Found someone selling this pattern on Etsy Seller: Souvenirstoys
01.02.2019 - 07:39
![]() Jessica wrote:
Jessica wrote:
Ce n'est pas Patty mais Pippa. Cdlt,
02.12.2017 - 15:22
![]() Jessica wrote:
Jessica wrote:
Bonjour, Je vous informe que vous avez deux fois le même patron en ligne : miss mew et patty. A bientot
02.12.2017 - 15:21
![]() Patricia wrote:
Patricia wrote:
Bonjour, je ne comprends rien aux explications concernant la fleur ? Pouvez-vous m'aider s'il vous plaît ? Avec mes remerciements
23.02.2015 - 08:12DROPS Design answered:
Bonjour Patricia, on commence par un rond de 6 ms, on ferme ce rond avec l'autre couleur (pour que le changement de couleur soit plus joli), puis on crée les pétales avec 4 ml, 1 mc dans la ms suiv tout le tour, on termine le tour avec 1 mc dans la 1ère ms (du tour 1) avec la nouvelle couleur. On crochète ensuite des arceaux de 5 ml, 1 mc dans la ms du tour 1 en piquant le crochet derrière la 1ère rangée de pétales. Bon crochet!
23.02.2015 - 14:08
![]() Lotte W S wrote:
Lotte W S wrote:
Tak for mange gode opskrifter og hjælp! Mener ikke at antallet af masker angivet i slutningen af hver række kan stemme overens med fremgangsmåden. Har man 24 masker og tilføjer en maske til hver 2. må man få 12 masker mere, dvs. 36 og ikke 32. Skal jeg ende med 36 eller blot tilføje en maske til hver 3.? Tak på forhånd :)
17.11.2014 - 10:08DROPS Design answered:
Hej Lotte, Er det 4.omg på hovedet du mener, så står der således: 4.OMG: * 1 fm i næste 2 fm, 2 fm i næste fm *, gentag fra *-* omg rundt = 32 fm. det vil sige udtagning i hver 3.
25.11.2014 - 15:18
![]() Christina Truetsch wrote:
Christina Truetsch wrote:
Hallo! Ich verstehe nicht ganz wie das mit dem Schwanz gemeint ist: ich soll unten am Körper mit einem Magic Circle beginnen, soll ich den gleich annähen? Und das wird ja ein Kreis, wie soll der dann ausschauen? Wie ein Bommel oder wird der Kreis flach aufgenäht? Vielen Dank für ihre Hilfe!
16.10.2013 - 09:59DROPS Design answered:
Liebe Christina, der Anfang des Schwanzes mit dem Magic Circle ist nicht zum Körper zu, sondern aussen. Nähen Sie den Kreis dann flach (und ungefüllt) mit der letzten Rd zum Körper an.
17.10.2013 - 07:07
![]() Stefania wrote:
Stefania wrote:
è possibile fare i modelli gratis in versione pdf ? grazie mille
08.06.2013 - 15:40DROPS Design answered:
Buongiorno, i modelli non sono disponibili in versione pdf; in ogni modello è presente comunque il bottone per la stampa, cliccando quello apparirà una finestra con la versione stampabile del modello. In alternativa è possibile comunque selezionare il testo e copiarlo su un foglio di testo, se vuole conservarlo. Buon lavoro!
09.06.2013 - 18:28
|
|
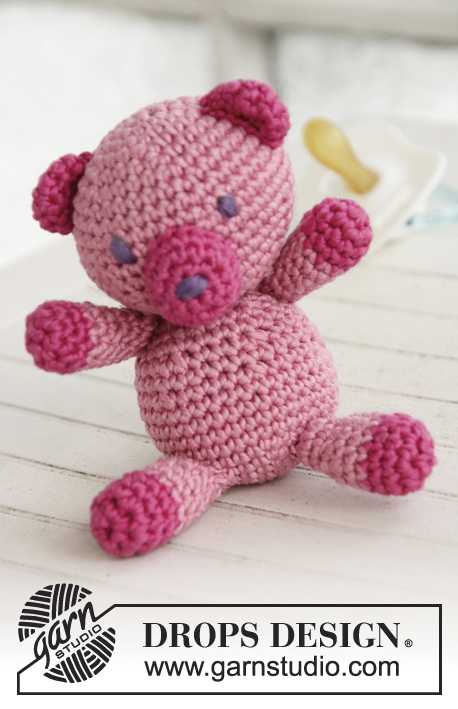
Pippa#dropspippa |
|
 |
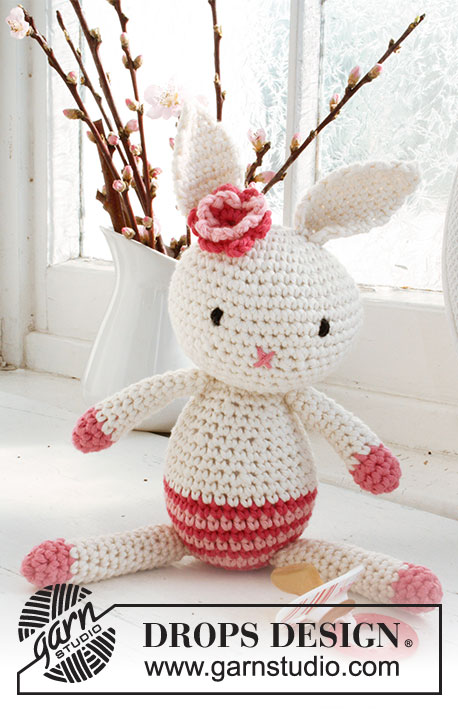 |
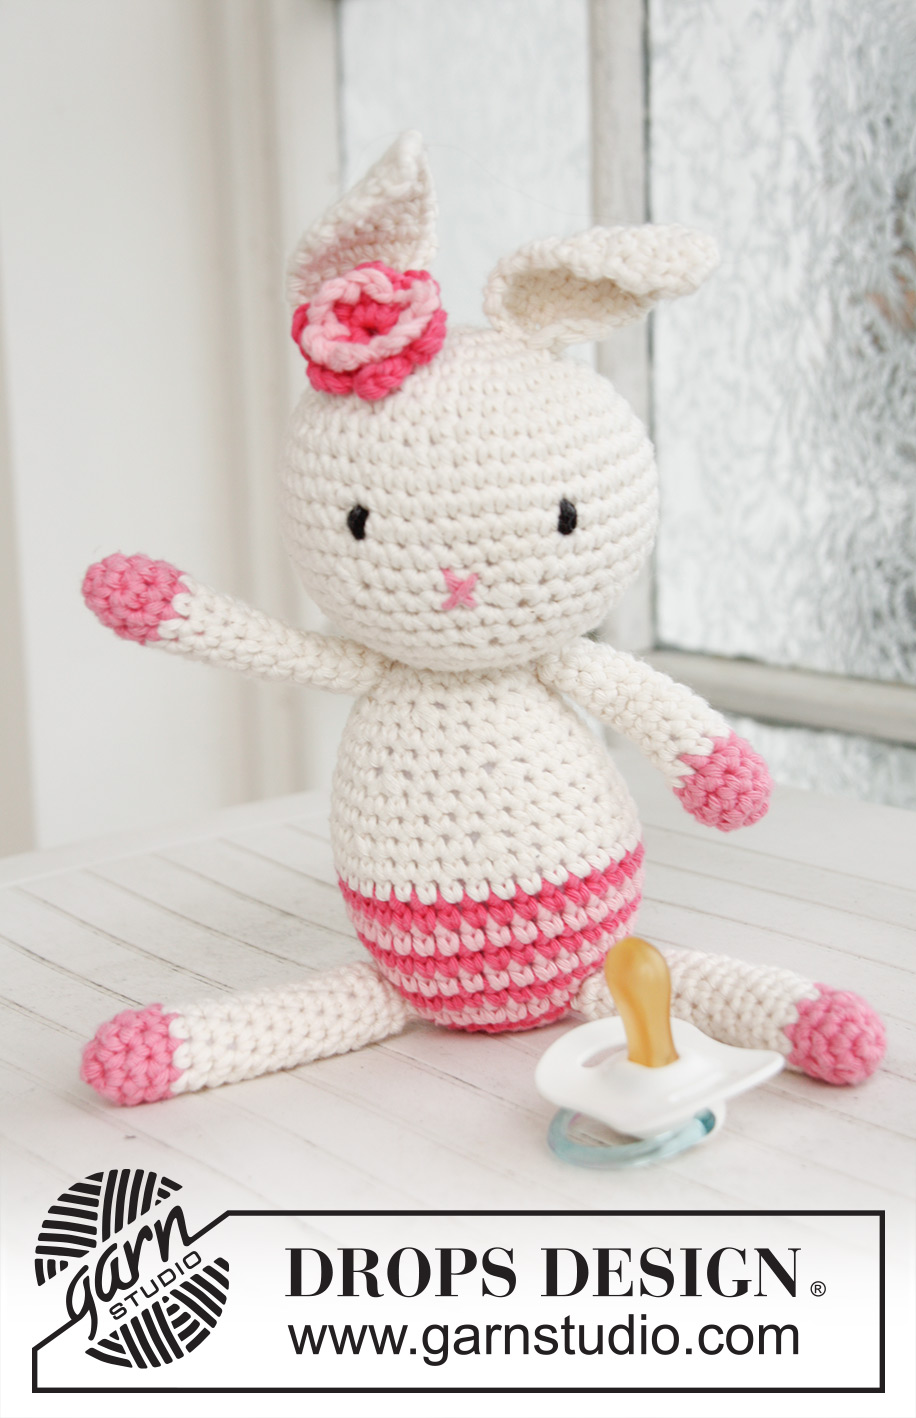
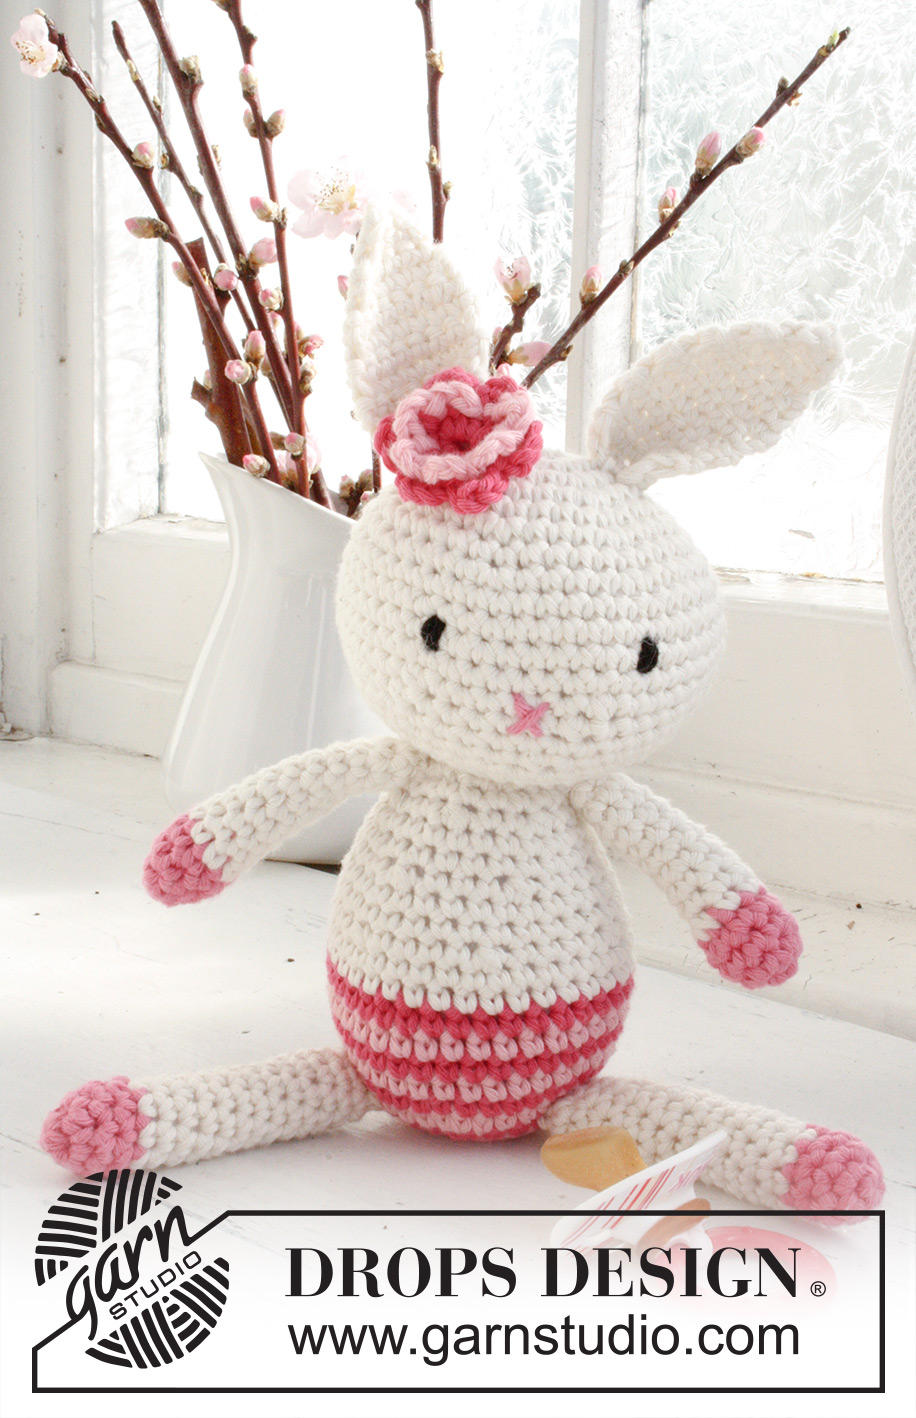
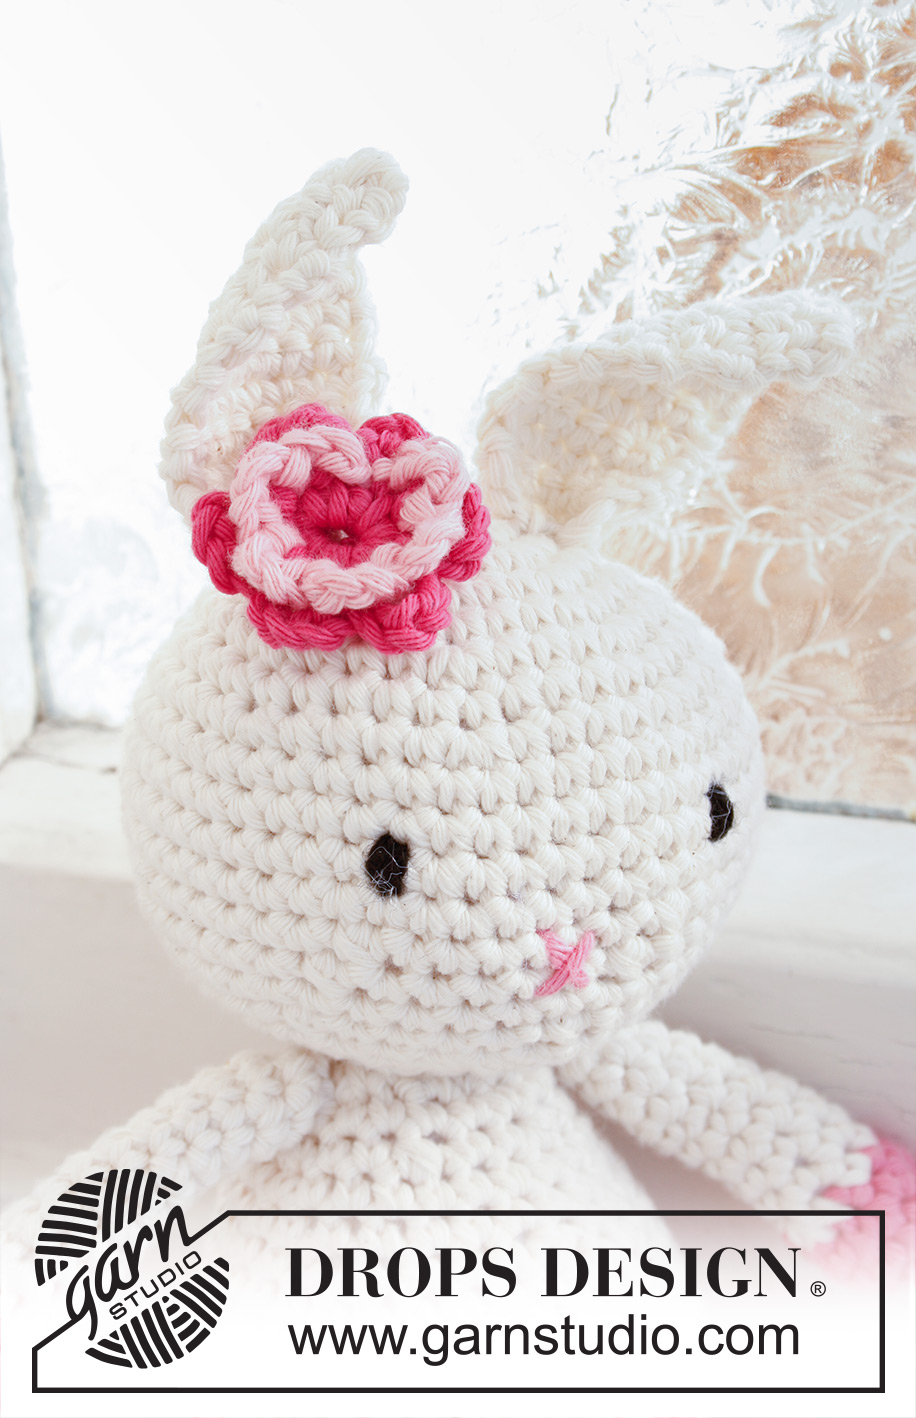
Crochet Easter bunny with flower in DROPS Paris
DROPS Baby 21-42 |
|
|
CROCHET INFO: MAGIC CIRCLE: When piece is worked in the round, start with this technique to avoid holes in the middle (instead of ch-ring): Hold the yarn end and wind the yarn one time around the index finger to make a loop. Hold the loop with left thumb and middle finger, place the thread over left index finger. Insert hook through the loop, make a YO and pull thread through loop, work 1 ch, then work dc around the loop. When the desired no of dc have been reached, pull the yarn end to tighten the loop. Fasten the yarn end on the back side. Continue to work in the round in a circle. WORK IN THE ROUND IN A CIRCLE: After last dc on the round, continue to next round with 1 dc in next dc (= first dc on next round). NOTE: Insert a marker at the beg of round between last dc and first dc on the round, move the marker upwards. WORKING 2 DC TOG: * Insert hook in next st, get thread *, repeat from *-* one more time, make a YO and pull thread through all 3 sts on hook. COLOUR CHANGE - DC: To get a nice colour change work last dc on round as follows: Insert hook in last st, get thread, make a YO with the new colour and pull it through all sts on hook. Continue on to next round with the new colour. -------------------------------------------------------- HEAD: Start at the top of the head by making a Magic circle - READ EXPLANATION ABOVE - on hook size 4 mm with Paris off white. ROUND 1: Work 8 dc in the circle. READ WORK IN THE ROUND IN A CIRCLE. ROUND 2: 2 dc in every dc = 16 dc. ROUND 3: * 1 dc in next dc, 2 dc in next dc *, repeat from *-* the rest of the round = 24 dc. ROUND 4: * 1 dc in the next 2 dc, 2 dc in next dc *, repeat from *-* the rest of the round = 32 dc. ROUND 5: Work 1 dc in every dc = 32 dc. ROUND 6: * 1 dc in the next 3 dc, 2 dc in next dc *, repeat from *-* the rest of the round = 40 dc. ROUND 7: Work 1 dc in every dc = 40 dc. ROUND 8: * 1 dc in the next 4 dc, 2 dc in next dc *, repeat from *-* the rest of the round = 48 dc. ROUND 9-12: Work 1 dc in every dc = 48 dc on the round. ROUND 13: * 1 dc in the next 6 dc, then crochet the next 2 dc tog * - See explanation above, repeat from *-* the rest of the round = 42 dc. ROUND 14: * 1 dc in the next 5 dc, then crochet the next 2 dc tog *, repeat from *-* the rest of the round = 36 dc. ROUND 15: Work 1 dc in every dc = 36 dc. ROUND 16: * 1 dc in the next 4 dc, then crochet the next 2 dc tog *, repeat from *-* the rest of the round = 30 dc. ROUND 17: Work 1 dc in every dc = 30 dc. ROUND 18: * 1 dc in the next 3 dc, then crochet the next 2 dc tog *, repeat from *-* the rest of the round = 24 dc. ROUND 19: * 1 dc in the next 2 dc, then crochet the next 2 dc tog *, repeat from *-* the rest of the round = 18 dc. ROUND 20: * 1 dc in next dc, then crochet the next 2 dc tog *, repeat from *-* the rest of the round = 12 dc. Cut and fasten the thread. Fill the head with some cotton wool. BODY: Start at the bottom of body by making a magic circle in shocking pink. ROUND 1: Work 6 dc in the circle. ROUND 2: 2 dc in every dc = 12 dc. ROUND 3: * 1 dc in next dc, 2 dc in next dc *, repeat from *-* the rest of the round = 18 dc. Switch to light pink in last dc - READ COLOUR CHANGE - DC. ROUND 4: * 1 dc in the next 2 dc, 2 dc in next dc *, repeat from *-* the rest of the round = 24 dc - switch to shocking pink in last dc. ROUND 5: * 1 dc in the next 3 dc, 2 dc in next dc *, repeat from *-* the rest of the round = 30 dc. Switch to light pink in last dc. ROUND 6: * 1 dc in the next 4 dc, 2 dc in next dc *, repeat from *-* the rest of the round = 36 dc. Switch to shocking pink in last dc. ROUND 7: Work 1 dc in every dc = 36 dc. Switch to light pink in last dc. ROUND 8: Work 1 dc in every dc = 36 dc. Switch to shocking pink in last dc. ROUND 9: Work as 7th round. ROUND 10: Work as 8th round. ROUND 11: Work as 7th round - but switch to off white instead of light pink in last dc. ROUND 12-13: Work 1 dc in every dc = 36 dc on the round. ROUND 14: * 1 dc in the next 4 dc, then crochet the next 2 dc tog *, repeat from *-* the rest of the round = 30 dc. ROUND 15-16: Work 1 dc in every dc = 30 dc on the round. ROUND 17: * 1 dc in the next 3 dc, then crochet the next 2 dc tog *, repeat from *-* the rest of the round = 24 dc. ROUND 18-19: Work 1 dc in every dc = 24 dc on the round. ROUND 20: * 1 dc in the next 2 dc, then crochet the next 2 dc tog *, repeat from *-* the rest of the round = 18 dc. ROUND 21: Work 1 dc in every dc = 18 dc. ROUND 22: * 1 dc in next dc, then crochet the next 2 dc tog *, repeat from *-* the rest of the round = 12 dc. Cut the thread and keep 30 cm for assembly. Fill the body with some cotton wool. LEG: Start at the bottom of leg by making a magic circle in medium pink. ROUND 1: Work 4 dc in the circle. ROUND 2: 2 dc in every dc = 8 dc. ROUND 3-4: Work 1 dc in every dc = 8 dc on round - switch to off white in last dc on 4TH ROUND. ROUND 5-18: Work 1 dc in every dc = 8 dc on the round. Cut the thread and keep 20 cm for assembly. Fill leg with some cotton wool. Work another leg the same way. ARM: Start at the bottom of arm by making a magic circle in medium pink on hook size 4 mm. Work as ROUND 1-4 for leg. ROUND 5: Work 1 dc in the next 6 dc, then crochet the next 2 dc tog = 7 dc. ROUND 6-15: Work 1 dc in every dc = 7 dc on the round. Cut the thread and keep 20 cm for assembly. Fill half the arm with some cotton wool. Work another arm the same way. TAIL: Start by making a magic circle with light pink on hook size 4 mm. ROUND 1: Work 4 dc in the circle. ROUND 2: 2 dc in every dc = 8 dc. ROUND 3-4: Work 1 dc in every dc = 8 dc on the round. Cut the thread and keep 20 cm for assembly (do not fill with cotton wool). EAR: Start at the bottom of the ear by making 8 ch (7 ch + 1 ch to turn with) on hook size 3 mm with off white. ROW 1: Work 1 dc in every ch from 2nd ch on hook = 7 dc. Turn piece. ROW 2-8: 1 ch, 1 dc in every dc, turn piece = 7 dc on row. ROW 9: 1 ch, skip 1st dc, 1 dc in the next 4 dc, skip next dc, 1 dc in last dc = 5 dc. Turn piece. ROW 10: 1 ch, 1 dc in every dc = 5 dc. Turn piece. ROW 11: 1 ch, skip 1st dc, 1 dc in the next 2 dc, skip next dc, 1 dc in last dc = 3 dc. Turn piece. ROW 12: 1 ch, skip 1st dc, work the next 2 dc tog = 1 dc. Cut and fasten the thread. Work another ear the same way. FLOWER: Work on hook size 3 mm with shocking pink as follows: ROUND 1: Work 4 ch and form a ring with 1 sl st in 1st ch. Work 1 ch, then work 6 dc in ch-ring, finish round and switch to light pink as follows: Insert hook in 1st dc on round, make a YO with light pink and pull the new thread through all sts on hook. ROUND 2: * Work 4 ch, 1 sl st in next dc from 1st round *. Repeat from *-* a total of 5 times. Then work 4 ch, finish round and switch to shocking pink as follows: Insert hook in 1st dc on 1st round, make a YO with shocking pink and pull the new thread through all sts on hook = 6 leaves in light pink. ROUND 3: * Work 5 ch, fold next leaf from 2ND ROUND towards you and work on the back of the leaf as follows: Insert hook in next dc from 1st round (to the right of sl st from 2nd round), 1 sl st *. Repeat from *-* a total of 5 times, finish with 5 ch and 1 sl st in 1st dc from 1st round = 6 leaves in shocking pink. Cut the thread and keep 20 cm for assembly. ASSEMBLY: Fold the bottom of the ears on the middle and sew on to the head. Sew the flower below one ear. Sew a cross for nose with medium pink and eyes with black. Sew the head on to body with neat little stitches. Sew the legs and the arms on to each side of body with neat little stitches. Sew the tail to the back of body. |
|
Have you finished this pattern?Tag your pictures with #dropspattern #dropspippa or submit them to the #dropsfan gallery. Do you need help with this pattern?You'll find 8 tutorial videos, a Comments/Questions area and more by visiting the pattern on garnstudio.com. © 1982-2026 DROPS Design A/S. We reserve all rights. This document, including all its sub-sections, has copyrights. Read more about what you can do with our patterns at the bottom of each pattern on our site. |
|


With over 40 years in knitting and crochet design, DROPS Design offers one of the most extensive collections of free patterns on the internet - translated to 17 languages. As of today we count 325 catalogues and 12298 patterns translated into English (UK/cm).
We work hard to bring you the best knitting and crochet have to offer, inspiration and advice as well as great quality yarns at incredible prices! Would you like to use our patterns for other than personal use? You can read what you are allowed to do in the Copyright text at the bottom of all our patterns. Happy crafting!
Post a comment to pattern DROPS Baby 21-42
We would love to hear what you have to say about this pattern!
If you want to leave a question, please make sure you select the correct category in the form below, to speed up the answering process. Required fields are marked *.