
Looking for a yarn?


Comments / Questions (9)
![]() Rina wrote:
Rina wrote:
Wat een leuk vest! Wel heb ik nog een vraag. Waar betekent de afkorting "tr"?
04.05.2019 - 11:27DROPS Design answered:
Dag Rina,
tr staat voor toer. Veel haakplezier!
05.05.2019 - 16:30
![]() Nadine wrote:
Nadine wrote:
Bonjour, il me semble qu'il y a erreurs pour " le devant" de 10 cm entre les explications en français versus en anglais ou italien.... voici en francais: "A 17-20-20-23-23 cm de hauteur totale, augmenter 1 DB côté milieu devant 9 fois tous les rangs en crochetant 2 DB dans l’avant dernière m du bord" Tandis que les autres langues mentionnent 10 et 13 cm. Quelle explication est la bonne ???? Merci
21.03.2018 - 01:36DROPS Design answered:
Bonjour Nadine, les explications françaises sont conformes à l'original (norvégien), les autres langues vont être vérifiées. Bon crochet!
21.03.2018 - 09:19Mara Velazco wrote:
Gracias por compartir todos los patrones!!! todos los trabajos son hermosos !!!❤
13.03.2018 - 03:47
![]() Sheryl wrote:
Sheryl wrote:
So for the back piece when you are doing the final row it says to tr 10 on both sides leaving the middle 8 unworked but it does not tell you to bind off after 10 then reconnect and do the last 10, so is the innermost tr of the 10 suspose to attach to the other innermost tr on the other side leaving a round opening where the unworked tr's are? Or are we suspose to do 8 chains between the 10 tr's on one side and the other?
04.02.2016 - 18:58DROPS Design answered:
Dear Sheryl, this is done for shoulders: you work 1 row over the first 10 tr on row (= 1st shoulder), then cut the yarn, skip the 8 next sts on previous row (neckline on back piece), join the yarn in the next st and work the next (last) 10 tr on row (= 2nd shoulder). Happy crocheting!
05.02.2016 - 09:39
![]() Claire Shepherd wrote:
Claire Shepherd wrote:
Please can you tell me if I need to chain 1 in between each dtr on back piece after the first row where the pattern says crotchet 1 dtr in each dtr from previous row?
10.01.2014 - 11:52DROPS Design answered:
Dear Mrs Shepherd, there is no ch 1 between each dtr on back piece, neither on row 1, you start on the fundation chain with 1 dtr in the 5th ch from the hook, 1 dtr in the next ch *skip 1ch, 1 dtr in the next 3 ch* repeat from *-* = 24-27-30-33-36 dtr (see size). Continue then with 1 dtr in each dtr from previous row. Happy crocheting!
10.01.2014 - 14:51
![]() Shikoba wrote:
Shikoba wrote:
Ich verstehe den letzten Abschnitt des Ärmels nicht ganz. Werden auf jeder Seite 3 D-Stb abgenommen? Sind dann nach allen Abnahmen in Gr. S noch 11 D-Stb übrig? Muss man nach 49 cm noch 2 oder 3 Reihen häkeln? Danke vorab
04.12.2012 - 18:18DROPS Design answered:
Hallo, für Grösse S wird 3 x in jeder 3. R auf beiden Seiten 1 M aufgenommen = 21 M. Für die angedeutete Armkugel war nicht deutlich beschrieben, wir haben dies jetzt etwas verbessert.
05.12.2012 - 07:42
![]() Carmela wrote:
Carmela wrote:
Tolle Jacke!
24.06.2011 - 11:26
![]() Drops Design wrote:
Drops Design wrote:
The tip is telling to work a slip st in first st instead of a tr and this way you will dec 1 st. At the end of the row you don't work the last st on row, but turn before it, to dec 1 st. To dec 2 sts work 2 sl st in beg of row and turn when 2 sts remains on row.
20.11.2009 - 18:49
![]() Toni wrote:
Toni wrote:
Im having trouble understanding the bind off tips on the back piece. the directions are unclear to me.
20.11.2009 - 06:51
|
|
DROPS 92-20 |
|
 |
 |
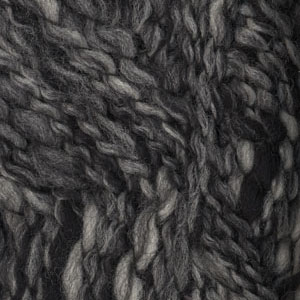
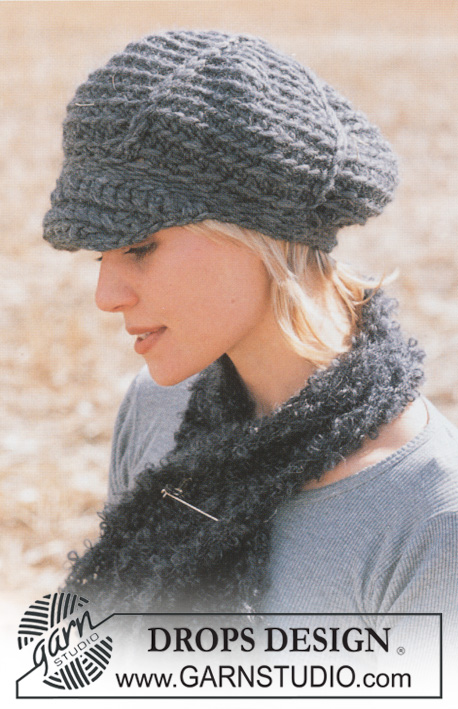
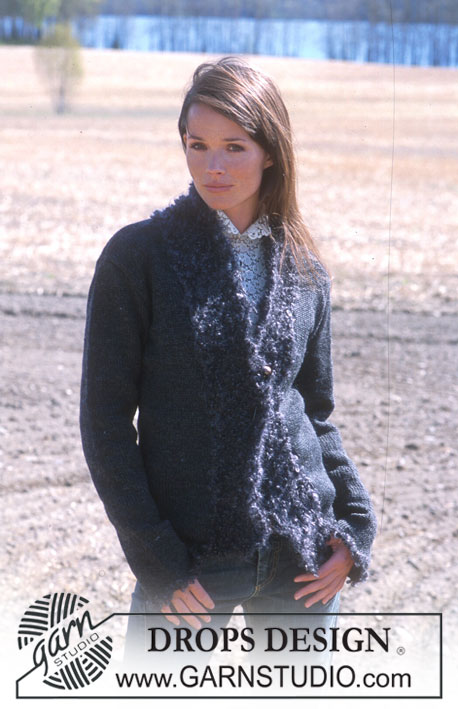
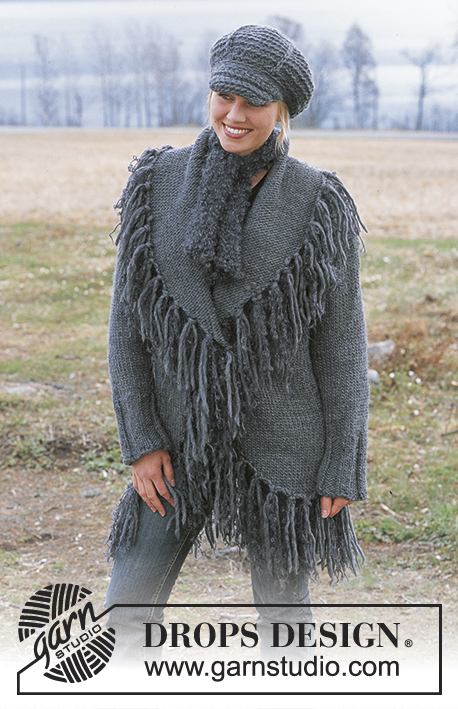
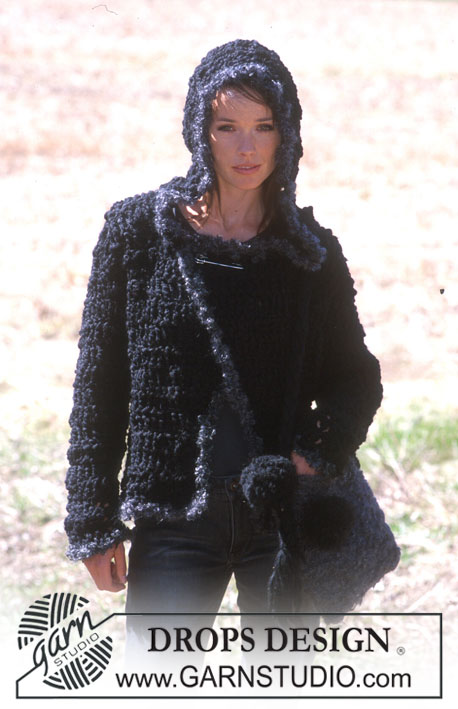
Crocheted Cardigan in Ull-Flamé with Puddel edges and Felted Purse in Puddel and Snow
DROPS 92-20 |
|
|
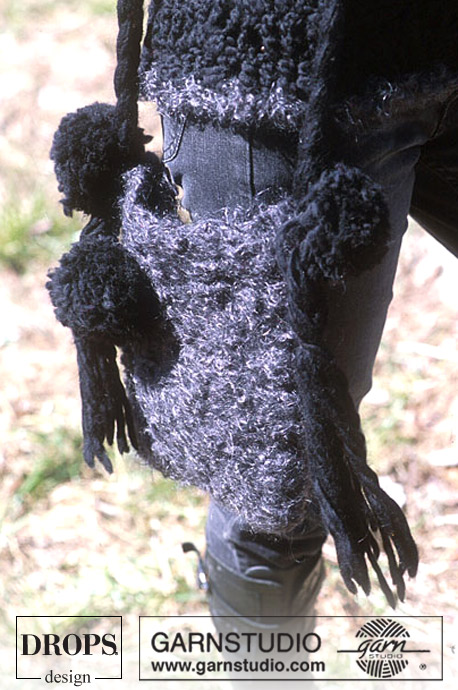
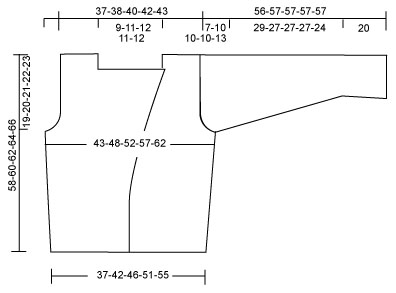
CARDIGAN: Crochet Gauge: 6,5 dtr x 3 rows on hook size 10 = 10 x 10 cm. NB: Because of different crochet techniques used by the individual, the gauge may vary, so you might have to drop a size up or down in hook size to obtain the correct gauge. Crochet info: At the beginning of each row replace the 1st dtr with 4 ch. Finish each row as follows: Crochet 1 dtr in the 4th ch from beginning of the previous row. Bind off tips: At the beginning of row: Replace 1 dtr with a sl st. At the end of row: Turn the piece when the number of dtr’s to be bound off are left on row and crochet back again. Back piece: Read Crochet info above! Crochet loosely 34-38-42-46-50 ch (inclusive of the 4 ch to turn with) on hook size 10 in Ull-Flame’. Crochet the 1st row as follows: 1 dtr in the 5th ch from the hook, 1dtr in the next ch *skip 1ch, 1 dtr in the next 3 ch* repeat from *-* = 24-27-30-33-36 dtr, turn the piece. Continue to crochet 1 dtr in each dtr from previous row (crochet into the dtr and not in between). Remember to check your Crochet gauge! When piece measures approx 12 and 26 cm inc a dtr at each side as follows: Crochet an extra dtr in the second and the second but last dtr on row = 28-31-34-37-40 dtr. When piece measures approx 39-40-41-42-43 cm bind off for armhole ewither side – see Bind off tips, as follows: 2dtr 1-1-1-2-2 times and 1 dtr 0-1-2-1-2 times = 24-25-26-27-28 dtr left. When piece measures 55-57-59-61-63 cm (only 1 row left before finished measurements) crochet 1 row of dtr but only in the outer most 9-9-9-10-10 dtr at each side (do not crochet the centre 6-7-8-7-8 dtr = back neck. Cut thread, the piece now measures approx 58-60-62-64-66 cm. Left front: Crochet loosely 19-22-23-26-27 ch (inclusive of the 4 ch to turn with) on hook size 10 in Ull-Flame’. Crochet the 1st row as follows: 1 dtr in the 5th ch from the hook, 1dtr in the next ch *skip 1ch, 1 dtr in the next 3 ch* repeat from *-* but for size S + L + XXL finish with a dtr in the last 4 ch (instead of the last 3 ch) = 13-15-16-18-19 dtr, turn the piece. Continue to crochet dtr as described for back piece. When piece measures approx 17-20-20-23-23 cm inc at centre mid front, 1 dtr on each row a total of 9 times. NB: Inc as follows: Crochet an extra dtr in the second outer most dtr at the centre front. At the same time when piece measures approx. 19 and 33 cm (instead of 12 and 26 cm) inc. as described for back piece. At the same time, when piece measures approx 39-40-41-42-43 cm bind off for armhole as described for back. When all dec. and inc. have been made, there are 22-23-23-24-24 dtr left on row. When piece measures 48-50-52-54-56 cm (after the last inc at the centre front) bind off the centre front 13-14-14-14-14 dtr – see Bind off tips = 9-9-9-10-10 dtr left for shoulder. Continue to crochet until piece measures approx. 58-60-62-64-66 cm. Cut thread. Right front: Crochet as left front but reverse. Sleeve: Crochet loosely 27-27-28-28-30 ch (inclusive of the 4 ch to turn with) on hook size 10 in Ull-Flame’. Crochet the 1st row as follows: 1 dtr in the 5th ch from the hook, 1dtr in the next ch *skip 1 ch, 1 dtr in the next 3 ch* repeat from *-* but for size S + M finish off with a dtr in the last 4 ch (instead of the last 3 ch), and size L + XL finish off with a dtr in the last 5 ch = 19-19-20-20-21 dtr, turn the piece. Continue to crochet dtr as done on back and front pieces. At the same time on the 3rd row of dtr bind off 2 dtr evenly distributed on row – NB: To bind off 1 dtr just miss 1 dtr from previous row. Repeat at row 6 = 15-15-16-16-17 dtr left. On the next row (the piece now measures approx 20 cm) inc. 1 dtr at each side a total of 3-4-4-5-5 times for size S: on every 3rd row, for size M + L: on every other row and for size XL + XXL: on each row = 21-23-24-26-27 dtr. When piece measures approx 49-47-47-47-44 cm bind off for sleeve cap at each side on every row: 3 dtr 1 time, 2 dtr 1 time and 1 dtr 0-1-1-1-2 times. Finish off when the piece measures 56-57-57-57-57 cm. Make another sleeve. Assembly: Crochet the shoulder seams tog. as follows: Crochet 1 sl st. in the first dtr on the back, 1 ch, 1 dc in the first dtr on the front, 1 ch, 1 dc in the next dtr on the back and so on. Hood: On the first row crochet 18 -22 dc around the collar – beginning 13-14-14-14-14 dtr in from the right centre mid front (= overlap) and continue until there are 13-14-14-14-14 dtr left on left centre mid front (= overlap). NB: This dc row is meant to keep the collar tight together so it will not expand. It is therefore a good idea to crochet a little tight and to skip 1 dtr every now and again -make sure the collar measurements corresponds the measurements in chart. Continue to crochet dtr forwards and backwards from the centre mid front (do not crochet at the outer most 13-14-14-14-14 dtr at each side which overlap each other). At the same time, after 1 row of dtr, inc evenly on row to 30-32-32-34-34 dtr. On next row bind off 1 dtr at each side = 26-28-28-30-30 dtr. Continue until the hood measures 30-33-33-36-36 cm from the shoulder and finish off. Crochet the hood together at the top the same way the shoulders were crochet together. Crochet in the sleeves the same way and finally crochet the side and the sleeves seams together the same way too. Crochet edge: Crochet an edge around all edges including the bottom sleeve edges on crochet hook size 10 with double thread of puddel as follows: 1dc in the first st, *3 ch, skip 2-3 cm (the edge should be nice and straight not wavy), 1 dc in the next st.* repeat from *-*. The cardigan can be held together with a string or a kilt pin. BAG: Measurements: Before felting: width approx 30 cm, length 34 cm After felting: width approx 23 cm, lenght 28 cm Materials: Puddel, 150 g colour no. 08, Charcoal grey Snow, 150 g colour no. 02, Black Drops pointed needles size 7 mm. Knitting Gauge: 10 sts x 14 rows on needles size 7mm in stocking sts. = 10 x10 cm Felting: Machine wash bag at 40 deg. with 1 tbls of powder. For a more rough surface wash the bag together with a pair of jeans. After wash, shape and leave to dry flat. Bag: Cast on 30 sts on 2 needles size 7 mm with puddel (2 needles make the edge more elastic). Remove one needle and continue in stocking sts. When piece measures 68cm bind off loosely. Assembly: Sew the side seams and felt the bag in the washing machine – see explanation above. Strap: Cut 18 threads of Snow each 2.5 m long. Make a knot approx 18 cm from one end. Split the threads into 3 groups of 6 threads and make a loose plait. Finish approx 18 cm from the other end and make another knot. Sew the strap to the bag at each side. Let the end piece be a little longer on one side than the other side, i.e. some of the plait is hanging down too. Pom-poms: Make 3 pom-poms with Snow yarn. The pom-poms should be 9-10 cm in diameter. Attach the pom-poms to the bag where the strap is attached. |
|
 |
|
Have you finished this pattern?Tag your pictures with #dropspattern or submit them to the #dropsfan gallery. Do you need help with this pattern?You'll find 18 tutorial videos, a Comments/Questions area and more by visiting the pattern on garnstudio.com. © 1982-2025 DROPS Design A/S. We reserve all rights. This document, including all its sub-sections, has copyrights. Read more about what you can do with our patterns at the bottom of each pattern on our site. |
|

With over 40 years in knitting and crochet design, DROPS Design offers one of the most extensive collections of free patterns on the internet - translated to 17 languages. As of today we count 319 catalogues and 12042 patterns translated into English (UK/cm).
We work hard to bring you the best knitting and crochet have to offer, inspiration and advice as well as great quality yarns at incredible prices! Would you like to use our patterns for other than personal use? You can read what you are allowed to do in the Copyright text at the bottom of all our patterns. Happy crafting!
Post a comment to pattern DROPS 92-20
We would love to hear what you have to say about this pattern!
If you want to leave a question, please make sure you select the correct category in the form below, to speed up the answering process. Required fields are marked *.