Clue #14 - 6th edge - gorgeous tulips

It wouldn't be the most beautiful meadow without any tulips in it! So with this new clue we go 4 rounds around our blanket to add a lovely flower detail. Just follow the diagrams - it's not difficult - and enjoy!

ROUND 1: Switch to white (no 01). READ CROCHET TIP-1. Now work according to diagram A.1. Repeat diagram A.1 along entire long side (= 7 times in total) but finish the side with diagram A.2 and work 1 ch, skip 1 dc and ch-space, 1 dc in back loop of next dc, 1 ch, skip 2 dc, 1 dc in back loop of next dc. (Please note that you have automatically decreased 10 sts evenly while working diagram A.1)
In 1st corner work as follows: 1 dc, 3 ch, 1 dc, and 1 dc in back loop of next dc, 1 ch, skip 1 dc, 1 dc in back loop of next dc, 1 ch, skip 1 dc and ch-space, 1 dc in back loop of next dc, 1 ch, skip 1 dc, 1 dc in back loop of next dc, 1 ch, skip ch-space and 2 dc.
Then work according to diagram A.1 along entire short side (= 6 times in total) but finish after 1st short side with 1 dc in back loop of next dc, 1 ch, skip ch-space and 1 dc, 1 dc in back loop of next dc, 1 ch, skip next dc, 1 dc in back loop of next dc.
In 2nd corner work as follows: 1 dc, 3 ch, 1 dc, 1 dc in back loop of next dc, 1 ch, skip 2 dc, 1 dc in back loop of next dc, 1 ch, skip ch-space and 1 dc, 1 dc in back loop of next dc, 1 ch, skip next dc and ch-space, 1 dc in back loop of next dc, 1 ch, skip next dc.
Then continue with diagram A.1 along the other long side (= 8 times in total), finish the side with diagram A.2 then 1 ch, skip 1 dc and ch-space, 1 dc in back loop of next dc, 1 ch, skip 2 dc, 1 dc in back loop of next dc.
In 3rd corner work as follows: 1 dc, 3 ch, 1 dc, and 1 dc in back loop of next dc, 1 ch, skip next dc, 1 dc in back loop in next dc, 1 ch, skip 1 dc and ch-space, 1 dc in back loop of next dc, 1 ch, skip next dc, 1 dc in back loop of next dc, 1 ch, skip ch-space and 2 dc.
Then continue with A.1 (= 6 times in total) but finish after 2nd short side with 1 dc in back loop of next dc, 1 ch, skip ch-space and 1 dc, 1 dc in back loop of next dc, 1 ch, skip next dc, 1 dc in back loop of next dc.
In 4th corner work as follows: 1 dc, 3 ch, 1 dc, and 1 dc in back loop of next dc, 1 ch, skip 2 dc, 1 dc in back loop of next dc, 1 ch, skip ch-space and 1 dc, 1 dc in back loop of next dc, 1 ch, skip 1 dc and ch-space, 1 dc in back loop of next dc, 1 ch, skip next dc.
Finish by working A.1 1 time and 1 sl st in back loop of 1st st at beg of round. READ COLOUR CHANGE! = 231 sts (117 dc + 114 ch) on each long side and 171 sts (87 dc + 84 ch) on each short side ( = 804 sts on round) + 4 3-ch-spaces in corners.
COLOUR CHANGE:
When changing colour work as follows: Before last pull through of last loop on hook, switch colour, pull the last loop on hook through with the new colour.
CROCHET TIP-1: Do not work too tight on round with 1 dc + 1 ch.
Chart A.1.
 |
= ch |
 |
= dc in back loop |
 |
= start |

Chart A.2.
 |
= ch |
 |
= dc in back loop |

Finish the side work 1 ch, skip 1 dc and ch-space, 1 dc in back loop of next dc, 1 ch, skip 2 dc, 1 dc in back loop of next dc.
 |
= ch |
 |
= dc in back loop |

In 1st corner work as follows:
1 dc, 3 ch, 1 dc, and 1 dc in back loop of next dc, 1 ch, skip 1 dc, 1 dc in back loop of next dc, 1 ch, skip 1 dc and ch-space, 1 dc in back loop of next dc, 1 ch, skip 1 dc, 1 dc in back loop of next dc, 1 ch, skip ch-space and 2 dc.
 |
= ch |
 |
= dc in back loop |

Finish 1st short side with 1 dc in back loop of next dc, 1 ch, skip ch-space and 1 dc, 1 dc in back loop of next dc, 1 ch, skip next dc, 1 dc in back loop of next dc.
 |
= ch |
 |
= dc in back loop |

In 2nd corner work as follows: 1 dc, 3 ch, 1 dc, 1 dc in back loop of next dc, 1 ch, skip 2 dc, 1 dc in back loop of next dc, 1 ch, skip ch-space and 1 dc, 1 dc in back loop of next dc, 1 ch, skip next dc and ch-space, 1 dc in back loop of next dc, 1 ch, skip next dc.
 |
= ch |
 |
= dc in back loop |

Finish the 2nd longside with diagram A.2 then 1 ch, skip 1 dc and ch-space, 1 dc in back loop of next dc, 1 ch, skip 2 dc, 1 dc in back loop of next dc.
 |
= ch |
 |
= dc in back loop |

In 3rd corner work as follows: 1 dc, 3 ch, 1 dc, and 1 dc in back loop of next dc, 1 ch, skip next dc, 1 dc in back loop in next dc, 1 ch, skip 1 dc and ch-space, 1 dc in back loop of next dc, 1 ch, skip next dc, 1 dc in back loop of next dc, 1 ch, skip ch-space and 2 dc.
 |
= ch |
 |
= dc in back loop |

Finish 2nd short side with 1 dc in back loop of next dc, 1 ch, skip ch-space and 1 dc, 1 dc in back loop of next dc, 1 ch, skip next dc, 1 dc in back loop of next dc.
 |
= ch |
 |
= dc in back loop |

In 4th corner work as follows: 1 dc, 3 ch, 1 dc, and 1 dc in back loop of next dc, 1 ch, skip 2 dc, 1 dc in back loop of next dc, 1 ch, skip ch-space and 1 dc, 1 dc in back loop of next dc, 1 ch, skip 1 dc and ch-space, 1 dc in back loop of next dc, 1 ch, skip next dc.
 |
= ch |
 |
= dc in back loop |

Finish the round with 1 sl st in back loop of 1st st at beg of round.
 |
= sl st |


ROUND 2 Tulip stems:
Switch to opal green (no 17) and work 1 sl st around next ch, 3 ch (= 1 tr), 1 ch, 1 tr around same ch, 1 ch, skip 3 sts, * 1 tr around next ch, 1 ch, 1 tr around same ch, 1 ch, skip 3 sts * (= A.3), repeat from *-* the entire round but skip only 2 sts at the end of side.
Work as follows in the corners: * 1 tr around ch-space, 1 ch, 1 tr around same ch-space *, 3 ch, repeat *-* 1 more time, 1 ch, skip 4 sts (= 59 2-tr stems on each long side and 44 2-tr stems on each short side) + 4 3-ch-spaces in corners.
Finish round with 1 sl st in 3rd ch from beg of round.
Chart A3:
 |
= ch |
 |
= tr |

Skip only 2 sts (see green) at the end of side.
 |
= ch |
 |
= dc |
 |
= tr |

Work as follows in the corners: * 1 tr around ch-space, 1 ch, 1 tr around same ch-space *, 3 ch, repeat *-* 1 more time, 1 ch, skip 4 sts.
 |
= ch |
 |
= tr |

Finish round with 1 sl st in 3rd ch from beg of round.
 |
= sl st |


ROUND 3 Tulip flower:
Switch to pink (no 15) and work 1 sl st around ch, 3 ch (= 1 tr), work 1 tr around same ch but wait with last pull through (= 2 loops on hook), then work 2 tr more in same st but wait with last pull through (= 4 loops on hook) and pull yarn through all 4 sts on hook, 3 ch. Then work one tulip around every other ch the entire round with 3 ch between each - read TULIP FLOWER.
Work as follows in the corners: 3 ch, 1 TULIP FLOWER, 3 ch (= 59 tulip flower in each long side and 44 tulip flowers in each short side + 3 ch, 1 tulip flower, 3 ch in each corner). Finish with 1 sl st in 3rd ch from beg of round.
1 TULIP FLOWER:
Work 4 tr tog in the same st as follows: Work 1 tr but wait with last pull through (= 2 sts on hook), then work 3 tr more in same st but wait with last pull through (= 5 sts on hook) and pull yarn through all 5 sts on hook.
Work - READ - Tulip flower, 3 ch, skip 3 sts.
 |
= ch |
 |
= tulip flower |

Work as follows in the corners: 3 ch, 1 TULIP FLOWER, 3 ch.
 |
= ch |
 |
= tulip flower |

Finish with 1 sl st in 3rd ch from beg of round.
 |
= sl st |


ROUND 4:
Switch to white (no 01) and work 2 ch, A.4, * 1 ch, 3 htr around next ch-space *, repeat from *-* the entire round, finish with 1 ch in each side.
Work as follows in the corners: 3 htr, 3 ch, 3 htr.
Finish round with 2 htr in the last ch-space and 1 sl st in 2nd st from beg of round, at the same time change to opal green (no 17) (= 60 htr-groups on each long side, 59 ch on each long side and 45 htr-groups on each short side, 44 ch on each short side = 630 htr and 206 ch on round + 4 3-ch-spaces in the corners. Cut the pink (no. 15) and the light turquoise (no 19) strand and fasten off.
Chart A.4: 1 ch, 3 htr around next ch-space.
 |
= ch |
 |
= htr |

Work as follows in the corners: 3 htr, 3 ch, 3 htr.
 |
= ch |
 |
= htr |

Finish round with 2 htr in the last ch-space and 1 sl st in 2nd st from beg of round, at the same time change to opal green (no 17).
 |
= sl st |
 |
= htr |

Tutorial Video
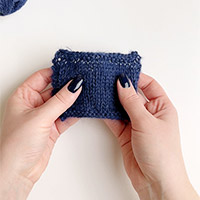
IMPORTANT: The pictures and the video show an example where we crochet the edge around 1 single square. You need to crochet this edge around the whole blanket (40 squares).



I am sorry but I don't think I left you with my email addre
15.02.2021 - 21:38