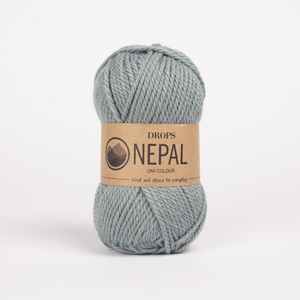
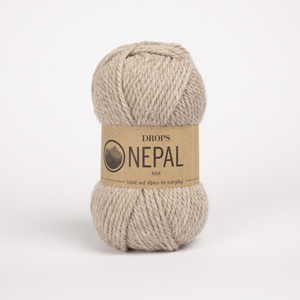
Clicking the ORDER button will redirect you to Wool Warehouse Direct Ltd website
The yarn cost is calculated from the pattern’s smallest size and the yarn’s cheapest product type. Looking for an even better price? You might find it on the DROPS Deals!
-------------------------------------------------------
Alternative Yarn – See how to change yarns here
Yarn Groups A to F – Use the same pattern and change the yarn here
Yarn usage using an alternative yarn – Use our yarn converter here
-------------------------------------------------------
Clicking the ORDER button will redirect you to Wool Warehouse Direct Ltd website
The yarn cost is calculated from the pattern’s smallest size and the yarn’s cheapest product type. Looking for an even better price? You might find it on the DROPS Deals!
Each of our patterns has specific tutorial videos to help you.
These step-by-step tutorials might also help you:
Why is the knitting/crochet tension so important?
Knitting tension is what determines the final measurements of your work, and is usually measured per 10 x 10 cm. It is provided like so: number of stitches in width x number of rows in height - eg: 19 stitches x 26 rows = 10 x 10 cm.
The knitting tension is very individual; some people knit/crochet loosely while others work tightly. You adjust the knitting tension with the needle size, which is why the suggested needle size is only meant as a guide! You need to adjust this (up or down) to ensure that YOUR knitting tension matches the knitting tension provided in the pattern. If you work with a different knitting tension than provided you will have a different yarn consumption, and your work will have different measurements than what the pattern suggests.
The knitting tension also determines which yarns can replace each other. As long as you achieve the same knitting tension you can replace one yarn with another.
See DROPS lesson: How to measure your tension/gauge
See DROPS video: How to make a gauge tension swatch
How do I know how many balls of yarn I need?
The required amount of yarn is provided in grams, eg: 450 g. To calculate how many balls you’ll need you first need to know how many grams are in 1 ball (25g, 50g or 100g). This information is available if you click on the individual yarn quality on our pages. Divide the amount required with the amount of each ball. For example, if each ball is 50g (the most common amount), the calculation will be as follows: 450 / 50 = 9 balls.
Can I use a different yarn than what the pattern suggests?
The important thing when changing from one yarn to another is that the knitting/crochet tension remains the same. This is so that the measurements of the finished piece will be the same as on the sketch provided. It is easier to achieve the same knitting tension using yarns from the same yarn group. It is also possible to work with multiple strands of a thinner yarn to achieve the knitting tension of a thicker one. Please try our yarn converter. We recommend you to always work a test swatch.
Please NOTE: when changing yarn the garment might have a different look and feel to the garment in the photo, due to individual properties and qualities of each yarn.
See DROPS lesson: Can I use a different yarn than the one mentioned in the pattern?
What are the yarn groups?
All our yarns are categorised into yarn groups (from A to F) according to thickness and knitting tension – group A contains the thinnest yarns and group F the thickest. This makes it easier for you to find alternative yarns to our patterns, should you wish to switch yarn. All yarns within the same group have a similar knitting tension and can easily replace each other. However, different yarn qualities have different structures and properties which will give the finished work a unique look and feel.
How do I use the yarn calculator?
At the top of all our patterns you’ll find a link to our yarn calculator, which is a helpful tool should you wish to use a different yarn than suggested. By filling in the yarn quality you wish to replace, the amount (in your size) and number of strands, the calculator will present good alternative yarns with the same knitting tension. Additionally it will tell you how much you’ll require in the new qualities and whether you’ll need to work with multiple strands. Most skeins are 50g (some are 25g or 100g).
If the pattern is worked with multiple colours, every colour will have to be calculated separately. Similarly, if the pattern is worked with several strands of different yarns (for example 1 strand Alpaca and 1 strand Kid-Silk) you will have to find alternatives for each, individually.
Why do you show discontinued yarns in the patterns?
Since different yarns have different qualities and textures we have chosen to keep the original yarn in our patterns. However, you can easily find options among our available qualities by using our yarn calculator, or simply pick a yarn from the same yarn group.
It is possible that some retailers still have discontinued yarns in stock, or that someone has a few skeins at home that they would like to find patterns for.
The yarn calculator will provide both alternative yarn as well as required amount in the new quality.
What size should I knit?
If you think it's hard to decide what size to make, it can be a good idea to measure a garment you own already and like the size of. Then you can pick the size by comparing those measures with the ones available in the pattern's size chart.
You'll find the size chart at the bottom of the pattern.
See DROPS lesson: How to read size chart
Why do I get the wrong knitting tension with the suggested needle size?
The needle size provided in the pattern serves only as a guide, the important thing is to follow the knitting tension. And since knitting tension is very individual, you will have to adjust the needle size to ensure that YOUR tension is the same as in the pattern – maybe you’ll have to adjust 1, or even 2 needle sizes, up or down to achieve the correct tension. For this, we recommend that you work test swatches.
Should you work with a different knitting tension than the one provided, the measurements of the finished garment might deviate from the measurement sketch.
See DROPS lesson: How to measure your tension/gauge
See DROPS video: How to make a tension/gauge swatch
Why is the pattern worked top-down?
Working a garment top-down provides more flexibility and room for personal adjustment. For example it is easier to try the garment on while working, as well as making adjustments to length of yoke and shoulder caps.
The instructions are carefully explaining every step, in the correct order. Diagrams are adjusted to the knitting direction and are worked as usual.
How do I work according to a knitting diagram?
The diagram depicts all rows/rounds, and every stitch seen from the right side. It is read from bottom to top, from right to left. 1 square = 1 stitch.
When working back and forth, every other row is worked from the right side and every other row is worked from the wrong side. When working from the wrong side, the diagram will have to be worked reversed: from left to right, knit stitches are purled, purl stitches are knit etc.
When working in the round every round is worked from the right side and the diagram are worked from right to left on all rounds.
See DROPS lesson: How to read knitting diagrams
How do I work according to a crochet diagram?
The diagram depicts all rows/rounds, and every stitch seen from the right side. It is worked from bottom to top, from right to left.
When working back and forth every other row is worked from the right side: from right to left and every other row is worked from the wrong side: from left to right.
When working in the round, every row in the diagram are worked from the right side, from right to left.
When working a circular diagram you start in the middle and work your way outwards, counter clockwise, row by row.
The rows usually start with a given number of chain stitches (equivalent to the height of the following stitch), this will either be depicted in the diagram or explained in the pattern.
See DROPS lesson: How to read crochet diagrams
How do I work several diagrams simultaneously on the same row/round?
Instructions for working several diagrams after each other on the same row/round, will often be written like so: “work A.1, A.2, A.3 a total of 0-0-2-3-4 times". This means you work A.1 once, then A.2 is worked once, and A.3 is repeated (in width) the number of times provided for your size – in this case like so: S = 0 times, M = 0 times, L=2 times, XL= 3 times and XXL = 4 times.
The diagrams are worked as usual: begin with the first row in A.1, then work the first row in A.2 etc.
See DROPS lesson: How to read knitting diagrams
See DROPS lesson: How to read crochet diagrams
Why are the sleeves shorter in larger sizes?
The total width of the garment (from wrist-to-wrist) will be larger in the larger sizes, despite the actual sleeves being shorter. The larger sizes have longer sleeve caps and wider shoulders, so there will be a good fit in all sizes.
Where on the garment is the length measured?
The measurement sketch/schematic drawing provides information regarding the full length of the garment. If it’s a jumper or a jacket the length is measured from the highest point on the shoulder closest to the neckline, and straight down to the bottom of the garment. It is NOT measured from the tip of shoulder. Similarly, the length of yoke is measured from the highest point on the shoulder and down to where yoke is split into body and sleeves.
On a jacket measures are never taken along bands, unless specifically stated. Always measure inside band stitches when measuring the length.
See DROPS lesson: How to read a schematic drawing
What is a repeat?
Diagrams are often repeated on the round or in height. 1 repeat is the diagram the way it appears in the pattern. If it says to work 5 repeats of A.1 in the round, then you work A.1 a total of 5 times after/next to each other in the round. If it says to work 2 repeats of A.1 vertically/in height you work the entire diagram once, then begin again at the start and work the entire diagram one more time.
Why does the piece start with more chain stitches than it’s worked with?
Chain stitches are slightly narrower than other stitches and to avoid working the cast-on edge too tight, we simply chain more stitches to begin with. The stitch count will be adjusted on the following row to fit the pattern and measurement sketch.
Why increase before the rib edge when the piece is worked top-down?
The rib edge is more elastic and will contract slightly compared to, for example, stocking stitch. By increasing before the rib edge, you avoid a visible difference in width between the rib edge and the rest of the body.
Why increase in the cast-off edge?
It’s very easy to cast off too tightly, and by making yarn overs while casting off (and simultaneously casting these off) you avoid a too tight cast off edge.
See DROPS video: How to bind off with yarn overs (yo)
How do I increase/decrease on every 3rd and 4th row/round alternately?
To achieve an even increase (or decrease) you can increase on, for example: every 3rd and 4th row alternately, like so: work 2 rows and increase on the 3rd row, work 3 rows and increase on the 4th. Repeat this until the increase is complete.
See DROPS lesson: Increase or decrease 1 st on every 3rd and 4th row alternately
How can I work a jacket in the round instead of back and forth?
Should you prefer to work in the round instead of back and forth, you may of course adjust the pattern. You’ll need to add steeks mid-front (usually 5 stitches), and follow the instructions. When you would normally turn and work from the wrong side, simply work across the steek and continue in the round. At the end you’ll cut the piece open, pick up stitches to work bands, and cover the cut edges.
See DROPS video: How to knit steeks and cut open
Can I work a jumper back and forth instead of in the round?
Should you prefer to work back and forth instead of in the round, you may of course adjust the pattern so you work the pieces separately and then assemble them at the end. Divide the stitches for the body in 2, add 1 edge stitch in each side (for sewing) and work the front and back pieces separately.
See DROPS lesson: Can I adapt a pattern for circular needles into straight needles?
Why is the pattern slightly different than what I see in the photo?
Pattern repeats can vary slightly in the different sizes, in order to get the correct proportions. If you’re not working the exact same size as the garment in the photo, yours might deviate slightly. This has been carefully developed and adjusted so that the complete impression of the garment is the same in all sizes.
Make sure to follow instructions and diagrams for your size!
How do I make a women’s size garment into a men’s size one?
If you have found a pattern you like which is available in women’s size it’s not very difficult to convert it to men’s size. The biggest difference will be the length of sleeves and body. Start working on the women size that you think would fit across the chest. The additional length will be worked right before you cast off for the armhole/sleeve cap. If the pattern is worked top-down you can add the length right after the armhole or before the first decrease on sleeve.
Regarding additional yarn amount, this will depend on how much length you add, but it is better with a skein too many than too few.
How do I prevent a hairy garment from shedding?
All yarns will have excess fibres (from production) that might come off as lint or shedding. Brushed yarns (ie hairier yarns) have more of these loose, excess fibres, causing more shedding.
Shedding also depends on what is worn under or over the garment, and whether this pulls at the yarn fibres. It’s therefore not possible to guarantee that there will be no shedding
Below are some tips on how to get the best result when working with hairier yarns:
1. When the garment is finished (before you wash it) shake it vigorously so the looser hairs come off. NOTE: do NOT use a lint roller, brush or any method that pulls at the yarn.
2. Place the garment in a plastic bag and put it in your freezer - the temperature will cause the fibres to become less attached to each other, and excess fibres will come off easier.
3. Leave in the freezer for a few hours before taking it out and shaking it again.
4. Wash the garment according to the instructions on the yarn label.
Why does my garment pill?
Pilling is a natural process that happens to even the most exclusive of fibers. It's a natural sign of wear and tear that is hard to avoid, and that is most visible in high friction areas of your garment like a sweater's arms and cuffs.
You can make your garment look as new by removing the pilling, using a fabric comb or a pill/lint remover.
Ocean Stripes |
|
|
|
Knitted DROPS tunic with raglan and stripes, worked top down in ”Nepal”. Size: S - XXXL.
DROPS 171-32 |
|
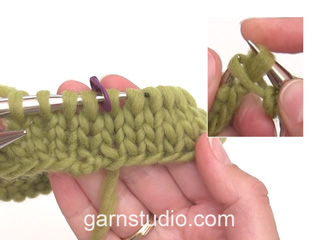
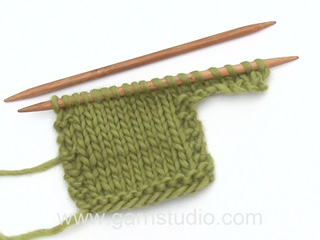
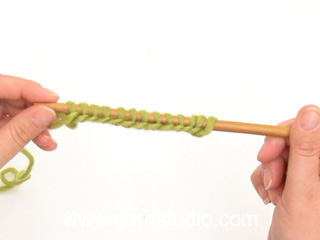
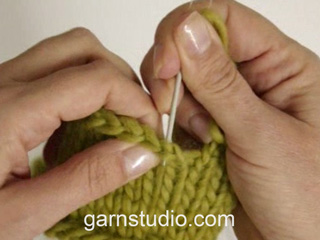
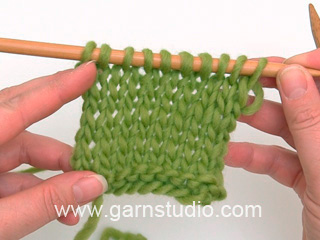
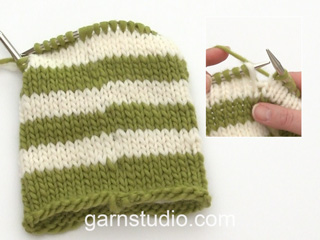
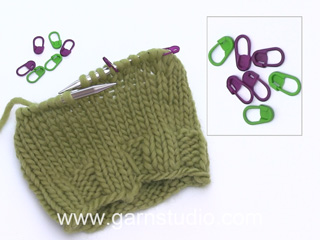
GARTER ST (worked in the round): 1 ridge = 2 rounds. * K 1 round and P 1 round *, repeat from *-*. STRIPES: STRIPE 1: Work 7 cm in stocking st with beige. STRIPE 2: Work 7 cm in stocking st with light beige. STRIPE 3: Work 7 cm in stocking st with fog. STRIPE 4: Work 7 cm in stocking st with medium blue. STRIPE 5: Work 7 cm in stocking st with denim blue. Repeat 1st to 5th stripe until finished measurements. RAGLAN: Inc differently on sleeves and body. Inc with YOs. When inc on every round, work YOs as follows: K every other YO twisted, i.e. K 1st YO (it should make a hole), K 2nd YO twisted (it should NOT make a hole). I.e. every other YO will make a hole and every other YO is worked twisted. When inc on every other round, K all YOs (they should make holes). BODY: Inc with 1 YO on each side of 2nd and 5th marker as follows: Inc every round 16-18-20-24-28-32 times in total. Inc on every other round a total of 11-12-12-12-12-12 times (= 27-30-32-36-40-44 times in total). SLEEVE: Inc with 1 YO after 3rd and 6th marker and before 4th and 1st marker as follows: Inc every round 0-0-2-2-0-0 times in total. Inc every other round 17-21-21-23-24-26 times in total. Inc on every 4th round a total of 1-0-0-0-1-1 time (= 18-21-23-25-25-27 times in total). DECREASE TIP: Dec as follows: Work until 3 sts remain before marker, K the next 2 sts tog (= 1 st dec), K 2 (marker is in the middle of these sts), slip 1 st as if to K, K 1, psso (= 1 st dec). CAST-OFF TIP: If cast-off edge is tight, cast off on a larger needle size. ---------------------------------------------------------- YOKE: Work in the round in STRIPES - see explanation above. Cast on 62-66-70-74-78-82 sts on circular needle size 5.5 mm with beige. Work 2 ridges in GARTER ST - see explanation above and inc 24-24-28-32-32-36 sts evenly on last round with K = 86-90-98-106-110-118 sts. Switch to circular needle size 6 mm. On next round insert 6 markers as follows (insert 2nd and 5th marker in st, insert the others in piece) as follows: Insert 1st marker at beg of round, work 17-18-20-22-23-25 sts, insert 2nd marker in next st (= mid back), work 17-18-20-22-23-25 sts (= back piece), insert 3rd marker, work 8 sts, insert 4th marker (= sleeve), work 17-18-20-22-23-25 sts, insert 5th marker in st (= mid front), work 17-18-20-22-23-25 sts (= front piece), insert 6th marker, work the last 8 sts (= sleeve). Inc for RAGLAN – see explanation above! REMEMBER THE KNITTING TENSION After raglan inc there are 44-50-54-58-58-62 sts on each of the sleeves and 89-97-105-117-127-139 sts on back piece and front piece (i.e. 44-48-52-58-63-69 sts on each side of st with marker) = 266-294-318-350-370-402 sts. Work next round as follows: Work 44-48-52-58-63-69 sts, 1 YO, work st with 2nd marker (= mid back), 1 YO, work 44-48-52-58-63-69 sts, slip the next 44-50-54-58-58-62 sts on a stitch holder for sleeve, cast on 6-6-8-8-10-10 sts under sleeve (insert 1 marker in the middle of the new sts), work 44-48-52-58-63-69 sts, 1 YO, work st with 5th marker (= mid front), 1 YO, work 44-48-52-58-63-69 sts, slip the next 44-50-54-58-58-62 sts on a stitch holder for sleeve, cast on 6-6-8-8-10-10 sts under sleeve (insert 1 marker in the middle of the new sts) = 194-210-230-254-278-302 sts on needle. BODY: Insert 1 marker in the piece. NOW MEASURE PIECE FROM HERE! ROUND 1: K all sts. ROUND 2 (round with YO and dec): Inc 1 YO on each side of st with marker mid front and mid back (= 4 sts inc) and dec 1 st on each side of marker under each of the sleeves – READ DECREASE TIP, (= 4 sts dec, i.e. no of sts is the same). ROUND 3: K all sts. ROUND 4 (round with YO and dec): Work as 2nd round. ROUND 5: K all sts. ROUND 6 (round with YO): Inc 1 YO on each side of st with marker mid front and mid back (= 4 sts inc). ROUND 7: K all sts. ROUND 8 (round with YO): As 6th round = 4 sts inc. Repeat 1st to 8th round until piece measures 35 cm from marker (or continue to desired length) = approx. 64-68-73-79-85-91 sts on each side of st with marker = approx. 258-274-294-318-342-366 sts in total. Work 2 ridges. Loosely cast off - READ CAST-OFF TIP. SLEEVE: = 44-50-54-58-58-62 sts. Work sleeve in stocking st with stripes as before. Slip sts from stitch holder back on double pointed needles size 6 mm and cast on 6-6-8-8-10-10 sts under sleeve = 50-56-62-66-68-72 sts. Insert 1 marker in the middle of the new sts under the sleeve. NOW MEASURE THE PIECE FROM HERE. When piece measures 3 cm, dec 1 st on each side of marker. Dec like this approx. every 4-3½-2½-2-2-2 cm 9-11-14-15-15-16 times in total = 32-34-34-36-38-40 sts. When sleeve measures 44-43-42-41-40-38 cm (NOTE: Shorter measurements in the larger sizes because of longer yoke), switch to double pointed needles size 5.5 mm. Work 2 ridges. Cast off. Work the other sleeve the same way. ASSEMBLY: Sew the opening under the sleeves. |
|
Have you made this or any other of our designs? Tag your pictures in social media with #dropsdesign so we can see them! Do you need help with this pattern?You'll find tutorial videos, a Comments/Questions area and more by visiting the pattern on garnstudio.com. © 1982-2024 DROPS Design A/S. We reserve all rights. This document, including all its sub-sections, has copyrights. Read more about what you can do with our patterns at the bottom of each pattern on our site. |
With over 40 years in knitting and crochet design, DROPS Design offers one of the most extensive collections of free patterns on the internet - translated to 17 languages. As of today we count 304 catalogues and 11422 patterns - 11422 of which are translated into English (UK/cm).
We work hard to bring you the best knitting and crochet have to offer, inspiration and advice as well as great quality yarns at incredible prices! Would you like to use our patterns for other than personal use? You can read what you are allowed to do in the Copyright text at the bottom of all our patterns. Happy crafting!
Comments / Questions (28)
Johnny wrote:
Jeg synes jeres opskrifter er svære at forstå, fordi I vælger at henvise til noget som står længere oppe. kan I ikke bare fortælle nede i opskriften, at når du kommer til den markør så gør du det og når du når til mærke 2 så gør du det osv. I stedet for at begynde at forklare et andet sted, at efter mærke den og den skal du udtage før og efter mærke den og den skal du udtage efter. Hold jer nu til opskriften og forklar tydeligt nede i den, i stedet for alle de der forklaringer.
07.04.2024 - 01:27Carol wrote:
Har jag förstått rätt? När man stickar raglan så ökar man totalt 8 m/varv de första 2 v & sedan vartannat v 4 m & vartannat 8 osv. När jag stickar omslagen på ärmarna så blir hålen närmre halsen på 3 & 6 markören om jag ska vrida vartannat omslag när det ökas varje varv.
19.01.2024 - 18:52DROPS Design answered:
Hei Carol. Se vårt tidligere svar til deg under. mvh DROPS Design
22.01.2024 - 14:10Carol wrote:
Har jag förstått rätt? När man stickar raglan så ökar man totalt 8 m/varv de första 2 v & sedan vartannat v 4 m & vartannat 8 osv. När jag stickar omslagen på ärmarna så blir hålen närmre halsen på 3 & 6 markören om jag ska vrida vartannat omslag när det ökas varje varv. Fel antar jag. Undrar även över: när man ökar på alla varv stickas alla omslag räta? Det gäller även på fram/bakstycket? Blir inte hålen olika då mot när man ökar vartannat varv?
19.01.2024 - 11:27DROPS Design answered:
Hei Carol. Det kommer an på hvilken str. du strikker. Du øker 4 masker på ermene og 4 masker foran/bak = 8 økte masker på de omgangen det økes ved hvert merke. Det økes med 1 kast etter 3. og 6.merke og før 4. og 1.merke, da skal da bli likt på begge sider av halsen. Når det økes på hver omgang strikkes kastene på 1. omgang rett = skal bli hull, men neste omgang / 2. omgang strikkes kastene vridd rett = ikke hull. mvh DROPS Design
22.01.2024 - 11:45Brunni Sahl wrote:
Zusatz zur 1.Frage es wird in jeder Runde zugenommen in der Mitte und es sind doch Löcher abgestrickt in der Mitte,kann doch nicht sein das bei dem 2.Markierer einmal rechts und einmal verschränkt gestrickt wird.
11.11.2023 - 09:24DROPS Design answered:
Liebe Frau Sahl, es soll Löcher in jeder 2. Runde entstehen, so wenn man in jeder Runde zunimmt wird man abwechslungsweise die Umschläge rechts und rechts verschränkt stricken. Viel Spaß beim stricken!
13.11.2023 - 07:30Brunni Sahl wrote:
Hallo habe eine Frage zu den Umschlägen abstricken..Wenn in jeder Reihe zugenommen wird, den 1., 3.,5. Umschlag rechts stricken und jeden 2.,4.,6., Umschlag re verschränkt stricken?? Ist das richtig?
11.11.2023 - 09:18DROPS Design answered:
Liebe Frau Sahl, wenn man in jeder Runde zunimmt dann wird 1 Umschlag verschränkt und der 2. Umschlag "normal" gestrickt - siehe Beschreibung under RAGLANZUNAHMEN". Viel Spaß beim stricken!
13.11.2023 - 07:29Monica Peyronnet wrote:
There is an error in the second paragraph of the yoke section …if you work 22 sts + 22 + 8 + 22 + 22 + 8 thé total is 104 and NOT 106
19.01.2023 - 15:35DROPS Design answered:
Dear Mrs Peryonnet, the number of stitches is right, please note that the markers on mid back and on mid front should be inserted in one stitch and not between stitches, so that you will have (4th size): 22 + 1 + 22 (back piece)+ 8 (sleeve) + 22 + 1 + 22 (front piece) + 8 (sleeve = 22+1+22+8+22+1+22+8= 106 sts. Happy knitting!
19.01.2023 - 18:59Monica Peyronnet wrote:
Am having a lot of trouble doing a yo on either side of the marker middle front and back (which equals basically a double yo) on every row of the yoke because it means I have to do a yo in the yo of the previous row. Obviously if the row after the yo row was knitted (as for the yo of the sleeves which are only done on every other row) I wouldn’t have any problems. How should the increases take place on either side of the mid front and back markers? Help ! I have already undone 3 times!!
19.01.2023 - 15:25DROPS Design answered:
Dear Mrs Peyronnet, on mid front and mid back, you will not work a double yarn over but 1 yarn over on each side of the stitch with the marker on mid front + on mid back: YO, mid-stitch with marker, YO - on next round you will knit the yarn over twisted to avoid holes. You will increase the number of stitches before the marker on mid front/back + the number of sts after the marker on mid front/back. Hope it can help. Happy knitting!
19.01.2023 - 18:43Jenny wrote:
I’m not seeing finished measurements for chest size. When looking at the diagram it appears the measurements are for under the arm. Is this actually the chest size?
10.01.2022 - 19:32DROPS Design answered:
Dear Jenny, the measurements for the chest are the first line after the underarm. It ranges from 42 to 66 cm. Happy knitting!
10.01.2022 - 20:40Lorena wrote:
Ho un dubbio quando dice che si deve aumentare per il raglan ad ogni giro cosa faccio un giro faccio la gettata e il giro dopo lavoro la maglia gettata oppure devo lavorare la maglia gettata e fare contemporaneamente un’altra gettata ? E quando è ogni 2 giri? Grazie
12.07.2021 - 00:30DROPS Design answered:
Buonasera Lorena, quando si aumenta su tutti i giri deve lavorare come indicato su tutti i giri. Ogni 2 giri si intende 1 giro si e 1 no. Buon lavoro!
14.07.2021 - 18:20Christine wrote:
I also am confused after placing markers. I do not see instructions as to how many times to increase every round and how many times to increase every other rounds for the raglan.
23.01.2021 - 19:06DROPS Design answered:
Dear Christine, you then increase for raglan as explained under RAGLAN at the very beginning of the pattern. You will incrase with/without yarn overs and on a different rythm on body and sleeve. Happy knitting!
25.01.2021 - 08:55