-------------------------------------------------------
Alternative Yarn – See how to change yarns here
Yarn Groups A to F – Use the same pattern and change the yarn here
Yarn usage using an alternative yarn – Use our yarn converter here
-------------------------------------------------------
= K from RS, P from WS | |
= P from RS, K from WS |
Each of our patterns has specific tutorial videos to help you.
These step-by-step tutorials might also help you:
Why is the knitting/crochet tension so important?
Knitting tension is what determines the final measurements of your work, and is usually measured per 10 x 10 cm. It is provided like so: number of stitches in width x number of rows in height - eg: 19 stitches x 26 rows = 10 x 10 cm.
The knitting tension is very individual; some people knit/crochet loosely while others work tightly. You adjust the knitting tension with the needle size, which is why the suggested needle size is only meant as a guide! You need to adjust this (up or down) to ensure that YOUR knitting tension matches the knitting tension provided in the pattern. If you work with a different knitting tension than provided you will have a different yarn consumption, and your work will have different measurements than what the pattern suggests.
The knitting tension also determines which yarns can replace each other. As long as you achieve the same knitting tension you can replace one yarn with another.
See DROPS lesson: How to measure your tension/gauge
See DROPS video: How to make a gauge tension swatch
How do I know how many balls of yarn I need?
The required amount of yarn is provided in grams, eg: 450 g. To calculate how many balls you’ll need you first need to know how many grams are in 1 ball (25g, 50g or 100g). This information is available if you click on the individual yarn quality on our pages. Divide the amount required with the amount of each ball. For example, if each ball is 50g (the most common amount), the calculation will be as follows: 450 / 50 = 9 balls.
Can I use a different yarn than what the pattern suggests?
The important thing when changing from one yarn to another is that the knitting/crochet tension remains the same. This is so that the measurements of the finished piece will be the same as on the sketch provided. It is easier to achieve the same knitting tension using yarns from the same yarn group. It is also possible to work with multiple strands of a thinner yarn to achieve the knitting tension of a thicker one. Please try our yarn converter. We recommend you to always work a test swatch.
Please NOTE: when changing yarn the garment might have a different look and feel to the garment in the photo, due to individual properties and qualities of each yarn.
See DROPS lesson: Can I use a different yarn than the one mentioned in the pattern?
What are the yarn groups?
All our yarns are categorised into yarn groups (from A to F) according to thickness and knitting tension – group A contains the thinnest yarns and group F the thickest. This makes it easier for you to find alternative yarns to our patterns, should you wish to switch yarn. All yarns within the same group have a similar knitting tension and can easily replace each other. However, different yarn qualities have different structures and properties which will give the finished work a unique look and feel.
How do I use the yarn calculator?
At the top of all our patterns you’ll find a link to our yarn calculator, which is a helpful tool should you wish to use a different yarn than suggested. By filling in the yarn quality you wish to replace, the amount (in your size) and number of strands, the calculator will present good alternative yarns with the same knitting tension. Additionally it will tell you how much you’ll require in the new qualities and whether you’ll need to work with multiple strands. Most skeins are 50g (some are 25g or 100g).
If the pattern is worked with multiple colours, every colour will have to be calculated separately. Similarly, if the pattern is worked with several strands of different yarns (for example 1 strand Alpaca and 1 strand Kid-Silk) you will have to find alternatives for each, individually.
Why do you show discontinued yarns in the patterns?
Since different yarns have different qualities and textures we have chosen to keep the original yarn in our patterns. However, you can easily find options among our available qualities by using our yarn calculator, or simply pick a yarn from the same yarn group.
It is possible that some retailers still have discontinued yarns in stock, or that someone has a few skeins at home that they would like to find patterns for.
The yarn calculator will provide both alternative yarn as well as required amount in the new quality.
What size should I knit?
If you think it's hard to decide what size to make, it can be a good idea to measure a garment you own already and like the size of. Then you can pick the size by comparing those measures with the ones available in the pattern's size chart.
You'll find the size chart at the bottom of the pattern.
See DROPS lesson: How to read size chart
Why do I get the wrong knitting tension with the suggested needle size?
The needle size provided in the pattern serves only as a guide, the important thing is to follow the knitting tension. And since knitting tension is very individual, you will have to adjust the needle size to ensure that YOUR tension is the same as in the pattern – maybe you’ll have to adjust 1, or even 2 needle sizes, up or down to achieve the correct tension. For this, we recommend that you work test swatches.
Should you work with a different knitting tension than the one provided, the measurements of the finished garment might deviate from the measurement sketch.
See DROPS lesson: How to measure your tension/gauge
See DROPS video: How to make a tension/gauge swatch
Why is the pattern worked top-down?
Working a garment top-down provides more flexibility and room for personal adjustment. For example it is easier to try the garment on while working, as well as making adjustments to length of yoke and shoulder caps.
The instructions are carefully explaining every step, in the correct order. Diagrams are adjusted to the knitting direction and are worked as usual.
How do I work according to a knitting diagram?
The diagram depicts all rows/rounds, and every stitch seen from the right side. It is read from bottom to top, from right to left. 1 square = 1 stitch.
When working back and forth, every other row is worked from the right side and every other row is worked from the wrong side. When working from the wrong side, the diagram will have to be worked reversed: from left to right, knit stitches are purled, purl stitches are knit etc.
When working in the round every round is worked from the right side and the diagram are worked from right to left on all rounds.
See DROPS lesson: How to read knitting diagrams
How do I work according to a crochet diagram?
The diagram depicts all rows/rounds, and every stitch seen from the right side. It is worked from bottom to top, from right to left.
When working back and forth every other row is worked from the right side: from right to left and every other row is worked from the wrong side: from left to right.
When working in the round, every row in the diagram are worked from the right side, from right to left.
When working a circular diagram you start in the middle and work your way outwards, counter clockwise, row by row.
The rows usually start with a given number of chain stitches (equivalent to the height of the following stitch), this will either be depicted in the diagram or explained in the pattern.
See DROPS lesson: How to read crochet diagrams
How do I work several diagrams simultaneously on the same row/round?
Instructions for working several diagrams after each other on the same row/round, will often be written like so: “work A.1, A.2, A.3 a total of 0-0-2-3-4 times". This means you work A.1 once, then A.2 is worked once, and A.3 is repeated (in width) the number of times provided for your size – in this case like so: S = 0 times, M = 0 times, L=2 times, XL= 3 times and XXL = 4 times.
The diagrams are worked as usual: begin with the first row in A.1, then work the first row in A.2 etc.
See DROPS lesson: How to read knitting diagrams
See DROPS lesson: How to read crochet diagrams
Why are the sleeves shorter in larger sizes?
The total width of the garment (from wrist-to-wrist) will be larger in the larger sizes, despite the actual sleeves being shorter. The larger sizes have longer sleeve caps and wider shoulders, so there will be a good fit in all sizes.
Where on the garment is the length measured?
The measurement sketch/schematic drawing provides information regarding the full length of the garment. If it’s a jumper or a jacket the length is measured from the highest point on the shoulder closest to the neckline, and straight down to the bottom of the garment. It is NOT measured from the tip of shoulder. Similarly, the length of yoke is measured from the highest point on the shoulder and down to where yoke is split into body and sleeves.
On a jacket measures are never taken along bands, unless specifically stated. Always measure inside band stitches when measuring the length.
See DROPS lesson: How to read a schematic drawing
What is a repeat?
Diagrams are often repeated on the round or in height. 1 repeat is the diagram the way it appears in the pattern. If it says to work 5 repeats of A.1 in the round, then you work A.1 a total of 5 times after/next to each other in the round. If it says to work 2 repeats of A.1 vertically/in height you work the entire diagram once, then begin again at the start and work the entire diagram one more time.
Why does the piece start with more chain stitches than it’s worked with?
Chain stitches are slightly narrower than other stitches and to avoid working the cast-on edge too tight, we simply chain more stitches to begin with. The stitch count will be adjusted on the following row to fit the pattern and measurement sketch.
Why increase before the rib edge when the piece is worked top-down?
The rib edge is more elastic and will contract slightly compared to, for example, stocking stitch. By increasing before the rib edge, you avoid a visible difference in width between the rib edge and the rest of the body.
Why increase in the cast-off edge?
It’s very easy to cast off too tightly, and by making yarn overs while casting off (and simultaneously casting these off) you avoid a too tight cast off edge.
See DROPS video: How to bind off with yarn overs (yo)
How do I increase/decrease on every 3rd and 4th row/round alternately?
To achieve an even increase (or decrease) you can increase on, for example: every 3rd and 4th row alternately, like so: work 2 rows and increase on the 3rd row, work 3 rows and increase on the 4th. Repeat this until the increase is complete.
See DROPS lesson: Increase or decrease 1 st on every 3rd and 4th row alternately
How can I work a jacket in the round instead of back and forth?
Should you prefer to work in the round instead of back and forth, you may of course adjust the pattern. You’ll need to add steeks mid-front (usually 5 stitches), and follow the instructions. When you would normally turn and work from the wrong side, simply work across the steek and continue in the round. At the end you’ll cut the piece open, pick up stitches to work bands, and cover the cut edges.
See DROPS video: How to knit steeks and cut open
Can I work a jumper back and forth instead of in the round?
Should you prefer to work back and forth instead of in the round, you may of course adjust the pattern so you work the pieces separately and then assemble them at the end. Divide the stitches for the body in 2, add 1 edge stitch in each side (for sewing) and work the front and back pieces separately.
See DROPS lesson: Can I adapt a pattern for circular needles into straight needles?
Why is the pattern slightly different than what I see in the photo?
Pattern repeats can vary slightly in the different sizes, in order to get the correct proportions. If you’re not working the exact same size as the garment in the photo, yours might deviate slightly. This has been carefully developed and adjusted so that the complete impression of the garment is the same in all sizes.
Make sure to follow instructions and diagrams for your size!
How do I make a women’s size garment into a men’s size one?
If you have found a pattern you like which is available in women’s size it’s not very difficult to convert it to men’s size. The biggest difference will be the length of sleeves and body. Start working on the women size that you think would fit across the chest. The additional length will be worked right before you cast off for the armhole/sleeve cap. If the pattern is worked top-down you can add the length right after the armhole or before the first decrease on sleeve.
Regarding additional yarn amount, this will depend on how much length you add, but it is better with a skein too many than too few.
How do I prevent a hairy garment from shedding?
All yarns will have excess fibres (from production) that might come off as lint or shedding. Brushed yarns (ie hairier yarns) have more of these loose, excess fibres, causing more shedding.
Shedding also depends on what is worn under or over the garment, and whether this pulls at the yarn fibres. It’s therefore not possible to guarantee that there will be no shedding
Below are some tips on how to get the best result when working with hairier yarns:
1. When the garment is finished (before you wash it) shake it vigorously so the looser hairs come off. NOTE: do NOT use a lint roller, brush or any method that pulls at the yarn.
2. Place the garment in a plastic bag and put it in your freezer - the temperature will cause the fibres to become less attached to each other, and excess fibres will come off easier.
3. Leave in the freezer for a few hours before taking it out and shaking it again.
4. Wash the garment according to the instructions on the yarn label.
Why does my garment pill?
Pilling is a natural process that happens to even the most exclusive of fibers. It's a natural sign of wear and tear that is hard to avoid, and that is most visible in high friction areas of your garment like a sweater's arms and cuffs.
You can make your garment look as new by removing the pilling, using a fabric comb or a pill/lint remover.
Brume de Mer |
|||||||
|
|
||||||
Jacket or jumper with round yoke and hat in Passion or Air.
DROPS Baby 11-14 |
|||||||
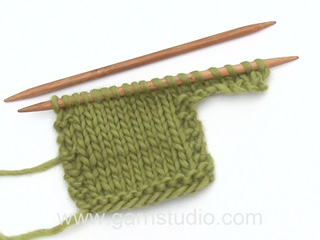
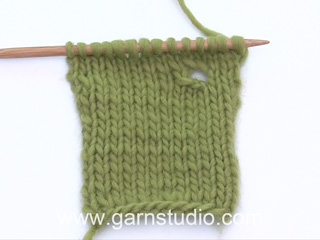
Knitting tension: Jacket/jumper: 16 sts x 21 rows on needles size 5.5 mm in stocking sts = 10 x 10 cm. Hat: 17 sts x 22 rows on needle size 5 mm = 10 x 10 cm. Garter sts (back and forth on needle): knit all rows. Pattern: See diagrams M.1 and M.2. The diagrams show the pattern from the right side. Buttonhole (apply to jacket): Make 5 buttonholes on right front edge from the RS. 1 buttonhole = cast off the 3rd st from the edge and cast on 1 new st on the return row. Make buttonholes as follows: Size 1/3 months: 1, 6, 11, 17 and 22 cm Size 6/9 months: 1, 7, 12, 18 and 23 cm Size 12/18 months: 1, 7, 13, 20 and 26 cm Size 24 months: 1, 8, 15, 22 and 28 cm Note! There will also be a buttonhole on the neck border. ---------------------------------------------------------------------- JACKET: Front and back piece: Knit the jacket back and forth on circular needle from mid front. Cast on 84-94-104-116 sts (incl 4 edge sts each side towards mid front, knitted in garter sts throughout) with Passion or Air on needle size 5.5 mm and knit M.1 with 4 edge sts each side – remember buttonholes on right front piece. After M.1 continue in stocking sts. When piece measures 16-17-19-21 cm, knit next row as follows from the RS: knit 19-22-24-27 sts (= front piece), cast off 6 sts for armhole, knit 34-38-44-50 sts (= back piece), cast off 6 sts for armhole, knit 19-22-24-27 sts (= front piece). Put the piece aside and knit the sleeves. Sleeve: Cast on 24-26-28-28 sts with Passion or Air on pointed needles size 5.5 mm. Knit M.1 and finish the sleeve in stocking sts. At the same time when piece measures 3 cm inc 1 st each side on every 5th row a total of 5-6-6-8 times = 34-38-40-44 sts. When piece measures 15-17-18-23 cm cast off 4 sts each side for armhole = 26-30-32-36 sts. Knit the other sleeve. Yoke: Put sleeves in on the same needle as body piece where you cast off for armholes = 124-142-156-176 sts. Continue in M.2 with edge sts in garter sts. At the same time dec 12-14-14-16 sts evenly on every 4th row a total of 6-6-7-7 times (make sure to dec on a row in stocking sts from the RS, and don’t dec over the edge sts) = 52-58-58-64 sts. When piece measures 27-29-32-35 cm dec 10-12-10-12 sts evenly on row = 42-46-48-52 sts. Knit 4 rows garter sts over all sts, at the same time make a buttonhole over the others on right front edge. Cast off. Assembly: Sew the sleeve seams and sew the openings under arms. Sew on buttons. ---------------------------------------------------------------------- JUMPER: Front and back piece: Knit the jumper round on circular needle. Cast on 80-90-100-112 sts with Passion or Air on needle size 5.5 mm and knit M.1. After M.1 continue in stocking sts. When piece measures 16-17-19-21 cm, knit next row as follows from the RS: cast off 6 sts for armhole, knit 34-39-44-50 sts (= front piece), cast off 6 sts for armhole, knit 34-39-44-50 sts (= back piece). Put the piece aside and knit the sleeves. Sleeve: Cast on 24-26-28-28 sts with Passion or Air on pointed needles size 5.5 mm. Knit M.1 and finish the sleeve in stocking sts. At the same time when piece measures 3 cm inc 1 st each side on every 5th row a total of 5-6-6-8 times = 34-38-40-44 sts. When piece measures 15-17-18-23 cm cast off 4 sts each side for armhole = 26-30-32-36 sts. Knit the other sleeve. Insert a marking thread between the 2 middle sts at the top of left sleeve. Yoke: Put sleeves in on the same needle as body piece where you cast off for armholes (put the sleeve with MT in on the left side) = 120-138-152-172 sts. Continue in M.2. At the same time dec 12-14-14-16 sts evenly on every 4th row a total of 6-6-7-7 times (make sure to dec on a row in stocking sts from the RS). At the same time after 4-4-5-5 dec divide the piece on mid left shoulder for slit (ref MT) and finish the jumper back and forth on needle. Cast on 4 new sts on back piece by the slit and continue with these 4 sts and 4 sts on front piece in garter sts. At the same time after 1 cm make 1 buttonhole on the front piece by the slit. Buttonhole = cast off 3rd st from edge and cast on 1 new st on next row. Continue the dec as described earlier but do not dec over the 4 slit sts each side. When piece measures 27-29-32-35 cm dec 10-12-10-12 sts evenly on row = 42-46-48-52 sts. Knit 4 rows garter sts over all sts, at the same time make a buttonhole over the other. Cast off. Assembly: Sew the sleeve seams and sew the openings under arms. Sew on buttons on shoulder. ---------------------------------------------------------------------- HAT: To fit head circumference: 41-44-46-48 cm Loosely cast on 56-60-64-68 sts on pointed needles size 5 mm with Passion or Air. Knit 10 cm garter sts and continue in stocking sts. When piece measures 17-18-19-20 cm dec 9-10-10-11 sts evenly and repeat the dec on every other row a total of 5 times = 11-10-14-13 sts. Cut the thread and pull through remaining sts. Sew tog hat mid back. Fold edge approx 6 cm towards the RS and attach. ---------------------------------------------------------------------- |
|||||||
Diagram explanations |
|||||||
|
|||||||
Have you made this or any other of our designs? Tag your pictures in social media with #dropsdesign so we can see them! Do you need help with this pattern?You'll find tutorial videos, a Comments/Questions area and more by visiting the pattern on garnstudio.com. © 1982-2024 DROPS Design A/S. We reserve all rights. This document, including all its sub-sections, has copyrights. Read more about what you can do with our patterns at the bottom of each pattern on our site. |
With over 40 years in knitting and crochet design, DROPS Design offers one of the most extensive collections of free patterns on the internet - translated to 17 languages. As of today we count 304 catalogues and 11422 patterns - 11422 of which are translated into English (UK/cm).
We work hard to bring you the best knitting and crochet have to offer, inspiration and advice as well as great quality yarns at incredible prices! Would you like to use our patterns for other than personal use? You can read what you are allowed to do in the Copyright text at the bottom of all our patterns. Happy crafting!
Comments / Questions (14)
Stephanie wrote:
Guten Morgen, Ich hab eine Frage zum Pulli zum Schluss werden bei der kleinsten Größe zwei mal sechs Maschen abgekettet. Müsste dann nicht das Endergebnis 33M sein? "6 M für das Armloch abketten, 34-39-44-50 M (= Vorderteil), 6 M für das Armloch abketten, 34-39-44-50 M (= Rückenteil)." Beste Grüße Stephanie
09.12.2023 - 09:16DROPS Design answered:
Liebe Stephanie, beim Pullover sind die 80 Maschen so verteilt: 34 Maschen für das Vorder- und das Rückenteil und 6 Maschen beidseitig für die Armlöcher (34+6+34+6= 80 Maschen). Viel Spaß beim stricken!
11.12.2023 - 08:10Gudrun wrote:
Liebes DROPS-Team! Sie schreiben: \"Die Wolle hat eine Tendenz dazu, sich zusammenzudrehen. Sie sollten die Wolle auseinanderdrehen, um ein gutes Resultat zu bekommen.\" Wie wird Wolle auseinandergedreht und wie oft muss ich das machen? Betrifft das die Wolle Air? Viele Grüße von Gudrun
14.01.2023 - 21:48Gudrun wrote:
Liebes DROPS-Team, unter "Tipp zum Stricken" steht: Die Wolle hat eine Tendenz dazu, sich zusammenzudrehen. Sie sollten die Wolle auseinanderdrehen, um ein gutes Resultat zu bekommen. Das verstehe ich nicht. Wie muss ich die Wolle auseinanderdrehen? Viele Grüße von Gudrun
29.12.2022 - 23:01Michelle Campbell wrote:
On the hat, will you please explain what this means? "...on every other row a total of 5 times = 11-10-14-13 sts. I do not understand what you mean by stating = 11-10-14-13 sts. I realize that it means decreasing, but unsure as to what the number of stitches means.
30.04.2021 - 19:01DROPS Design answered:
Dear Michelle, those are the number of stitches you will have left over after doing all those decreases. Happy Knitting!
01.05.2021 - 00:26Sille wrote:
Hej I opskriften omkring aflukning til knaphul, står der at man skal lukke 3 af for hvert hul, og slå 1 op på næste pind. Giver dette det rigtige maskeantal? Og er det rigtigt forstået?
10.01.2021 - 19:14DROPS Design answered:
Hej Sille, nej du lukker 3. (tredje) maske af (ikke 3 masker). God fornøjelse!
15.01.2021 - 15:54Lilly wrote:
Pullover-Teilung an der Schulter: beim Teilen/Wenden bin ich auf der linken Seite des Rückenteils. Werden die 4 Maschen dann auf links angeschlagen? Wie geht das? Oder schlage ich rechts an als Anfang der Krausrippen? Sind am Rückenteil 8 Maschen Krausrippen und am Vorderteil 4? Es heißt nach dem Anschlagen von 4 Maschen, 4 M Krausrippe auf jeder Seite des Schlitzes weiter stricken. Gleichzeitig nach 1 cm 1 Knopfloch : nach 1cm Krausrippenhöhe? Vielen Dank schon im Voraus!
03.11.2020 - 17:53DROPS Design answered:
Liebe Lilly, wenn Sie die Passen teilen sollen Sie 4 neuen Maschen am Ende der 2 ersten Reihen anschlagen, diese 4 neuen Maschen stricken Sie jetzt krausrechts - und die anderen Maschen wie zuvor, dh es sind 4 Maschen kraus rechts am Anfang der Hinreihe (= Schulter) und auch 4 Maschen kraus rechts am Ende der Hinreihen (= am Rückenteil)- 1 cm nach dieser Teilung stricken Sie 1 Knofloch. Viel Spaß beim stricken!
04.11.2020 - 08:48Karine wrote:
Hei. Finnes denne i størrelse 4 år også? Hvis ikke, har dere forslag til en annen oppskrift der jeg kan strikke samme mønster/diagram?
08.10.2019 - 20:07DROPS Design answered:
Hei Karine, Det finnes mange oppskrifter for barn i vår samling, bare skriv barnegenser i søk-boksen og velg den du liker best. God fornøyelse!
09.10.2019 - 12:32Janet wrote:
What does (ref MT) mean in this sentence? At the same time after 4-4-5-5 dec divide the piece on mid left shoulder for slit (ref MT)
19.02.2019 - 14:02DROPS Design answered:
Dear Janet, after you have decrease 4-4-5-5 times, divide piece where you added the marker on left shoulder and continue working back and forth casting on 4 new sts on each side for the button bands. Happy knitting!
19.02.2019 - 15:19Eva Wahlbeck wrote:
Det står att man ska öka vart femte varv i båda sidorna på ärmen, betyder det, att man räknar ökningsvarvet som varv ett? Det blir konstigt, då man ska göra ökningar på avigsidan,
02.02.2019 - 15:23DROPS Design answered:
Hej, det blir 4 varv mellan ökningarna, så varannan gång görs då ökningarna från avigsidan.
18.02.2019 - 17:51Peppis wrote:
Hur dan ökning ska man göra?\\r\\nDe blev snett på ena sidan och rakt på andra.
27.06.2018 - 21:13