
Catégories populaires
Vous cherchez un fil?


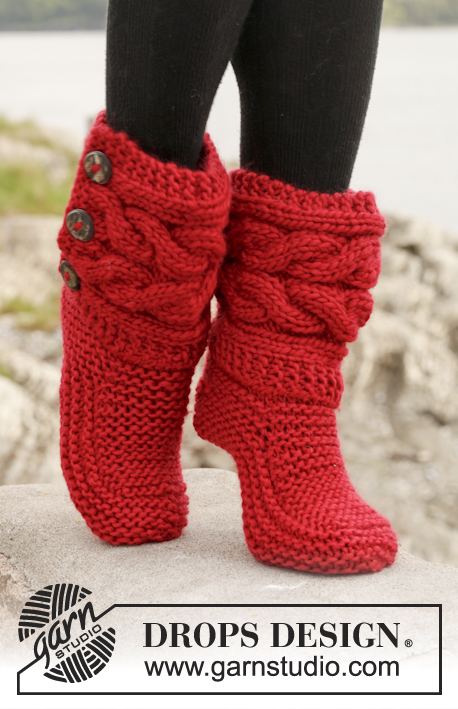
Comment tricoter et assembler les chaussons DROPS 150-4

Ces chaussons se tricotent en DROPS Snow, et c'est la laine que nous utilisons dans la vidéo.
Il vous faudra également lire les explications et regarder le diagramme pour pouvoir suivre la vidéo. Vous trouverez ce modèle en cliquant sur la photo ci-dessous.
Modèles utilisant cette technique
Vidéo #567, classé dans: Tutoriels Modèles, Chaussettes & Chaussons, Tutoriels vidéo, modèles tricot
Nos vidéos n'ont pas de son. Nous sommes une entreprise internationale et nos vidéos sont regardées par des personnes parlant différentes langues et beaucoup d'entre elles ne comprennent pas le français. Comme on ne peut utiliser aucune langue déterminée, nous avons des instructions écrites pour accompagner la vidéo, et il n'y a pas de son perturbant lorsque vous regardez la vidéo.
Vous pouvez ajuster la vitesse de la vidéo en cliquant sur l'icône sur la barre de lecture.
Écrire un commentaire ou une question à propos de cette vidéo
Votre adresse mail ne sera pas publiée. Les champs obligatoires sont indiqués par une *.
Vous pourriez aussi aimer...


Avec plus de 40 ans dans la conception de modèles tricot et crochet, DROPS Design offre l'une des plus vastes collections de modèles gratuits sur internet - traduits dans 17 langues. À ce jour, on compte 325 catalogues et 12298 modèles en français.
Nous nous efforçons de vous apporter le meilleur de ce que le tricot et le crochet peuvent vous offrir, inspiration et conseils mais également des fils de haute qualité à des prix incroyables! Vous souhaiteriez utiliser nos modèles autrement que pour un usage personnel? Vous pouvez lire ce que vous êtes autorisés à faire dans le Copyright en bas de page de chacun de nos modèles. Bon tricot!
Edwina a écrit:
Thank you. It has now worked out perfectly. :)
30.06.2015 - 13:42Edwina a écrit:
Thank you. However, I would just like to ask you something. I have tried to do this but it seems that on one side i have a lot of stitches and the opposite side I dont. In your video your stitches seem to be evenly spaced and mine do not - its almost lopsided. That is why I wanted to know more or less how many stitches are on each needle. I hope this makes sense to you. Thanks again.
29.06.2015 - 15:30DROPS Design :
Dear Edwina, simply distribute your sts evenly onto your needles, inserting 1 marker mid front on toe + 1 marker mid back on heel. Happy knitting!
30.06.2015 - 09:50Edwina a écrit:
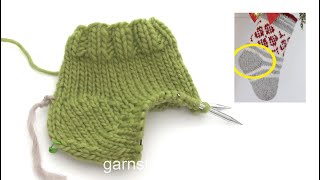
I have watched the video so many times. At the point where I have just picked up the stitches (14) on the sides, I have so many stitches on those needles and it doesn't look like yours and you SPEED up the video at that stage so I cannot make it out. At what stage did you start the perl row and how many stitches should be on each needle. Thank you.
29.06.2015 - 09:10DROPS Design :
Dear Edwina, when all sts from thread are back on needle, first pick up sts along the left side of mid part, then knit them, work sts from foot, pick up sts along right side of mid part and knit them. Start now in garter st in the round, starting with a P round. Happy knitting!
29.06.2015 - 11:43Tem como fazer com a agulha comum de uma ponta só ou seja duas agulhas
14.05.2015 - 14:38Eda a écrit:
Não tinha ideia de como é feita, se não tivesse assistido o video.Obrigada por passar tão vasto conhecimento.São lindas as pantufas.
13.05.2015 - 08:03Blanca Armida a écrit:
Nunca hubiera podido hacer estas pantunflas sin el video mil gracias con estas indicaciones ya podre hacerlas
18.02.2015 - 04:45I would like to knit this so the buttons would actually be functional rather than just decorative. My question is would that mess with the stability or contruction of the slipper? The main problem I see would be where the upper part connects to the foot. Let me know what you think.
12.02.2015 - 22:00DROPS Design :
Dear Maria, if you like to make buttonholes, you will have to adjust lenght and place them following the button size and where you like them to be. These slippers are great with buttons just like decoration and can be easily put out/on like this. Happy knitting!
13.02.2015 - 11:14Merci d'exister. Les explications sont assez claires surtout pour une débutante. Les modèles sont intéressants pour tout âge. J'espère pouvoir apprendre avec vous longtemps. ; )
04.12.2014 - 19:13Löytyykö jostain apuvideota tuon varren tekemiseen? Tossu osan sain jo aikaiseksi hienosti ohjeen ja videon avulla mutta kaipailen kuviollisesta varresta ohjevideota. Ja monellako aloitus silmukalla tossusta pitäisi tulla aikuisen jalkaan sopiva, 39-40 koko? Tuolla 40 silmukalla sain 3v lapseni jalkaan sopivan tossun.
02.11.2014 - 20:14Bukowsky a écrit:
Where is the tutorial for the loose leg worked across?
22.10.2014 - 01:00DROPS Design :
Dear Mrs Bukowsky, you will find relevant videos to the loose leg (such as garter st, increase, cables..) under the tab "video" on the pattern page. Click here to learn how to read diagram. Happy knitting!
22.10.2014 - 10:19