
Popular categories
Looking for a yarn?


Comments / Questions (33)
![]() Amy wrote:
Amy wrote:
In flounce 6, I think there is a mistake. It says piece is now 49cm. That is the same size as flounce 5. Please clarify
18.08.2024 - 03:12DROPS Design answered:
Dear Amy, you worked the 5th flounce when the piece measured 40 cm. Then you knitted in stocking stitch until the piece measures 49cm to separate both flounces. At this point, you create a flounce and join it to the 49cm mark of the piece. From here on you don't need to knit a separation between flounces, you immediately start the yoke. So the last flounce is added when the piece measures 49cm and then you continue, but instead of simply knitting in stocking stitch you work the yoke. Happy knitting!
18.08.2024 - 23:07
![]() Amy Krauss wrote:
Amy Krauss wrote:
When you indicate ‘ put piece aside.’ what does that mean? Are we supposed to leave each section on needle holders?
19.05.2024 - 06:20DROPS Design answered:
Dear Amy, yes, when you leave a piece aside it means that you take it off the main needles and leave it on stitch holders, cables, threads or extra needles. Happy knitting!
20.05.2024 - 00:20
![]() Amy Krauss wrote:
Amy Krauss wrote:
How many grams of yarn do I need to purchase for a medium dress? Can this be made longer? If so,how could I adapt the pattern?
27.04.2024 - 06:30DROPS Design answered:
Dear Amy, for a size M, you need about 450 gramms of DROPS Belle. Please understand that with many thousands of patterns on our site, we cannot modify our patterns to each individual request. Having said that, yes, you can make it longer, if I would do it, I would add length and another ruffle at the bottom, that is just as much larger than the previous, then the original lowest ruffle was from the original second lowest ruffle. Happy Knitting!
27.04.2024 - 07:43
![]() Magdalena wrote:
Magdalena wrote:
Mam pytanie co do tego wzoru. Na zdjęciu falbanki są przyszywane w odstępach. A ja wg rozpisanego wzoru rozumiem, ze nakłada się jedną na drugą i z tego powstaje falbana na falbanie. Czy ja coś źle rozumiem? Bardzo proszę o wyjaśnienie. Pozdrawiam. Magda
23.02.2022 - 12:36DROPS Design answered:
Witaj Magdo, w opisie falbanek jest opisana sama mała falbanka i dalsza (gładka) część sukienki > to jest w sumie cała falbanka. Łączysz poszczególne części dołu sukienki (falbanki) razem jak w opisie przerabiając 2 części razem. Powodzenia!
25.02.2022 - 11:28
![]() Lilianna wrote:
Lilianna wrote:
Meine Frage lautete aber anders: es heisst in der Anleitung, dass man nach dem sechsten Volant das Vorder- und Rückenteil mit Krausrippen stricken soll. Das heisst, dass ein kraus rechts Muster entsteht, obwohl in den Volants ein hauptsächlich glatt rechts Muster besteht. Ist das korrekt?
28.07.2018 - 16:52DROPS Design answered:
Liebe Lilianna, ja genau, wenn Sie Vorder- und Rückenteil separat stricken, wird jeder Teil krausrechts gestrickt = immer rechts stricken (Hin- sowie Rückreihen). Viel Spaß beim stricken!
31.07.2018 - 09:02
![]() Lilianna wrote:
Lilianna wrote:
Ich finde das Kleid super! Ein paar Frage aber. Wenn ich die Volants in Runden hauptsächlich rechts stricke, resultiert ein vorwiegend glatt rechts Muster. Wenn ich den Vorderteil rechts hin- und zurück-stricke, resultiert ein kraus rechts Muster. Ist das korrekt? Und nach dem 6. Volant wechsle ich auf Nadel Nr. 3. Belassen ich die Nr. 3 Nadel für den Vorder- und Hinterteil? Vielen Dank!
25.07.2018 - 20:20DROPS Design answered:
Liebe Lilianna, wenn Sie immer rechts in Runden stricken bekommen Sie glatt rechts Muster, wenn Sie immer rechts in Reihen stricken, bekommen Sie Kraus rechts Muster. Glatt rechts bekommen Sie in Reihen beim stricken 1 Hin-Reihe rechts , 1 Rückreihe links. Nach dem 6. Volant stricken Sie mit Nadel Nr 3 weiter bis zur Ende. Viel Spaß beim stricken!
26.07.2018 - 10:05
![]() Katharina Gerlach wrote:
Katharina Gerlach wrote:
Nochmal als Frage: :) Hallo, ich finde dieses Kleid toll und mich würde interessieren, welches Garn am besten geeignet wäre, nun da es Lin nicht mehr gibt... also von der Textur und dem Materialverhalten... Es gibt noch weitere wunderschöne Sommerstücke in Lin und ich möchte gern ein Garn wählen, welches die luftig leichte Struktur erhält
22.01.2014 - 21:59DROPS Design answered:
Liebe Katharina, tatsächlich erhalten Sie mit den Garnalternativen eine weniger transparente Textur. Ich persönlich würde am ehesten Cotton Merino wählen, damit das Kleid nicht so schwer wird wie mit einer reinen Baumwolle - die Garnalternativen aus Wolle/Alpaca sind eher nicht für die Sommervariante geeignet.
23.01.2014 - 07:52
![]() DROPS Design wrote:
DROPS Design wrote:
Nei det er riller.
24.01.2010 - 19:54
![]() Irene wrote:
Irene wrote:
Kjemefin!! Men i oppskriften står det at det skal være riller på bærestykket,men på bildet ser det ut til å være glattstrikk!!!!
24.01.2010 - 17:48
![]() Anneli wrote:
Anneli wrote:
Trendig! Volanger är hett nu, det märks i denna kollektion.
14.01.2010 - 21:17
|
|
All Dolled Up#alldolleduptunic |
|
 |
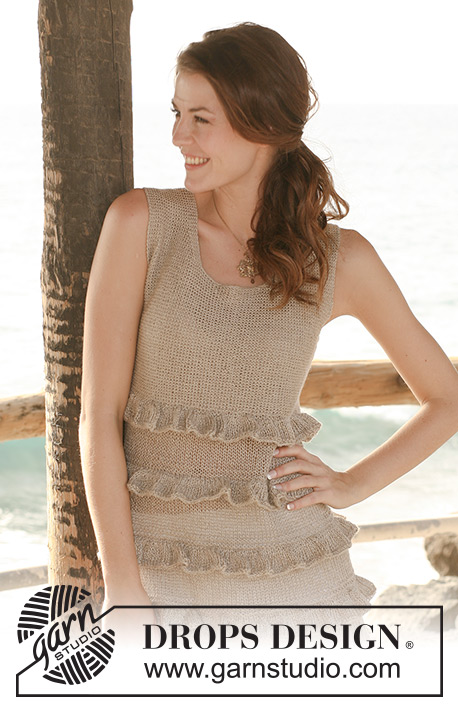 |
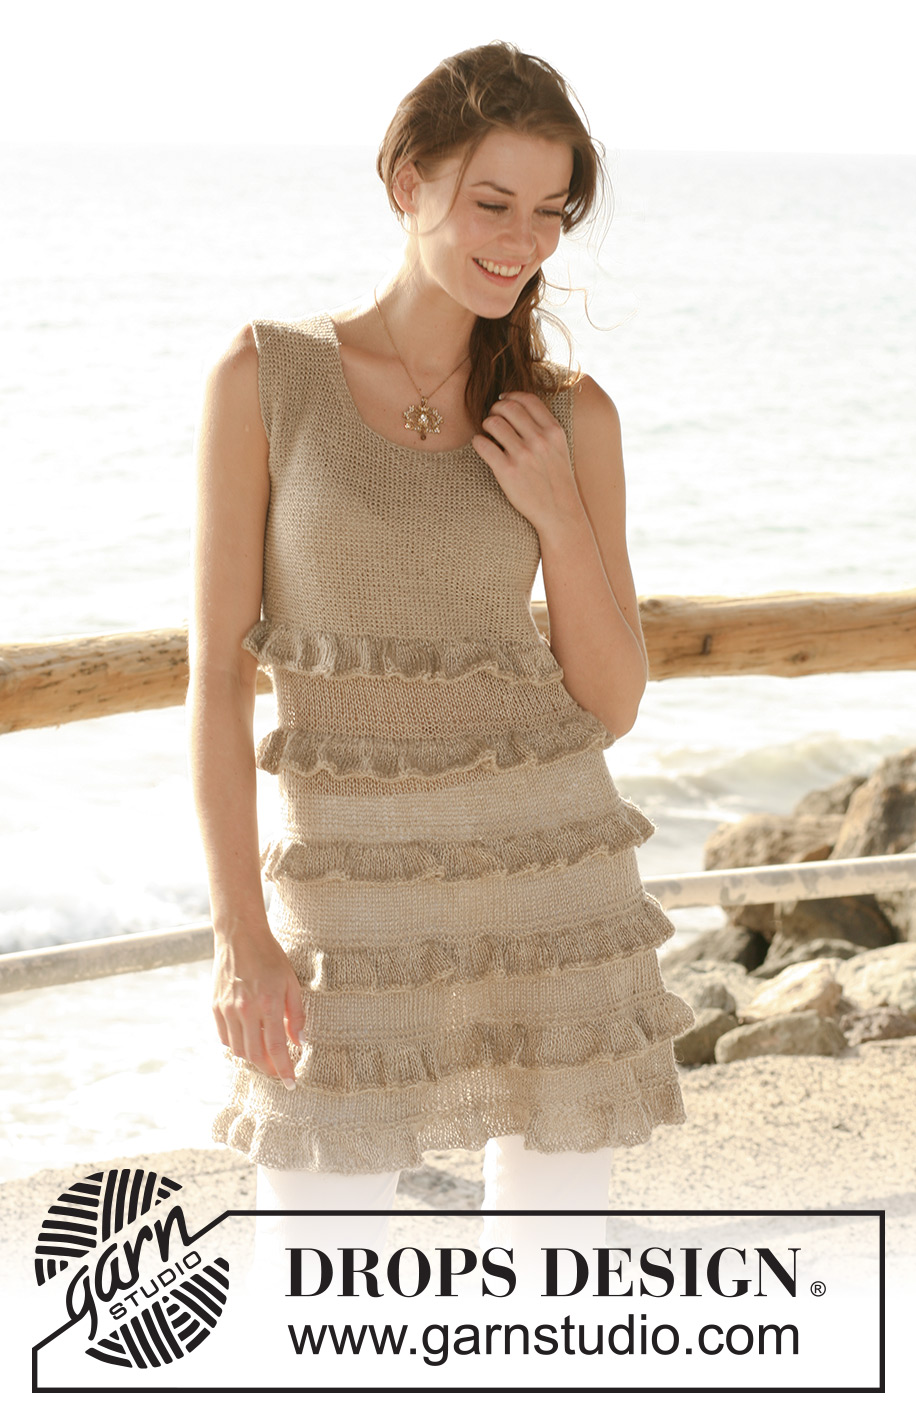
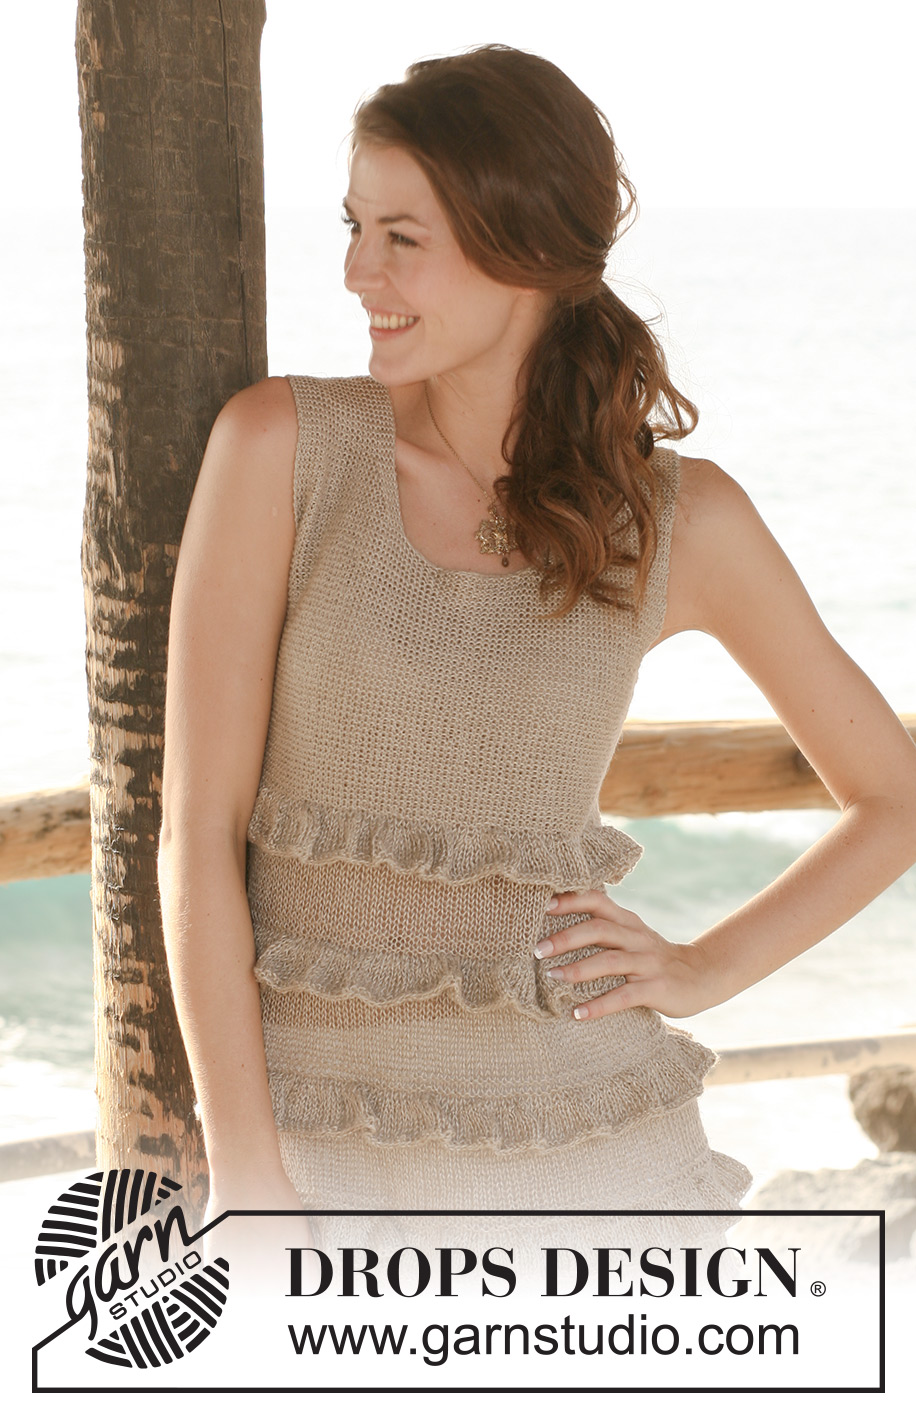
Tunic in DROPS Lin or DROPS Belle with flounces. Size S to XXXL.
DROPS 118-41 |
|
|
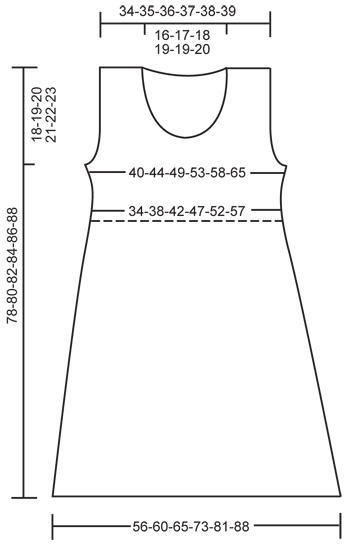
GARTER ST (back and forth on needle): K all rows. DECREASING TIP: Make all dec from RS! Dec as follows AFTER 4 garter sts: slip 1 st as if to K, K1 and psso. Dec as follows BEFORE 4 garter sts: K2 tog. -------------------------------------------------------- -------------------------------------------------------- BODY PIECE: Worked in the round on circular needle. The flounces are worked separately and knitted tog as you go along. FLOUNCE-1: Cast on 360-384-416-468-520-560 sts on circular needle size 5.5 mm with Lin or Belle. P 1 round, K 8 rounds and then K2 tog across the round = 180-192-208-234-260-280 sts. P 1 round, K 1 round, P 1 round and continue in stocking st until piece measures 13 cm. REMEMBER THE KNITTING TENSION! Work next round as follows: * K 10-10-11-11-11-12, K2 tog *, repeat from *-* = 165-176-192-216-240-260 sts, put piece aside. FLOUNCE-2: Cast on 330-352-384-432-480-520 sts, P 1 round, K 8 rounds and then K2 tog across the round = 165-176-192-216-240-260 sts. Place flounce-2 on top of flounce-1 and work them tog, i.e. K first st on flounce-2 tog with first st on flounce-1, etc across the round = 165-176-192-216-240-260 sts. P 1 round, K 1 round, P 1 round and continue in stocking st until piece measures 22 cm – make sure to have the same number of rounds after flounce-2 as between flounce-1 and 2. Work next round as follows: * K 9-9-10-10-10-11, K2 tog *, repeat from *-* = 150-160-176-198-220-240 sts, put piece aside. FLOUNCE-3: Cast on 300-320-352-396-440-480 sts, P 1 round, K 8 rounds and then K2 tog across the round = 150-160-176-198-220-240 sts. Place flounce-3 on top of flounce-2 and work them tog as described above = 150-160-176-198-220-240 sts. P 1 round, K 1 round, P 1 round and continue in stocking st until piece measures 31 cm – make sure to have the same number of rounds after each flounce. Work next round as follows: * K 8-8-9-9-9-10, K2 tog *, repeat from *-* = 135-144-160-180-200-220 sts, put piece aside. FLOUNCE-4: Cast on 270-288-320-360-400-440 sts, P 1 round, K 8 rounds and then K2 tog across the round = 135-144-160-180-200-220 sts. Place flounce-4 on top of flounce-3 and work them tog as described above = 135-144-160-180-200-220 sts. P 1 round, K 1 round, P 1 round and continue in stocking st until piece measures 40 cm – make sure to have the same number of rounds after each flounce. Work next round as follows: * K 7-7-8-8-8-9, K2 tog *, repeat from *-* = 120-128-144-162-180-200 sts, put piece aside. FLOUNCE-5: Cast on 240-256-288-324-360-400 sts and P 1 round, K 8 rounds and then K2 tog across the round = 120-128-144-162-180-200 sts. Place flounce-5 on top of flounce-4 and work them tog as described above = 120-128-144-162-180-200 sts. P 1 round, K 1 round, P 1 round and continue in stocking st until piece measures 49 cm – make sure to have the same number of rounds after each flounce. K 1 round and put piece aside. FLOUNCE-6: Cast on and work like flounce-5 until there are 120-128-144-162-180-200 sts on needle. Place flounce-6 on top of flounce-5, change to circular needle size 3 mm and work them tog across the round as described above = 120-128-144-162-180-200 sts. Piece now measures approx 49 cm. YOKE: Work next round as follows: SIZE S: * P7, 1 YO *, repeat from *-* until 8 sts remain, P these = 136 sts. SIZE M: * P5, 1 YO *, repeat from *-* until 8 sts remain, P these = 152 sts. SIZE L: * P6, 1 YO *, repeat from *-* = 168 sts. SIZE XL: * P6, 1 YO *, repeat from *-* until 6 sts remain, P these = 188 sts. SIZE XXL: * P6, 1 YO *, repeat from *-* until 12 sts remain, P these = 208 sts. SIZE XXXL: * P7, 1 YO *, repeat from *-* until 4 sts remain, P these = 228 sts. ALL SIZES: K 1 round - work YO into back of loop to avoid a hole. P 1 round and now divide piece with 68-76-84-94-104-114 sts on front and back pieces. Slip back piece on a stitch holder and complete each piece separately. NOW MEASURE PIECE FROM HERE! FRONT PIECE: = 68-76-84-94-104-114 sts. Work garter st back and forth on needle. AT THE SAME TIME when piece measures 2 cm inc 1 st each side, and repeat the inc on every 1.5-1.5-1.5-2-2-2 cm a total of 6 times = 80-88-96-106-116-126 sts. When piece measures 11-12-13-14-15-16 cm cast off 3-4-5-6-8-10 sts each side (i.e. at the beg of the next 2 rows). On next row from RS dec 1 st each side to shape the armhole – SEE DECREASING TIP – and repeat the dec on every other row a total of 3-5-7-10-12-14 times = 68-70-72-74-76-78 sts. When piece measures 17-19-20-22-24-25 cm cast off the middle 18-18-20-20-20-22 sts for neck (cast off from RS) and complete each shoulder separately. RIGHT SHOULDER: = 25-26-26-27-28-28 sts. On next row from RS dec 1 st on neckline – SEE DECREASING TIP, and repeat the dec on every other row a total of 7-8-8-9-9-9 times = 18-18-18-18-19-19 sts. When piece measures 29-31-33-35-37-39 cm cast off, piece now measures a total of 78-80-82-84-86-88 cm. LEFT SHOULDER: = 25-26-26-27-28-28 sts. Beg from mid front (i.e. from WS), pick up 1 st in the first st that was cast off and work this tog with first st on needle (to make neckline neat and even), K remaining sts on row. Dec to shape the neckline as described for right shoulder =18-18-18-18-19-19 sts. Cast off when piece measures 29-31-33-35-37-39 cm. BACK PIECE: = 68-76-84-94-104-114 sts. Work garter st and inc at the sides as described for front piece, then cast off for armhole each side as described for front piece = 68-70-72-74-76-78 sts. Continue until piece measures 26-28-30-32-34-36 cm and now cast off the middle 26-28-30-32-32-34 sts for neck and complete each shoulder separately. On next row from RS dec 1 st on neckline – SEE DECREASING TIP – and repeat the dec on every other row a total of 3 times = 18-18-18-18-19-19 sts left on shoulder. When piece measures the same as front piece cast off. Work the other shoulder in the same way – beg from mid back (i.e. from WS), pick up 1 st in the first st that was cast off and K this tog with first st on needle. ASSEMBLY: Sew side seams, edge to edge in outer loops of sts. Sew shoulder seams. |
|
 |
|
Have you finished this pattern?Tag your pictures with #dropspattern #alldolleduptunic or submit them to the #dropsfan gallery. Do you need help with this pattern?You'll find 19 tutorial videos, a Comments/Questions area and more by visiting the pattern on garnstudio.com. © 1982-2026 DROPS Design A/S. We reserve all rights. This document, including all its sub-sections, has copyrights. Read more about what you can do with our patterns at the bottom of each pattern on our site. |
|


With over 40 years in knitting and crochet design, DROPS Design offers one of the most extensive collections of free patterns on the internet - translated to 17 languages. As of today we count 324 catalogues and 12290 patterns translated into English (UK/cm).
We work hard to bring you the best knitting and crochet have to offer, inspiration and advice as well as great quality yarns at incredible prices! Would you like to use our patterns for other than personal use? You can read what you are allowed to do in the Copyright text at the bottom of all our patterns. Happy crafting!
Post a comment to pattern DROPS 118-41
We would love to hear what you have to say about this pattern!
If you want to leave a question, please make sure you select the correct category in the form below, to speed up the answering process. Required fields are marked *.