
Popular categories
Looking for a yarn?


Comments / Questions (87)
![]() Barbara wrote:
Barbara wrote:
Posso. Fare lo stesso modello a maglia rasata con bordo iniziale a coste ?
28.05.2026 - 07:26DROPS Design answered:
Buonasera Barbara, può apportare le modifiche che preferisce al modello, ovviamente la quantità di filato e l'aspetto finale saranno diversi da quello nella foto. Buon lavoro!
30.05.2026 - 20:40
![]() Jeongeun Hwang wrote:
Jeongeun Hwang wrote:
감사합니다 좋은 도안
21.03.2026 - 09:51
![]() Jola wrote:
Jola wrote:
Stawiam pierwsze kroki w robótkach na drutach. Moje pytanie dotyczy próbki. Kiedy ją mierzymy-zaraz po zrobieniu czy dopiero po praniu?
25.04.2025 - 15:46DROPS Design answered:
Witaj Jolu, należy uprać, wysuszyć próbkę, a następnie ją zmierzyć. Tylko wtedy możesz mieć pewność jaki rozmiar będzie miało gotowe ubranie. Jeżeli chcesz otrzymać określone wymiary (zgodnie ze schematycznym rysunkiem swetra na dole strony), Twoja próbka musi być zgodna z tą podaną we wzorze. Jeśli masz dodatkowe pytania to śmiało pisz. Pozdrawiam!
25.04.2025 - 15:50
![]() Emily wrote:
Emily wrote:
Hallo, erst einmal wollte ich mich dafür bedanken, dass hier so viele Anleitungen kostenlos bereitgestellt werden, das ist wirklich super. Jedoch fände ich es gut, wenn diese noch ein wenig ausführlicher wären, da ich mir so manchmal schwertue, mich in dem Chaos aus Abkürzungen zurechtzufinden (; . Das ist evtl. auch der Grund, aus dem ich noch nicht ganz verstehe, wie bei dieser Jacke die Ärmel gestrickt werden, ich bin aber auch noch ungeübt, was das Anleitungen befolgen angeht…
03.08.2024 - 00:49
![]() Eva Juhlin wrote:
Eva Juhlin wrote:
Hej. Jag undrar vad som menas med 70 - 100 maskor i beskrivningen av ärmen. Behöver det inte vara ett bestämt antal maskor? Jag undrar också om man stickar ärmen uppifrån och ned eller nedifrån och upp?
27.07.2024 - 18:38DROPS Design answered:
Hej Eva, ærmet strikkes oppefra og ned. Du får korrekt maskeantal på næste linje, men det kan være svært at plukke nøjagtig antal masker op, så derfor er det bare at justere :)
01.08.2024 - 10:59
![]() Katherine wrote:
Katherine wrote:
Can't find the gauge for this project. Can you help me out? It's listed on Ravelry at 23 sts and 30 rows to 4 inches in stockinette stitch. Is that correct?
19.01.2024 - 21:24DROPS Design answered:
Dear Katherine, yes, the gauge is 23 sts x 30 rows in stocking st with needles size 3 mm = 10 x 10 cm (see header by the main photo). Happy knitting!
20.01.2024 - 14:49
![]() Christine wrote:
Christine wrote:
Liebes Drops-Team, Verstehe ich das richtig, dass die Maschenprobe glatt rechts mit Nadelstärke 5 gestrickt wird, während die Jacke dann kraus rechts gestrickt wird? Vielen Dank im Voraus, Christine
09.03.2023 - 13:30DROPS Design answered:
Liebe Christine, nicht genau, hier strickt man nur 1 Faden Kid-silk mit der Rundnadel Nr 3 (nicht Nr 5) und die Maschenprobe ist 23 M x 30 R glatt rechts = 10 x 10 cm. Viel Spaß beim stricken!
09.03.2023 - 17:42
![]() Margareta Eriksson wrote:
Margareta Eriksson wrote:
Skulle man kunna sticka den här koftan i slätstickning i stället? Vilken skillnad i storlek kan man förvänta sig, vad gäller längd och bredd?
12.11.2021 - 17:27DROPS Design answered:
Hei Margareta. Denne jakken er skrevet etter strikkefasthet og mål i riller, om du ønsker å strikke den i glattstrikk vil det ha en annen strikkefasthet og andre mål. Vi har dessverre ikke anledning til å skreve om / regne om denne jakken til glattstikk. Men ta en titt på lignende jakker som er strikket i glattstrikk og i garngruppe A. mvh DROPS Design
15.11.2021 - 09:58
![]() ELSA MOSCOSO wrote:
ELSA MOSCOSO wrote:
NO PUEDO VER LAS IMAGENES.
14.12.2020 - 05:40
![]() Annalena Brage wrote:
Annalena Brage wrote:
Hej igen! Vad är skillnaden på Drops You 7 och 9? Kan även dessa användas till denna kofta? Mvh/Annalena
13.08.2020 - 12:35DROPS Design answered:
Hej. Det är lite olika struktur på garnen, olika löplängd och de finns i olika färger. Båda tillhör garngrupp A och kan användas till detta mönster. Mvh DROPS Design
14.08.2020 - 09:00
|
|
Morning Sky#morningskycardigan |
|
 |
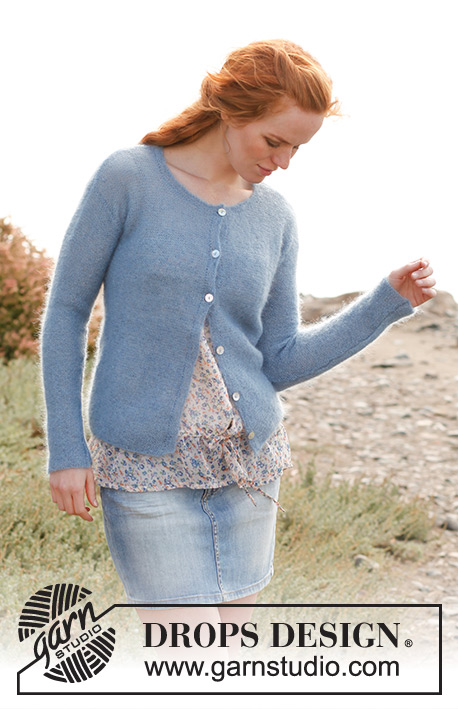 |
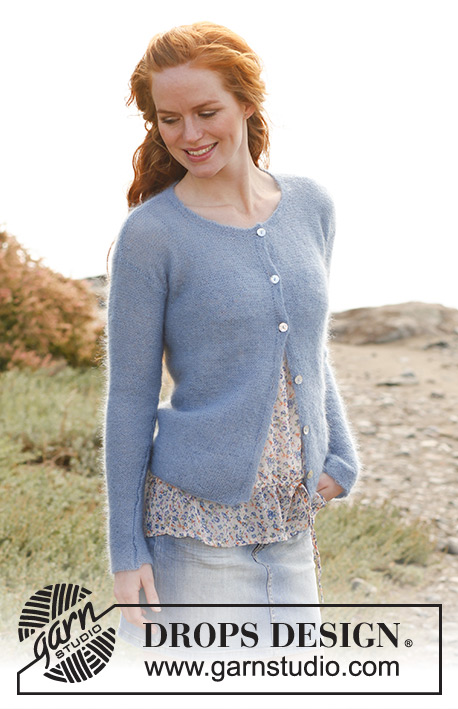
Knitted DROPS jacket in garter st in ”Kid-Silk”. Size S-XXXL.
DROPS 138-21 |
|
|
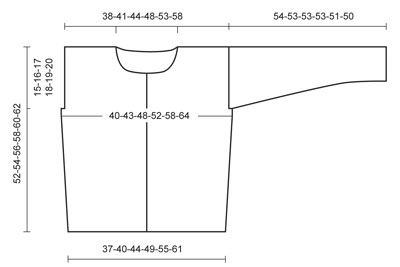
GARTER ST (back and forth on needle): K all rows. INCREASE TIP: Inc 1 st on each side of every marker as follows: Work until 1 st remains before marker, make 1 YO, K 2 (marker is between these sts), make 1 YO. On next row K YOs twisted (i.e. work in back loop of st instead of front) to avoid holes. -------------------------------------------------------- BODY: Worked in garter st - See explanation above - back and forth on circular needle from mid front. Cast on 168-184-204-224-252-280 sts on circular needle size 3 mm with 2 threads Kid-Silk (to avoid a tight cast on edge). Then work back and forth with 1 thread Kid-Silk (1st row = RS). REMEMBER THE KNITTING TENSION! When piece measures 6-6-6-6-7-7 cm, insert 2 markers in the piece; 42-46-51-56-63-70 sts in from each side (= 84-92-102-112-126-140 sts between markers on back piece). Move the markers upwards when working. On next row, inc 1 st on each side of each marker - Read INCREASE TIP above = 4 new sts. Repeat inc every 8-8-8-9-9-9 cm a total of 4 times = 184-200-220-240-268-296 sts. Continue to work until piece measures 37-38-39-40-41-42 cm. On next row cast off 2-3-4-5-6-7 sts for armholes on each side of every marker = 4-6-8-10-12-14 cast off sts in each side. Now divide the piece and finish each part separately. BACK PIECE: = 88-94-102-110-122-134 sts. Remove the markers in the sides and insert new markers at beg and end of row (where to knit up sleeves later). Continue in garter st until piece measures 50-52-54-56-58-60 cm. On next row from RS, cast off the middle 32-36-38-40-42-42 sts for neck and finish each shoulder separately. Continue to cast off 2 sts on next row from neck = 26-27-30-33-38-44 sts remain on the shoulder. Loosely cast off all sts when piece measures 52-54-56-58-60-62 cm. RIGHT FRONT PIECE: = 44-47-51-55-61-67 sts. Insert a marker at end of row (where to knit up sleeves later). Continue in garter st until piece measures 44-46-47-49-50-52 cm. Then cast off for neck at the beg of every row from RS (= every other row) as follows: Cast off 8-10-12-12-14-14 sts 1 time, 3 sts 1 time, and 2 sts 2 times. Then cast off 1 st every other row from RS (= every 4th row) 3-3-2-3-2-2 times = 26-27-30-33-38-44 sts remain on shoulder. Loosely cast off all sts when piece measures 52-54-56-58-60-62 cm. LEFT FRONT PIECE: Work as right front piece but reversed. ASSEMBLY: Sew the shoulder seams tog. SLEEVE: Worked back and forth on needle as follows: Knit up from RS approx. 70 to 100 sts between markers along one armhole (NOTE: Do not knit up sts over the cast off sts for armhole). On next row adjust no of sts to 68-74-78-82-86-92. Then work in garter st. When piece measures 3-3-3-3-4-4 cm, dec 1 st (by K 2 sts tog) in each side of piece. Repeat dec every 4-3½-3-3-2½-2 cm a total of 12-14-15-16-17-19 times = 44-46-48-50-52-54 sts. Continue in garter st until piece measures 54-53-53-53-51-50 cm (shorter measurements in the larger sizes because of broader shoulder width), loosely cast off all sts. Sew sleeve seam inside 1 edge st, NOTE: The top part of the sleeve should be sewn to the cast off edge on each side of back and front piece. Knit up another sleeve in the other side of piece. RIGHT BAND: Worked back and forth on needle as follows: Knit up from RS approx. 100 to 120 sts inside 1 edge st along mid front on right front piece. K 1 row from WS while AT THE SAME TIME adjusting no of sts to 104-109-109-118-118-118. On next row from RS, cast off for 5-5-5-6-6-6 button holes as follows: K 4, * K tog the next 2 sts, make 1 YO, K 18-19-19-17-17-17 *, repeat from *-* a total of 5-5-5-6-6-6 times. On next row K the YOs. Continue in garter st until band measures 2-2-2-3-3-3 cm, loosely cast off all sts. LEFT BAND: Work as right band but without button holes. NECK EDGE: Worked back and forth on needle as follows: Knit up from RS approx. 90 to 110 sts around the neck (also over bands). K 1 row from WS while AT THE SAME TIME adjusting no of sts to 92-96-100-104-108-112. On next row from RS, cast off for the last button hole as follows: K 3-3-3-4-4-4, K tog the next 2 sts, make 1 YO, K the rest of row. On next row K the YO. Continue in garter st until neck edge measures 2 cm, loosely cast off all sts. Sew the buttons on to the left band. |
|
 |
|
Have you finished this pattern?Tag your pictures with #dropspattern #morningskycardigan or submit them to the #dropsfan gallery. Do you need help with this pattern?You'll find 14 tutorial videos, a Comments/Questions area and more by visiting the pattern on garnstudio.com. © 1982-2026 DROPS Design A/S. We reserve all rights. This document, including all its sub-sections, has copyrights. Read more about what you can do with our patterns at the bottom of each pattern on our site. |
|


With over 40 years in knitting and crochet design, DROPS Design offers one of the most extensive collections of free patterns on the internet - translated to 17 languages. As of today we count 325 catalogues and 12298 patterns translated into English (UK/cm).
We work hard to bring you the best knitting and crochet have to offer, inspiration and advice as well as great quality yarns at incredible prices! Would you like to use our patterns for other than personal use? You can read what you are allowed to do in the Copyright text at the bottom of all our patterns. Happy crafting!
Post a comment to pattern DROPS 138-21
We would love to hear what you have to say about this pattern!
If you want to leave a question, please make sure you select the correct category in the form below, to speed up the answering process. Required fields are marked *.