
Popular categories
Looking for a yarn?


Comments / Questions (48)
![]() Helene wrote:
Helene wrote:
J'adore le gilet fait avec ce modèle ! en général, je trouve toujours à mon goût. Merci
25.04.2023 - 14:19
![]() Agneta wrote:
Agneta wrote:
Ska ökningarna i sidorna på nedre delen av koftan göras endast från rätsidan. 1 varv utan ökning, 2 varv med ökning innebär ju annars att man även gör en ökning från avigsidan?????
30.04.2019 - 08:02DROPS Design answered:
Hei Agneta. Det økes fra både rettsiden og vrangsiden. Du strikker først 1 pinne fra rettsiden og øker. Videre strikker du slik: strikk 1 pinne uten økninger (fra vrangsiden) og strikk 2 pinner med økninger (1 pinne fra rettsiden og 1 pinne fra vrangsiden, det økes på begge). God fornøyelse
30.04.2019 - 14:42
![]() Lies De Kort wrote:
Lies De Kort wrote:
Bij het 2de gedeelte van de beschrijving van het voorpand staat: Meerder TEGELIJKERTIJD bij een hoogte van 16-16-15-14-13-11 cm. 1 steek ....... enz. Waarom hier aflopende cm. Een kleinere maat wordt dan langer en het grotere patroon krijgt een hoog armsgat. Of zie ik het verkeerd? Alvast bedankt! Lies
02.02.2016 - 19:37DROPS Design answered:
Hoi Lies. Je begint eerder omdat je vaker moet meerderen: "Herhaal dit meerderen aan het einde van iedere nld aan de goede kant in totaal 3-5-8-11-15-19 keer". De kleinere maat wordt niet langer, zie ook cm aan het eind van dit stukje.
03.02.2016 - 17:33
![]() Marianne Ouwehand wrote:
Marianne Ouwehand wrote:
Bij het LINKER VOORPAND moet gemeerderd worden aan het einde van de volgende naald aan de verkeerde kant. Bij het RECHTER VOORPAND moet gemeerderd worden aan de tegengestelde kant. Betekent dit dat ik het meerderen aan het begin van de goede kant van het werk moet doen? Of aan het einde van de goede kant? Groeten, Marianne
09.10.2015 - 23:04DROPS Design answered:
Hoi Marianne. Je meerdert nog steeds aan de verkeerde kant, maar dan aan het begin van de nld ipv aan het einde van de nld
12.10.2015 - 15:22
![]() DROPS Design wrote:
DROPS Design wrote:
Jo, det er meningen: Kastene strikkes i glattstrikk på neste p, slik at det blir hull.
13.01.2012 - 15:31
![]() Karin Tingström wrote:
Karin Tingström wrote:
Om jag ökar i sidorna med tips 2 får jag ju hål. Det ska det väl inte vara? Mvh Karin
12.01.2012 - 21:59
![]() Monica wrote:
Monica wrote:
Underbar!! Kommer mönstret snart? =)
02.02.2011 - 21:27
![]() Marie-Alice wrote:
Marie-Alice wrote:
J'ai très envie de tricoter ce modèle qui cachera mes rondeurs. Vivement que les explications arrivent. Est-ce difficile à tricoter pour une débutante?
31.01.2011 - 13:58
![]() Raffaela Daniele wrote:
Raffaela Daniele wrote:
Bellissimo.aspetto le spiegazioni per farlo.
31.01.2011 - 12:50
![]() Tove Lindfjord wrote:
Tove Lindfjord wrote:
Nydelig, den vil jeg strikke
31.01.2011 - 12:21
|
|
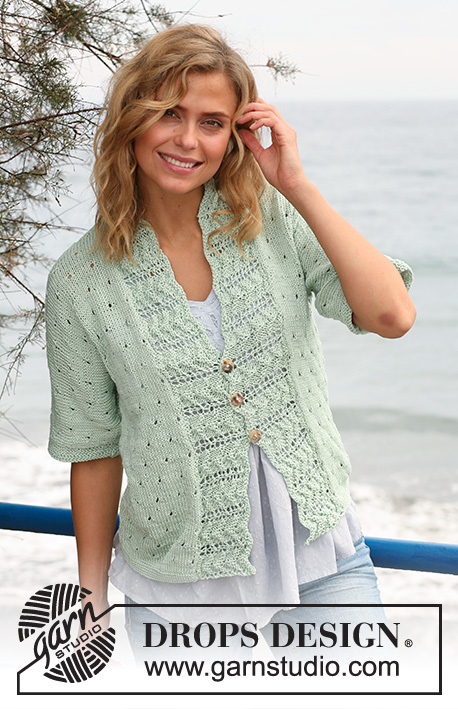
Sweet Pia#sweetpiacardigan |
|
 |
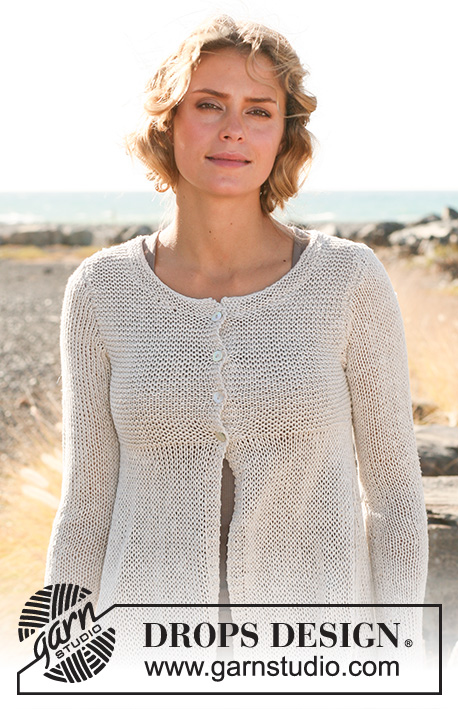 |
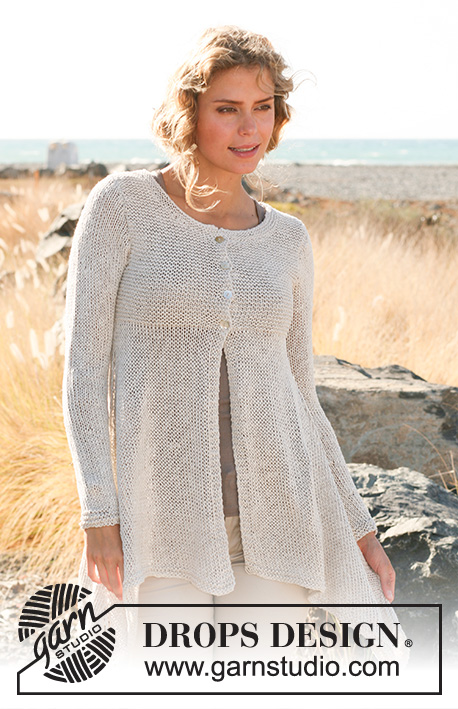
Knitted DROPS jacket, worked top down with extra width in ”Bomull-Lin”. Size: S - XXXL.
DROPS 129-21 |
|
|
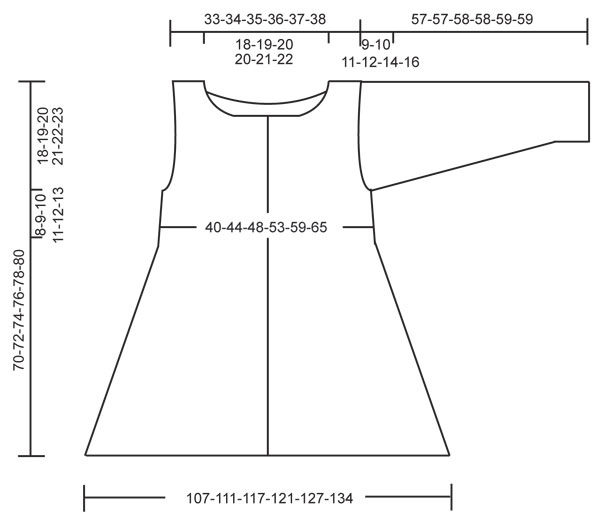
GARTER ST (back and forth on needle): K all rows. GARTER ST (in the round on double pointed needles): 1 ridge = 2 rounds * K 1 round and P 1 round *, repeat from *-*. INCREASE TIP 1: Inc 1 st by working 2 sts in the outermost st on needle. INCREASE TIP 2: Inc by making 1 YO on each side of st with marker in each side as follows: Work in stocking st until marker, 1 YO, work st with marker in stocking st, 1 YO. Work YOs in stocking st on next row to make holes. BUTTON HOLES: Cast off for button holes on right front band. 1 button hole = K tog 3rd and 4th st from WS, then make 1 YO. Cast off for button holes when piece measures (measured from the shoulder and down): SIZE S: 11, 16, 21, 26 cm SIZE M: 12, 17, 22, 27 cm SIZE L: 13, 18, 23, 28 cm SIZE XL: 14, 20, 26, 32 cm SIZE XXL: 15, 21, 27, 33 cm SIZE XXXL: 16, 22, 28, 34 cm -------------------------------------------------------- The piece is worked top down. Front and back piece is worked back and forth separately down to and with armhole. Then all sts are slipped on the same circular needle. Then the piece is worked back and forth from mid front. LEFT FRONT PIECE: Worked back and forth on circular needle. Cast on 13-13-13-14-14-14 sts on circular needle size 4 mm with Bomull-Lin. Work in GARTER ST - see explanation above. REMEMBER THE KNITTING TENSION! (SIZE XXL-XXXL: Read all of the following section before continuing) When piece measures 7-8-9-10-11-12 cm, inc 1 st towards the neck at the end of next row from WS - READ INCREASE TIP 1! Repeat inc towards the neck at the end of every row from WS a total of 3 times. Then cast on 2 new sts at the end of every row from WS a total of 2 times and 12-13-14-14-15-16 sts 1 time = Size S-XL: 32-33-34-35 sts. Size XXL-XXXL: 36-37 sts + the new sts cast on for armhole at the end of every row from RS. Now piece measures approx. 10-11-12-13-14-15 cm. Continue in garter st. AT THE SAME TIME when piece measures 16-16-15-14-13-11 cm, inc 1 st at the end of every row from RS towards the armhole - READ INCREASE TIP 1! Repeat inc at the end of every row from RS a total of 3-5-8-11-15-19 times, then cast on 3 new sts at the end of next row from RS = 38-41-45-49-54-59 sts. Work 1 row from WS. Now piece measures approx. 18-19-20-21-22-23 cm. Do not cut the thread. RIGHT FRONT PIECE: Work as on left front piece but with inc in the opposite side. AT THE SAME TIME when piece measures 11-12-13-14-15-16 cm (approx. 1 cm after the last sts have been cast on for neck) cast off for first BUTTON HOLE - see explanation above! Finish with 1 row from WS. BACK PIECE: Left shoulder: Cast on 13-13-13-14-14-14 sts on circular needle size 4 mm with Bomull-Lin. Work in garter st back and forth on needle. When piece measures 2 cm, inc 1 st towards the neck at the end of next row from RS = 14-14-14-15-15-15 sts. K 1 row from WS. Cut the thread and put piece aside. Right shoulder: Cast on and work as left shoulder. When piece measures 2 cm, inc 1 st towards the neck at the end of next row from WS. Work 1 row from RS. Then cast on 28-30-32-32-34-36 sts for neck at the end of next row from WS = 42-44-46-47-49-51 sts. Cut the thread. Slip sts from left shoulder on to same needle = 56-58-60-62-64-66 sts. Continue in garter st, start from RS. When piece measures 16-16-15-14-13-11 cm, inc 1 st at the end of every row for armhole in each side. Repeat inc a total of 3-5-8-11-15-19 times in each side, then cast on 3 new sts at the end of the next 2 rows, finish with 1 row from WS = 68-74-82-90-100-110 sts. Cut the thread. BODY: Slip sts from right and left front piece on to same circular needle as back piece. Now work piece back and forth with start from mid front on left front piece = 144-156-172-188-208-228 sts. Continue in garter st until piece measures 26-28-30-32-34-36 cm, finish with 1 row from WS. Switch to circular needle size 7 mm. Continue to work as follows: 4 sts in GARTER ST, K the next sts until 4 sts remain while AT THE SAME TIME dec 16-16-16-20-24-24 sts evenly (dec 4-4-4-5-6-6 sts on each front piece and 8-8-8-10-12-12 sts on back piece), finish with 4 sts in garter st = 128-140-156-168-184-204 sts. Insert 2 markers in the piece; 34-37-41-44-48-53 sts in from each side (back piece = 60-66-74-80-88-98 sts). Continue in stocking st with 4 sts in garter st towards mid front in each side (= front bands). REMEMBER THE KNITTING TENSION! When 4 cm have been worked in stocking st (piece measures approx. 30-32-34-36-38-40 cm, measured from the shoulder and down) work 1 row from RS while inc 1 st on each side of st with marker in each side – READ INCREASE TIP 2! Continue to work as follows: 1 row without inc, 2 rows with inc. Continue inc until finished measurements = approx. 45 rows with inc (approx. 40 cm). AT THE SAME TIME when piece measures 69-71-73-75-77-79 cm, measured mid front (from shoulder and down), K 4 rows over all sts. After all inc are done there are approx. 308-320-336-348-364-384 sts on circular needle. LOOSELY cast off. Piece now measures approx. 70-72-74-76-78-80 cm mid front (the sides are longer because of the inc that give extra width and length). SLEEVE: Worked in the round on double pointed needles. Cast on 30-32-34-36-38-40 sts on double pointed needles size 7 mm with Bomull-Lin. Work 6 rounds in GARTER ST - see explanation above! Insert a marker at the beg of the round. Then work in stocking st. When piece measures 8 cm, inc 1 st on each side of marker. Repeat inc every 7-7-6-5-4-3½ cm a total of 6-6-7-8-9-10 times = 42-44-48-52-56-60 sts. When piece measures 48-47-47-46-45-43 cm (NOTE! Shorter measurements in the larger sizes because of longer sleeve cap and broader shoulder width) cast off 6 sts mid under sleeve (cast off 3 sts on each side of marker). Then continue back and forth while AT THE SAME TIME casting off for sleeve cap at the beg of every row in each side as follows: 2 sts 1-1-1-1-2-2 times, 1 st 4-4-5-6-5-7 times, then cast off 2 sts in each side until piece measures 56-56-57-57-58-58 cm. Cast off 3 sts 1 time in each side. Cast off. Now sleeve measures approx. 57-57-58-58-59-59 cm. Knit another sleeve. ASSEMBLY: Sew the shoulder seams. Sew in the sleeves. Sew the buttons on to the left front band. NECKLINE: Knit up 90-94-100-102-106-112 sts around the neck edge on circular needle size 4 mm with Bomull-Lin. Work 8 rows in garter st. Cast off. |
|
 |
|
Have you finished this pattern?Tag your pictures with #dropspattern #sweetpiacardigan or submit them to the #dropsfan gallery. Do you need help with this pattern?You'll find 21 tutorial videos, a Comments/Questions area and more by visiting the pattern on garnstudio.com. © 1982-2026 DROPS Design A/S. We reserve all rights. This document, including all its sub-sections, has copyrights. Read more about what you can do with our patterns at the bottom of each pattern on our site. |
|


With over 40 years in knitting and crochet design, DROPS Design offers one of the most extensive collections of free patterns on the internet - translated to 17 languages. As of today we count 324 catalogues and 12278 patterns translated into English (UK/cm).
We work hard to bring you the best knitting and crochet have to offer, inspiration and advice as well as great quality yarns at incredible prices! Would you like to use our patterns for other than personal use? You can read what you are allowed to do in the Copyright text at the bottom of all our patterns. Happy crafting!
Post a comment to pattern DROPS 129-21
We would love to hear what you have to say about this pattern!
If you want to leave a question, please make sure you select the correct category in the form below, to speed up the answering process. Required fields are marked *.