
Looking for a yarn?


Comments / Questions (10)
![]() Angel wrote:
Angel wrote:
Je pense qu'il y a une erreur au niveau des diminutions. Je pense qu'elles doivent se faire sur chaque rang 11 fois et non tous les deux rangs.
08.08.2013 - 18:55DROPS Design answered:
Bonjour Angel, c'est exact, les diminutions et les augmentations plus tard se font tous les rangs et non tous les 2 rangs, la correction a été faite, merci. Bon crochet!
09.08.2013 - 09:24Dimitra wrote:
Please help me with this instraction dec 1 dc each side on every row a total of 11 times what i have to do? i have to make 1 slst in the beg and skip 1dc at the end for 11 rows? also i need help with the Increasing tip: For increases crochet 2 dc in the last but 1 dc. what does this means?
02.03.2013 - 15:47DROPS Design answered:
Dear Dimitra, you are correct for the dec. For inc, you have to crochet 2 dc in the 2nd dc of the row each side : 2nd st of the row and 2nd to last st. Happy crocheting!
04.03.2013 - 08:58
![]() Amanda wrote:
Amanda wrote:
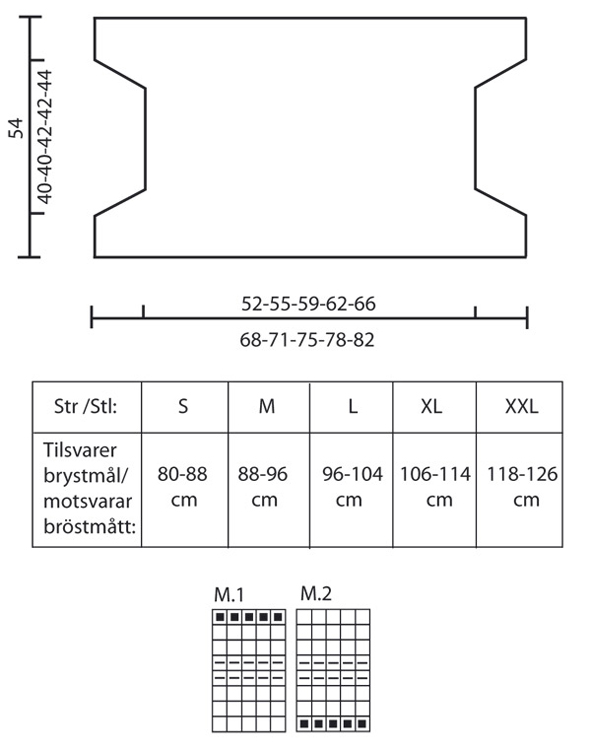
The wording on the size chart has not been translated. Do the measurements refer to bust size?
18.07.2011 - 06:50DROPS Design answered:
Hi Amanda, Yes, the measures in cm refers to the bust size.
18.07.2011 - 20:11
![]() Janneke wrote:
Janneke wrote:
"Meerder tegelijkertijd bij een hoogte van 35-35-36-36-37 cm aan weerskanten 11 x 1 stk in elke 2e toer – lees de tips voor het meerderen = 95-99-105-109-115 stk. " Moet dat niet elke toer zijn ipv elke 2e toer? De schematische tekening is symetrisch, bovendien kom je uit op veel meer toeren en dus lengte dan 54 cm. GRaag jullie reacties.
02.04.2009 - 16:02DROPS Design NL answered:
Hoi Janneke. Ik heb net het originele patroon doorgelezen en je hebt gelijk. Het moet inderdaad elke toer zijn. Ik heb het patroon gewijzigd. Excuses en veel haakplezier verder. Gr. Tine
03.04.2009 - 09:28
![]() Verani wrote:
Verani wrote:
Dear Ms.Jeanette Matzau First i really like bolero DROPS number 99-9, but my english is not good. Sometimes i don't understand what that mean. I can not make decrease and increase. If you can give me the pattern diagram symbols for Drops 99-9, i will be glad for that. Thankfull for your help and attention. Best Regards verani
18.11.2007 - 12:59Susanne Schmidt wrote:
Den er bare flot. Ærgerligt der ikke er opskrift på den . Skønt den er hæklet.
31.01.2007 - 16:10
![]() Mona C. Larsen wrote:
Mona C. Larsen wrote:
Enkel og pæn - mon den kan laves med 3/4 ærmer?!
25.01.2007 - 16:12
![]() Beate wrote:
Beate wrote:
origenell gefertigtes Sommerjäckchen
03.01.2007 - 20:17Pia wrote:
Härlig kofta/bolero som kan användas svala sommarkvällar istället för en schal. Mycket behändigt!
11.12.2006 - 17:26
![]() jannicke wrote:
jannicke wrote:
Enderlig en som er heklet.kjempe flott.
09.12.2006 - 18:52
|
||||||||||
Galapagos#galapagosbolero |
||||||||||
 |
 |
|||||||||
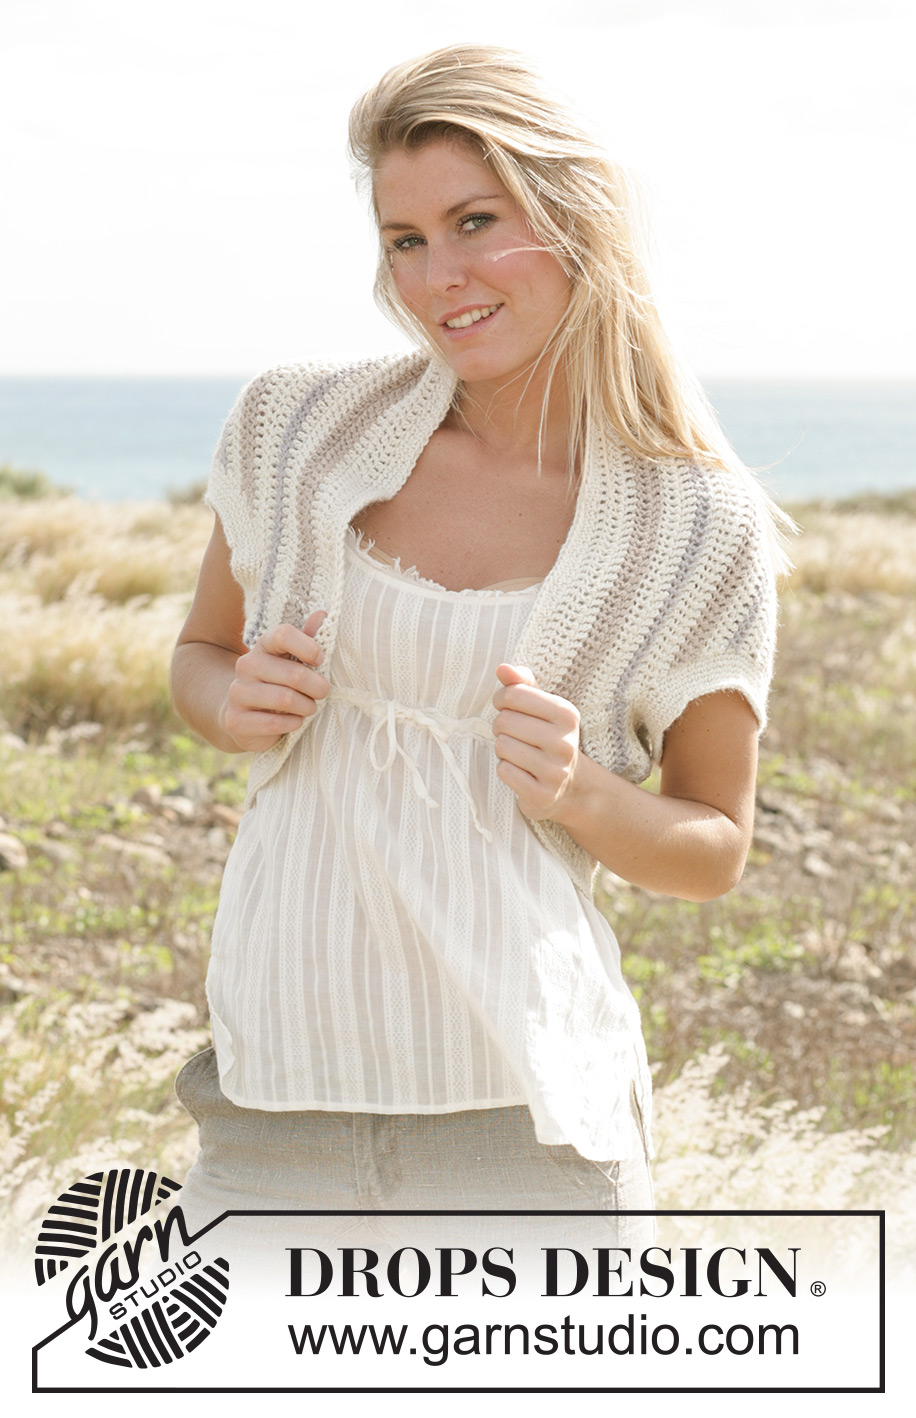
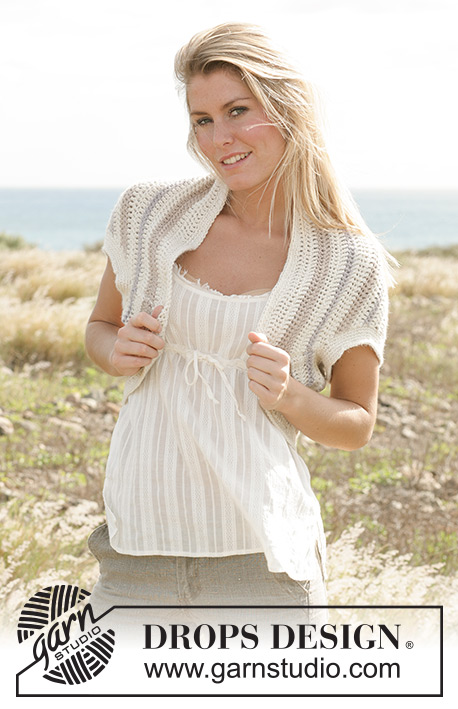
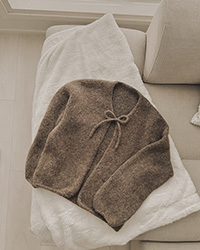
DROPS shrug crochet with “Silke-Alpaca”.
DROPS 99-9 |
||||||||||
|
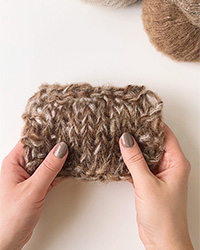
Crochet tension: 14 tr x 9 row using hook size 5 mm and Silke-Alpaca = 10 x 10 cm. Crochet info: Substitute the first tr beg. of round with 3 ch and finish each tr round with a tr in the 3rd ch from previous round. Substitute the first dc at beg. of round with 1 ch and finish each dc round with 1 sl st in the first dc. Stripes: Change colours according to M.1 and M.2. The diagrams are seen from the RS. English Translations for the wording in the diagrams are given at the bottom of this pattern, and they are given in the vertical order in which they appear in the diagram. Increasing tips: For increases crochet 2 tr in the last but 1 tr. Decreasing tips: dec. as follows at beg. of round: Crochet sl st over the number of sts to be dec. Dec. as follows at the end of round: Turn when the number of sts equal the number of sts to be dec. Shrug: Crochet loosely 127-132-140-146-154 ch (incl. of 3 ch to turn with) with hook size 5 mm in off white. Now crochet as follows: 1 tr in the 4th ch from hook, 1 tr in each of the following 2 ch, *skip a ch, 1 tr in each of the following 3 ch*, repeat from *-*, for size S finish with a tr in the last ch. For size M and L finish with 1 tr in each of the last 2 ch = 95-99-105-109-115 tr. Now crochet 1 tr in each tr – read crochet info. At the same time crochet stripes according to M.1 – see diagram. When the piece measures 7-7-6-6-5 cm dec. 1 tr each side on every row a total of 11 times – read cast off tips = 73-77-83-87-93 tr. Crochet M.1 a total of 3 times vertically. Continue to crochet 1 row with off white. Then crochet according to M.2 – see explanation above. At the same time when the piece measures 35-35-36-36-37 cm inc. 1 tr each side on every row a total of 11 times – read increasing tips = 95-99-105-109-115 tr. Crochet M.2 a total of 3 times vertically. Cut and sew the thread – the piece measures approx. 54 cm Assembly: Fold the piece double along the long side and sew the outer most 7-7-6-6-5 cm tog. each side – opening left is the armhole. Now crochet approx. 50 – 65 dc around the arm hole – read crochet info. Crochet a total of 6 rows of dc. Repeat for the other armhole. Crochet approx. 190 to 230 dc. around the edge of the shrug. Crochet 1 dc in each dc until the piece measures 1-2-3-4-5 cm. Cut and sew the thread. NOTE! TEXT IN SIZE CHART BELOW SAY THAT THE CM MEASURES GIVEN PER SIZE IS THE FINISHED BUST MEASURE. |
||||||||||
Diagram explanations |
||||||||||
|
||||||||||
|
||||||||||
Have you finished this pattern?Tag your pictures with #dropspattern #galapagosbolero or submit them to the #dropsfan gallery. Do you need help with this pattern?You'll find 5 tutorial videos, a Comments/Questions area and more by visiting the pattern on garnstudio.com. © 1982-2025 DROPS Design A/S. We reserve all rights. This document, including all its sub-sections, has copyrights. Read more about what you can do with our patterns at the bottom of each pattern on our site. |
||||||||||
With over 40 years in knitting and crochet design, DROPS Design offers one of the most extensive collections of free patterns on the internet - translated to 17 languages. As of today we count 319 catalogues and 12007 patterns translated into English (UK/cm).
We work hard to bring you the best knitting and crochet have to offer, inspiration and advice as well as great quality yarns at incredible prices! Would you like to use our patterns for other than personal use? You can read what you are allowed to do in the Copyright text at the bottom of all our patterns. Happy crafting!
Post a comment to pattern DROPS 99-9
We would love to hear what you have to say about this pattern!
If you want to leave a question, please make sure you select the correct category in the form below, to speed up the answering process. Required fields are marked *.