
Looking for a yarn?


Comments / Questions (17)
![]() Lydie wrote:
Lydie wrote:
Bonjour et merci de vos réponses, de plus rapides. Comment tricoter les motifs quand le nombre de mailles est inférieur aux 12 du diagramme ? Cordialement Lydie
24.11.2025 - 16:53
![]() Lydie wrote:
Lydie wrote:
Comment tricoter les motifs avec les augmentations de la manche ? Merci de votre réponse Cordialement
20.11.2025 - 22:10DROPS Design answered:
Bonjour Lydie, les augmentations à la fin de tour se tricotent comme la maille suivante du motif (en lisant le diagramme de droite à gauche), celles au début du tour vont se tricoter comme la maille précédente (on va lire le diagramme de gauche à droite pour étendre le motif vers la droite). Bon tricot!
21.11.2025 - 07:43
![]() Lydie wrote:
Lydie wrote:
Peut on tricoter les manches avec une aiguille circulaire D avance merci
05.11.2025 - 22:22DROPS Design answered:
Bonjour Lydie, tout à fait, vous pouvez commencer les manches avec une aiguille circulaire de 40 cm ou bien dès le début tricoter en magic loop avec une aiguille circulaire de 80 cm. Bon tricot!
06.11.2025 - 09:19
![]() Lone wrote:
Lone wrote:
Hvordan får man placeret en rapport på midten?
06.09.2025 - 18:18DROPS Design answered:
Hei Lona. Da må man telle hvor mange masker man har, og så finne ut hvor man skal starte på diagrammet i forhold til hvor mange masker man har fra midt under til midt oppå. mvh DROPS Design
22.09.2025 - 10:15
![]() Alice wrote:
Alice wrote:
Is there a simple way to convert this pattern to a cardigan? I just love the design!
24.08.2025 - 18:30DROPS Design answered:
Dear Alice, we don't make custom patterns. You will need to calculate the pattern by checking how to center the texture patterns while adding the bands. It would be easier to look for a simple cardigan worked in DROPS Karisma and then work the texture pattern over that cardigan. Happy knitting!
26.08.2025 - 23:12
![]() Silke wrote:
Silke wrote:
Moin Der Pullover ist wunderschön und ich würde ihn mir gerne stricken. Aber leider nur bis Gr. L . Das ist mir zu klein. Wird die Anleitung aktualisiert? Die neueren Anleitungen sind meistens bis Gr. XXL.
23.08.2025 - 19:58DROPS Design answered:
Liebe Silke, hier finden Sie Modellen für XXL mit einer ähnlichen Maschenprobe, das kann Ihnen inspirieren, um dieses Modell zu den gewüsnchten Größe anzupassen. Viel Spaß beim Stricken!
25.08.2025 - 10:01
![]() Lena wrote:
Lena wrote:
Ik heb een proeflesje gebreid van de wol die voor dit patroon genoemd wordt en nu is het proeflapje 11 breedt en 11,5 hoog. Maar ik vind de stevigheid en dichtheid van het lapje al best hoog en wil liever niet een dunnere naald gebruiken. Wat kan ik doen?
03.04.2025 - 10:02DROPS Design answered:
Dag Lena,
Dit is wel de normale stekenverhouding voor dit garen. Als je het toch losser wilt hebben, zou je het patroon om kunnen rekenen op basis van je stekenverhouding. Dus berekenen hoeveel steken je op moet zetten om dezelfde breedte te krijgen. Je zult dus minder op moeten zetten.
09.04.2025 - 11:00
![]() Jillian Watson wrote:
Jillian Watson wrote:
I require a shorter garment than the pattern shows. I have adjusted the length of the body between the bottom & the split for the armholes. Do i adjust the armhole length accordingly, or do I follow the armhole measurement shown on the pattern to accommodate the sleeve? Thank you.
01.03.2025 - 11:07DROPS Design answered:
Dear Jillian, the upper section, from the armholes to the neck, should remain the same, since these yoke decreases are fundamental to keep the correct shaping of the piece.To shorten the piece you only need to shorten the body section, between the lower edge and before the armholes. Happy knitting!
02.03.2025 - 18:43
![]() Jillwatson wrote:
Jillwatson wrote:
I have downloaded your pattern (water textures) however I cannot wear pure wool as in your Karisma. Please ofer an alternative yarn which would knit up similarly; perferably a wool/acrylic mix (75%/25%) in a similar colour if possible. Thank you.
29.04.2024 - 09:50DROPS Design answered:
Dear Jillwatson, please use our yarn converter to see all possible alternatives as well as the new amount required for your size. Remember to always check gauge and adjust needle size if needed. Your DROPS Store can help you - even per mail or telephone -choosing the best matching yarn. Happy knitting!
29.04.2024 - 12:40
|
|||||||
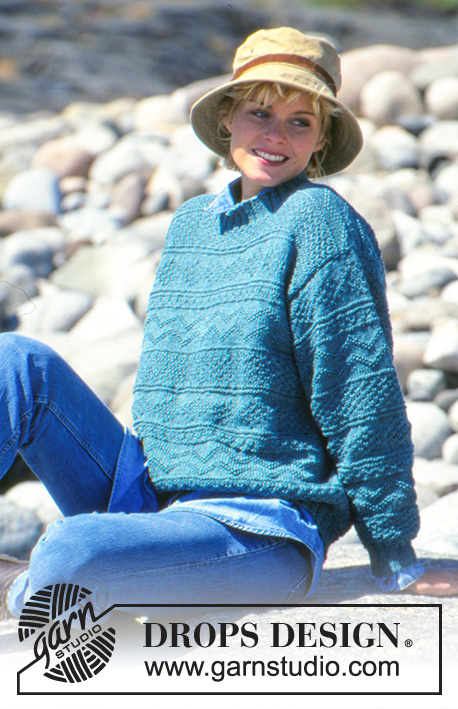
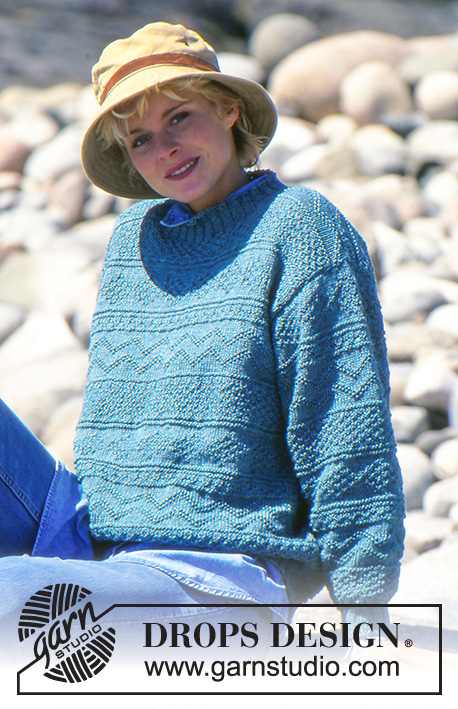
Water Textures |
|||||||
 |
 |
||||||
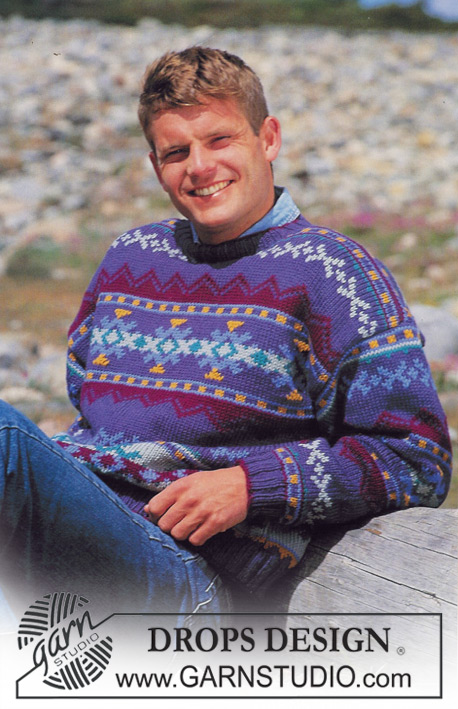
Lady and Gentleman sweater in DROPS Karisma with texture
DROPS 40-8 |
|||||||
|
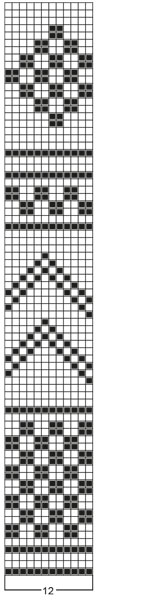
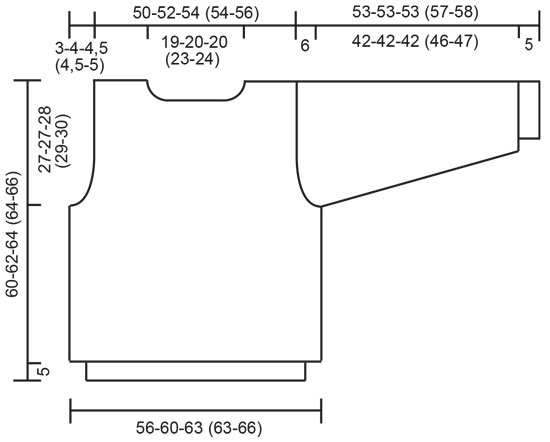
Tension: 20 sts x 30 rows on needle size 4 mm and pattern = 10 x 10 cm. Needle size is only recommended! Pattern: See diagram (1 diagram = 1 repeat). Diagram is showing pattern from RS. Mönster = Pattern 12 m = 12 sts Rib: * K2, 2 P *. Repeat from *-*. Body: Figures in () = Gent sizes. Cast on 188-192-200 (200-208) sts on circular needle size 2,5 mm and work rib for 5 cm. Change to circular needle size 4 mm, work Pattern according to diagram and at the same time inc 40-48-52 (52-56) sts evenly on first round = 228-240-252 (252-264) sts. Check your tension. When piece measures 33-35-36 (35-36) cm cast off 4 sts on each side for armhole (place a repeat mid front). Front and back piece continues separate until finished measurement. Front piece: = 110-116-122 (122-128) sts. Continue to cast off each side for armhole on every other row: 2 sts 2-2-2 (2-3) times, 1 sts 1-2-3 (3-2) times = 100-104-108 (108-112) sts. When piece measures 55-57-59 (59-61) cm cast off center 28-30-30 (36-38) sts for neck. Continue cast off towards neck on every other row: 2 sts 2 times, 1 st 1 time. Cast off when piece measures 60-62-64 (64-66) cm. Back piece: = 110-116-122 (122-128) sts. Cast off for armhole as on front piece = 100-104-108 (108-112) sts. When piece measures 58-60-62 (62-64) cm cast off center 34-36-36 (42-44) sts for neck. Cast off additional 2 sts on next row each side towards neck. Cast off when piece measures 60-62-64 (64-66) cm. Sleeve: Cast on 48-48-48 (48-52) sts on double pointed needles size 2,5 mm and work rib in 5 cm. Change to double pointed needles size 4 mm, work Pattern (place a repeat mid on sleeve) and inc 6-6-8 (10-8) sts evenly on first round = 54-54-56 (58-60) sts. At the same time after rib inc 2 sts mid under sleeve 27-27-28 (29-30) times on Lady: S+M+L: every 4th round, and Gent: S/M+M/L: alternately * every 4th and 5th round * = 108-108-112 (116-120) sts. When piece measures 47-47-47 (51-52) cm cast off 6 sts mid under sleeve and finishe work back and forth on needles. Continue to cast off 4 sts each side on every other row a total of 8 times, then cast off. Piece measures approx 53-53-53 (57-58) cm. Assembly: Sew shoulder seams. Pick up approx 100-112 sts around the neckline on double pointed needles size 2,5 mm and work rib in 5 cm, cast off. Sew in sleeves. |
|||||||
Diagram explanations |
|||||||
|
|||||||
 |
|||||||
 |
|||||||
Have you finished this pattern?Tag your pictures with #dropspattern or submit them to the #dropsfan gallery. Do you need help with this pattern?You'll find 18 tutorial videos, a Comments/Questions area and more by visiting the pattern on garnstudio.com. © 1982-2025 DROPS Design A/S. We reserve all rights. This document, including all its sub-sections, has copyrights. Read more about what you can do with our patterns at the bottom of each pattern on our site. |
|||||||


With over 40 years in knitting and crochet design, DROPS Design offers one of the most extensive collections of free patterns on the internet - translated to 17 languages. As of today we count 320 catalogues and 12090 patterns translated into English (UK/cm).
We work hard to bring you the best knitting and crochet have to offer, inspiration and advice as well as great quality yarns at incredible prices! Would you like to use our patterns for other than personal use? You can read what you are allowed to do in the Copyright text at the bottom of all our patterns. Happy crafting!
Post a comment to pattern DROPS 40-8
We would love to hear what you have to say about this pattern!
If you want to leave a question, please make sure you select the correct category in the form below, to speed up the answering process. Required fields are marked *.