Comments to DROPS 103-1
![]() Angela wrote:
Angela wrote:
Hello, I am having trouble with the instructions for the sleeves. I have completed the decreases which are the same as Back but then patterns says ‘Continue to bind off 2 sts each side’ which does not make sense as the last decrease I did was 1 st each side. Also there is no stitch count in these instructions compared to other sections. Any help would be great. Thank you.
21.07.2023 kl. 11:49:DROPS Design answered:
Dear Angela, it means that, after casting off 1 stitch the specified amount of times indicated you will continue by casting off 2 stitches on each side until the piece reaches the desired measurements (to obtain this specific sleeve cup curved shape). Since the amount of stitches is not relevant here (you will cast off all stitches right after reaching the desired length) we don't indicate the remaining stitches. After all, these remaining stitches may vary depending on the gauge of your work and it will not matter how many you have left as long as you reach the indicated length. Happy knitting!
23.07.2023 kl. 19:17:
![]() Helena Lopes Silva wrote:
Helena Lopes Silva wrote:
Ola, ao fazer a gola deste modelo posso levantar as malhas a toda volta do decote em vez de ter fazer aumentos e depois coser? Qual a diferença? Obrigada
16.10.2022 kl. 23:33:DROPS Design answered:
Boa tarde, As malhas , no modelo, são levantadas para formar a gola. Pode levantar sem fazer os aumentos, mas não terá o mesmo feitio. Os aumentos vão enviesar a gola para que possa ficar como na foto ao ser dobrada. Sem os aumentos, há a possibilidade de a gola, ao ser dobrada, ficar estreita. Bons tricôs!
18.10.2022 kl. 15:47:
![]() Karen Christensen wrote:
Karen Christensen wrote:
Vedr. drops 103-1 Nepal Ærme: …….. Når arb måler 34-33-32-29-28(49-48-47-46-44-43) Skal det ikke være…………. Når arb måler 28-29-32-33-34(43-44-46-47-48-49 Med venlig hilsen Karen Christensen
12.10.2022 kl. 17:15:DROPS Design answered:
Hei Karen. Nei, det er riktig slik det står (det er kortere mål i de større størrelsene pga bredere skuldervidde og lengre ermetopp). mvh DROPS Design
17.10.2022 kl. 13:12:
![]() Helena Lopes Silva wrote:
Helena Lopes Silva wrote:
No vosso diagrama os números são n. de malhas ou cm e na vertical são voltas? Não consigo chegar a uma conclusão. Obrigada
02.10.2022 kl. 22:23:DROPS Design answered:
Bom dia, Todos os números indicados no diagrama são em cm tanto em largura como em altura. Bons tricôs!
03.10.2022 kl. 10:09:
![]() Nancy Normandeau wrote:
Nancy Normandeau wrote:
Est-ce que je peux prendre une autre sorte de laine moyenne pour faire ce chandail? Il est tellement beau
29.04.2022 kl. 03:33:DROPS Design answered:
Bonjour Mme Normandeau, les explications de ce modèle sont disponibles en 2 versions: Snow/Andes soit 11 m x 15 rangs jersey = 10 x 10 cm soit la version Nepal (plus bas dans la page) 17 m x22 rangs jersey = 10 x 10 cm. Bon tricot!
29.04.2022 kl. 08:33:
![]() Sharon wrote:
Sharon wrote:
Hi igjen. Am working on the collar and I have a question. The collar is not yet 12 cm and it seems like it is going to be longer than the peice it is going to be sewn to. Should I knit 12 cm anyways and stretch to sew together. Or should I cast off when the collar is the correct length to see. That is the lengths are the same. Not sure how to end this .Thanks. S
27.01.2022 kl. 20:23:DROPS Design answered:
Dear Sharon, cast off stitches on collar when peice measures 12 cm on mid back, then sew the new stitches increased on each side along the 16 sts cast off on each front piece. Happy knitting!
28.01.2022 kl. 08:50:
![]() Sharon wrote:
Sharon wrote:
Hi! Thanks for your response, but it is impossible to pick up 36 or 42 sts. If i do there er large gaps. Had to pick up more sts and decreased. the YO is not the problem its the amount of stitches to pic up.
24.01.2022 kl. 08:18:DROPS Design answered:
Dear Sharon, remember that you don't have to pick up sts along the 16 sts on each front piece; this mean just pick up 8 sts on each front piece + 24 sts on neckline back piece = 42 sts. Should you get more/less sts, you can then adjust on first row. Happy knitting!
24.01.2022 kl. 10:25:
![]() Sharon wrote:
Sharon wrote:
Hi, am picking for the collar on the largest size of the Nepal version. My question is how do i pick up so there er no large gaps between the picked up stitches. I tried twice and ripped put because there were too many stitches and when i tried to pick up 42 stitches there were large gaps between stitches as mentioned. So how do I solve this problem.
23.01.2022 kl. 00:16:DROPS Design answered:
Hi Sharon, If you get large gaps between the stitches, when you first work the knitted-up stitches, work them twisted (i.e. in the back loop). This should avoid holes. Happy knitting!
24.01.2022 kl. 08:05:
![]() Sharon wrote:
Sharon wrote:
Sorry i have to ask a question about Silver Haze size 52 (made in Nepal)I have 108 stitches on the needles after casting off 3 stitches on both sides for armhole. When I decrease 2 stitches 5 times and the instructions thereafter I end up with the wrong amount of stitches. I cannot seem to get this correct. What am I missing?\r\nS
16.01.2022 kl. 15:11:DROPS Design answered:
Dear Sharon, if you are working the largest size, you need to decrease: 3 sts twice on each side (=12 stitches), 2 stitches 5 times on each side (= 20 stitches) and 1 stitch 4 times on each side (= 8 stitches). So you need to have 114-40 stitches= 74 stitches. Happy knitting!
17.01.2022 kl. 00:57:
![]() Sharon wrote:
Sharon wrote:
Hi, am making the Nepal version of this sweater. How many stitches should i pick up for the collar? Thanks for your response. S
29.12.2021 kl. 22:45:DROPS Design answered:
Hi Sharon, follow the pattern, i.e. pick up approx. 36 to 42 sts in between the MT at the neck line (i.e do not pick up sts in the outer most 16 sts each side at the mid front). Happy knitting!
30.12.2021 kl. 09:20:
![]() Sharon wrote:
Sharon wrote:
Hi am making Silver Haze again, but with short sleeves. 15 inches is still to long for med and would be a long sleeve. Should I start to increase earlier than stated in the pattern. If so at what point?
22.12.2021 kl. 10:42:DROPS Design answered:
Dear Sharon, we are unfortunately unable to adjust every pattern to every single request, you can try to take inspiration from a similar pattern - same tension and the desired length of sleeve or ask the store where you bought the yarn for any individual assistance. You can even ask other knitters in our group DROPS Workshop. Thanks for your comprehension.
22.12.2021 kl. 15:48:
![]() Sharon wrote:
Sharon wrote:
Which row do i start on for the left front so the pattern matches? Reversing the pattern so that the stockinett stitches faces each other is ok. But how do I knit this so pattern is symmetrical.
20.11.2021 kl. 02:01:DROPS Design answered:
Dear Sharon, just work in pattern as for first piece, ie follow "double seed stitch" the same way (P2, K2 on first row from RS). Happy knitting!
22.11.2021 kl. 07:43:
![]() Sharon wrote:
Sharon wrote:
Hi, Sharon again making size 52 Silver Haze with snow. Made the sleeve twice and had to redo. I would like a sleeve a longer than the short version. Following the instruction for the short version is too small in width. The instruction for the long sleeves is perfect with but way too long. Suggestion is appreciate. Sharon
18.11.2021 kl. 20:01:DROPS Design answered:
Dear Sharon, we are unfortunately not able to adjust every pattern to every single request, please contact your DROPS store or any knitting forum for any individual assistance adjusting the pattern as you would like it to be. Thanks for your comprehension. Happy knitting!
19.11.2021 kl. 07:16:
![]() Sharon wrote:
Sharon wrote:
Is there a problem withthe snow version size 52. Largest size. Am here: when the piece measures 35-36-37-38-39-40 cm [13¾”- 14¼”- 14½”- 15”- 15¼“-15¾”] bind off for armholes in the beg of every row each side: 3 sts 1 time, 2 sts 0-0-1-2-3-3 times and 1 st 1-2-3-3-3-4 times = 40-42-42-44-46-48 sts left. won’t be left with 48 stitches after the decreases. Shouldn’t the stitches after decrease be 58. First Dec. instructions says to decrease 3 st. 1 time. There is 2 armholes.
17.11.2021 kl. 21:23:DROPS Design answered:
Dear Sharon, in Snow largest size you have 74 sts, then cast off 3 sts at the beg of next 2 row (3 sts on each side) = 68 sts, then cast off 2 sts at the beg of next 6 rows (3 times 2 sts on each side) = 68-12=56 sts; then cast off 1 stitch at the beg of next 8 rows (4 times 1 st on each side) = 56-8=48 sts. Can this help?
18.11.2021 kl. 08:38:
![]() Sharon wrote:
Sharon wrote:
Hi, the instructions says to increase 1 stitch at the side for the front and there after every x amount of rows. Making largest side. how many rows equals 3 cm? I worked it out and I got 7 rows. Could be wrong. Is the hem a slanted shape? Is there a gauge for the seed stitch? Am confused.
09.11.2021 kl. 15:48:DROPS Design answered:
Dear Sharon, the number of rows depend on your exact gauge (which might be different for every individual. The pattern itself works with 15 rows = 10 cm. . Please make a gauge swatch, wash, and then measure. The hem should be straight. Happy stitching!.
09.11.2021 kl. 21:41:
![]() Sharon wrote:
Sharon wrote:
Hei! Am still puzzled over this sweater. The instructions says to decrease 1 stitch each side after 2inches. After 2 inches there is an increase every 1,1/8 rows how much rows is 1. 1/8. I am not good at math so my calculations could be incorrect. Also after the increases the hem is not straight like the picture. Is the hen slanted?
09.11.2021 kl. 15:25:DROPS Design answered:
Dear Sharon, with a tension of 22 rows = 10 cm/4 ", 1 row should be approx. 0.45 cm/1.18 inches. The bottom edge should be straight, the decreases are worked on the sides of the jacket to give the A-Shape - see chart. Hope this will help.
10.11.2021 kl. 07:23:
![]() Sharon wrote:
Sharon wrote:
Hi! Thanks again. Am making size 52. Am still confused because theme stockinett stitch section and the seed stitch section is not the same length. The instructions and your response is “when the piece measures 15 inches to start the buttonhole. I So am not sure how to proceed or if I should just give up on this project. I have put a lot of time into it so far. I could purchase the yarn used in the pattern but will I have the Sam problems.
08.11.2021 kl. 11:55:DROPS Design answered:
Dear Sharon, do you mean size XXXL? When piece measures 58 cm / 22¾” you cast off the first 10 sts (= seed stitches) for neck, continue working the remaining sts as before and continue casting off for neck as explained (all seed stitches will then be cast off and picked up later for neck). First buttonhole is worked at 15 " and last buttonhole will be opened at 22', this means before you cast off for neck. Can this help?
08.11.2021 kl. 12:15:
![]() Sharon wrote:
Sharon wrote:
First let me thank this team for responding to all my questions. I am at the right front of this project. The seed stitch band is on 18 inches an am supposed to make 3 buttonholes. The problem I have is one buttonhole at 18 inches the other at 20 inches brings me to where I should begin to cast off for the neck with not enough length here for the last buttonhole? What is the solution here? Thinking og ripping out and making a buttonhole closer yo the first. Am just tired of undoing my work.
06.11.2021 kl. 06:52:DROPS Design answered:
Dear Sharon, could you remind us which size you are working on? If I'm right thinking you are working the largest size, buttonholes are worked when piece measures 15”- 18½”- 22” and you will bind off fro neckt when piece measures 22¾, ie after the 3rd buttonhole. Can this help?
08.11.2021 kl. 07:30:
![]() Sharon wrote:
Sharon wrote:
Hi! Finally Working on the left front and I have a question: Where should I measure for length? The Stockinette area has a length of 31 cm with 3 stitches left to decrease. The moss stitch area measures 22 cm in length. My gauge in Stockinette is spot on after blocking. For the buttonholes I assume I would measure only the moss stitch area. And the Stockinette area for all other purposes. Please confirm.
29.10.2021 kl. 11:34:DROPS Design answered:
Hi Sharon, for the buttonholes you should measure the moss stitch area,the stockinette area for all other purposes. A jumper or a jacket the length is measured from the highest point on the shoulder closest to the neckline. Happy knitting!
29.10.2021 kl. 12:36:
![]() Sharon wrote:
Sharon wrote:
Hi! Tok my calculator and the numbers for the largest size and they still don’t add up. I had 70 stitches after casting off for the sides. I have 3 stitches extra. Am to do do this cast off on another row. S
20.10.2021 kl. 14:06:DROPS Design answered:
Dear Sharon, on the left front piece, you decrease for the armhole 3 sts 2 times + 2 sts 5 times + 1 st 4 times = 20 sts; there were 70 sts - 20 = 50 sts remain. Can this help? Happy knitting!
20.10.2021 kl. 15:26:
![]() Sharon wrote:
Sharon wrote:
Hi! Am working the left front and I cannot get the numbers to add up. Using Nepal yarn. How many stitches am I supposed to cast off at the side of the left front. If I cast off 3 or 6 I have more than 50 stitches. Am ripping back and hope to get som help before I proceed. S
19.10.2021 kl. 21:34:DROPS Design answered:
Dear Sharon, if you mean about the casting off for the armhole, you should cast off "3 sts 1 time, 2 sts 0-0-1-2-3-3 times and 1 st 1-2-3-3-3-4 times " (depending on the size you are making. Happy Knitting!
20.10.2021 kl. 02:24:
![]() Sharon wrote:
Sharon wrote:
Hi! Working the decreases on the back. Am I supposed to work the decreases of 2 stitches on the beginning and end of the knit and purl rows? What I did is knit the decreases between the edge stitches so as to make this easier to sew. I also added I inch of stitches to make a slightly larger sweater and follow the decreases stated for size 52. Thanks for your help about the decreases. Sharon
08.10.2021 kl. 11:52:DROPS Design answered:
Dear Sharon, you can bind off at the beg of next 2 row (from RS + from WS) or decrease on each side on a RS row inside the edge stich - just chooses what you rather lilke to. Happy knitting!
08.10.2021 kl. 12:56:
![]() Sharon wrote:
Sharon wrote:
Hi, thanks for your quick response. Have looked at this pattern many times to see if I can find instructions/tipson how to make a size 54, but the size goes up to a size 52. I would like o also know how I could adjust the front to overlap perfectly. Thanks
06.10.2021 kl. 12:37:DROPS Design answered:
Dear Sharon, please undestand that we cannot modify our patterns to each individual request. Having said that, we would suggest you take a piece that fits the intended wearer and compare the measurements, and you might find that there is not that much difference. Also you can try a somewhat looser gauge to aquire a bigger piece with the same stitch and row cound. If there is further modification, then you have to recalculate the stitchnumbers yourself. Happy Stitching!
06.10.2021 kl. 16:20:
![]() Sharon wrote:
Sharon wrote:
Hello! I am about to make this jacket. Am working a swatch to see how it will work. I would like to make the jacket 2 inches larger. Hope to get a response and some help. Thank you.
05.10.2021 kl. 20:39:DROPS Design answered:
Hi Sharon, There is a measurement sketch for all the sizes at the bottom of the pattern. Find the measurements you require and then you can work the corresponding size. Happy knitting!
06.10.2021 kl. 07:04:
![]() Nella Zecchi wrote:
Nella Zecchi wrote:
Non capisco il colletto .le 24 maglie vanno riprese anche sul dietro ?
13.01.2021 kl. 11:13:DROPS Design answered:
Buonasera Nella, seguendo la lavorazione con Snow deve riprendere un numero compreso tra 24 e 28 maglie tra i segnapunti sulla scollatura, evitando le 10 maglie verso i lati. Buon lavoro!
13.01.2021 kl. 20:14:
![]() Anna wrote:
Anna wrote:
Buonasera, posso avere una spiegazione più chiara del collettò. Grazie
09.01.2021 kl. 20:39:DROPS Design answered:
Buonasera Anna, quale parte del colletto non le è chiara? Deve iniziare riprendendo circa 24-28 m tra i segnapunti sulla scollatura e lavorando 2 ferri a legaccio e sull'ultimo ferro aumentare 10 maglie. Poi continuare a grana di riso doppia con 1 maglia a maglia legaccio a ogni lato. Deve seguire gli aumenti come indicato. Buon lavoro!
10.01.2021 kl. 19:24:
![]() Silvana wrote:
Silvana wrote:
Buongiorno, come devo lavorare le maglie di vivagno? Grazie per l' aiuto.
23.12.2020 kl. 07:29:DROPS Design answered:
In questo modello non è indicato come lavorare le maglie di vivagno. Può usare la tecnica che preferisce. Buon lavoro!
23.12.2020 kl. 09:10:
![]() Alice wrote:
Alice wrote:
I’ve checked my gage twice. US #11s with Alafoss Lopi, a Group D bulky yarn, comes out 4”. But it’s way too loose for a coherent sweater. Casting on 84 sts for the back at 2.75 sts/in means the back is 30 inches wide for size XL (44 inch bust). WAY too big. What am I missing?
05.12.2020 kl. 00:10:DROPS Design answered:
Dear Alice, when you use a yarn not indicated in the pattern you need to make a gauge swatch and either try to obtain the same gauge as in the pattern, to ensure you can use the calculations in the instructions, or, if the gauge is different, recalculate the number of stitches in each step, taking into account your gauge. Also, you need to take into account that the model is quite wide in itself, so take a look at the measurements in the chart to guide you. Happy knitting!
06.12.2020 kl. 16:54:
![]() Jo Kramer wrote:
Jo Kramer wrote:
Hi thanks for getting back to me with the number of stitches for collar I did a few extra but it looks ok so now I am confused with the increase of 2 stitches at beginning of row it says work 1 garter then two moss and yarn over ? Do you put yarn over twice ?? To make two stitches and hoe do I stop the pattern from bring out in the moss stitch just not sure how and sent yo increase as it says increase two stitches could you please help so sorry to not understand jo x
02.07.2020 kl. 16:50:DROPS Design answered:
Dear Mrs Kramer, you increase at the beg and end of row by working the first/last stitch (= edge stitch) in the front and back loop + make a yarn over inside the edge stitch, ie at the beg of row work the edge stitch twice, make a YO, work in pattern to the end of row, turn and repeat on the other side (so that you increase on each side at the beg of every row) and work the new stitches in pattern (double moss stitch). Hope this will help. Happy knitting!
02.07.2020 kl. 17:25:
![]() Jo Kramer wrote:
Jo Kramer wrote:
Hi can you please help me i have finished the garment and i am about to start the collar and i am so confused as it state to pick up 42 stiches between the front markers and to not include the 16 stiches on each front section but the gap between the markers is way more than 42 stiches the back neck part is 24 stiches then you have the shoulder parts and the front section can you please tell me how to assemble the collar only thing i dont understand
01.07.2020 kl. 17:51:DROPS Design answered:
Dear Mrs Kramer, you should pick up approx. 10 sts along each side of front piece (after/before the 16 sts on each side) and approx. 24 sts on back piece - if you pick up more/less stitches you can adjust the number of stitches on first row. Happy knitting!
02.07.2020 kl. 08:34:
![]() Alessandra Piazza wrote:
Alessandra Piazza wrote:
Hola La abreviación REM es disminución de un punto? Gracias
29.04.2020 kl. 00:21:DROPS Design answered:
Hola Alessandra. La abreviación REM = rematar, cerrar.
30.04.2020 kl. 23:34:
![]() Monique Mary wrote:
Monique Mary wrote:
Je souhaite avoir les explications pour le modèle "veste SPRINGDANCE de perle en perle" qui est paru vers 2013, avec un col "normal" et 3 boutons "bâtons" qui est sur les photos gris clair chinée. Quelqu'un peut il me communiquer les explications de ce modèle? je vous en remercie. Monique
26.01.2020 kl. 16:22:DROPS Design answered:
Bonjour Mme Mary, pouvez-vous essayez de retrouver ce modèle? Je n'ai pas trouver de modèle de ce nom sur notre site. N'hésitez pas à vous adresser à votre magasin DROPS, il peut aussi vous aider. Bon tricot!
27.01.2020 kl. 09:26:
![]() Brodbeck-Berger Christin wrote:
Brodbeck-Berger Christin wrote:
Die Erklärung zum Kragen irritiert: was heisst „auf beiden Seiten nicht über den 10 Maschen zur vorderen Mitte zu“? WO ist denn die vordereMitte?
11.12.2019 kl. 09:59:DROPS Design answered:
Liebe Frau Brodbeck-Berger, es handelt sich um die ersten 10 Maschen beim rechten Vorderteil und die letzten 10 Maschen beim linken Vorderteil - von der Vorderseite gesehen. Dh die Maschen werden von der 11. Maschen am rechten Vorderteil bis 10 Maschen Perlmuster bleiben am linken Vorderteil. Viel Spaß beim stricken!
11.12.2019 kl. 12:59:
![]() Renee Beerens wrote:
Renee Beerens wrote:
Hoe moet ik de kraag precies aan de voorpanden naaien? De 10 niet gebruikte steken aan de zijkant meten 10 cm. Als ik de kraag middenachter echter door brei tot 12 cm is de zijkant van de kraag veel langer dan de 10 cm waar deze op zou moeten aansluiten.
22.10.2019 kl. 21:27:DROPS Design answered:
Dag Renee,
Het is inderdaad wel de bedoeling dat je de kanten van de kraag aan de biezen midden voor naait, dus dan zou ik de kraag iets minder hoog breien, zodat hij mooi aansluit.
30.10.2019 kl. 12:11:
![]() Kaisa wrote:
Kaisa wrote:
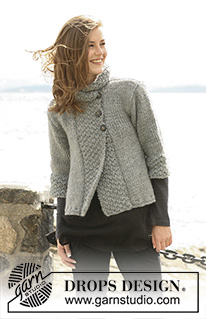
Hi! Is the yarn used in the photos on this page Eskimo or one of the alternative yarn options? Also, which colour is used? Thanks!
03.09.2019 kl. 12:04:DROPS Design answered:
Dear Kaisa, the jacket in the picture has been worked with Eskimo colour no 46 (see Materials list under the header). Happy knitting!
03.09.2019 kl. 14:49:
![]() Terry Harley wrote:
Terry Harley wrote:
What is the difference between the Eskimo, Nepal, and Andes patterns? I'm so confused.
26.08.2019 kl. 17:37:DROPS Design answered:
Dear Mrs Harley, the yarns are different thicknesses - the jacket worked in Eskimo or Andes is worked with a tension of 11 sts x 15 rows = 10 x10 cm while the jacket worked with Nepal is worked with a tension of 17 sts x 22 rows = 10 x 10 cm. Happy knitting!
27.08.2019 kl. 09:03:
![]() Sue Garner wrote:
Sue Garner wrote:
Got to trying to sew the shoulder seams and there is no way front and back will fit. The armhole and top of arm don't fit together either. I knit a lot and am really frustrated with the outcome , it's a pattern I really like, but despite trying to follow it , I have ended up with something I am going to have to create my own pattern to join parts together or pull it all down. Have you done any corrections to the pattern since December last year ? This is from a very frustrated knitter.
27.06.2019 kl. 16:51:DROPS Design answered:
Dear Mrs Garner, there are no new corrections to this very popular pattern - make sure you have the right measurements on both armholes and sleeve cap, lay the sleeve over armhole pinning if if required before sewing, it should fit. For any further individual assistance please show your work to your store (even per mail), they could be able to find if there is anything wrong. Happy knitting!
28.06.2019 kl. 06:23:
![]() Marja Stravers wrote:
Marja Stravers wrote:
Ik ben dit vest aan het breien voor maat L Nu wordt bij het rugpand voor de mouwmindering 1x3, 3x2 en 4x1 steek minderen opgegeven. Maar het bovenste deel is dan nog maar ongeveer 33 cm breed. Dat is toch teveel minderen? Het is echt te smal, ook voor de maat in de tekening die uit komt op 38 cm. De rest van de maten klopt.
18.03.2019 kl. 19:33:DROPS Design answered:
Dag Marja,
Voor de armsgaten kant je in totaal 8 steken af aan beide kanten, dus in totaal 16 steken. Dan heb je 42 steken over en dit zou bij de juiste stekenverhouding op ongeveer 38 cm breed komen. Misschien even het totaal aantal steken nakijken en controleren of de stekenverhouding klopt voor Eskimo. Als je met Nepal breit, neem dan het patroon voor Nepal dat eronder staat, hiervoor is het aantal steken aangepast.
21.03.2019 kl. 17:04:
![]() Adriana Akkermans wrote:
Adriana Akkermans wrote:
Ik wil dit vest gaan breien met Eskimo nld 7 omdat ik erg los brei: ik heb dan 8 st. = 10 cm. Als ik 56 steken zou opzetten voor de achterkant, kom ik aan de juiste breedte. Mijn vraag is: is dit vest nietv heel erg breed aan de onderkant
31.01.2019 kl. 22:18:DROPS Design answered:
Dag Adriana,
Onderaan het patroon staat de tekening van het vest met de maten erbij. Dit zijn vrij normale afmetingen. Als je 8 steken hebt op 10 cm. Dan deel je het aantal op te zetten steken door 11 en dat getal doe je weer keer 8.
03.02.2019 kl. 11:36:
![]() Kathy wrote:
Kathy wrote:
Hola, no entiendo bien la explicación para hacer la espalda: [Tejer 2 vtas pt musgo, y luego 2 vtas pt resorte con 1 pt de orillo y 2 d a cada lado (visto por el LD)]. Hecho esto una veces continuó con el pto resorte todo el tiempo o pto musgo y luego resorte, y que quiere decir 2 d a cada lado. Muchas gracias antemano y me encanta lo que hacéis
21.01.2019 kl. 02:05:DROPS Design answered:
Hola Kathy. Primero se trabajan 2 filas en punto musgo. Las 2 filas con punto elástico (2 derechos/2 reveses) se trabajan como sigue: 1 punto orillo, 2 puntos de derecho,*2 reveses, 2 derechos*, repetir de *a* hasta el final de la fila, 1 punto orillo.
25.02.2019 kl. 20:44:
![]() Valerie Wiebe wrote:
Valerie Wiebe wrote:
When attaching the sleeves, should I sew the seam of the sleeve itself first, then sew to the cardigan or sew the sleeve flat onto the cardigan?
14.01.2019 kl. 20:23:DROPS Design answered:
Dear Mrs Wiebe, you can either start to set the sleeve then sew the sleeve seeam or sew first the sleeve then set it. This video shows how to set a sleeve. Happy assembly!
15.01.2019 kl. 09:23:
![]() Ana Alba Cubero wrote:
Ana Alba Cubero wrote:
Hola. Quiero tejer esta chaqueta pero no entiendo la explicación para tejer el cuello. ¿ Qué quereis decir con MP? Concretamente la frase "levantar x puntos entre el MP en la línea del escote" no la entiendo. ¿ME lo podrian explicar? Gracias.
05.01.2019 kl. 09:17:DROPS Design answered:
Hola Ana. MP = el marcapuntos. Se colocan antes de comenzar el cuello para marcar donde se levantan los puntos para el cuello. Levantar los puntos entre MP = empezar en el marcapuntos en el delantero derecho, ir cogiendo los puntos para el cuello y terminar en el marcapuntos en el delantero izquierdo.
03.02.2019 kl. 19:02:
![]() Bernadette wrote:
Bernadette wrote:
The directions for seed stitch seem to be different than the video instructions..... is there an error in the pattern directions.
24.10.2018 kl. 23:19:DROPS Design answered:
Dear Bernadette, the double moss seed stitch in this pattern is worked as shown in the video below - which difference have you seen? Happy knitting!
25.10.2018 kl. 08:42:
![]() Valérie P. wrote:
Valérie P. wrote:
Bonjour, je vois que vous venez de rectifier la 1ère parenthèse concernant le col. Vous avez mis "de ne pas relever les 16m. de chaque côté du milieu devant", alors qu'avant vous parliez de "10m."
17.10.2018 kl. 08:25:DROPS Design answered:
Bonjour Valérie P., pour la veste en Eskimo, on ne relève pas les mailles du col dans les 10 m de chaque côté, pour celle en Nepal on ne relève pas les mailles du col dans les 16 m de chaque côté. Bon tricot!
17.10.2018 kl. 12:30:Mery wrote:
Est il possible d'avoir les explications en français? Merci
16.10.2018 kl. 20:47:DROPS Design answered:
Bonjour Mme Mery, tous nos modèles sont disponibles en français, cliquez sur le menu sous la photo pour changer la langue. Bon tricot!
17.10.2018 kl. 08:21:
![]() Valérie P. wrote:
Valérie P. wrote:
Bonjour, Concernant le montage du col (ouvrage en eskimo), je dois reprendre 24 mailles (ou 28) après le marqueur des 10 mailles rabattues du demi-devant. Hors, il s'avère que pour arriver à la fin, j'obtiens plus de 40 mailles... puis je avoir plus de précision? Merci à vous
16.10.2018 kl. 08:50:DROPS Design answered:
Bonjour Valérie P., ajustez bien le nombre de mailles que vous relevez le long des côtés de l'encolure (voir vidéo), si vous avez toujours trop de mailles, vous pouvez diminuer à intervalles réguliers au rang suivant pour ajuster au nombre de mailles requis. Bon tricot!
16.10.2018 kl. 09:14:Eva wrote:
Que medidas y gramos debería usar para realizarlo con Alpca (4mm de aguja)
29.08.2018 kl. 13:33:DROPS Design answered:
Hola Eva. Este patrón con Alpaca hay que trabajarlo con 2 hilos. La cantidad del material depende del modelo ( si es con manga corta o larga), la talla, la aguja y la tensión del tejido. Aprox. vas a necesitar 1 ovillo menos de Alpaca que las cantidades de Nepal indicadas en el patrón.
18.09.2018 kl. 11:57:
![]() Guylaine wrote:
Guylaine wrote:
Bonjour, j'aime ce modele mais puis je le faire en fil plus petit question que cette veste ne soit pas aussi epaisse. Comment faire pour la grandeur dans ce cas. Merci
25.08.2018 kl. 19:10:DROPS Design answered:
Bonjour Guylaine, ce modèle existe en deux versions différentes: 1 en laine du groupe E (Eskimo ou Andes) et 1 en laine du groupe C (en Nepal) plus bas sur la page des explications. Pour une autre tension, il vaudra mieux regarder un autre modèle correspondant à votre échantillon, ce sera plus simple que de recalculer entièrement le modèle. Bon tricot!
05.09.2018 kl. 14:13:
![]() Carmela Siegel-Heck wrote:
Carmela Siegel-Heck wrote:
Unterschied Eskimo-Nepal? Wo bekomme ich Wolle? Ist "L" Größe 44?
05.08.2018 kl. 14:22:DROPS Design answered:
Lliebe Frau Siegel-Heck, DROPS Eskimo ist ein dickes einfädiges Garn und Nepal ist etwas dünner - bei den jeweiligen Farbkarten lesen Sie mehr. Hier finden Sie Ihren Händler! Hier lesen Sie mehr über Masse und Grösse. Viel Spaß beim stricken!
06.08.2018 kl. 09:33:Diane Florin wrote:
Bonjour, je trouve ce modèle superbe. Les explications sont-elles disponibles quelque part en français svp ? Merci d'avance !
31.07.2018 kl. 21:04:DROPS Design answered:
Bonjour Mme Florin, tout à fait, cliquez sur le menu déroulant sous la photo pour changer la langue. Bon tricot!
01.08.2018 kl. 08:46:Gisse wrote:
Hola! Me encanta este modelo y estoy tratando de hacer pero tengo una pregunta, en la parte del cuello los puntos se rematan? No sé dejan en espera? De antemano muchas gracias y saludos!
30.06.2018 kl. 05:25:DROPS Design answered:
Hola Gisse. En la parte del escote los puntos se rematan y después se recogen para hacer el cuello. Esto permite que el cuello se mantenga mejor en vertical.
30.06.2018 kl. 19:12:
![]() Soulard wrote:
Soulard wrote:
Je viens de finir la veste en laine Andes. Je la trouve très jolie, lais je pense avoir rabattu les mailles du col trop serré et suis déçue du résultat. Y a t-il un moyen de refaire le "rabattage " avec aiguilles plus grosses sans défaire tout? J'avoue que je suis perdue et j'espère vraiment qu'il y a une solution... Merci à l'avance pour votre aide!
15.02.2018 kl. 16:12:DROPS Design answered:
Bonjour Mme Soulard, si vos mailles rabattues sont trop serrées, il va vous falloir redéfaire ce dernier rang et les rabattre soit avec une aiguille d'une taille au-dessus, soit avec quelques jetés à intervalles réguliers. N'hésitez pas à apporter/montrer votre veste/une photo à votre magasin (même par mail), ils auront probablement d'autres astuces personnalisées pour vous. Bon tricot!
15.02.2018 kl. 16:22:
![]() Yvonne wrote:
Yvonne wrote:
Hallo liebes Drops Team, welches Garn wurde bei dem Model auf dem Foto verwendet? Vielen Dank Lg
13.02.2018 kl. 17:22:DROPS Design answered:
Liebe Yvonne, die Jacke auf dem Foto wurde mit Eskimo gestrickt. Viel Spaß beim stricken!
14.02.2018 kl. 08:38:
![]() Lelletta wrote:
Lelletta wrote:
Scusate ancora, quindi sarebbero le 24 maglie (12 e 12) che si aumentano con i gettati?
08.01.2018 kl. 12:51:DROPS Design answered:
Buongiorno Lelletta. Sì esatto. Buon lavoro!
09.01.2018 kl. 08:42:
![]() Lelletta wrote:
Lelletta wrote:
Buongiorno! Ho difficoltà a capire le istruzioni per il collo.Le 28m. (taglia M) sono per la metà davanti? E se non riprendo le 10 m. intrecciate il colletto mi rimane staccato! Aiutatemi per favore! Grazie! Ah...buon anno anche se un po' in ritardo! :)
08.01.2018 kl. 09:59:DROPS Design answered:
Buongiorno Lelletta. Le 28 m sono per tutto il colletto. Il colletto verrà cucito alle 10 m intrecciate, alla fine del lavoro. Buon lavoro!
08.01.2018 kl. 11:17:
![]() Monica wrote:
Monica wrote:
Salve, scusate se insisto, ma secondo me, se aumento per il collo all' inizio di ogni ferro da ciascun lato x 6 volte e devo aumentare 12 m per lato, ci vogliono 6 ferri, non 12...
30.08.2016 kl. 06:55:DROPS Design answered:
Buongiorno Monica, deve aumentare 6 volte a ogni lato all'inizio del f, per cui procede in questo modo: aumenta, lavora il ferro, gira il lavoro, aumenta, lavora il ferro. Tutto questo per sei volte, così avrà 12 aumenti per lato (= 24 aumenti totali) in 12 ferri totali. Buon lavor
30.08.2016 kl. 07:18:
![]() Monica wrote:
Monica wrote:
Salve, non ho capito se per il collo devo eseguire i 2 aumenti per lato ogni ferro (quindi in 6 ferri eseguo gli aumenti di 12 m per ogni lato) oppure aumento a ferri alterni (12 ferri per aumentare 12 m per lato); calcolando che per ottenere, come previsto, un collo di 20 cm., lavorerò 20 ferri. Grazie saluti
15.08.2016 kl. 18:10:DROPS Design answered:
Buonasera Monica. Deve aumentare 2 m, all'inizio di ogni ferro, da ciascun lato, per 6 volte. Quindi 12 ferri per aumentare 12 m da ciascun lato. Buon lavoro!
15.08.2016 kl. 19:12:Diane Kirby wrote:
I love this pattern but the bottom edges are curling - 2 rows garter stitch and 2 rows rib. Do you have any advice on how to make it lie flat? Thank you.
28.07.2016 kl. 09:00:DROPS Design answered:
Dear Mrs Kirby, you can block the jacket and/or add a small crocheted border at the bottom of the jacket. Your DROPS store may have more tips & advices for you, they"ll help you even per mail or telephone. Happy knitting!
28.07.2016 kl. 09:11:
![]() Langevin Jenny wrote:
Langevin Jenny wrote:
Bonjour, Je suis en train de tricoter le col, mais malheureusement je ne comprends pas la technique indiquée pour les augmentations : "faire un jeté qui devra être tourné avant d'être tricoté au rang suivant" je ne comprends pas ce que signifie tourner le jeté.... est-ce la technique des rangs raccourcis qu'il faut employer? Merci d'avance pour votre réponse.
16.05.2016 kl. 22:22:DROPS Design answered:
Bonjour Mme Langevin, les jetés doivent être tricotés torse (= dans le brin arrière au lieu du brin avant) voir aussi vidéo ci-dessous. Bon tricot!
17.05.2016 kl. 11:22:
![]() Langevin Jenny wrote:
Langevin Jenny wrote:
Bonjour, Je tricote en Andes, taille M. Pour le dos, lorsqu'il faut rabattre les mailles pour les emmanchures, on rabat tous les deux rangs, d'abord trois mailles, puis "o fois 2 m" = dois je quand même tricoter deux rangs sans faire de diminution, ou bien directement passer à la suite? Merci pour votre réponse
10.04.2016 kl. 12:22:DROPS Design answered:
Bonjour Mme Langevin, en taille M, après avoir rabattu 1 x 3 m de chaque côté, puis 2 x 1 m de chaque côté (directement après les 3 m). Bon tricot!
11.04.2016 kl. 11:10:
![]() Fabienne De Vree wrote:
Fabienne De Vree wrote:
Goedemiddag, Voor rugpand: vanaf 5 cm hoogte afkanten aan beide kanten. Bedoelen jullie 5 cm tricotsteek of 5 cm totale hoogte inclusief ribbel- en boordsteek? Bedankt!
06.04.2016 kl. 13:36:DROPS Design answered:
Hoi Fabienne. Altijd totale hoogte meten - tenzij anders wordt vermeld in het patroon.
06.04.2016 kl. 14:44:
![]() Ella wrote:
Ella wrote:
Tere Kudusin selle mudeli suurus L lõngast Nepal vastavalt õpetusele. Lõpptulemus-ühendamisel topeltpärlkude esiosadel ei kattunud täielikult nagu näeb ette see mudel. Puudu umbes 3cm. Palun abi. Ette tänades.
25.02.2016 kl. 21:27:DROPS Design answered:
Tere Ella! Mõlemad hõlmad kootakse ühesugused, teine ainult peegelpildis. St. et ei tohiks erinevusi olla.
07.03.2016 kl. 14:20:
![]() Claudia wrote:
Claudia wrote:
Sto lavorando le maniche. Nel disegno vedo 15 cm (bordo polso) mentre nelle spiegazioni c'è scritto 25. Se devo aumentare ogni 5 cm 1 maglia per 5 volte, forse 25 non va bene. Cosa mi dite? Grazie
04.12.2015 kl. 12:22:DROPS Design answered:
Buonasera Claudia, abbiamo chiesto alla casa madre di verificare lo schema riguardo alla misura delle maniche; in ogni caso lei deve lavorare 10 cm a grana di riso doppia e lavorare a maglia rasata fino a 11 (25) cm e poi iniziare gli aumenti. Ci riscriva se ha altri dubbi. Buon lavoro!
08.12.2015 kl. 18:04:Claudia wrote:
Ringrazio per la pronta risposta, ma quello che desidero sapere non è la quantità della lana, ma LA MISURA in cm. della metà davanti. Il dietro misura cm.42 allo scavo manica, ma quanto misura la metà del dAVANTI?
03.12.2015 kl. 21:04:DROPS Design answered:
Buongiorno Claudia. Il davanti, all’altezza dello scavo manica, per la taglia S, misura ca. 27 cm. Buon lavoro!
04.12.2015 kl. 10:29:Claudia Naimi wrote:
Le misure della metà davanti? devo calcolare i cm perchè la lana è diversa. omunque il mdello è delizioso. Spero di riuscire a farlo bene
02.12.2015 kl. 18:37:DROPS Design answered:
Buongiorno Claudia. Per il davanti dovrebbe considerare circa un terzo di lana in più rispetto a quella usata per il dietro. Se non le rappresenta un problema, consigliamo sempre di ordinare un gomitolo di lana in più, soprattutto se l'ordine è postale. Buon lavoro!
03.12.2015 kl. 15:57:
![]() Stella wrote:
Stella wrote:
Ho realizzato questo modello nella taglia S, il campione corrispondeva ma, purtroppo, per la prima volta il risultato è stato davvero deludente: il maglione realizzato non corrisponde assolutamente con la foto, è esageratamente ampio sia alla base che nelle maniche (e le misure corrispondono). Forse 34 maglie avviate per la manica sono eccessive, così come quelle alla base del corpo. Per la prima volta sono davvero delusa perché il risultato finale è decisamente diverso dalle aspettative.
15.11.2015 kl. 11:17:DROPS Design answered:
Buongiorno Stella, ci dispiace per questo inconveniente: le misure della taglia S nel diagramma in fondo al modello corrispondono alle sue? Forse avrebbe dovuto adattarlo per una taglia più piccola: in ogni caso questo capo realizzato in Eskimo è pensato come una giacchina, da usare sopra un maglioncino, se invece vuole usarlo come maglione, meglio realizzarlo in Nepal perchè sia meno pesante. Buon lavoro!
16.11.2015 kl. 18:09:
![]() Ella wrote:
Ella wrote:
Tere, elan kohas, kus talv on sarnane Eesti sügisega ja villast jäkki ei taha. Millist lõnga soovitate M-suuruse pikkade varukatega kudumiseks? Ette tänades. Ella
24.08.2015 kl. 00:47:DROPS Design answered:
Tere Ella! Alternatiivlõngaks sobib suurepäraselt sama lõngagrupi puuvillane lõng DROPS Paris. Teisi võimalusi saab vaadata mustrilehel nupu alt "Alternatiivlõngad". Head kudumist!
02.09.2015 kl. 13:41:
![]() Doris Bemo Thrane wrote:
Doris Bemo Thrane wrote:
Hej, hvordan finder jeg brystmål mv. til t finde min størrelse i den enkelte opskrift?
18.08.2015 kl. 11:35:DROPS Design answered:
Hej Doris. Nederst paa mönstret finde du maalskitsen med alle maal i cm.
18.08.2015 kl. 17:02:
![]() Sally Ann wrote:
Sally Ann wrote:
Hej fin jakke, kan jeg strikke den i børstet alpaka silk ? evt på mindre pinde i en størrelse større end den jeg skal bruge ?
31.07.2015 kl. 20:59:DROPS Design answered:
Hej Sally, Ja men så skal du strikke den med dobbelt tråd DROPS Brushed Alpaca Silk. Her ser du hvordan du regner garnforbruget ud!
03.08.2015 kl. 10:58:
![]() Jane wrote:
Jane wrote:
I don't understand which actual pattern to use. You mention Eskimo wool which refers to the Eskimo pattern - fine. Then you mention Andes wool but no pattern with Andes wool only Nepal. Which pattern am i supposed to use with Andes wool
21.03.2015 kl. 15:39:DROPS Design answered:
Dear Jane, With Andes, please follow pattern in Eskimo (same group, same tension). Happy knitting!
23.03.2015 kl. 08:58:Elsa Garcia Garcia wrote:
Hola! me encantan los patrones de drops Desing! y estoy encantada con la revista! Quisiera que ver si me podrían ayudar a escoger mi talla correcta. Mido 90 cm de busto, 90 de cadera y 35cm de largo de tronco, normalmente soy talla 9 o mediana pero no se cuales instrucciones seguir. El modelo que quiero hacer es el Drops 103-1 Nepal. Les Agradecería mucho me pudieran ayudar. Soy de Mexico y me encantaría que abrieran una sucursal en el D.F.
23.01.2015 kl. 02:15:DROPS Design answered:
Hola Elsa. Para elegir la talla correcta te recomendamos fijarte en el diagrama que viene debajo del patrón. Las medidas son en cm. Para este modelo en concreto tienes que trabajar la talla M. No te olvides la importancia de mantener siempre la misma tensión del tejido recomendada en el patrón.
24.01.2015 kl. 11:38:
![]() Rita wrote:
Rita wrote:
Salve, ho problemi nell'esecuzione delle maniche: quando il lavoromisura 34 cm ( taglia S) intrecciare per l arrotondamento della manica da ogni lato ogni 2 ferri 3 m 1 volta, 2 m 1 volta e 1 m 2 volte, continuate e intrecciare 2 m a obni lato fino a quando il lavoro misura 40 cm. Come faccio ad avere 40 cm di altezza se solo per eseguire gli scalfi li ho superati di gran lunga considerato lo spessore della lana? ( 16 ferri sono 10 cm) quindi 3,2 ferri sono 2 cm.........Aiuto
01.01.2015 kl. 21:57:DROPS Design answered:
Buongiorno Rita. Per la taglia S, quando il lavoro misura 34 cm, intreccia da ciascun lato: 3 m 1 volta (quindi 2 ferri, il primo ferro sul diritto del lavoro, il secondo sul rovescio), 2 m 1 volta (2 ferri), 1 m 2 volte (4 ferri). In tutto, fino ad ora, sono 8 ferri, quindi ca. 5 cm. Il suo lavoro dovrebbe misurare ora ca.39 cm. Può così proseguire come indicato nelle spiegazioni. Buon lavoro!
02.01.2015 kl. 09:05:
![]() Patricia LECUYER wrote:
Patricia LECUYER wrote:
Bonjour Taille L en NEPAL combien de fois diminuer 2 m de chaque côté avant 1 x 3 m et rabattre les mailles restantes ? Combien de mailles restantes restent à rabattre au final. Merci Patricia
25.11.2014 kl. 22:53:DROPS Design answered:
Bonjour Mme Lecuyer, on rabat pour l'arrondi de la manche 2 m de chaque côté jusqu'à ce que la manche mesure 41 (56) cm de hauteur totale, ce nombre de fois dépendra de votre tension, on se concentre ici sur la hauteur seulement, quand la manche mesure 41(56) cm de hauteur totale, on rabat alors 1 x 3 m de chaque côté puis les mailles restantes. Bon tricot!
26.11.2014 kl. 10:02:
![]() Bourdet Joëlle wrote:
Bourdet Joëlle wrote:
Je ne comprends pas pourquoi les diminutions des manches ( niveau emmanchures)se font à 34cm pour la taille S et à 28 cm pour la taille XXXL ; n'est ce pas l'inverse ? Merci beaucoup pour votre aide. Joëlle ( je tricote taille S)
19.11.2014 kl. 22:38:DROPS Design answered:
Bonjour Mme Bourdet, les épaules sont plus larges et l'arrondi de la manche plus long dans les grandes tailles, on commence à former l'arrondi de la manche en taille S plus tôt. Bon tricot!
20.11.2014 kl. 09:54:
![]() Sarah wrote:
Sarah wrote:
Bei der Abnahme zum Beispiel am Rücken, wenn steht von beiden Seiten je 1 M abnehmen, ist dann in der Hin- und Rückrunde gemeint?
22.09.2014 kl. 18:29:DROPS Design answered:
Nein, "auf beiden Seiten" bedeutet am rechten und am linken Rand des Rückenteils. Die Jacke soll ja einen schrägen Schnitt bekommen (siehe Schnittzeichnung), d.h. nach oben hin enger werden, daher müssen Sie an beiden Rändern M abnehmen. Sie nehmen also nach 5 cm am rechten und am linken Rand je 1 M ab (= 2 Abnahmen) und machen das alle 2½-2½-2½-2½-2½-3 cm insgesamt 11-12-12-13-12-11 Mal.
23.09.2014 kl. 00:29:
![]() Francesca wrote:
Francesca wrote:
Salve! Ho acquistato la lana Nepal per realizzare questo giacchino, ma non mi sembra adatta per i ferri 8. Devo lavorarla a doppio filo?
14.09.2014 kl. 20:36:DROPS Design answered:
Buonasera Francesca. Per la lana Nepal vengono suggeriti i ferri n° 4,5. Le istruzioni per lavorare il modello con la lana Nepal, sono riportate subito dopo quelle per lavorare con la lana Eskimo. Buon lavoro!
14.09.2014 kl. 23:16:
![]() Giada wrote:
Giada wrote:
Sto lavorando la taglia S
23.06.2014 kl. 12:49:DROPS Design answered:
Buongiorno Giada, allora deve intrecciare 3 m, lavorare il f, girare, intrecciare 3 m, lavorare il f, girare, intrecciare 1 m, lavorare il f, girare, intrecciare 1 m, lavorare il f: sono state intrecciate 8 m, quindi da 48 si trova con 40 m rimaste. Ci riscriva se ha ancora dubbi. Buon lavoro!!
23.06.2014 kl. 13:34:
![]() Giada wrote:
Giada wrote:
Leggo e rileggo, ma non riesco a capire questo passaggio: "intrecciare per gli scalfi a ogni lato su f alterni: 3 m 1 volta, 2 m 0-0-1-2-3-3 volte e 1 m 1-2-3-3-3-4 volte = 40-42-42-44-46-48 m rimaste"
23.06.2014 kl. 11:26:DROPS Design answered:
Buongiorno Giada, che taglia sta lavorando? Deve iniziare ad intrecciare per gli scalfi, quindi inizi a intrecciare 3 m, lavorare tutto il f, giri il lavoro, intrecci 3 m e torni indietro, giri il lavoro, intrecci 2 m e lavori il f, e così via...Ci riscriva se ha altre difficoltà. Buon lavoro!
23.06.2014 kl. 12:04:
![]() Martine wrote:
Martine wrote:
Bonjour, Je tricote cette veste en taille L ; je ne comprends pas votre explication concernant les diminutions du devant L "rabattre comme au dos 36m" ; mais sur le dos en taille L il n'y a que 14 diminutions avant celles des emmanchures... Qu'est ce qui m'échappe ? d'avance merci
08.05.2014 kl. 21:33:DROPS Design answered:
Bonjour Martine, pour le dos, on rabat 7 x 1 m de chaque côté, pour le devant, on rabat 7 x 1 m d'un seul côté seulement (côté couture au dos), on aura ainsi 43 m - 7 dim = 36 m avant les emmanchures en taille L. Bon tricot!
09.05.2014 kl. 09:15:
![]() Manuela wrote:
Manuela wrote:
Estoy haciendo este modelo pero no entiendo muy bien la explicación del cuello, ¿serían tan amables de darme otra?. Muchas gracias de antemano-
19.01.2014 kl. 23:51:DROPS Design answered:
Hola Manuela. Cuando trabajas los delanteros debes insertar 2 MP (ver el patrón). La parte principal del cuello se trabaja entre estos 2 MP (delantero, espalda y otro delantero), la parte aumentada del cuello se cose al finalizar el trabajo en el espacio entre el borde del centro del delantero y los MP de cada lado.
23.01.2014 kl. 10:54:
![]() Maggie wrote:
Maggie wrote:
Ik hoop dat u me even op weg kunt helpen. Ik heb een tijd niet gebreid en kom er niet uit hoe ik de minderingen voor de armsgaten moet doen. Ik begin neem ik aan met minderen aan weerskanten op de goede kant van het werk, maar het patroon zegt elke 2e naald. Betekent dat dat ik dan in de volgende teruggaande naald weer moet minderen? En hoe minder ik 3 steken aan het einde van een naald? Alvast dank voor uw reactie
18.09.2013 kl. 14:00:DROPS Design answered:
Hoi Maggie. Je kant af aan beide kanten in elke 2e nld. Afkanten begint altijd aan het begin van een naald. Dus je breit, kant 3 st af, brei de nld uit, keer, kant 3 st af, brei de nld uit, keer en zo voort.
19.09.2013 kl. 11:24:Aysan wrote:
Hello in the picture this jacket is eskimo or nepal?
21.08.2013 kl. 21:16:DROPS Design answered:
Dear Mrs Aysan, the jacket on the picture has been made in DROPS Eskimo. Happy knitting!
28.08.2013 kl. 10:34:
![]() Diana Brewer wrote:
Diana Brewer wrote:
Please could you enlighten me on what the sizes knit up too, i would like to do this pattern in a small, allso am i right in thinking that i will have to order 13 balls of the 50g. Thankyou.
13.02.2013 kl. 21:59:DROPS Design answered:
Dear Mrs Brewer, you are correct for size S you will require 13 balls Eskimo x 50 g the ball = 650 g. To choose your size, look at the measurement chart at the end of the pattern, measures are in cm and can be compared to a similar garment you have to find the correct size. Happy knitting!
14.02.2013 kl. 09:21:
![]() Eva wrote:
Eva wrote:
Sehe ich es richtig, dass für den Kragen im Nacken 24-28 Maschen aufgenommen werden, nach einer Kraussrippe für die Schultern je 17-19 M aufgenommen werden und die 12 aufgenommenen M je seite dann angenäht werden (So wie der gesamte Kragen im Tunnel?) Danke schonmal! =D
21.01.2013 kl. 13:06:DROPS Design answered:
Liebe Eva, nein, es gibt keine zusätzlichen Schultermaschen. Sie nehmen die 24-28 M auf (nicht über den 10 abgeketteten - ich habe dies in der Anleitung ergänzt), erhöhen die Maschenzahl dann auf 34-38 und nehmen zusätzlich an den Kanten noch Maschen auf, diese werden dann zum Schluss über den 10 abgeketteten M an den Vorderteilen angenäht.
22.01.2013 kl. 08:46:
![]() Fátima wrote:
Fátima wrote:
Os nºs que se encontram no diagrama,referem-se a pontos ou cms? O que significam?
11.01.2013 kl. 17:35:DROPS Design answered:
Os números indicados no diagrama referem-se a centímentos e dizem respeito às medidas em altura e largura da peça. Esperamos tê-la ajudado. Para mais perguntas, não hesite em contactar-nos através da opção "pergunta". Bom tricô!
17.01.2013 kl. 11:27:
![]() Helle Iversen wrote:
Helle Iversen wrote:
Da Silke Alpaca tilsyneladende ikke findes længere, står der foreslået Nepal - og det passer også fint til modellen - men får godt nok meget garn til rest - ca. 300g! Løbelængden på Silke Alpaca var måske en anden end Nepal.
17.12.2012 kl. 16:17:DROPS Design answered:
Men garnforbruget til Nepal står i opskriften og det er lidt mindre end garnforbruget i Eskimo som også står med.
19.12.2012 kl. 13:49:
![]() Elisa wrote:
Elisa wrote:
Bom dia. Adoro este modelo porém gostaria de o fazer num fio mais fino, será que o resultado será o mesmo? isto é, ficará com o mesmo aspecto no que respeita à gola? Obrigada
28.11.2012 kl. 10:49:DROPS Design answered:
Bom dia. Muito sinceramente, é a espessura do fio que faz o efeito da gola. Num fio mais fino, o ponto da gola vai ficar mais pequeno e não tão texturado. Obrigada e bons tricôs!
28.11.2012 kl. 11:21:
![]() Aubree wrote:
Aubree wrote:
Bonjour, j'ai relevé une toute petite erreur sur le modèle : DROPS 103-1 by DROPS Design en français. DOS : A 5 cm de hauteur totale, rabat 1 m de chaque côté 8-8-7-8-7-7 fois tous les 3,5-3,5-4,5-4-5-5 cm = "48-52-64-70-74 m". Il manque un nombre de mails dans la partie entre guillemets... En tout cas, bravo pour votre site, je le trouve formidable! Cordialement, Celine
15.11.2012 kl. 13:23:DROPS Design answered:
Bonjour Madame Aubree et merci, il fallait effectivement lire "48-52-58-64-70-74 m". Bon tricot !
15.11.2012 kl. 13:35:
![]() Janice Brash wrote:
Janice Brash wrote:
How many remaining stiches are cast off at the end. Does it matter?
14.06.2012 kl. 23:22:DROPS Design answered:
The no of stitches are mentioned in the pattern
25.12.2012 kl. 18:13:
![]() Marie Danneels wrote:
Marie Danneels wrote:
Ik zou de lange mouwen breien; hoeveel extra wol heb ik nodig a.u.b. ? 10 op 10 voor de ontwerpster !
22.04.2012 kl. 09:25:DROPS Design answered:
In de kop van het patroon onder de materialen (Eskimo en Silke-Alpaca) vindt u de nodige hoeveelheden garen voor eerst 3/4 mouwen en daaronder de lange mouwen.
23.04.2012 kl. 09:59:Post a comment to pattern DROPS 103-1
We would love to hear what you have to say about this pattern!
If you want to leave a question, please make sure you select the correct category in the form below, to speed up the answering process.
Your email address will not be published. Required fields are marked *.