DROPS Melody
DROPS Melody
71% Alpaca, 25% Wool, 4% Polyamide
from 4.25 £ /50g
Get the yarn to make this pattern from 25.50£.

The yarn cost is calculated from the pattern’s smallest size and the yarn’s cheapest product type. Looking for an even better price? You might find it on the DROPS Deals!

DROPS SS24

Campfire Snuggles Cardigan

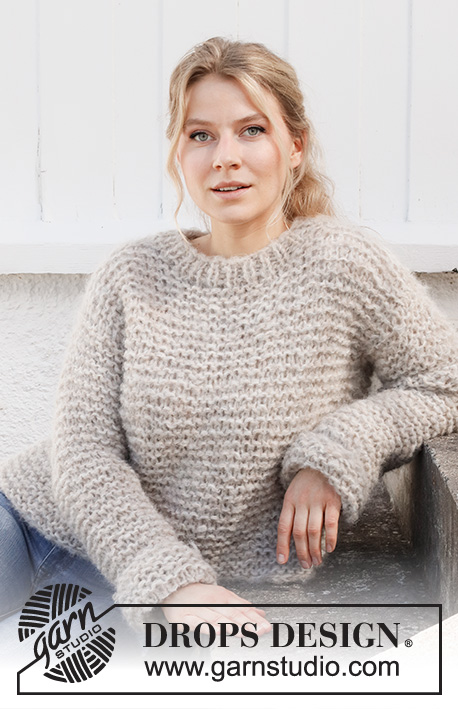
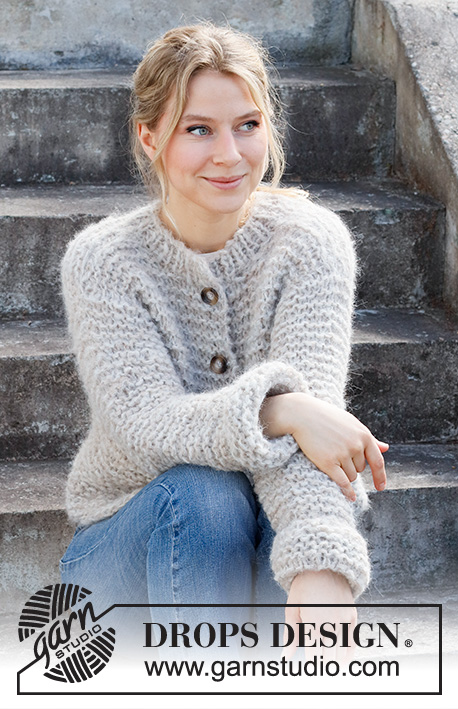
Knitted jacket with garter stitch in 2 strands DROPS Melody. Size: S - XXXL

DROPS 215-34
DROPS design: Pattern ml-060
Yarn group D and D
-------------------------------------------------------

SIZE:
S - M - L - XL - XXL - XXXL

MATERIALS:
DROPS MELODY from Garnstudio (belongs to yarn group D)
150-200-200-250-250-250 g colour 03, pearl grey
150-200-200-250-250-250 g colour no 15, beige

KNITTING TENSION:
8 stitches in width and 15 rows vertically in garter stitch and 1 strand of each colour = 10 x 10 cm.

NEEDLES:
DROPS CIRCULAR NEEDLE SIZE 12 mm : 60 or 80 cm for garter stitch.
Needle size is only a suggestion! If you have too many stitches on 10 cm switch to a larger needle size. If you have too few stitches on 10 cm switch to a smaller needle size.

DROPS BUTTON, Marble NR 629: 5-5-5-6-6-6

-------------------------------------------------------

Alternative Yarn – See how to change yarns here
Yarn Groups A to F – Use the same pattern and change the yarn here
Yarn usage using an alternative yarn – Use our yarn converter here

-------------------------------------------------------

DROPS Melody
DROPS Melody
71% Alpaca, 25% Wool, 4% Polyamide
from 4.25 £ /50g
Get the yarn to make this pattern from 25.50£.

The yarn cost is calculated from the pattern’s smallest size and the yarn’s cheapest product type. Looking for an even better price? You might find it on the DROPS Deals!

Pattern instructions

NOTE: This pattern is written in British English. All measurements in charts are in cm. For conversion from cm to inches - click here. There are different terms for crocheting in British and American English. If this pattern includes crochet, click for "crochet terms" here. For this pattern in American English, please click here.
-------------------------------------------------------

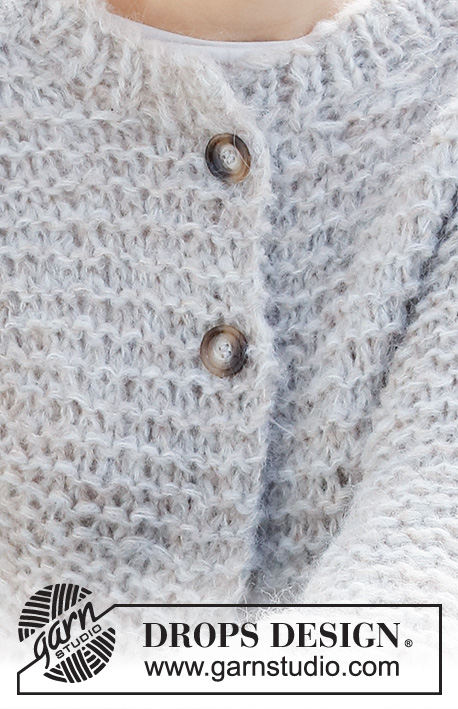
EXPLANATION FOR THE PATTERN:

-------------------------------------------------------

GARTER STITCH (back and forth):
Knit all rows.
1 ridge vertically = knit 2 rows.
-------------------------------------------------------

START THE PIECE HERE:

-------------------------------------------------------

JACKET - SHORT OVERVIEW OF THE PIECE:
Work jacket back and forth, bottom up, on circular needle from mid front, up to armhole. Now divide the piece; finish each part separately. Sleeves are picked up in armhole and worked back and forth on needle, top down. Finish by working a neck edge.

BODY:
Cast on 82-90-94-102-110-118 stitches on circular needle size 12 mm with 1 strand pearl grey and 1 strand beige (= 2 strands). Work in GARTER STITCH - read explanation above.

Work until piece measures 31-32-33-34-35-36 cm from cast-on edge. REMEMBER THE KNITTING TENSION! Work next row as follows from right side: Work the first 20-22-23-24-26-28 stitches, cast off the next 4-4-4-6-6-6 stitches, work the next 34-38-40-42-46-50 stitches, cast off the next 4-4-4-6-6-6 stitches, work the last 20-22-23-24-26-28 stitches on row. Work front pieces and back piece back and forth separately from here.

RIGHT FRONT PIECE:
= 20-22-23-24-26-28 stitches. Work in garter stitch. When piece measures 44-46-48-50-52-54 cm, slip the first 6-6-6-6-7-7 stitches on a stitch holder for neck, then cast off at beginning of every row from right side as follows: 2 stitches 1 time, 1 stitch 2 times = 10-12-13-14-15-17 stitches remain for shoulder. Cast off when piece measures 50-52-54-56-58-60 cm (19-20-21-22-23-24 cm from cast-off for armholes).

LEFT FRONT PIECE:
Work as right front piece but opposite, cast off for neck at the beginning of every row from wrong side.

BACK PIECE:
= 34-38-40-42-46-50 stitches. Continue in garter stitch until piece measures 48-50-52-54-56-58 cm. Cast off the middle 12-12-12-12-14-14 stitches for neck, and finish each shoulder separately. On next row decrease 1 stitch towards the neck = 10-12-13-14-15-17 stitches remain on each shoulder. Finish each shoulder separately. Cast off when piece measures 50-52-54-56-58-60 cm (= 19-20-21-22-23-24 cm from cast-off for armholes).

ASSEMBLY:
Sew the shoulder seams.

SLEEVE:
Work sleeves back and forth, top down.
Pick up 30-32-34-36-36-38 stitches around the sleeve opening in outer loop of edge stitch on circular needle size 12 mm with 1 strand of each colour, i.e. start in the middle of the 4-4-4-6-6-6 stitches that where cast of when dividing for front pieces and back piece, pick up 15-16-17-18-18-19 stitches up to shoulder seam, and pick up 15-16-17-18-18-19 stitches from shoulder seam and down to the middle of the 4-4-4-6-6-6 stitches that where cast of when dividing for front pieces and back piece. Work in garter stitch back and forth. When piece measures 3 cm, decrease 1 stitch in each side of piece. Decrease every 10-8-8-6½-7-6 cm 5-6-6-7-6-7 times in total = 20-20-22-22-24-24 stitches. Continue with garter stitch until piece measures 52-50-50-50-48-47 cm (shorter sleeve in the larger sizes because of wider shoulders), cast off. Work the other sleeve the same way.

NECK EDGE:
Begin from right side with 1 strand of each colour and circular needle size 12 mm and pick up approx. 35 to 41 stitches around the neck including stitches on stitch holders. Make sure number of stitches is divisible by 2+ 1. Work as follows - work first row from wrong side: 1 edge stitch in garter stitch, * purl 1, knit 1 *, repeat from *-* until 2 stitches remain, purl 1 and 1 edge stitch in garter stitch. Continue with rib for 4 cm, then cast off with knit over knit and purl over purl.

ASSEMBLY:
Sew sleeve seams. Place 5-5-5-6-6-6 buttons evenly on left band and fasten. Place top button right below neck edge, and bottom button approx. 8 cm from bottom edge. Button through stitches on right piece.

Diagram

diagram measurements
Do you have a question? See a list of frequently asked questions (FAQ)

Knitting tension is what determines the final measurements of your work, and is usually measured per 10 x 10 cm. It is provided like so: number of stitches in width x number of rows in height - eg: 19 stitches x 26 rows = 10 x 10 cm.

The knitting tension is very individual; some people knit/crochet loosely while others work tightly. You adjust the knitting tension with the needle size, which is why the suggested needle size is only meant as a guide! You need to adjust this (up or down) to ensure that YOUR knitting tension matches the knitting tension provided in the pattern. If you work with a different knitting tension than provided you will have a different yarn consumption, and your work will have different measurements than what the pattern suggests.

The knitting tension also determines which yarns can replace each other. As long as you achieve the same knitting tension you can replace one yarn with another.

See DROPS lesson: How to measure your tension/gauge

See DROPS video: How to make a gauge tension swatch

The required amount of yarn is provided in grams, eg: 450 g. To calculate how many balls you’ll need you first need to know how many grams are in 1 ball (25g, 50g or 100g). This information is available if you click on the individual yarn quality on our pages. Divide the amount required with the amount of each ball. For example, if each ball is 50g (the most common amount), the calculation will be as follows: 450 / 50 = 9 balls.

The important thing when changing from one yarn to another is that the knitting/crochet tension remains the same. This is so that the measurements of the finished piece will be the same as on the sketch provided. It is easier to achieve the same knitting tension using yarns from the same yarn group. It is also possible to work with multiple strands of a thinner yarn to achieve the knitting tension of a thicker one. Please try our yarn converter. We recommend you to always work a test swatch.

Please NOTE: when changing yarn the garment might have a different look and feel to the garment in the photo, due to individual properties and qualities of each yarn.

See DROPS lesson: Can I use a different yarn than the one mentioned in the pattern?

All our yarns are categorised into yarn groups (from A to F) according to thickness and knitting tension – group A contains the thinnest yarns and group F the thickest. This makes it easier for you to find alternative yarns to our patterns, should you wish to switch yarn. All yarns within the same group have a similar knitting tension and can easily replace each other. However, different yarn qualities have different structures and properties which will give the finished work a unique look and feel.

Click here for an overview of the yarns in each yarn group

At the top of all our patterns you’ll find a link to our yarn calculator, which is a helpful tool should you wish to use a different yarn than suggested. By filling in the yarn quality you wish to replace, the amount (in your size) and number of strands, the calculator will present good alternative yarns with the same knitting tension. Additionally it will tell you how much you’ll require in the new qualities and whether you’ll need to work with multiple strands. Most skeins are 50g (some are 25g or 100g).

If the pattern is worked with multiple colours, every colour will have to be calculated separately. Similarly, if the pattern is worked with several strands of different yarns (for example 1 strand Alpaca and 1 strand Kid-Silk) you will have to find alternatives for each, individually.

Click here to see our yarn calculator

Since different yarns have different qualities and textures we have chosen to keep the original yarn in our patterns. However, you can easily find options among our available qualities by using our yarn calculator, or simply pick a yarn from the same yarn group.

It is possible that some retailers still have discontinued yarns in stock, or that someone has a few skeins at home that they would like to find patterns for.

The yarn calculator will provide both alternative yarn as well as required amount in the new quality.

If you think it's hard to decide what size to make, it can be a good idea to measure a garment you own already and like the size of. Then you can pick the size by comparing those measures with the ones available in the pattern's size chart.

You'll find the size chart at the bottom of the pattern.

See DROPS lesson: How to read size chart

The needle size provided in the pattern serves only as a guide, the important thing is to follow the knitting tension. And since knitting tension is very individual, you will have to adjust the needle size to ensure that YOUR tension is the same as in the pattern – maybe you’ll have to adjust 1, or even 2 needle sizes, up or down to achieve the correct tension. For this, we recommend that you work test swatches.

Should you work with a different knitting tension than the one provided, the measurements of the finished garment might deviate from the measurement sketch.

See DROPS lesson: How to measure your tension/gauge

See DROPS video: How to make a tension/gauge swatch

Working a garment top-down provides more flexibility and room for personal adjustment. For example it is easier to try the garment on while working, as well as making adjustments to length of yoke and shoulder caps.

The instructions are carefully explaining every step, in the correct order. Diagrams are adjusted to the knitting direction and are worked as usual.

The diagram depicts all rows/rounds, and every stitch seen from the right side. It is read from bottom to top, from right to left. 1 square = 1 stitch.

When working back and forth, every other row is worked from the right side and every other row is worked from the wrong side. When working from the wrong side, the diagram will have to be worked reversed: from left to right, knit stitches are purled, purl stitches are knit etc.

When working in the round every round is worked from the right side and the diagram are worked from right to left on all rounds.

See DROPS lesson: How to read knitting diagrams

The diagram depicts all rows/rounds, and every stitch seen from the right side. It is worked from bottom to top, from right to left.

When working back and forth every other row is worked from the right side: from right to left and every other row is worked from the wrong side: from left to right.

When working in the round, every row in the diagram are worked from the right side, from right to left.

When working a circular diagram you start in the middle and work your way outwards, counter clockwise, row by row.

The rows usually start with a given number of chain stitches (equivalent to the height of the following stitch), this will either be depicted in the diagram or explained in the pattern.

See DROPS lesson: How to read crochet diagrams

Instructions for working several diagrams after each other on the same row/round, will often be written like so: “work A.1, A.2, A.3 a total of 0-0-2-3-4 times". This means you work A.1 once, then A.2 is worked once, and A.3 is repeated (in width) the number of times provided for your size – in this case like so: S = 0 times, M = 0 times, L=2 times, XL= 3 times and XXL = 4 times.

The diagrams are worked as usual: begin with the first row in A.1, then work the first row in A.2 etc.

See DROPS lesson: How to read knitting diagrams

See DROPS lesson: How to read crochet diagrams

The total width of the garment (from wrist-to-wrist) will be larger in the larger sizes, despite the actual sleeves being shorter. The larger sizes have longer sleeve caps and wider shoulders, so there will be a good fit in all sizes.

The measurement sketch/schematic drawing provides information regarding the full length of the garment. If it’s a jumper or a jacket the length is measured from the highest point on the shoulder closest to the neckline, and straight down to the bottom of the garment. It is NOT measured from the tip of shoulder. Similarly, the length of yoke is measured from the highest point on the shoulder and down to where yoke is split into body and sleeves.

On a jacket measures are never taken along bands, unless specifically stated. Always measure inside band stitches when measuring the length.

See DROPS lesson: How to read a schematic drawing

Diagrams are often repeated on the round or in height. 1 repeat is the diagram the way it appears in the pattern. If it says to work 5 repeats of A.1 in the round, then you work A.1 a total of 5 times after/next to each other in the round. If it says to work 2 repeats of A.1 vertically/in height you work the entire diagram once, then begin again at the start and work the entire diagram one more time.

Chain stitches are slightly narrower than other stitches and to avoid working the cast-on edge too tight, we simply chain more stitches to begin with. The stitch count will be adjusted on the following row to fit the pattern and measurement sketch.

The rib edge is more elastic and will contract slightly compared to, for example, stocking stitch. By increasing before the rib edge, you avoid a visible difference in width between the rib edge and the rest of the body.

It’s very easy to cast off too tightly, and by making yarn overs while casting off (and simultaneously casting these off) you avoid a too tight cast off edge.

See DROPS video: How to bind off with yarn overs (yo)

To achieve an even increase (or decrease) you can increase on, for example: every 3rd and 4th row alternately, like so: work 2 rows and increase on the 3rd row, work 3 rows and increase on the 4th. Repeat this until the increase is complete.

See DROPS lesson: Increase or decrease 1 st on every 3rd and 4th row alternately

Should you prefer to work in the round instead of back and forth, you may of course adjust the pattern. You’ll need to add steeks mid-front (usually 5 stitches), and follow the instructions. When you would normally turn and work from the wrong side, simply work across the steek and continue in the round. At the end you’ll cut the piece open, pick up stitches to work bands, and cover the cut edges.

See DROPS video: How to knit steeks and cut open

Should you prefer to work back and forth instead of in the round, you may of course adjust the pattern so you work the pieces separately and then assemble them at the end. Divide the stitches for the body in 2, add 1 edge stitch in each side (for sewing) and work the front and back pieces separately.

See DROPS lesson: Can I adapt a pattern for circular needles into straight needles?

Pattern repeats can vary slightly in the different sizes, in order to get the correct proportions. If you’re not working the exact same size as the garment in the photo, yours might deviate slightly. This has been carefully developed and adjusted so that the complete impression of the garment is the same in all sizes.

Make sure to follow instructions and diagrams for your size!

If you have found a pattern you like which is available in women’s size it’s not very difficult to convert it to men’s size. The biggest difference will be the length of sleeves and body. Start working on the women size that you think would fit across the chest. The additional length will be worked right before you cast off for the armhole/sleeve cap. If the pattern is worked top-down you can add the length right after the armhole or before the first decrease on sleeve.

Regarding additional yarn amount, this will depend on how much length you add, but it is better with a skein too many than too few.

All yarns will have excess fibres (from production) that might come off as lint or shedding. Brushed yarns (ie hairier yarns) have more of these loose, excess fibres, causing more shedding.

Shedding also depends on what is worn under or over the garment, and whether this pulls at the yarn fibres. It’s therefore not possible to guarantee that there will be no shedding

Below are some tips on how to get the best result when working with hairier yarns:

1. When the garment is finished (before you wash it) shake it vigorously so the looser hairs come off. NOTE: do NOT use a lint roller, brush or any method that pulls at the yarn.

2. Place the garment in a plastic bag and put it in your freezer - the temperature will cause the fibres to become less attached to each other, and excess fibres will come off easier.

3. Leave in the freezer for a few hours before taking it out and shaking it again.

4. Wash the garment according to the instructions on the yarn label.

Pilling is a natural process that happens to even the most exclusive of fibers. It's a natural sign of wear and tear that is hard to avoid, and that is most visible in high friction areas of your garment like a sweater's arms and cuffs.

You can make your garment look as new by removing the pilling, using a fabric comb or a pill/lint remover.

Still can't find the answer you need? Then scroll down and leave your question so one of our experts can try to help you. This will be done normally within 5 to 10 working days.
In the meantime, you can read the questions and answers that others have left to this pattern or join the DROPS Workshop on Facebook to get help from fellow knitters/crocheters!

You might also like...

Post a comment to pattern DROPS 215-34

We would love to hear what you have to say about this pattern!

If you want to leave a question, please make sure you select the correct category in the form below, to speed up the answering process. Required fields are marked *.

Comments / Questions (10)

country flag MM wrote:

Hello, So the bind off at beginning of every row from right side ( for the right front piece) after slipping the first 6-6-6-6-7-7 stitches on a stitch holder for neck, is the bind off of the stitches right after the 6-6-6-6-7-7 slipped stitches for neck?

16.12.2023 - 11:44

DROPS Design answered:

Dear MM, slip the first stitches, then work the rest of the row and work back. Then, on the next row from the right side, start binding off the first stitches of the row. Happy knitting!

17.12.2023 - 18:58

country flag Mia wrote:

Hello, the 6 stitches I need to put on hold for the neck, are those the first 6 stitches next to the front opening of the cardigan or are they on the other side? Thank you so much

19.01.2022 - 19:27

DROPS Design answered:

Hi Mia, They are the stitches by the neck opening. Happy knitting!

20.01.2022 - 07:49

country flag Sjanie Vd Berge wrote:

Hallo, ik heb dit vest gebreid met Drops Melody, nu wil ik er nog een maken met Drops Sky, moet ik dan 1 draad of 2 draden gebruiken en hoeveel bollen heb ik dan nodig? en op welke naalddikte? groeten Sjanie

23.04.2021 - 14:17

DROPS Design answered:

Dag Sjanie,

Sky valt in garengroep B en als je 2 draden van garengroep B neemt, dan komt dat ongeveer overeen met garengroep D. Je hebt dus 4 draden Sky nodig. De hoeveelheid benodigde garen kun je uitrekenen aan de hand van de looplengte van beide garens. In dit artikel staat dat uitgelegd.

25.04.2021 - 18:21

country flag Gitte wrote:

Hej Hvordan er det muligt at slå alle maskerne op rundt om hele ærmegabet på en DROPS rundpind 12? Jeg kan ikke nå rundt med pinden og er nød til at sy under ærmegab

03.04.2021 - 19:16

DROPS Design answered:

Hej Gitte, opskriften er skrevet så den strikkes frem og tilbage på rundpind. Hvis du vil strikke rundt, så er du nødt til at bruge strømpepinde eller lave magic loop. God fornøjelse!

06.04.2021 - 13:29

country flag Stine wrote:

Jeg forstår ikke flg. (Højre forstykke): Når arbejdet måler 44-46-48-50-52-54 cm sættes de første 6-6-6-6-7-7 masker på en tråd til hals, derefter lukkes der af i begyndelsen af hver pind fra retsiden således: 2 masker 1 gang, 1 maske 2 gange = 10-12-13-14-15-17 masker tilbage på skulderen. Findes der en video til det? Mvh Stine

24.02.2021 - 22:45

DROPS Design answered:

Hej Stine, du strikker først de 6 masker, flytter dem over på en sikkerhedsnål eller en tråd. Strikker pinden ud. Vend arbejdet strik til maskerne på sikkerhedsnålen, vend arbejdet og luk 2 masker af, strik pinden ud, vend arbejdet og strik tilbage, vend arbejdet og luk 1 maske af strik pinden ud. Det gør du en gang til på samme måde :)

25.02.2021 - 14:19

country flag Sigrid wrote:

Hallo! Könnte man die Ärmel auch rund stricken? Mit abwechselnd 1 Reihe re / 1 Reihe li und den entsprechenden Abnahmen? Danke!

20.02.2021 - 18:48

DROPS Design answered:

Liebe Sigrid, die ersten 3 cm sollen aber in Reihen gestrickt werden, denn diese 3 cm werden dann am Armloch zusammengenäht (siehe Video. Viel Spaß beim stricken!

22.02.2021 - 08:21

country flag Mien wrote:

Wat wordt bedoeld, hoe moet je het volgende breien? Zet een hoogte van X cm, de eerste 6 steken op een hulpdraad voor de hals, kant dan af op het begin van iedere naald aan de goede kant als volgt. Moet je de eerste 6 steken eerst breien en dan op een hulpnaald zetten? Of moet je deze gelijk op een hulpdraad zetten? Maar wat doe je dan met de draad door dan nog vooraan zit? Alvast bedankt

31.01.2021 - 17:02

DROPS Design answered:

Dag Mien,

Je kunt de eerste 6 steken eerst breien en dan op een hulpdraad zetten, zodat je niet de draad af hoeft te knippen.

01.02.2021 - 08:42

country flag Claire wrote:

Hallo, Welche Größe trägt das Modell in dem Photo? Und welche Größe trägt sie normalerweise?

15.01.2021 - 08:57

DROPS Design answered:

Liebe Claire, das Modell trägt entweder eine S oder M - aber um die richtige Größe zu wählen, messen Sie eine ähnliche Jacke, die Sie gerne haben und vergleichen Sie die Maßen mit den in der Maßskizze. Hier lesen Sie mehr. Viel Spaß beim stricken!

15.01.2021 - 15:18

country flag Martsa wrote:

Hei, miten voin korvata ohjeessa olevan beigen Melody-langan? Lanka on ollut jo pitkään loppu verkkokaupoista, mutta haluaisin silti tehdä neuleen saman sävyisenä.

02.01.2021 - 19:55

DROPS Design answered:

Hei, voisit korvata langan esim. beigellä DROPS Sky-langalla. Tee kuitenkin aluksi koetilkku, jotta näet miltä neulepinta näyttää.

16.03.2021 - 18:17

country flag Esther Bosveld wrote:

Hallo, graag zou ik willen weten hoe ik de maat kan bepalen. Wat is de omvang van maat s/m/l Welke maten/ omtrek moet ik hanteren voor welke maat? Alvast bedankt Esther

09.12.2020 - 21:29

DROPS Design answered:

Dag Esther,

Onderaan het patroon staat een tekening waarin de maten staan aangegeven. Het kleinste getal voor de kleinste maat, het grootste getal voor de grootst maat.

14.12.2020 - 13:12