
Popular categories
Looking for a yarn?


|
|
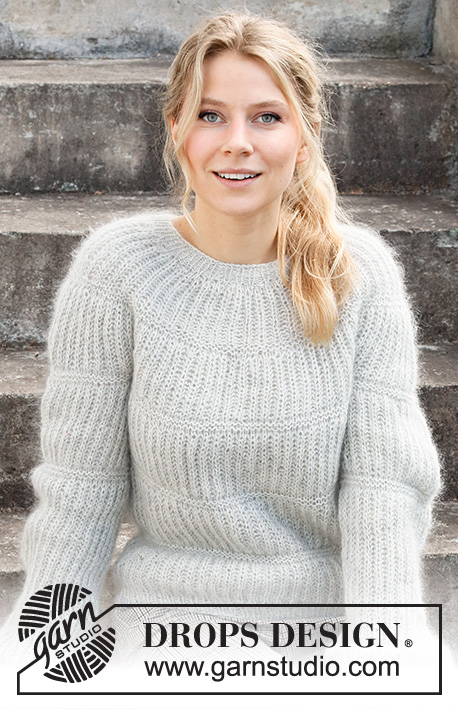
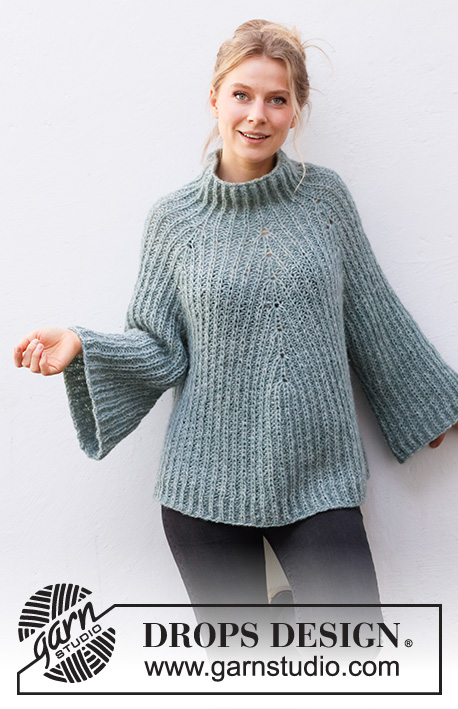
Dublin Winter Sweater |
|
 |
 |
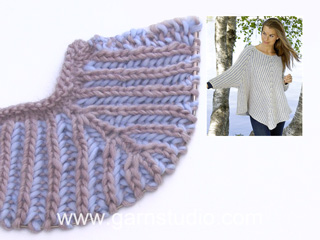
Knitted sweater with round yoke in DROPS Air. The piece is worked top down with English rib and A-shape. Sizes XS - XXL.
DROPS 215-12 |
|
|
------------------------------------------------------- EXPLANATIONS FOR THE PATTERN: ------------------------------------------------------- RIB (in the round): ROUND 1: * Make 1 yarn over, slip 1 stitch as if to purl, purl 2 *, work from *-* to end of round. ROUND 2: * Knit together the yarn over and slipped stitch, purl 2 *, work from *-* to end of round. Repeat rounds 1 and 2. ENGLISH RIB (in the round): ROUND 1: * Knit together the yarn over and slipped stitch, make 1 yarn over, slip 1 stitch as if to purl, *, repeat from *-* to end of round. ROUND 2: * 1 yarn over, slip 1 stitch as if to purl, purl together the yarn over and slipped stitch *, repeat from *-* to end of round. Repeat rounds 1 and 2. INCREASE TIP (for increases in English rib stitch): All increases are worked on a round where the yarn overs and knitted stitches are knitted together (i.e. Round 1 in English rib). Increase 4 stitches in the English rib stitch as follows: Knit together the yarn over and knitted stitch, but do not slip them from the needle, make 1 yarn over the right needle, knit together the yarn over and knitted stitch again, move the marker to this stitch (= mid-stitch), make 1 yarn over the right needle, knit together the yarn over and knitted stitch again (= 3 stitches and 2 yarn overs), slip the stitches from the left needle. On the next round work the increased stitches as follows: * Make 1 yarn over, slip 1 stitch as if to purl, purl 1 *, work from *-* a total of 2 times, make 1 yarn over, slip 1 stitch as if to purl (= 3 knitted stitches and 2 purled stitches). The marker sits in the middle stitch of the increased stitches (in a knitted stitch). DECREASE TIP (mid under sleeve): All decreases are worked on a round where the yarn overs and knitted stitches are knitted together (i.e. Round 1 in English rib). Start mid under the sleeve (i.e. before the marker-stitch) and decrease 4 stitches on the round as follows: Work the first 2 stitches in English rib as before, slip the next stitch + its yarn over as if to knit, knit together the next 2 stitches + and their yarn overs and pass the slipped stitch + and its yarn-over over the knitted together stitches. Work until there are 4 stitches left before the marker stitch (= mid-stitch under the sleeve), knit together the next 3 stitches + and their yarn overs (= 2 stitches decreased), work the last stitch on the round. BINDING-OFF TIP: To avoid the bind-off edge being tight you can bind off with a larger size needle. If the edge is still tight, make 1 yarn over after approx. each 3rd stitch at the same time as binding off; the yarn overs are bind off as normal stitches. ------------------------------------------------------- START THE PIECE HERE: ------------------------------------------------------- SWEATER – SHORT OVERVIEW OF THE PIECE: The neck and yoke are worked in the round with circular needle, top down. On yoke, increase in 6 stitches marked with markers. The yoke is divided for body and sleeves and the body continued in the round with circular needle. The sleeves are worked in the round with short circular needle, top down. NECK: Cast on 78-78-84-90-90-96 stitches with circular needle size 4 mm = US 6 and Air. Knit 1 round. Then work RIB – read description above, for 12 cm = 4¾"; finish after round 2. The next round is worked as follows: * Make 1 yarn over, slip 1 stitch as if to purl, purl 2 together *, work from *-* to end of round = 52-52-56-60-60-64 stitches. Change to circular needle size 6 mm = US 10. Insert 1 marker thread at the beginning of the round; the yoke is measured from this marker thread. YOKE: Insert 6 markers in the piece as described below (without working the stitches). All markers are in knitted stitches and are used when increasing on the yoke. Count 8-8-8-10-10-10 stitches, insert marker 1 in the next stitch (= back right sleeve), count 5-5-7-5-5-7 stitches, insert marker 2 in the next stitch (= raglan-line in front), count 7-7-7-9-9-9 stitches, insert marker 3 in the next stitch (= mid-front), count 7-7-7-9-9-9 stitches, insert marker 4 in the next stitch (= raglan-line in front), count 5-5-7-5-5-7 stitches, insert marker 5 in the next stitch (= back left sleeve), count 11-11-11-13-13-13 stitches, insert marker 6 in the next stitch (= mid-back), there are 3 stitches left on the round. Work ENGLISH RIB in the round – read description above. REMEMBER THE KNITTING GAUGE! When you have worked 2-2-6-2-6-2 rounds of English rib, increase stitches on the next round as follows: Increase 4 stitches in all 6 marker-stitches - read INCREASE TIP (= 24 stitches increased on the round). Increase like this every 12th-10th-10th-10th-8th-10th round (every 6th-5th-5th-5th-4th-5th round of visible English rib stitches) a total of 5-6-6-7-8-8 times at markers 1, 2, 4 and 5 and a total of 4-5-6-6-7-8 times at markers 3 and 6 = 164-188-200-220-244-256 stitches on the needle. If the knitting gauge is correct in height, the piece measures approx. 20-20-22-24-24-28 cm = 8"-8"-8¾"-9½"-9½"-11" from the marker on the neck. Increases at markers 3 and 6 continue two more times on the piece (i.e. a total of 6-7-8-8-9-10 increases mid-front and mid-back); if the piece is shorter than 20-20-22-24-24-28 cm = 8"-8"-8¾"-9½"-9½"-11", some of these increases might be on the yoke. The number of stitches when dividing the yoke for body and sleeves will then not be the same as described below. The extra stitches will be on the front and back pieces. (Markers 1 and 5 also have further increases after the division, but these are described under SLEEVE.) Continue working until the piece measures 22-22-24-25-27-29 cm = 8¾"-8¾"-9½"-9¾"-10⅝"-11⅜" from the marker on the neck. On the next round divide for the body and sleeves as follows: Work the first 14-16-16-18-20-20 stitches as before, place the next 31-35-37-43-47-49 stitches on a thread for the sleeve, cast on 7 stitches under the sleeve, work the next 51-59-63-67-75-79 stitches as before, place the next 31-35-37-43-47-49 stitches on a thread for the sleeve, cast on 7 stitches under the sleeve and work the remaining 37-43-47-49-55-59 stitches as before. BODY: = 116-132-140-148-164-172 stitches – this stitch-count is only applicable if you have increased 4-5-6-6-7-8 times at markers 3 and 6 on the yoke. If you have increased more times on the yoke there will be more stitches on the needle now). Continue in the round with English rib as before and work the last 2 increases at markers 3 and 6 if necessary. The stitches under the sleeve are worked without knitting together stitches and yarn overs on the first round. When all the increases are finished there are 132-148-156-164-180-188 stitches on the body. Work until the piece measures 26-28-28-29-30-29 cm = 10¼"-11"-11"-11⅜"-11¾"-11⅜" from the division (adjust so the next round is one where stitches and yarn overs are knitted together). There is approx. 5 cm = 2" left to finished length; try the sweater on and work to desired length. Change to circular needle size 4 mm = US 6 and work rib as follows: * Knit the first stitch and yarn over together as before, 1 yarn over (= 1 stitch increased), purl 1 *, work from *-* to end of round = 198-222-234-246-270-282 stitches. Then work the same rib as on the neck for 5 cm = 2" (yarn overs worked twisted on the first round). Loosely bind off with knit over knit and purl over purl - read BINDING-OFF TIP! The sweater measures approx. 56-58-60-62-64-66 cm = 22"-22¾"-23⅝"-24⅜"-25¼"-26" from the shoulder down. SLEEVE: Place the 31-35-37-43-47-49 stitches from the thread on the one side of the piece on short circular needle size 6 mm = US 10 and knit up 1 stitch in each of the 7 stitches cast on under the sleeve = 38-42-44-50-54-56 stitches. Insert a marker thread in the middle of the 7 stitches under the sleeve (a knitted stitch in the English rib pattern). This stitch will be where you decrease under the sleeve later. Start the round before the mid-stitch and work as follows: Continue in the round with English rib as before; the knitted-up stitches under the sleeve are worked without knitting together stitches and yarn overs on the first round. At the same time increase at marker 1 (or 5 depending on which sleeve you are working) from the yoke and decrease stitches under the sleeve as described below: INCREASES: Continue to increase as before at marker 1/5 (= 4 stitches increased on each increase-round). Increase like this every 12th-10th-10th-10th-8th-10th round a total of 4 times. After the first increase there are 42-46-48-54-58-60 stitches (subsequently the number of stitches stays the same as you decrease at the same time as you increase). DECREASES: When working increase 2, decrease at the same time under the sleeve – read DECREASE TIP (= 4 stitches decreased on each decrease-round). Decrease like this on every round where you also increase (a total of 3 times). In other words, at increase 1, you are left with 42-46-48-54-58-60 stitches. Then the number of stitches remains the same on subsequent increase/decrease rounds. Continue with English rib until the sleeve measures 34-35-34-33-32-30 cm = 13⅜"-13¾"-13⅜"-13"-12½"-11¾" (there are 3 cm = 1⅛" left to finished length). Now work the next round in rib in the same way as on the body; i.e. the yarn overs and knitted stitches are knitted together, increase 1 stitch after each knitted stitch and purl the purled stitch = 63-69-72-81-87-90 stitches. Change to circular needle size 4 mm = US 6 and work rib as on the neck (1 English rib stitch, purl 2) for 3 cm = 1⅛". Loosely bind off with knit over knit and purl over purl - remember BINDING-OFF TIP. The sleeve measures approx. 37-38-37-36-35-33 cm = 14½"-15"-14½"-14¼"-13¾"-13" from the division. Work the other sleeve in the same way. |
|

|
|
|
Have you made this or any other of our designs? Tag your pictures in social media with #dropsdesign so we can see them! Do you need help with this pattern?You'll find tutorial videos, a Comments/Questions area and more by visiting the pattern on garnstudio.com. © 1982-2024 DROPS Design A/S. We reserve all rights. This document, including all its sub-sections, has copyrights. Read more about what you can do with our patterns at the bottom of each pattern on our site. |
|


With over 40 years in knitting and crochet design, DROPS Design offers one of the most extensive collections of free patterns on the internet - translated to 17 languages. As of today we count 304 catalogs and 11422 patterns - 11417 of which are translated into English (US/in).
We work hard to bring you the best knitting and crochet have to offer, inspiration and advice as well as great quality yarns at incredible prices! Would you like to use our patterns for other than personal use? You can read what you are allowed to do in the Copyright text at the bottom of all our patterns. Happy crafting!
Comments / Questions (77)
Hej! Har sett flera fråga samma sak men ser inget försåtligt svar. I stl S har jag nu ökat 5 resp 6 varv, har 188 maskor och arb mäter 20cm, precis som mönstret säger. Jag har hoppat över att öka på 3:e och 6:e markören på sista varvet och nu ska det stickas till 22cm innan delning till ärmar (innan sista 2 ökningarna)- men då blir det ju ett lägre avstånd mellan ökningarna fram och back än innan? Stämmer det verkligen? Stort tack!
06.03.2024 - 16:18DROPS Design answered:
Hej Linnea, du skall öka vid 3:e och 6:e markören 2 ggr till, så du har 22 cm när du delar till fram och bakstycke :)
13.03.2024 - 15:31In the beginning (size S) I have 15 (7+1+7) stiches in the front and 23 st in the back (8+3+1+11), how can I have equal number of stiches (back 14+1+37, front 51) after separated the sleeves?
23.02.2024 - 20:57DROPS Design answered:
Dear Mari, the markers are not exactly showing the transition sleeves and body, so just increase exactly as explained for your size so that you get the correct number of stitches at the end of yoke when dividing. Happy knitting!
26.02.2024 - 07:45Hallo, ich habe eine Frage zum Übergang der Halsblende zur Passe. Bei Größe XXL habe ich in der letzten Runde der Halsblende 64 Maschen. In der ersten Runde der Passe habe ich nach dem 5. Marker noch 13 Maschen übrig. Laut Anleitung sollten nur 3 Maschen übrig sein. Ist das ein Druckfehler? Oder zähle ich falsch? Die Umschläge habe ich nicht mitgezählt.
11.02.2024 - 10:42DROPS Design answered:
Liebe Claudia, so sollen die Maschen auf der Nadel aussehen: 10 M, 1 M mit Markierung, 7 M, 1 M mit Markierung, 9 M, 1 M mit Markierung, 9 M, 1 M mit Markierung, 7 M, 1 M mit Markierung,13 M, 1 M mit Markierung, 3 M = 10+1+7+1+9+1+9+1+7+1+10+1+3=64 Maschen. Viel Spaß beim stricken!
12.02.2024 - 07:45Am I correct to increase 8times on the yoke but at the 8time row of increase i skip marker 3 and 6 and just knit 2tog that will make count for increase 7times at markers 3and6
17.05.2023 - 16:25DROPS Design answered:
Dear Elize, maybe you could tell us which size you are working on? So that we could check together how to increase in your size. Thanks for your comprehension.
19.05.2023 - 07:50Am I correct to increase 8times on the yoke but at the 8time row of increase i skip marker 3 and 6 and just knit 2tog that will make count for increase 7times at markers 3and6
17.05.2023 - 15:24DROPS Design answered:
Dear Elize, in 5th size you will increase 8 times on markers 1, 2, 4 and 5 and at the same time increase 7 times on marker 3 and 6. Then incrase 2 more times on markers 3 and 6 (but not on the other markers anymore, except when working sleeve). Happy knitting!
17.05.2023 - 15:54Hei! Ny utfordring :) På ermene så skal man fortsette å øke i 1/5 raglansøkning samtidig som man feller to på hver side av merkemasken under ermet. Iht økeinstruksen øker man 4 masker hver i 1 og 5, mens man feller 4 under ermet., sa øker man 4 masker per øke/felle-runde, men det står at man øker og feller like mye på hver omgang og slik blir maskeantallet likt. Hvordan blir det slik?
20.02.2023 - 15:09DROPS Design answered:
Hei Birgitte. 1 merke = bak på høyre erme og 5. merke = bak på venstre ermet. Når du strikker det ene ermet øker du som tidligere ved 1. merke eller 5. merke, (ett merke på hvert erme), og du feller 4 masker under hvert erme. Maskeantallet vil da være det samme. mvh DROPS Design
06.03.2023 - 09:09Beklager at jeg gjentar meg selv, men siden det skal økes to ganger til på 3 og 6, altså 9 ganger mot 8 ganger på raglanen ville jeg trodd at jeg økte 8 ganger på alle, så én gang til på 3 og 6 iht for å få 9 økninger framme og bak.
16.01.2023 - 14:43DROPS Design answered:
Hej Birgitte, ja du fortsætter økningerne ved 3. og 6. merke (midt foran og midt bagpå) til du har totalt 9 gange i din størrelse.
19.01.2023 - 07:47Hei! Jeg forstår ikke hva jeg skal gjøre ved siste raglanøkning. XL: "Øk slik på hver 8. omgang (dvs på hver 4. synlige omgang med patentmasker) totalt 8 ganger ved 1., 2., 4. og 5. merke og totalt 7 ganger ved 3. og 6.merke " Når jeg øker den 8. gangen på 1, 2, 4 og 5 (raglan, altså er det ikke skilt til bol og ermer enda) hva gjør jeg ved 3 og 6 siden det ikke skal økes der på den runden, men skal økes 2 ganger til senere. Altså når har jeg 244 masker på pinnen?
16.01.2023 - 14:06DROPS Design answered:
Hei Birgitte. Den siste omgangen det økes ved merke 1,2, 4 og 5, økes det ikke ved merke 3 og 6. Du startet med 60 masker, så skal du øke ved merke 1-2-4 og 5. Du øker med 4 masker 4 steder pr. omgang = 16 økte masker og dette gjøres på 8 omganger = 16 x 8= 128 økte masker. Samtidig ved merke 3 og 6 økes det med 4 masker + 4 masker = 8 økte masker og dette gjøres 7 ganger = 8 x 7 = 56 masker. Du har da startet med 60 masker, økt med 128 og 56 masker = 60 + 128 + 56 = 244 masker. mvh DROPS Design
16.01.2023 - 14:36Sorry, this is going in circles and I am still not clear. You are describing the process up until 244 stitches, 8 increases in raglan, and 7 increases in front and back. However, since the increases continue on the front and the back twice more, 9 times total, I don't understand at which point I have 244 stitches on the needle. Does the interval for the 8th and 9th increase in front and back change?
16.01.2023 - 12:02DROPS Design answered:
Dear Brigitte, you will have 244 sts after these increases explained below will have been worked. Your piece should be 24 cm from the marker on the neck edge. Then you will increase 2 times more on markers 3 and 6, if your piece is shorter than 24 cm, some of these increase will be on yoke - this will then depend on your tension. You should divide when piece measures 27cm from the marker. So check your tension and adjust if necessary. Happy knitting!
16.01.2023 - 16:27Thank you again! This is however before we split into body and arms, so I still don't know what to do at the front and back markers when knitting the eighth increase in XL.
16.01.2023 - 09:49DROPS Design answered:
Dear Brigitte, in XL increase 7 times 4 sts in each of the 6 marker- stitches and then increase 1 time 4 sts at markers 1,2, 4 and 5 = you increase 7 times x 4 sts x 6 = 168sts then 1 time 4 sts x 4 markers = 16 sts, there were 60 sts on needle + 168+16 = 244 sts. Happy knitting!
16.01.2023 - 10:49