DROPS Karisma
DROPS Karisma
100% Wool
from 2.50 € /50g
Get the yarn to make this pattern from 15.00€.

The yarn cost is calculated from the pattern’s smallest size and the yarn’s cheapest product type. Looking for an even better price? You might find it on the DROPS Deals!

DROPS SS24

Lillesand Jumper

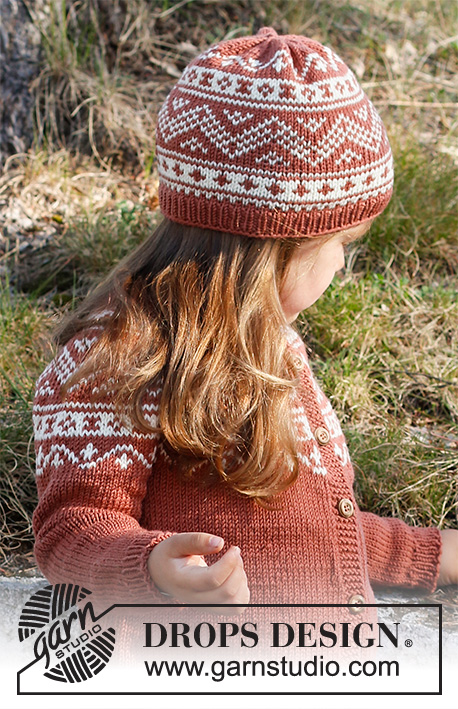
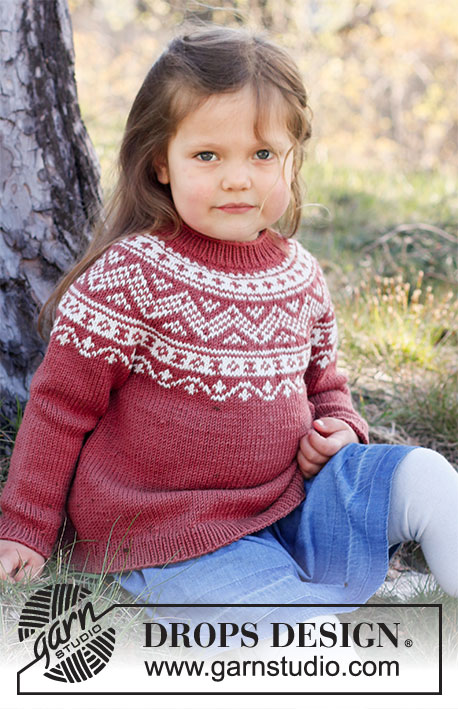
Knitted jumper for children in DROPS Karisma. The piece is worked top down, with round yoke and Nordic pattern. Sizes 2 – 12 years.

DROPS Children 37-5
DROPS Design: Pattern no u-087-bn
Yarn group B
-------------------------------------------------------

SIZES:
2 - 3/4 - 5/6 - 7/8 - 9/10 - 11/12 years
The size is approx. equivalent to the child’s height in cm:
92 - 98/104 - 110/116 - 122/128 - 134/140 - 146/152

MATERIALS:
DROPS KARISMA from Garnstudio (belongs to yarn group B)
250-250-300-300-350-400 g colour 81, old rose
50-50-50-50-50-100 g colour 01, off white

KNITTING TENSION:
21 stitches in width and 28 rows in height with stocking stitch and Nordic pattern = 10 x 10 cm.

NEEDLES:
DROPS DOUBLE POINTED NEEDLES SIZE 4 MM.
DROPS CIRCULAR NEEDLE SIZE 4 MM: Length 40 cm and 80 cm for stocking stitch.
DROPS DOUBLE POINTED NEEDLES SIZE 3 MM.
DROPS CIRCULAR NEEDLE SIZE 3 MM: Length 40 cm and 80 cm for rib.
Needle size is only a guide. If you get too many stitches on 10 cm, change to a larger needle size. If you get too few stitches on 10 cm, change to a smaller needle size.

-------------------------------------------------------

Alternative Yarn – See how to change yarns here
Yarn Groups A to F – Use the same pattern and change the yarn here
Yarn usage using an alternative yarn – Use our yarn converter here

-------------------------------------------------------

DROPS Karisma
DROPS Karisma
100% Wool
from 2.50 € /50g
Get the yarn to make this pattern from 15.00€.

The yarn cost is calculated from the pattern’s smallest size and the yarn’s cheapest product type. Looking for an even better price? You might find it on the DROPS Deals!

Pattern instructions

-------------------------------------------------------

EXPLANATIONS FOR THE PATTERN:

-------------------------------------------------------

PATTERN:
See diagram A.1. The whole pattern is worked in stocking stitch.

INCREASE TIP-1 (evenly spaced):
To work out how to increase evenly, count the total number of stitches on the needle (e.g. 72 stitches) and divide by the number of increases to be made (e.g. 16) = 4.5. 
In this example, increase by making 1 yarn over after alternately each 4th and 5th stitch. On the next round knit the yarn overs twisted to avoid holes.

INCREASE TIP-2 (for sides of body):
Increase 1 stitch on each side of both marker threads as follows. Work until there are 4 stitches left before the marker thread, make 1 yarn over, knit 8 (marker thread sits between these 8 stitches) make 1 yarn over (= 2 stitches increased at each marker thread; 4 stitches increased on round).
On the next round knit the yarn overs twisted to avoid holes. Then work the new stitches in stocking stitch.

KNITTING TIP:
To avoid the garment losing its elasticity when working the pattern, it is important the strands at the back are not tight. Increase a needle size when working pattern if this is a problem.

DECREASE TIP (for mid under sleeves): 
Decrease 1 stitch on each side of the marker thread as follows: Work until there are 3 stitches left before the marker thread, knit 2 together, knit 2 (marker thread sits between these 2 stitches), slip 1 stitch as if to knit, knit 1 and pass the slipped stitch over the knitted stitch (= 2 stitches decreased).

CASTING-OFF TIP:
To avoid the cast-off edge being tight you can cast off with a larger size needle. If the edge is still tight, make 1 yarn over after approx. each 4th stitch at the same time as casting off and the yarn overs are cast off as normal stitches.

-------------------------------------------------------

START THE PIECE HERE:

-------------------------------------------------------

JUMPER – SHORT OVERVIEW OF THE PIECE:
The neck and yoke are worked in the round with circular needle, top down and from mid back. The yoke is divided for the body and sleeves. The body is continued in the round with circular needle, from mid back. The sleeves are worked in the round and top down with double pointed needles.

NECK:
Cast on 72-74-76-78-80-82 stitches with short circular needle size 3 mm and old rose.
Knit 1 round, then work rib (= knit 1 / purl 1) for 3 cm.
Change to short circular needle size 4 mm.
Knit 1 round and increase 16-16-16-18-18-18 stitches evenly spaced – read INCREASE TIP-1 = 88-90-92-96-98-100 stitches.
Insert 1 marker at the beginning of the round; the yoke will be measured from this marker!

YOKE:
Knit 1-1-3-6-8-11 rounds with old rose.
On the next round work A.1 over all stitches (= 44-45-46-48-49-50 repeats of 2 stitches) - read KNITTING TIP!
Continue this pattern. REMEMBER THE KNITTING TENSION!
AT THE SAME TIME on each row marked with an arrow in A.1, increase stitches evenly spaced as follows – remember INCREASE TIP-1:
Arrow-1: Increase 16-18-20-20-22-24 stitches evenly spaced = 104-108-112-116-120-124 stitches (there is now room for 26-27-28-29-30-31 repeats of A.1 with 4 stitches).
Arrow-2: Increase 40-36-44-40-48-44 stitches evenly spaced = 144-144-156-156-168-168 stitches (there is now room for 12-12-13-13-14-14 repeats of A.1 with 12 stitches)
Arrow-3: Increase 32-40-36-44-40-48 stitches evenly spaced = 176-184-192-200-208-216 stitches (there is now room for 22-23-24-25-26-27 repeats of A.1 with 8 stitches).
Arrow-4: Increase 28-32-36-40-44-48 stitches evenly spaced = 204-216-228-240-252-264 stitches (there is now room for 17-18-19-20-21-22 repeats of A.1 with 12 stitches).
Arrow-5: Increase 4-4-4-0-0-0 stitches evenly spaced = 208-220-232-240-252-264 stitches.
If your knitting tension is correct, the piece now measures approx. 15-15-16-17-18-19 cm from the marker on the neck.
If the piece is shorter than this, continue working with old rose and stocking stitch to the correct length.
On the next round divide the piece for the body and sleeves as follows:
Work 30-32-34-36-38-40 stitches as before (= half the back piece), place the next 44-46-48-48-50-52 stitches on 1 thread for the sleeve, cast on 6-6-6-8-8-8 new stitches (= in the side under the sleeve), work 60-64-68-72-76-80 stitches as before (= front piece), place the next 44-46-48-48-50-52 stitches on 1 thread for the sleeve, cast on 6-6-6-8-8-8 new stitches (= in the side under the sleeve) and work the remaining 30-32-34-36-38-40 stitches as before (= half the back piece). Body and sleeves are finished separately.
THE PIECE IS NOW MEASURED FROM HERE!

BODY:
= 132-140-148-160-168-176 stitches.
Insert 1 marker thread in the middle of the 6-6-6-8-8-8 new stitches under each sleeve (= 66-70-74-80-84-88 stitches between the marker threads on both the front and back pieces).
Allow the marker threads to follow your work onwards; they will be used when increasing in the sides.
Work stocking stitch in the round with old rose.
When the piece measures 4-4-5-5-6-6 cm from the division, increase 1 stitch on each side of both marker threads – read INCREASE TIP-2 (= 4 stitches increased).
Increase like this every 4-5-6-6-7-8 cm a total of 3 times = 144-152-160-172-180-188 stitches.
Continue working until the piece measures 16-20-23-25-28-31 cm from the division.
There is now approx. 3-3-3-4-4-4 cm left to finished length; you can try the jumper on and continue working to desired length.
Knit 1 round where you increase 46-48-50-54-58-60 stitches evenly spaced = 190-200-210-226-238-248 stitches.
NOTE: The number of stitches is increased so the rib is not tight.
Change to circular needle size 3 mm.
Work rib (= knit 1 / purl 1) for 3-3-3-4-4-4 cm. Cast off with knit over knit and purl over purl – read CASTING-OFF TIP!
The jumper measures approx. 36-40-44-48-52-56 cm from the shoulder down.

SLEEVE:
Place the 44-46-48-48-50-52 stitches from the thread on the one side of the piece on double pointed needles size 4 mm and knit up 1 stitch in each of the 6-6-6-8-8-8 stitches cast on under the sleeve = 50-52-54-56-58-60 stitches.
Insert 1 marker thread at the beginning of the round, in the middle of the 6-6-6-8-8-8 stitches under the sleeve. Allow the marker thread to follow your work onwards; it will be used when decreasing mid under the sleeve.
Start the round at the marker thread and work stocking stitch in the round with old pink.
When the sleeve measures 3 cm from the division decrease 2 stitches mid under the sleeve – read DECREASE TIP. Decrease like this every 2-3-3-3½-3½-4 cm a total of 6-6-7-7-8-8 times = 38-40-40-42-42-44 stitches.
Continue working until the sleeve measures 16-21-25-29-32-36 cm from the division.
There is now approx. 3-3-3-4-4-4 cm left to finished length; you can try the jumper on and continue to desired length.
Knit 1 round where you increase 6-6-8-8-8-8 stitches evenly spaced = 44-46-48-50-50-52 stitches. Change to double pointed needles size 3 mm. Work rib (= knit 1 / purl 1) for 3-3-3-4-4-4 cm. Cast off with knit over knit and purl over purl– remember CASTING-OFF TIP. The sleeve measures approx. 19-24-28-33-36-40 cm from the division.
Work the other sleeve in the same way.

Diagram

symbols = old rose
symbols = off white
symbols = increase-round
diagram
diagram

Each of our patterns has specific tutorial videos to help you.

Do you have a question? See a list of frequently asked questions (FAQ)

Knitting tension is what determines the final measurements of your work, and is usually measured per 10 x 10 cm. It is provided like so: number of stitches in width x number of rows in height - eg: 19 stitches x 26 rows = 10 x 10 cm.

The knitting tension is very individual; some people knit/crochet loosely while others work tightly. You adjust the knitting tension with the needle size, which is why the suggested needle size is only meant as a guide! You need to adjust this (up or down) to ensure that YOUR knitting tension matches the knitting tension provided in the pattern. If you work with a different knitting tension than provided you will have a different yarn consumption, and your work will have different measurements than what the pattern suggests.

The knitting tension also determines which yarns can replace each other. As long as you achieve the same knitting tension you can replace one yarn with another.

See DROPS lesson: How to measure your tension/gauge

See DROPS video: How to make a gauge tension swatch

The required amount of yarn is provided in grams, eg: 450 g. To calculate how many balls you’ll need you first need to know how many grams are in 1 ball (25g, 50g or 100g). This information is available if you click on the individual yarn quality on our pages. Divide the amount required with the amount of each ball. For example, if each ball is 50g (the most common amount), the calculation will be as follows: 450 / 50 = 9 balls.

The important thing when changing from one yarn to another is that the knitting/crochet tension remains the same. This is so that the measurements of the finished piece will be the same as on the sketch provided. It is easier to achieve the same knitting tension using yarns from the same yarn group. It is also possible to work with multiple strands of a thinner yarn to achieve the knitting tension of a thicker one. Please try our yarn converter. We recommend you to always work a test swatch.

Please NOTE: when changing yarn the garment might have a different look and feel to the garment in the photo, due to individual properties and qualities of each yarn.

See DROPS lesson: Can I use a different yarn than the one mentioned in the pattern?

All our yarns are categorised into yarn groups (from A to F) according to thickness and knitting tension – group A contains the thinnest yarns and group F the thickest. This makes it easier for you to find alternative yarns to our patterns, should you wish to switch yarn. All yarns within the same group have a similar knitting tension and can easily replace each other. However, different yarn qualities have different structures and properties which will give the finished work a unique look and feel.

Click here for an overview of the yarns in each yarn group

At the top of all our patterns you’ll find a link to our yarn calculator, which is a helpful tool should you wish to use a different yarn than suggested. By filling in the yarn quality you wish to replace, the amount (in your size) and number of strands, the calculator will present good alternative yarns with the same knitting tension. Additionally it will tell you how much you’ll require in the new qualities and whether you’ll need to work with multiple strands. Most skeins are 50g (some are 25g or 100g).

If the pattern is worked with multiple colours, every colour will have to be calculated separately. Similarly, if the pattern is worked with several strands of different yarns (for example 1 strand Alpaca and 1 strand Kid-Silk) you will have to find alternatives for each, individually.

Click here to see our yarn calculator

Since different yarns have different qualities and textures we have chosen to keep the original yarn in our patterns. However, you can easily find options among our available qualities by using our yarn calculator, or simply pick a yarn from the same yarn group.

It is possible that some retailers still have discontinued yarns in stock, or that someone has a few skeins at home that they would like to find patterns for.

The yarn calculator will provide both alternative yarn as well as required amount in the new quality.

If you think it's hard to decide what size to make, it can be a good idea to measure a garment you own already and like the size of. Then you can pick the size by comparing those measures with the ones available in the pattern's size chart.

You'll find the size chart at the bottom of the pattern.

See DROPS lesson: How to read size chart

The needle size provided in the pattern serves only as a guide, the important thing is to follow the knitting tension. And since knitting tension is very individual, you will have to adjust the needle size to ensure that YOUR tension is the same as in the pattern – maybe you’ll have to adjust 1, or even 2 needle sizes, up or down to achieve the correct tension. For this, we recommend that you work test swatches.

Should you work with a different knitting tension than the one provided, the measurements of the finished garment might deviate from the measurement sketch.

See DROPS lesson: How to measure your tension/gauge

See DROPS video: How to make a tension/gauge swatch

Working a garment top-down provides more flexibility and room for personal adjustment. For example it is easier to try the garment on while working, as well as making adjustments to length of yoke and shoulder caps.

The instructions are carefully explaining every step, in the correct order. Diagrams are adjusted to the knitting direction and are worked as usual.

The diagram depicts all rows/rounds, and every stitch seen from the right side. It is read from bottom to top, from right to left. 1 square = 1 stitch.

When working back and forth, every other row is worked from the right side and every other row is worked from the wrong side. When working from the wrong side, the diagram will have to be worked reversed: from left to right, knit stitches are purled, purl stitches are knit etc.

When working in the round every round is worked from the right side and the diagram are worked from right to left on all rounds.

See DROPS lesson: How to read knitting diagrams

The diagram depicts all rows/rounds, and every stitch seen from the right side. It is worked from bottom to top, from right to left.

When working back and forth every other row is worked from the right side: from right to left and every other row is worked from the wrong side: from left to right.

When working in the round, every row in the diagram are worked from the right side, from right to left.

When working a circular diagram you start in the middle and work your way outwards, counter clockwise, row by row.

The rows usually start with a given number of chain stitches (equivalent to the height of the following stitch), this will either be depicted in the diagram or explained in the pattern.

See DROPS lesson: How to read crochet diagrams

Instructions for working several diagrams after each other on the same row/round, will often be written like so: “work A.1, A.2, A.3 a total of 0-0-2-3-4 times". This means you work A.1 once, then A.2 is worked once, and A.3 is repeated (in width) the number of times provided for your size – in this case like so: S = 0 times, M = 0 times, L=2 times, XL= 3 times and XXL = 4 times.

The diagrams are worked as usual: begin with the first row in A.1, then work the first row in A.2 etc.

See DROPS lesson: How to read knitting diagrams

See DROPS lesson: How to read crochet diagrams

The total width of the garment (from wrist-to-wrist) will be larger in the larger sizes, despite the actual sleeves being shorter. The larger sizes have longer sleeve caps and wider shoulders, so there will be a good fit in all sizes.

The measurement sketch/schematic drawing provides information regarding the full length of the garment. If it’s a jumper or a jacket the length is measured from the highest point on the shoulder closest to the neckline, and straight down to the bottom of the garment. It is NOT measured from the tip of shoulder. Similarly, the length of yoke is measured from the highest point on the shoulder and down to where yoke is split into body and sleeves.

On a jacket measures are never taken along bands, unless specifically stated. Always measure inside band stitches when measuring the length.

See DROPS lesson: How to read a schematic drawing

Diagrams are often repeated on the round or in height. 1 repeat is the diagram the way it appears in the pattern. If it says to work 5 repeats of A.1 in the round, then you work A.1 a total of 5 times after/next to each other in the round. If it says to work 2 repeats of A.1 vertically/in height you work the entire diagram once, then begin again at the start and work the entire diagram one more time.

Chain stitches are slightly narrower than other stitches and to avoid working the cast-on edge too tight, we simply chain more stitches to begin with. The stitch count will be adjusted on the following row to fit the pattern and measurement sketch.

The rib edge is more elastic and will contract slightly compared to, for example, stocking stitch. By increasing before the rib edge, you avoid a visible difference in width between the rib edge and the rest of the body.

It’s very easy to cast off too tightly, and by making yarn overs while casting off (and simultaneously casting these off) you avoid a too tight cast off edge.

See DROPS video: How to bind off with yarn overs (yo)

To achieve an even increase (or decrease) you can increase on, for example: every 3rd and 4th row alternately, like so: work 2 rows and increase on the 3rd row, work 3 rows and increase on the 4th. Repeat this until the increase is complete.

See DROPS lesson: Increase or decrease 1 st on every 3rd and 4th row alternately

Should you prefer to work in the round instead of back and forth, you may of course adjust the pattern. You’ll need to add steeks mid-front (usually 5 stitches), and follow the instructions. When you would normally turn and work from the wrong side, simply work across the steek and continue in the round. At the end you’ll cut the piece open, pick up stitches to work bands, and cover the cut edges.

See DROPS video: How to knit steeks and cut open

Should you prefer to work back and forth instead of in the round, you may of course adjust the pattern so you work the pieces separately and then assemble them at the end. Divide the stitches for the body in 2, add 1 edge stitch in each side (for sewing) and work the front and back pieces separately.

See DROPS lesson: Can I adapt a pattern for circular needles into straight needles?

Pattern repeats can vary slightly in the different sizes, in order to get the correct proportions. If you’re not working the exact same size as the garment in the photo, yours might deviate slightly. This has been carefully developed and adjusted so that the complete impression of the garment is the same in all sizes.

Make sure to follow instructions and diagrams for your size!

If you have found a pattern you like which is available in women’s size it’s not very difficult to convert it to men’s size. The biggest difference will be the length of sleeves and body. Start working on the women size that you think would fit across the chest. The additional length will be worked right before you cast off for the armhole/sleeve cap. If the pattern is worked top-down you can add the length right after the armhole or before the first decrease on sleeve.

Regarding additional yarn amount, this will depend on how much length you add, but it is better with a skein too many than too few.

All yarns will have excess fibres (from production) that might come off as lint or shedding. Brushed yarns (ie hairier yarns) have more of these loose, excess fibres, causing more shedding.

Shedding also depends on what is worn under or over the garment, and whether this pulls at the yarn fibres. It’s therefore not possible to guarantee that there will be no shedding

Below are some tips on how to get the best result when working with hairier yarns:

1. When the garment is finished (before you wash it) shake it vigorously so the looser hairs come off. NOTE: do NOT use a lint roller, brush or any method that pulls at the yarn.

2. Place the garment in a plastic bag and put it in your freezer - the temperature will cause the fibres to become less attached to each other, and excess fibres will come off easier.

3. Leave in the freezer for a few hours before taking it out and shaking it again.

4. Wash the garment according to the instructions on the yarn label.

Pilling is a natural process that happens to even the most exclusive of fibers. It's a natural sign of wear and tear that is hard to avoid, and that is most visible in high friction areas of your garment like a sweater's arms and cuffs.

You can make your garment look as new by removing the pilling, using a fabric comb or a pill/lint remover.

Still can't find the answer you need? Then scroll down and leave your question so one of our experts can try to help you. This will be done normally within 5 to 10 working days.
In the meantime, you can read the questions and answers that others have left to this pattern or join the DROPS Workshop on Facebook to get help from fellow knitters/crocheters!

You might also like...

Lillesand Jumper

Gabriela, Germany

Lillesand Jumper

@maryshel.knitting, Russian Federation

Lillesand Jumper

Zaji, United States

Post a comment to pattern DROPS Children 37-5

We would love to hear what you have to say about this pattern!

If you want to leave a question, please make sure you select the correct category in the form below, to speed up the answering process. Required fields are marked *.

Comments / Questions (14)

country flag Paneeraq Larsen wrote:

Jeg kan ikke forstå hvordan denne skal strikke i bærestykke Strikk 1-1-3-6-8-11 omganger rett med mørk rosa. fordi jeg er begynder

23.01.2024 - 23:50

DROPS Design answered:

Hej Paneeraq, hvis du strikker en af de to mindste størrelse så strikker du 1 omgang ret, næste størrelse strikker du 3 ret... osv - så det kommer an på hvilken størrelse du strikker :)

02.02.2024 - 13:48

country flag Carol wrote:

A tip - I used four dpns to get the project started, and when I shifted it to the circulars, added four markers for each needle(the first one, marking the beginning of the round, in bright blue, the other three in grey). This means that I can tell exactly how many stitches I need to add for each increase. I'm making the smallest size - at the third arrow, for example, I have144 stitches, 36 stitches for each section, and know that I need to increase 32 stitches, or 8 for each section.

10.09.2023 - 14:51

country flag Nicole wrote:

I am struggling to read diagram. Is first round of diagram old rose or two stitches old rose then two stitches off-white. The diagram only shows two cells. The second round is clearly one stitch old rose one stitch off-white. Would be helpful if all twelve cells were shown.

10.03.2023 - 02:10

DROPS Design answered:

Hi Nicole, The first round is old rose all the way round, the second round is alternate old rose, off white, the 3rd round just off white, fourth round old rose, etc. The diagrams are drawn in this way because the number of stitches in each repeat increases as the number of stitches on the round increases (same number of repeats in width on each round). Happy knitting!

10.03.2023 - 06:55

country flag Mc wrote:

Bonjour, J'ai terminé ce pull et je trouve que l'encolure est trop étroite, je dois la refaire ou du moins trouver un moyen de l'élargir ? Comment faire, peut on défaire le col si oui, je veux bien des explications Merci

17.02.2023 - 17:12

DROPS Design answered:

Bonjour Mc, vous pouvez peut-être défaire le col en utilisant cette technique pour défaire les côtes et les refaire, ou bien votre magasin aura peut-être une autre idée ou astuce à partager avec vous - même par mail ou téléphone. Bon tricot!

20.02.2023 - 08:50

country flag Kasia wrote:

Jak dodać oczka we wzorze A.1. w oznaczeniu -->2 dla wzrostu 92. (przejście ze 104 oczek na 144) Wychodzi mi, że powinnam dodawać za każdym 2 i 6 oczkiem ale ostatecznie nie wychodzi mi 144

26.10.2022 - 23:27

country flag Hetty wrote:

I have just begun this and I am wondering if it will fit over my 2year old’s head. 72 stitches on 3mm needles does not seem enough. A hat in the same yarn has 90 stitches on 3.5mm needles. Please assure me that I will be able to pull the jumper over her head?

18.04.2022 - 14:36

DROPS Design answered:

Dear Hetty, the sweater needs to adjust to the neck, not the head, so it may have less stitches than a hat. It's important that the cast on edge is elastic, you can use bigger needles if this is difficult to achieve with 3mm needles. If you want a wider neck, you could use a larger size for the neck and then adjust the number of stitches for the correct size. Happy knitting!

18.04.2022 - 19:38

country flag Martine Vervaet wrote:

Hallo, ik heb dit truitje gebreid voor mijn kleinzoontje van 7. Het truitje is heel mooi, maar is naar het schijnt ongemakkelijk, achter in de hals. Voelt raar aan zegt hij, net of het te kort is... . Kan ik de hals uithalen?Alvast dank. Martine Vervaet

16.02.2022 - 10:15

country flag Lucia Battisti wrote:

Buonasera vorrei sapere a che punto devo lavorare con i ferri circolari di 80 cm. Grazie

05.01.2022 - 22:21

DROPS Design answered:

Buonasera Lucia, può lavorare con il cavo da 80 cm quando il numero di maglie lo permette. Buon lavoro!

08.01.2022 - 13:18

country flag Britta Rasmussen wrote:

Jeg har garn til overs efter at have strikket tre små trøjer Lillesand....er der en opskrift på huer med samme mønster?

25.09.2021 - 19:03

DROPS Design answered:

Hej Britta. Ja det finns det, du hittar den här. Mvh DROPS Design

27.09.2021 - 09:31

country flag Kerstin wrote:

Ska jag börja medaljen, sedan oket, därefter framstycket och sist ärmarna?

28.08.2021 - 17:19

DROPS Design answered:

Hei Kerstin. Halskant och ok stickas runt på rundsticka från mitt bak, uppifrån och ner. Oket delas till fram- och bakstycke och ärmar. Fram- och bakstycket stickas runt på rundsticka från mitt bak, uppifrån och ner. Ärmarna stickas runt på strumpstickor, uppifrån och ner. mvh DROPS design

30.08.2021 - 13:30