Popular categories
Looking for a yarn?

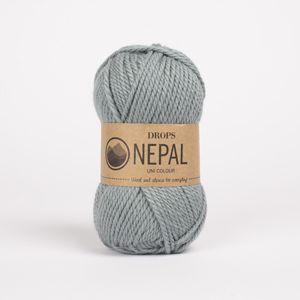
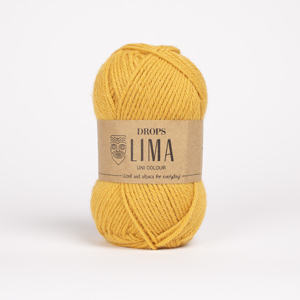
65% Wool, 35% Alpaca
from 2.60 € /50g
Order DROPS Needles & Hooks
Clicking the ORDER button will redirect you to Saules siulas website
The yarn cost is calculated from the pattern’s smallest size and the yarn’s cheapest product type. Looking for an even better price? You might find it on the DROPS Deals!
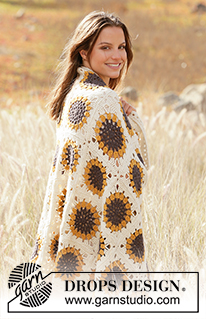
Golden Garden
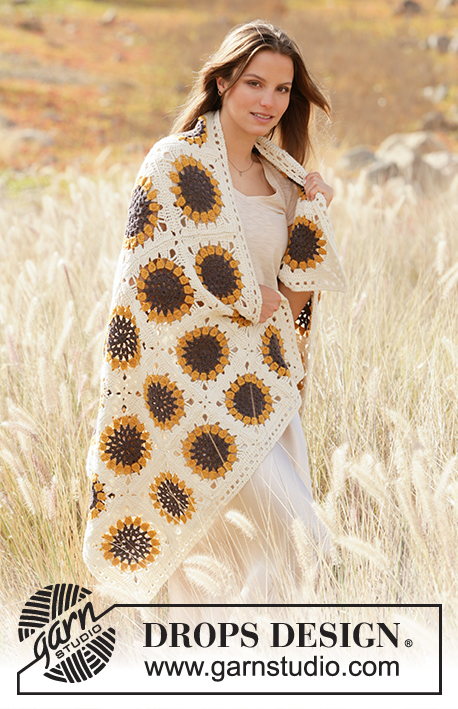
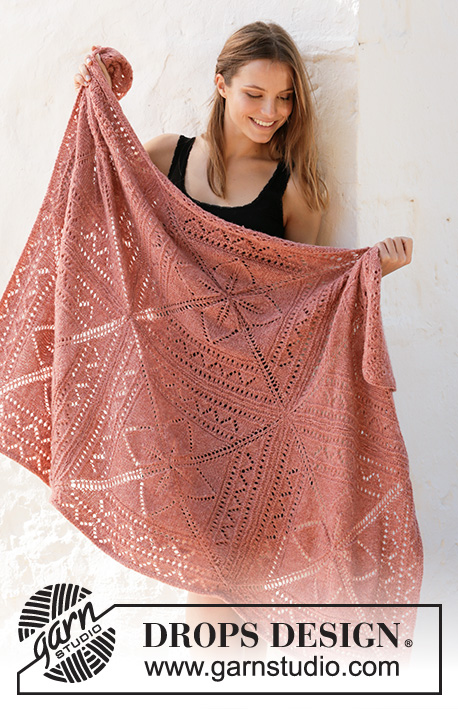
Crochet blanket in squares with sunflower in DROPS Lima.
DROPS design: Pattern no li-118
Yarn group B
----------------------------------------------------------
SIZE:
Blanket measures approx. Width = 86 cm Length = 134 cm
1 square measures approx. 16 x 16 cm.
MATERIALS:
DROPS LIMA from Garnstudio (belongs to yarn group B)
450 g colour 0100, off white
200 g colour 2923, goldenrod
200 g colour 5610, brown
CROCHET TENSION:
18 treble crochets in width and 9 rows vertically = 10 x 10 cm.
CROCHET HOOK:
DROPS CROCHET HOOK SIZE 4 mm
Hook size is only a suggestion! If you have too many stitches on 10 cm switch to larger hook. If you have too few stitches on 10 cm switch to smaller hook.
-------------------------------------------------------
Alternative Yarn – See how to change yarns here
Yarn Groups A to F – Use the same pattern and change the yarn here
Yarn usage using an alternative yarn – Use our yarn converter here
-------------------------------------------------------

65% Wool, 35% Alpaca
from 2.60 € /50g
Order DROPS Needles & Hooks
Clicking the ORDER button will redirect you to Saules siulas website
The yarn cost is calculated from the pattern’s smallest size and the yarn’s cheapest product type. Looking for an even better price? You might find it on the DROPS Deals!
- English (UK/cm), Lithuania
- Česky - not translated
- Dansk
- Deutsch
- Eesti keel
- English (UK/cm)
- English (US/in)
- Español
- Français
- Íslenska
- Italiano
- Magyar
- Nederlands
- Norsk
- Polski
- Português
- Suomi
- Svenska
- English (UK/cm), Bulgaria
- English (UK/cm), Croatia
- English (UK/cm), Greece
- English (UK/cm), Latvia
- English (UK/cm), Romania
- English (UK/cm), Slovenia
- Česky, Slovakia - not translated
Pattern instructions
EXPLANATION FOR THE PATTERN:
----------------------------------------------------------
PATTERN:
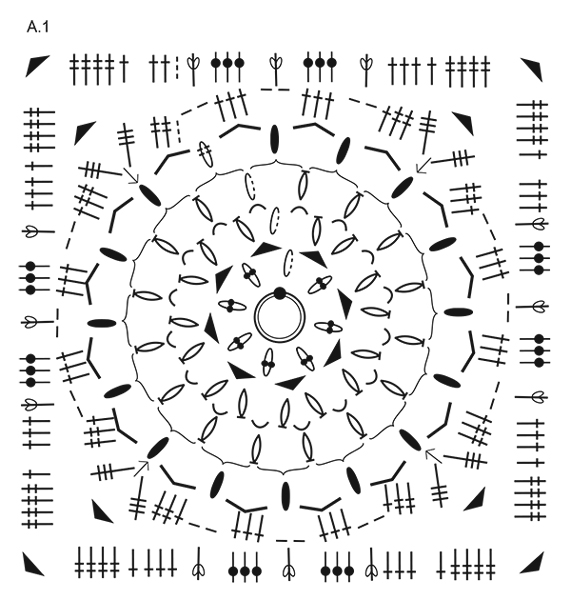
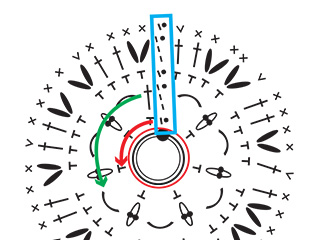
See diagrams A.1, A.2, A.3 and A.4. Diagram A.1 shows squares and A.2-A.4 show how edge around the blanket is worked.
SQUARE COLOURS:
Work squares with 3 colours in the following order:
Round 1-3: brown
Round 4: goldenrod
Round 5-6: off white.
COLOUR CHANGE:
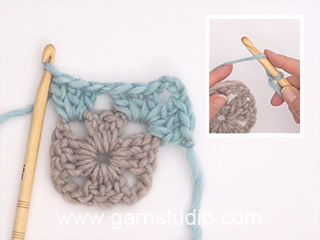
Crochet last slip stitch on the last round with the new colour to get a nice colour change.
CROCHET TIP:
If you work at the end of crochet hook the chain stitch will often be too tight.
1 chain stitch should be just as long as 1 double crochet/treble crochet/double treble crochet is wide.
CROCHET INFORMATION:
When working the edge around the blanket, begin 1st round by fastening the yarn with 1 slip stitch, then work 3 chain stitches. These chain stitches are not shown in diagram and are in addition to stitches shown in diagram. Finish 1st round with 1 slip stitch in 3rd chain stitch. On the next 2 rounds begin each round with 3 chain stitches (which are in addition to stitches shown) and finish each round with 1 slip stitch in 3rd chain stitch.
----------------------------------------------------------
START THE PIECE HERE:
----------------------------------------------------------
BLANKET - SHORT OVERVIEW OF THE PIECE:
Blanket consists of 40 equal squares that are sewn together at the end. Work an edge around the entire blanket.
SQUARE:
Begin with Lima on hook size 4 mm and read SQUARE COLOURS, COLOUR CHANGE and CROCHET TIP in explanation above and work PATTERN according to diagram A.1.
REMEMBER THE CROCHET TENSION! Work 40 squares in total.
ASSEMBLY:
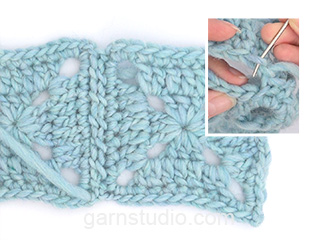
Place the squares 8 squares in length and 5 squares in width. Make sure all are right side up. Use off white and sew squares together edge to edge with one stitch in every stitch, also sew chain spaces in the corners. Make sure that seam is flat and as invisible as possible. Fasten off.
EDGE:
Work an edge around the entire blanket, begin by working straight after the first corner.
In diagram A.2 last round of A.1 is shown to make it clear which stitches you work in. Use hook size 4 mm and off white. Read CROCHET INFORMATION in explanation above and work as follows: * Work diagram A.2 along the side of diagram A.1. Work diagram A.3 in transition between squares *, work from *-* until 1st corner. Work diagram A.4 around corner. Work from *-* until 2nd corner. Work diagram A.4 around corner. Work from *-* until 3rd corner. Work diagram A.4 around corner. Work from *-* until 4th corner. Work diagram A.4 around corner.
When diagrams have been worked 1 time vertically, the edge is done.
Cut and fasten the yarn.
Diagram

|
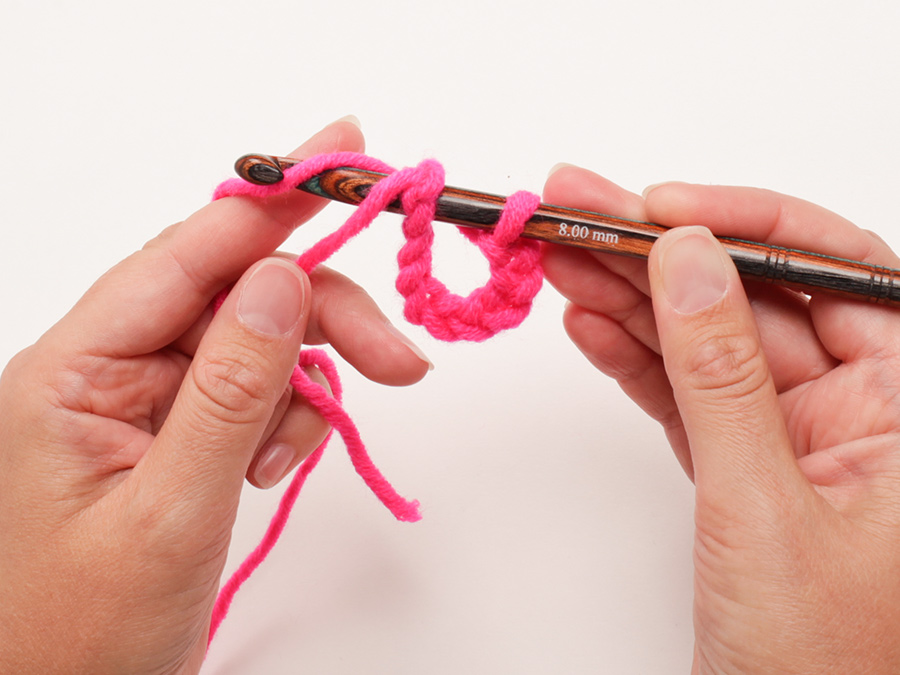
= Begin here Work 8 chain stitches and form a ring with 1 slip stitch in first chain stitch - see point on circle. |

|
= Begin round with 2 chain stitches and 1 treble crochet around chain stitch ring, finish round with 1 slip stitch in this treble crochet. |

|
= work 2 treble crochets together around the chain stitch ring. Work 1 treble crochet but wait with last yarn over and pull through (= 2 loops on hook), work 1 treble crochet more the same way around chain stitch ring. Make 1 yarn over on hook and pull through all 3 loops on hook. |

|
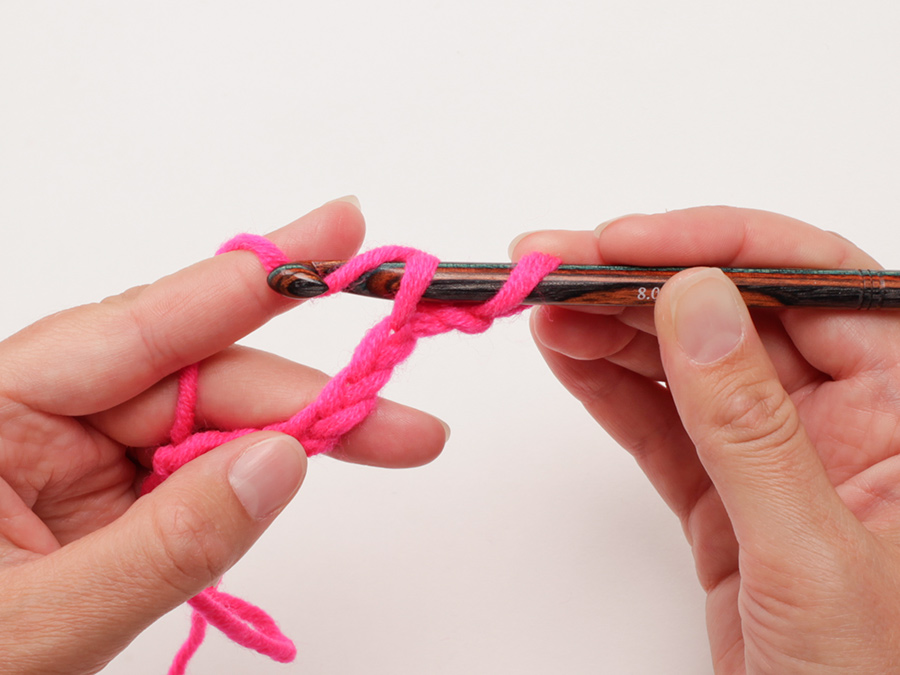
= 4 chain stitches |

|
= work 2 treble crochets together around same chain space. Work 1 treble crochet around chain space but wait with last yarn over and pull through (= 2 loops on hook), work 1 treble crochet more the same way around same chain space. Make 1 yarn over on hook and pull through all 3 loops on hook. |

|
= 2 chain stitches |

|
= 3 chain stitches |

|
= Begin round with 3 chain stitches, then work 4 double treble crochets together around same chain space: Work 1 double treble crochet but wait with last yarn over and pull through (= 2 loops on hook), work 3 double treble crochets more the same way around chain space. Make 1 yarn over on hook and pull through all 5 loops on hook. Finish round with 1 slip stitch at the top of double treble crochets. |

|
= 5 double treble crochets around same chain space: Work 1 double treble crochet around chain space but wait with last yarn over and pull through (= 2 loops on hook), work 4 double treble crochets more the same way around same chain space. Make 1 yarn over on hook and pull through all 6 loops on hook. |

|
= work 2 treble crochets together in same stitch. Work 1 treble crochet in stitch but wait with last yarn over and pull through (= 2 loops on hook), work 1 treble crochet more the same way in same stitch. Make 1 yarn over on hook and pull through all 3 loops on hook. |

|
= 5 chain stitches |

|
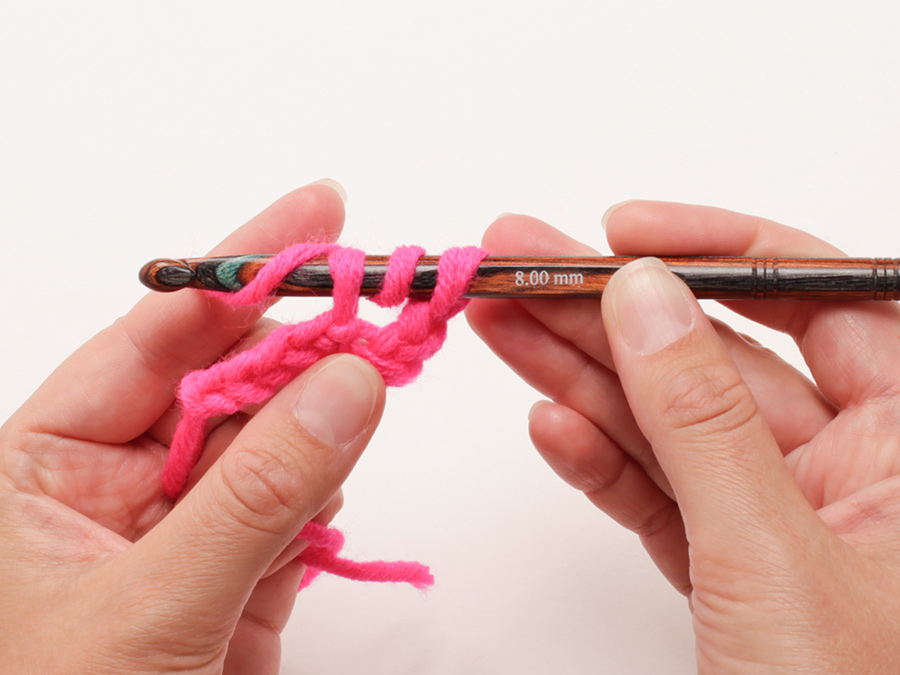
= treble crochet around/in stitch |

|
= 1 chain stitch - if you work at the end of crochet hook the chain stitch will often be too tight 1 chain stitch should be just as long as 1 double crochet/treble crochet/double treble crochet is wide. |

|
= double treble crochet around stitch |

|
= triple treble crochet in stitch |

|
= half treble crochet around chain space |

|
= half treble crochet in stitch |

|
= this round has already been worked, it is shown to see which stitches to work in. |

What can you do with our patterns? You can share DROPS patterns online, using the pattern original picture, materials, name and number. But you are NOT ALLOWED to reproduce the complete pattern digitally in any way. Yarn stores are welcome to use the DROPS pattern database to promote the sale of our assortment. You can print out our patterns, make as many copies as you’d like. The only thing we ask is that you don't make any changes / additions to the original printed document. And that the patterns according to the DROPS philosophy are given out to the consumers for free. Editorials that wish to publish our patterns in printed books or magazines can contact us for more information. The sale of garments based on DROPS patterns is permitted as long as they are sold as single items or per order. Further commercial use of the patterns is not permitted. It has to be clearly stated that the garment is made based on a design from DROPS DESIGN. The use of clothing labels of which DROPS DESIGN forms part is conditioned by the inclusion of the following text: “A DROPS DESIGN made by …..”. The use of DROPS photos for marketing purposes/sales is only permitted in connection with the use/sale of DROPS products. The photos may not be cut or edited and the logo should be clearly visible.
We reserve the right to withdraw the permission for use of our patterns at any time, notwithstanding the reason.
Each of our patterns has specific tutorial videos to help you.
These step-by-step tutorials might also help you:
Why is the knitting/crochet tension so important?
Knitting tension is what determines the final measurements of your work, and is usually measured per 10 x 10 cm. It is provided like so: number of stitches in width x number of rows in height - eg: 19 stitches x 26 rows = 10 x 10 cm.
The knitting tension is very individual; some people knit/crochet loosely while others work tightly. You adjust the knitting tension with the needle size, which is why the suggested needle size is only meant as a guide! You need to adjust this (up or down) to ensure that YOUR knitting tension matches the knitting tension provided in the pattern. If you work with a different knitting tension than provided you will have a different yarn consumption, and your work will have different measurements than what the pattern suggests.
The knitting tension also determines which yarns can replace each other. As long as you achieve the same knitting tension you can replace one yarn with another.
See DROPS lesson: How to measure your tension/gauge
See DROPS video: How to make a gauge tension swatch
How do I know how many balls of yarn I need?
The required amount of yarn is provided in grams, eg: 450 g. To calculate how many balls you’ll need you first need to know how many grams are in 1 ball (25g, 50g or 100g). This information is available if you click on the individual yarn quality on our pages. Divide the amount required with the amount of each ball. For example, if each ball is 50g (the most common amount), the calculation will be as follows: 450 / 50 = 9 balls.
Can I use a different yarn than what the pattern suggests?
The important thing when changing from one yarn to another is that the knitting/crochet tension remains the same. This is so that the measurements of the finished piece will be the same as on the sketch provided. It is easier to achieve the same knitting tension using yarns from the same yarn group. It is also possible to work with multiple strands of a thinner yarn to achieve the knitting tension of a thicker one. Please try our yarn converter. We recommend you to always work a test swatch.
Please NOTE: when changing yarn the garment might have a different look and feel to the garment in the photo, due to individual properties and qualities of each yarn.
See DROPS lesson: Can I use a different yarn than the one mentioned in the pattern?
What are the yarn groups?
All our yarns are categorised into yarn groups (from A to F) according to thickness and knitting tension – group A contains the thinnest yarns and group F the thickest. This makes it easier for you to find alternative yarns to our patterns, should you wish to switch yarn. All yarns within the same group have a similar knitting tension and can easily replace each other. However, different yarn qualities have different structures and properties which will give the finished work a unique look and feel.
How do I use the yarn calculator?
At the top of all our patterns you’ll find a link to our yarn calculator, which is a helpful tool should you wish to use a different yarn than suggested. By filling in the yarn quality you wish to replace, the amount (in your size) and number of strands, the calculator will present good alternative yarns with the same knitting tension. Additionally it will tell you how much you’ll require in the new qualities and whether you’ll need to work with multiple strands. Most skeins are 50g (some are 25g or 100g).
If the pattern is worked with multiple colours, every colour will have to be calculated separately. Similarly, if the pattern is worked with several strands of different yarns (for example 1 strand Alpaca and 1 strand Kid-Silk) you will have to find alternatives for each, individually.
Why do you show discontinued yarns in the patterns?
Since different yarns have different qualities and textures we have chosen to keep the original yarn in our patterns. However, you can easily find options among our available qualities by using our yarn calculator, or simply pick a yarn from the same yarn group.
It is possible that some retailers still have discontinued yarns in stock, or that someone has a few skeins at home that they would like to find patterns for.
The yarn calculator will provide both alternative yarn as well as required amount in the new quality.
What size should I knit?
If you think it's hard to decide what size to make, it can be a good idea to measure a garment you own already and like the size of. Then you can pick the size by comparing those measures with the ones available in the pattern's size chart.
You'll find the size chart at the bottom of the pattern.
See DROPS lesson: How to read size chart
Why do I get the wrong knitting tension with the suggested needle size?
The needle size provided in the pattern serves only as a guide, the important thing is to follow the knitting tension. And since knitting tension is very individual, you will have to adjust the needle size to ensure that YOUR tension is the same as in the pattern – maybe you’ll have to adjust 1, or even 2 needle sizes, up or down to achieve the correct tension. For this, we recommend that you work test swatches.
Should you work with a different knitting tension than the one provided, the measurements of the finished garment might deviate from the measurement sketch.
See DROPS lesson: How to measure your tension/gauge
See DROPS video: How to make a tension/gauge swatch
Why is the pattern worked top-down?
Working a garment top-down provides more flexibility and room for personal adjustment. For example it is easier to try the garment on while working, as well as making adjustments to length of yoke and shoulder caps.
The instructions are carefully explaining every step, in the correct order. Diagrams are adjusted to the knitting direction and are worked as usual.
How do I work according to a knitting diagram?
The diagram depicts all rows/rounds, and every stitch seen from the right side. It is read from bottom to top, from right to left. 1 square = 1 stitch.
When working back and forth, every other row is worked from the right side and every other row is worked from the wrong side. When working from the wrong side, the diagram will have to be worked reversed: from left to right, knit stitches are purled, purl stitches are knit etc.
When working in the round every round is worked from the right side and the diagram are worked from right to left on all rounds.
See DROPS lesson: How to read knitting diagrams
How do I work according to a crochet diagram?
The diagram depicts all rows/rounds, and every stitch seen from the right side. It is worked from bottom to top, from right to left.
When working back and forth every other row is worked from the right side: from right to left and every other row is worked from the wrong side: from left to right.
When working in the round, every row in the diagram are worked from the right side, from right to left.
When working a circular diagram you start in the middle and work your way outwards, counter clockwise, row by row.
The rows usually start with a given number of chain stitches (equivalent to the height of the following stitch), this will either be depicted in the diagram or explained in the pattern.
See DROPS lesson: How to read crochet diagrams
How do I work several diagrams simultaneously on the same row/round?
Instructions for working several diagrams after each other on the same row/round, will often be written like so: “work A.1, A.2, A.3 a total of 0-0-2-3-4 times". This means you work A.1 once, then A.2 is worked once, and A.3 is repeated (in width) the number of times provided for your size – in this case like so: S = 0 times, M = 0 times, L=2 times, XL= 3 times and XXL = 4 times.
The diagrams are worked as usual: begin with the first row in A.1, then work the first row in A.2 etc.
See DROPS lesson: How to read knitting diagrams
See DROPS lesson: How to read crochet diagrams
Why are the sleeves shorter in larger sizes?
The total width of the garment (from wrist-to-wrist) will be larger in the larger sizes, despite the actual sleeves being shorter. The larger sizes have longer sleeve caps and wider shoulders, so there will be a good fit in all sizes.
Where on the garment is the length measured?
The measurement sketch/schematic drawing provides information regarding the full length of the garment. If it’s a jumper or a jacket the length is measured from the highest point on the shoulder closest to the neckline, and straight down to the bottom of the garment. It is NOT measured from the tip of shoulder. Similarly, the length of yoke is measured from the highest point on the shoulder and down to where yoke is split into body and sleeves.
On a jacket measures are never taken along bands, unless specifically stated. Always measure inside band stitches when measuring the length.
See DROPS lesson: How to read a schematic drawing
What is a repeat?
Diagrams are often repeated on the round or in height. 1 repeat is the diagram the way it appears in the pattern. If it says to work 5 repeats of A.1 in the round, then you work A.1 a total of 5 times after/next to each other in the round. If it says to work 2 repeats of A.1 vertically/in height you work the entire diagram once, then begin again at the start and work the entire diagram one more time.
Why does the piece start with more chain stitches than it’s worked with?
Chain stitches are slightly narrower than other stitches and to avoid working the cast-on edge too tight, we simply chain more stitches to begin with. The stitch count will be adjusted on the following row to fit the pattern and measurement sketch.
Why increase before the rib edge when the piece is worked top-down?
The rib edge is more elastic and will contract slightly compared to, for example, stocking stitch. By increasing before the rib edge, you avoid a visible difference in width between the rib edge and the rest of the body.
Why increase in the cast-off edge?
It’s very easy to cast off too tightly, and by making yarn overs while casting off (and simultaneously casting these off) you avoid a too tight cast off edge.
See DROPS video: How to bind off with yarn overs (yo)
How do I increase/decrease on every 3rd and 4th row/round alternately?
To achieve an even increase (or decrease) you can increase on, for example: every 3rd and 4th row alternately, like so: work 2 rows and increase on the 3rd row, work 3 rows and increase on the 4th. Repeat this until the increase is complete.
See DROPS lesson: Increase or decrease 1 st on every 3rd and 4th row alternately
How can I work a jacket in the round instead of back and forth?
Should you prefer to work in the round instead of back and forth, you may of course adjust the pattern. You’ll need to add steeks mid-front (usually 5 stitches), and follow the instructions. When you would normally turn and work from the wrong side, simply work across the steek and continue in the round. At the end you’ll cut the piece open, pick up stitches to work bands, and cover the cut edges.
See DROPS video: How to knit steeks and cut open
Can I work a jumper back and forth instead of in the round?
Should you prefer to work back and forth instead of in the round, you may of course adjust the pattern so you work the pieces separately and then assemble them at the end. Divide the stitches for the body in 2, add 1 edge stitch in each side (for sewing) and work the front and back pieces separately.
See DROPS lesson: Can I adapt a pattern for circular needles into straight needles?
Why is the pattern slightly different than what I see in the photo?
Pattern repeats can vary slightly in the different sizes, in order to get the correct proportions. If you’re not working the exact same size as the garment in the photo, yours might deviate slightly. This has been carefully developed and adjusted so that the complete impression of the garment is the same in all sizes.
Make sure to follow instructions and diagrams for your size!
How do I make a women’s size garment into a men’s size one?
If you have found a pattern you like which is available in women’s size it’s not very difficult to convert it to men’s size. The biggest difference will be the length of sleeves and body. Start working on the women size that you think would fit across the chest. The additional length will be worked right before you cast off for the armhole/sleeve cap. If the pattern is worked top-down you can add the length right after the armhole or before the first decrease on sleeve.
Regarding additional yarn amount, this will depend on how much length you add, but it is better with a skein too many than too few.
How do I prevent a hairy garment from shedding?
All yarns will have excess fibres (from production) that might come off as lint or shedding. Brushed yarns (ie hairier yarns) have more of these loose, excess fibres, causing more shedding.
Shedding also depends on what is worn under or over the garment, and whether this pulls at the yarn fibres. It’s therefore not possible to guarantee that there will be no shedding
Below are some tips on how to get the best result when working with hairier yarns:
1. When the garment is finished (before you wash it) shake it vigorously so the looser hairs come off. NOTE: do NOT use a lint roller, brush or any method that pulls at the yarn.
2. Place the garment in a plastic bag and put it in your freezer - the temperature will cause the fibres to become less attached to each other, and excess fibres will come off easier.
3. Leave in the freezer for a few hours before taking it out and shaking it again.
4. Wash the garment according to the instructions on the yarn label.
Why does my garment pill?
Pilling is a natural process that happens to even the most exclusive of fibers. It's a natural sign of wear and tear that is hard to avoid, and that is most visible in high friction areas of your garment like a sweater's arms and cuffs.
You can make your garment look as new by removing the pilling, using a fabric comb or a pill/lint remover.
In the meantime, you can read the questions and answers that others have left to this pattern or join the DROPS Workshop on Facebook to get help from fellow knitters/crocheters!
You might also like...
Golden Garden |
|||||||||||||||||||||||||||||||||||||||||||||||||||||||
 |
 |
||||||||||||||||||||||||||||||||||||||||||||||||||||||
Crochet blanket in squares with sunflower in DROPS Lima.
DROPS 209-3 |
|||||||||||||||||||||||||||||||||||||||||||||||||||||||
|
---------------------------------------------------------- EXPLANATION FOR THE PATTERN: ---------------------------------------------------------- PATTERN: See diagrams A.1, A.2, A.3 and A.4. Diagram A.1 shows squares and A.2-A.4 show how edge around the blanket is worked. SQUARE COLOURS: Work squares with 3 colours in the following order: Round 1-3: brown Round 4: goldenrod Round 5-6: off white. COLOUR CHANGE: Crochet last slip stitch on the last round with the new colour to get a nice colour change. CROCHET TIP: If you work at the end of crochet hook the chain stitch will often be too tight. 1 chain stitch should be just as long as 1 double crochet/treble crochet/double treble crochet is wide. CROCHET INFORMATION: When working the edge around the blanket, begin 1st round by fastening the yarn with 1 slip stitch, then work 3 chain stitches. These chain stitches are not shown in diagram and are in addition to stitches shown in diagram. Finish 1st round with 1 slip stitch in 3rd chain stitch. On the next 2 rounds begin each round with 3 chain stitches (which are in addition to stitches shown) and finish each round with 1 slip stitch in 3rd chain stitch. ---------------------------------------------------------- START THE PIECE HERE: ---------------------------------------------------------- BLANKET - SHORT OVERVIEW OF THE PIECE: Blanket consists of 40 equal squares that are sewn together at the end. Work an edge around the entire blanket. SQUARE: Begin with Lima on hook size 4 mm and read SQUARE COLOURS, COLOUR CHANGE and CROCHET TIP in explanation above and work PATTERN according to diagram A.1. REMEMBER THE CROCHET TENSION! Work 40 squares in total. ASSEMBLY: Place the squares 8 squares in length and 5 squares in width. Make sure all are right side up. Use off white and sew squares together edge to edge with one stitch in every stitch, also sew chain spaces in the corners. Make sure that seam is flat and as invisible as possible. Fasten off. EDGE: Work an edge around the entire blanket, begin by working straight after the first corner. In diagram A.2 last round of A.1 is shown to make it clear which stitches you work in. Use hook size 4 mm and off white. Read CROCHET INFORMATION in explanation above and work as follows: * Work diagram A.2 along the side of diagram A.1. Work diagram A.3 in transition between squares *, work from *-* until 1st corner. Work diagram A.4 around corner. Work from *-* until 2nd corner. Work diagram A.4 around corner. Work from *-* until 3rd corner. Work diagram A.4 around corner. Work from *-* until 4th corner. Work diagram A.4 around corner. When diagrams have been worked 1 time vertically, the edge is done. Cut and fasten the yarn. |
|||||||||||||||||||||||||||||||||||||||||||||||||||||||
Diagram explanations |
|||||||||||||||||||||||||||||||||||||||||||||||||||||||
|
|||||||||||||||||||||||||||||||||||||||||||||||||||||||

|
|||||||||||||||||||||||||||||||||||||||||||||||||||||||

|
|||||||||||||||||||||||||||||||||||||||||||||||||||||||
|
Have you made this or any other of our designs? Tag your pictures in social media with #dropsdesign so we can see them! Do you need help with this pattern?You'll find tutorial videos, a Comments/Questions area and more by visiting the pattern on garnstudio.com. © 1982-2024 DROPS Design A/S. We reserve all rights. This document, including all its sub-sections, has copyrights. Read more about what you can do with our patterns at the bottom of each pattern on our site. |
|||||||||||||||||||||||||||||||||||||||||||||||||||||||
With over 40 years in knitting and crochet design, DROPS Design offers one of the most extensive collections of free patterns on the internet - translated to 17 languages. As of today we count 304 catalogues and 11422 patterns - 11422 of which are translated into English (UK/cm).
We work hard to bring you the best knitting and crochet have to offer, inspiration and advice as well as great quality yarns at incredible prices! Would you like to use our patterns for other than personal use? You can read what you are allowed to do in the Copyright text at the bottom of all our patterns. Happy crafting!












Comments / Questions (27)
Golden Garden by DROPS Design DROPS 209-3 DROPS Design: Pattern no li-118 What are the stitches for Round 1 of A.3 diagram? They are not shown on the pattern or diagram.
21.11.2022 - 20:00DROPS Design answered:
Dear Diana, A.3 is worked in the transition between squares, so it's worked over the joining of 2 squares. In the first round, you work 3 treble crochets: 1 at the end of a square, one in the transition and the third one at the start of the next square. Happy crocheting!
06.12.2022 - 18:25Wenn man das Bild der Decke genau betrachtet sieht man das nach den Blütenblättern vier Stäbchen in die Luftmaschen gehäkelt wurden. In der Häkelschrift sind es aber nur drei?
13.11.2022 - 21:24Hei. Jeg har heklet hele teppet, har bare kanten igjen. Men nå vises ikke symbolene eller diagrammene lenger. Har prøvd mange ganger å få dem opp igjen, men det står bare «symbols». Kan jeg bli tilsendt diagram med symbolbeskrivning? Er veldig kjipt å ikke kunne gjøre seg ferdig når man har lagt så mange timer i det.
13.05.2022 - 13:57DROPS Design answered:
Hej Kristin, jo men diagrammet og forklaringerne ligger der stadigvæk... Prøv at vælge et andet sprog og se om det ligger der, gå så tilbage til dit sprog igen :)
13.05.2022 - 14:52Hej. Detta var helt nya symboler för mig. har ni valt att göra egna symboler eller är dessa vanliga vid virkdiagram?
03.05.2022 - 10:55DROPS Design answered:
Hej Caroline, vi anvender så vidt muligt samme symboler som vi har brugt i tidligere DROPS modeller. Du finder beskrivning på symbolerne lige ovenfor diagrammerne nederst i mønsteret :)
03.05.2022 - 13:34Hej, jag har samma fråga som martina craig, vilket ni inte har svarat på. Hur ska jag virka första varvet på kanten enligt diagam 3? Vänligen Kirsti
11.04.2021 - 16:10DROPS Design answered:
Hei Kirsti. Du hekler diagram A.2 langs kanten av diagram A.1 (ruten), mens diagram A.3 hekles kun i overgangen mellom mellom rutene. Så på 1.omgang hekles det ingen masker i overgangen mellom rutene, på 2. omgang hekles det 2 luftmasker og på 3. omgang 3 staver. mvh DROPS design
26.04.2021 - 11:25Muchas gracias por su patrón. Me a ayudado mucho. Gracias de nuevo
03.03.2021 - 07:55Die Wolle Lima sollte man mit der Hand waschen, aber wie wäscht man eine ganze Decke mit der Hand?
07.02.2021 - 08:11DROPS Design answered:
Liebe Henriette, gerne wird Ihnen Ihr DROPS Laden damit weiterhelfen - auch telefonisch oder per E-Mail. Viel Spaß beim häkeln!
08.02.2021 - 09:32Hei! I mønsteret står det at på man på runde 5 skal hekle tre staver om luftmaskebuene i gult som ble hekletpå runde 4. Når jeg gjør dette dekker ikke de hvite stavene alle de fem gule luftmaskene. Det er ikke lett å se mønsteret på modellbildet, men der virker det som om hele buen er godt dekker, muligens med 5 staver over noen av de gule buene. Kan dette gjøres for å dekke luftmaskebuen eller finnes det andre måter å gjøre dette på? På forhånd takk!
19.06.2020 - 21:56DROPS Design answered:
Hei Nora. Du kan evnt hekle 4 luftmasker på forrige rad (altså på rad 4 med oker), istedenfor 5 luftmasker. Da vil neste rad med natur dekke litt bedre. Om du ønsker å hekle flere enn de 3 staver for å dekke luftmaskeraden, vil det bli for mange masker på neste omgang og da vil ikke maskeantallet til kanten stemme. mvh DROPS design
29.06.2020 - 14:50Is there a written out pattern with pictures I can follow? Diagrams are hard for me to understand. Thank you!
07.05.2020 - 12:16DROPS Design answered:
Dear Mrs Davis, there is no tutorial with pictures but you will find how to read crochet diagrams here. Happy crocheting!
07.05.2020 - 12:53Hej Äntligen
05.05.2020 - 09:51