DROPS Belle
DROPS Belle
53% Cotton, 33% Viscose, 14% Linen
from 2.00 £ /50g
Get the yarn to make this pattern from 22.00£.

The yarn cost is calculated from the pattern’s smallest size and the yarn’s cheapest product type. Looking for an even better price? You might find it on the DROPS Deals!

DROPS SS24

Spring Lineup

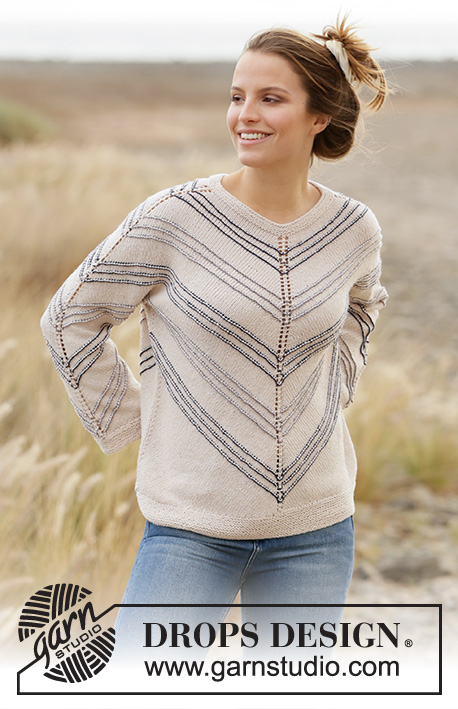
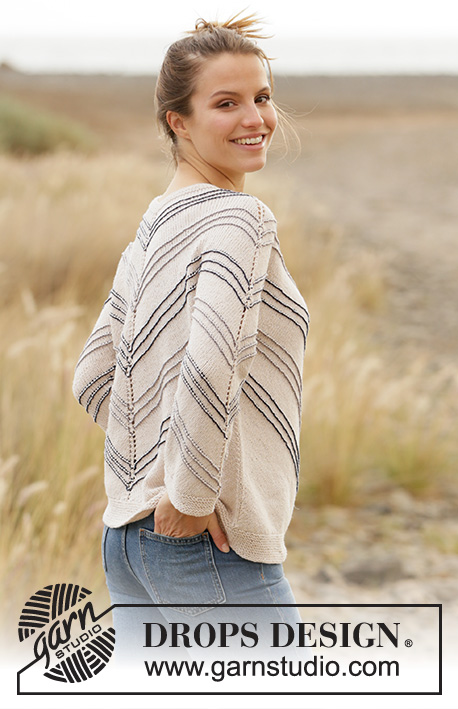
Knitted jumper in DROPS Belle. Piece is knitted top down at an angle with stripes. Size: S - XXXL

DROPS 210-14
DROPS design: Pattern vs-065
Yarn group B
----------------------------------------------------------

SIZE:
S - M - L - XL - XXL - XXXL

MATERIALS:
DROPS BELLE from Garnstudio (belongs to yarn group B)
450-500-550-600-700-750 g colour 03, light beige
50-50-50-50-50-50 g colour no 07, zinc
50-50-50-50-50-50 g colour 20, navy blue

KNITTING TENSION:
21 stitches in width and 28 rows vertically in stocking stitch = 10 x 10 cm.

NEEDLES:
DROPS DOUBLE POINTED NEEDLES SIZE 4 mm
DROPS CIRCULAR NEEDLE SIZE 4 mm : Length 40 and 80 cm for stocking stitch.
DROPS DOUBLE POINTED NEEDLES SIZE 3.5 mm – for edges in garter stitch.
DROPS CIRCULAR NEEDLE SIZE 3.5 mm : Length 40 and 80 cm for edges in garter stitch.
Needle size is only a suggestion! If you have too many stitches on 10 cm switch to a larger needle size. If you have too few stitches on 10 cm switch to a smaller needle size.

-------------------------------------------------------

Alternative Yarn – See how to change yarns here
Yarn Groups A to F – Use the same pattern and change the yarn here
Yarn usage using an alternative yarn – Use our yarn converter here

-------------------------------------------------------

DROPS Belle
DROPS Belle
53% Cotton, 33% Viscose, 14% Linen
from 2.00 £ /50g
Get the yarn to make this pattern from 22.00£.

The yarn cost is calculated from the pattern’s smallest size and the yarn’s cheapest product type. Looking for an even better price? You might find it on the DROPS Deals!

Pattern instructions

NOTE: This pattern is written in British English. All measurements in charts are in cm. For conversion from cm to inches - click here. There are different terms for crocheting in British and American English. If this pattern includes crochet, click for "crochet terms" here. For this pattern in American English, please click here.
----------------------------------------------------------

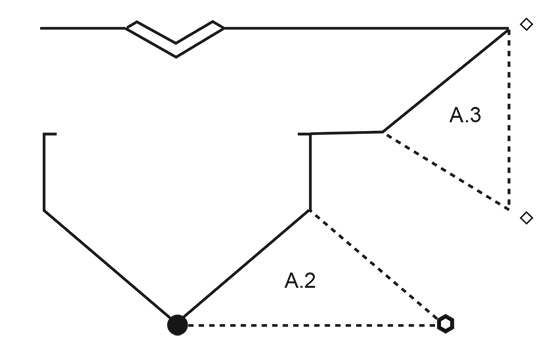
EXPLANATION FOR THE PATTERN:

----------------------------------------------------------

GARTER STITCH (worked in the round):
1 ridge vertically = 2 rounds, i.e. knit 1 round and purl 1 round.

PATTERN: 
See diagram A.1. Illustrations A.2 and A.3 show how parts are worked when working back and forth.

INCREASE TIP-1 (evenly):
To calculate how to increase evenly, use the total number of stitches on row (e.g. 104 stitches) and divide stitches by number of increases to be done (e.g. 8) = 13. 
In this example increase by making 1 yarn over after every 13th stitch. On next round knit yarn overs twisted to avoid holes.

INCREASE TIP-2:
Increase 1 stitch on each side of stitch with marker (= 8 stitches increased on round):
Increase as follows: Work until stitch with marker, make 1 yarn over, knit next stitch, make 1 yarn over. On next round knit the yarn overs (or purl if it is on a row with purl stitches in A.1), to make holes. Then work the new stitches in pattern A.1

DECREASE TIP:
Decrease 1 stitch on each side of marker thread as follows: Work until 3 stitches remain before marker thread and knit 2 together, knit 2 (marker thread is between these stitches), slip 1 stitch knitwise, knit 1, pass slipped stitch over stitch worked.

CAST-OFF TIP:
To avoid a tight cast-off edge you may use a larger needle size. If this also is too tight, work a 1 yarn over after approx. every 4th stitch while casting off (cast off yarn overs as regular stitches).

----------------------------------------------------------

START THE PIECE HERE:

----------------------------------------------------------

JUMPER - SHORT OVERVIEW OF THE PIECE:
Neck edge and yoke are worked in the round on circular needle, top down. Now divide yoke for body and sleeves. Work body in the round, top down. Then divide the piece mid front/mid back and work back and forth in 2 parts (= sides). Work rib edge at the bottom at the end.
Work sleeves in the round on double pointed needles/a short circular needle, top down. Then divide the piece mid on top of sleeve and work back and forth in one part (= underside of sleeve). Work rib edge at the bottom at the end.

NECK EDGE:
Cast on 96-100-104-112-116-120 stitches on circular needle size 3.5 mm with light beige. Work ridges in GARTER STITCH - read explanation above, for 2 cm. Then knit 1 round while increasing 0-0-8-8-8-24 stitches evenly - read INCREASE TIP-1 = 96-100-112-120-124-144 stitches.
Switch to circular needle size 4 mm. Now insert 4 markers in the piece. Insert marker in the stitch as follows: Insert a marker in the first stitch on round (= mid back), skip the next 23-24-27-29-30-35 stitches, insert a marker in next stitch (= mid on top of shoulder), skip the next 23-24-27-29-30-35 stitches, insert a marker in next stitch (= mid front), skip the next 23-24-27-29-30-35 stitches, insert a marker in next stitch (= mid on top of shoulder), there are now 23-24-27-29-30-35 stitches between last and first marker on round.

YOKE:
Now work pattern as follows: Work A.1 in the round, AT THE SAME TIME increase 1 stitch on each side of stitches with a marker - read INCREASE TIP-2. Increase like this every other round 40-44-48-51-56-59 times in total = 416-452-496-528-572-616 stitches. REMEMBER THE KNITTING TENSION! Piece measures approx. 29-31-34-36-40-42 cm from after neck edge and down in knitting direction (i.e. measure between the increase on one shoulder and mid front/mid back), and approx. 35-37-40-43-48-50 cm along middle stitch at each of the increases.
Work next round as follows:
Work the first 65-71-76-82-91-99 stitches (= half back piece), slip the next 79-85-97-101-105-111 stitches on a stitch holder for sleeve and cast on 8-8-10-12-12-12 new stitches on needle (= in the side under sleeve), work the next 129-141-151-163-181-197 stitches (= front piece), slip the next 79-85-97-101-105-111 stitches on a stitch holder for sleeve and cast on 8-8-10-12-12-12 new stitches on needle (= in the side under sleeve), work the remaining 64-70-75-81-90-98 stitches (= half back piece).
Insert 1 marker in the middle stitch on each shoulder, and insert 1 marker in the middle of front piece. Leave marker there - MEASURE PIECE FROM HERE!

BODY:
= 274-298-322-350-386-418 stitches. Insert a marker thread in the new stitches cast-on under sleeves in each side (= 4-4-5-6-6-6 new stitches on each side of marker thread). Continue in the round with pattern A.1 and increase 1 stitch on each side of middle stitch on front piece and back piece every other round as before, AT THE SAME TIME on first round with increase begin decrease in each side - read DECREASE TIP. Decrease like this every other round (the same round as increase is worked mid front and mid back). Continue like this until piece measures approx. 13-13-12-11-8-8 cm mid front (measured from marker inserted in middle stitch) – adjust to finish on a round without increases and decreases, and that 3 stripes in the same colour have been worked vertically (so that the 3 stripes in the same colour are not broken). Approx. 5 cm remains with garter stitch until finished measurements. Cut the yarn.
Slip stitch with marker mid back + stitches until before stitch with marker mid front on 1 stitch holder (= half back piece + half front piece), work over these stitches later. There is now half a front piece and half a back piece on row.

HALF FRONT/BACK PIECE:
See illustration A.2 for this part. Work with light beige until finished measurements. Begin from right side and cast off stitch with marker mid front/mid back. Continue with stocking stitch, light beige and decrease on each side of marker in the sides - AT THE SAME TIME cast off 2 stitches at the beginning of every row. Continue like this until 3 stitches remain on row, cut the yarn and pull it through the remaining stitch and fasten.

HALF FRONT/BACK PIECE:
Slip stitches from stitch holder on circular needle size 4 mm and work the same way as other half front/back piece.

BOTTOM EDGE:
Begin in one side and pick up approx. 202-218-236-256-282-306 stitches along entire bottom edge on circular needle size 3.5 mm with light beige - pick up inside the cast off, so that the cast off does not show. Work in garter stitch for 5 cm. Cast off - read CAST-OFF TIP.

SLEEVES:
Slip the 79-85-97-101-105-111 stitches from stitch holder in one side of piece double pointed needles or a short circular needle size 4 mm and pick in addition up 1 stitch in each of the 8-8-10-12-12-12 new stitches cast on in the side under sleeve = 87-93-107-113-117-123 stitches. Insert a marker thread in the middle of the new stitches cast-on (= 4-4-5-6-6-6 new stitches on each side of marker thread). Move the marker thread upwards when working. Continue in the round with A.1 and increase on each side of middle stitch at the top of sleeve every other round, AT THE SAME TIME on first round with increase begin decrease in each side of marker thread mid under sleeve - remember DECREASE TIP. Decrease like this on every round 6-10-22-24-24-24 times (= 6-10-22-24-24-24 stitches decreased in total on these rounds) = 81-83-85-98-93-99 stitches. Then continue decrease under sleeve and increase over sleeve on every other round (so that number of stitch is constant) until finished measurements. Continue like this until piece measures approx. 23-21-19-16-11-10 cm from marker in middle stitch – adjust to finish on a round without increases and decreases, and that 3 stripes in the same colour have been worked vertically (so that the 3 stripes in the same colour are not broken). Approx. 3 cm remains with garter stitch until finished measurements. Cut the yarn.
Now work back and forth - see illustration A.3 for this part. Begin from right side and cast off the middle stitch mid on top of sleeve (i.e. the stitch with increases on each side). Continue with stocking stitch and decrease at the marker mid under sleeve - AT THE SAME TIME cast off 2 stitches at the beginning of every row. Continue like this until 3 stitches remain on row, cut the yarn and pull it through the remaining stitches. Work the other sleeve the same way.

SLEEVE EDGES:
Begin mid under sleeve and pick up approx. 59-61-63-65-67-69 stitches along entire bottom edge on double pointed needles size 3.5 mm with light beige - pick up inside the cast off, so that the cast off does not show. Work garter stitch in the round for 3 cm. Cast off - remember CAST-OFF TIP. Work the other sleeve edge the same way.

This pattern has been corrected.

Updated online: 09.09.2022
SLEEVES:
Slip the 79-85-97-101-105-111 stitches from stitch holder in one side of piece double pointed needles or a short circular needle size 4 mm and pick in addition up 1 stitch in each of the 8-8-10-12-12-12 new stitches cast on in the side under sleeve = 87-93-107-113-117-123 stitches.

Diagram

symbols = knit with light beige
symbols = knit with navy blue
symbols = knit with zinc
symbols = purl with light beige
symbols = knitting direction
symbols = mid front
symbols = mid back
symbols = mid on top of sleeve
diagram
diagram
diagram

Each of our patterns has specific tutorial videos to help you.

Do you have a question? See a list of frequently asked questions (FAQ)

Knitting tension is what determines the final measurements of your work, and is usually measured per 10 x 10 cm. It is provided like so: number of stitches in width x number of rows in height - eg: 19 stitches x 26 rows = 10 x 10 cm.

The knitting tension is very individual; some people knit/crochet loosely while others work tightly. You adjust the knitting tension with the needle size, which is why the suggested needle size is only meant as a guide! You need to adjust this (up or down) to ensure that YOUR knitting tension matches the knitting tension provided in the pattern. If you work with a different knitting tension than provided you will have a different yarn consumption, and your work will have different measurements than what the pattern suggests.

The knitting tension also determines which yarns can replace each other. As long as you achieve the same knitting tension you can replace one yarn with another.

See DROPS lesson: How to measure your tension/gauge

See DROPS video: How to make a gauge tension swatch

The required amount of yarn is provided in grams, eg: 450 g. To calculate how many balls you’ll need you first need to know how many grams are in 1 ball (25g, 50g or 100g). This information is available if you click on the individual yarn quality on our pages. Divide the amount required with the amount of each ball. For example, if each ball is 50g (the most common amount), the calculation will be as follows: 450 / 50 = 9 balls.

The important thing when changing from one yarn to another is that the knitting/crochet tension remains the same. This is so that the measurements of the finished piece will be the same as on the sketch provided. It is easier to achieve the same knitting tension using yarns from the same yarn group. It is also possible to work with multiple strands of a thinner yarn to achieve the knitting tension of a thicker one. Please try our yarn converter. We recommend you to always work a test swatch.

Please NOTE: when changing yarn the garment might have a different look and feel to the garment in the photo, due to individual properties and qualities of each yarn.

See DROPS lesson: Can I use a different yarn than the one mentioned in the pattern?

All our yarns are categorised into yarn groups (from A to F) according to thickness and knitting tension – group A contains the thinnest yarns and group F the thickest. This makes it easier for you to find alternative yarns to our patterns, should you wish to switch yarn. All yarns within the same group have a similar knitting tension and can easily replace each other. However, different yarn qualities have different structures and properties which will give the finished work a unique look and feel.

Click here for an overview of the yarns in each yarn group

At the top of all our patterns you’ll find a link to our yarn calculator, which is a helpful tool should you wish to use a different yarn than suggested. By filling in the yarn quality you wish to replace, the amount (in your size) and number of strands, the calculator will present good alternative yarns with the same knitting tension. Additionally it will tell you how much you’ll require in the new qualities and whether you’ll need to work with multiple strands. Most skeins are 50g (some are 25g or 100g).

If the pattern is worked with multiple colours, every colour will have to be calculated separately. Similarly, if the pattern is worked with several strands of different yarns (for example 1 strand Alpaca and 1 strand Kid-Silk) you will have to find alternatives for each, individually.

Click here to see our yarn calculator

Since different yarns have different qualities and textures we have chosen to keep the original yarn in our patterns. However, you can easily find options among our available qualities by using our yarn calculator, or simply pick a yarn from the same yarn group.

It is possible that some retailers still have discontinued yarns in stock, or that someone has a few skeins at home that they would like to find patterns for.

The yarn calculator will provide both alternative yarn as well as required amount in the new quality.

If you think it's hard to decide what size to make, it can be a good idea to measure a garment you own already and like the size of. Then you can pick the size by comparing those measures with the ones available in the pattern's size chart.

You'll find the size chart at the bottom of the pattern.

See DROPS lesson: How to read size chart

The needle size provided in the pattern serves only as a guide, the important thing is to follow the knitting tension. And since knitting tension is very individual, you will have to adjust the needle size to ensure that YOUR tension is the same as in the pattern – maybe you’ll have to adjust 1, or even 2 needle sizes, up or down to achieve the correct tension. For this, we recommend that you work test swatches.

Should you work with a different knitting tension than the one provided, the measurements of the finished garment might deviate from the measurement sketch.

See DROPS lesson: How to measure your tension/gauge

See DROPS video: How to make a tension/gauge swatch

Working a garment top-down provides more flexibility and room for personal adjustment. For example it is easier to try the garment on while working, as well as making adjustments to length of yoke and shoulder caps.

The instructions are carefully explaining every step, in the correct order. Diagrams are adjusted to the knitting direction and are worked as usual.

The diagram depicts all rows/rounds, and every stitch seen from the right side. It is read from bottom to top, from right to left. 1 square = 1 stitch.

When working back and forth, every other row is worked from the right side and every other row is worked from the wrong side. When working from the wrong side, the diagram will have to be worked reversed: from left to right, knit stitches are purled, purl stitches are knit etc.

When working in the round every round is worked from the right side and the diagram are worked from right to left on all rounds.

See DROPS lesson: How to read knitting diagrams

The diagram depicts all rows/rounds, and every stitch seen from the right side. It is worked from bottom to top, from right to left.

When working back and forth every other row is worked from the right side: from right to left and every other row is worked from the wrong side: from left to right.

When working in the round, every row in the diagram are worked from the right side, from right to left.

When working a circular diagram you start in the middle and work your way outwards, counter clockwise, row by row.

The rows usually start with a given number of chain stitches (equivalent to the height of the following stitch), this will either be depicted in the diagram or explained in the pattern.

See DROPS lesson: How to read crochet diagrams

Instructions for working several diagrams after each other on the same row/round, will often be written like so: “work A.1, A.2, A.3 a total of 0-0-2-3-4 times". This means you work A.1 once, then A.2 is worked once, and A.3 is repeated (in width) the number of times provided for your size – in this case like so: S = 0 times, M = 0 times, L=2 times, XL= 3 times and XXL = 4 times.

The diagrams are worked as usual: begin with the first row in A.1, then work the first row in A.2 etc.

See DROPS lesson: How to read knitting diagrams

See DROPS lesson: How to read crochet diagrams

The total width of the garment (from wrist-to-wrist) will be larger in the larger sizes, despite the actual sleeves being shorter. The larger sizes have longer sleeve caps and wider shoulders, so there will be a good fit in all sizes.

The measurement sketch/schematic drawing provides information regarding the full length of the garment. If it’s a jumper or a jacket the length is measured from the highest point on the shoulder closest to the neckline, and straight down to the bottom of the garment. It is NOT measured from the tip of shoulder. Similarly, the length of yoke is measured from the highest point on the shoulder and down to where yoke is split into body and sleeves.

On a jacket measures are never taken along bands, unless specifically stated. Always measure inside band stitches when measuring the length.

See DROPS lesson: How to read a schematic drawing

Diagrams are often repeated on the round or in height. 1 repeat is the diagram the way it appears in the pattern. If it says to work 5 repeats of A.1 in the round, then you work A.1 a total of 5 times after/next to each other in the round. If it says to work 2 repeats of A.1 vertically/in height you work the entire diagram once, then begin again at the start and work the entire diagram one more time.

Chain stitches are slightly narrower than other stitches and to avoid working the cast-on edge too tight, we simply chain more stitches to begin with. The stitch count will be adjusted on the following row to fit the pattern and measurement sketch.

The rib edge is more elastic and will contract slightly compared to, for example, stocking stitch. By increasing before the rib edge, you avoid a visible difference in width between the rib edge and the rest of the body.

It’s very easy to cast off too tightly, and by making yarn overs while casting off (and simultaneously casting these off) you avoid a too tight cast off edge.

See DROPS video: How to bind off with yarn overs (yo)

To achieve an even increase (or decrease) you can increase on, for example: every 3rd and 4th row alternately, like so: work 2 rows and increase on the 3rd row, work 3 rows and increase on the 4th. Repeat this until the increase is complete.

See DROPS lesson: Increase or decrease 1 st on every 3rd and 4th row alternately

Should you prefer to work in the round instead of back and forth, you may of course adjust the pattern. You’ll need to add steeks mid-front (usually 5 stitches), and follow the instructions. When you would normally turn and work from the wrong side, simply work across the steek and continue in the round. At the end you’ll cut the piece open, pick up stitches to work bands, and cover the cut edges.

See DROPS video: How to knit steeks and cut open

Should you prefer to work back and forth instead of in the round, you may of course adjust the pattern so you work the pieces separately and then assemble them at the end. Divide the stitches for the body in 2, add 1 edge stitch in each side (for sewing) and work the front and back pieces separately.

See DROPS lesson: Can I adapt a pattern for circular needles into straight needles?

Pattern repeats can vary slightly in the different sizes, in order to get the correct proportions. If you’re not working the exact same size as the garment in the photo, yours might deviate slightly. This has been carefully developed and adjusted so that the complete impression of the garment is the same in all sizes.

Make sure to follow instructions and diagrams for your size!

If you have found a pattern you like which is available in women’s size it’s not very difficult to convert it to men’s size. The biggest difference will be the length of sleeves and body. Start working on the women size that you think would fit across the chest. The additional length will be worked right before you cast off for the armhole/sleeve cap. If the pattern is worked top-down you can add the length right after the armhole or before the first decrease on sleeve.

Regarding additional yarn amount, this will depend on how much length you add, but it is better with a skein too many than too few.

All yarns will have excess fibres (from production) that might come off as lint or shedding. Brushed yarns (ie hairier yarns) have more of these loose, excess fibres, causing more shedding.

Shedding also depends on what is worn under or over the garment, and whether this pulls at the yarn fibres. It’s therefore not possible to guarantee that there will be no shedding

Below are some tips on how to get the best result when working with hairier yarns:

1. When the garment is finished (before you wash it) shake it vigorously so the looser hairs come off. NOTE: do NOT use a lint roller, brush or any method that pulls at the yarn.

2. Place the garment in a plastic bag and put it in your freezer - the temperature will cause the fibres to become less attached to each other, and excess fibres will come off easier.

3. Leave in the freezer for a few hours before taking it out and shaking it again.

4. Wash the garment according to the instructions on the yarn label.

Pilling is a natural process that happens to even the most exclusive of fibers. It's a natural sign of wear and tear that is hard to avoid, and that is most visible in high friction areas of your garment like a sweater's arms and cuffs.

You can make your garment look as new by removing the pilling, using a fabric comb or a pill/lint remover.

Still can't find the answer you need? Then scroll down and leave your question so one of our experts can try to help you. This will be done normally within 5 to 10 working days.
In the meantime, you can read the questions and answers that others have left to this pattern or join the DROPS Workshop on Facebook to get help from fellow knitters/crocheters!

You might also like...

Spring Lineup

Elodie, France

Spring Lineup

Ana, Spain

Post a comment to pattern DROPS 210-14

We would love to hear what you have to say about this pattern!

If you want to leave a question, please make sure you select the correct category in the form below, to speed up the answering process. Required fields are marked *.

Comments / Questions (65)

country flag Carolyn Beeton wrote:

The instructions for the sleeves say: “ Slip the 79-85-97-101-105-111 stitches from stitch holder … and pick in addition up 1 stitch in each of the 8-8-10-12-12-12 new stitches cast on in the side under sleeve = 87-93-104-113-117-123 stitches.” In size L, shouldn’t you end with 107 stitches? (97+10)

09.04.2022 - 16:36

DROPS Design answered:

Dear Carolyn, that's correct, it should be 107 stitches for size L. We'll correct the typo as soon as possible. Thank you. Happy knitting!

09.04.2022 - 18:32

country flag Esperanza wrote:

Hola. La orilla del escote después de aumentar 8 puntos, inserto el marcador cada 27puntos para la talla L y me sobran puntos.

18.03.2022 - 00:54

DROPS Design answered:

Hola Esperanza, ten en cuenta que los marcapuntos se insertan en los puntos, no entre los puntos. Por lo tanto, 27 (en la talla L) se multiplica por 4 (108pts) y 4 pts con el marcapuntos = 112 pts.

20.03.2022 - 18:03

country flag Martine wrote:

Ik begin aan A2. In de uitleg staat dat je bij het begin van elke naald 2 st. dient af te kanten. Op de foto lijken de minderingen onder de mouwen door te lopen. Daarvan staat in de uitleg niets. Heb ik het juist dat die mindering ook in A2 dient verder gezet te worden? Dank u wel.

10.02.2022 - 16:35

DROPS Design answered:

Dag Martine,

Zowel in de zijkant van het lijf (dus aan elke kant van de markeerdraad) als midden onder de mouw lopen inderdaad de minderingen door. Dus je kant 2 steken af aan elke kant en TEGELIJKERTIJD minder je aan elke kant van de markerdraad midden onder de mouw.

11.02.2022 - 14:06

country flag Marianne Lange wrote:

Jeg skal til at strikke siderne, men forstår ikke hvad det er for en aflukning jeg skal lave i siderne . er det indtagning på hv anden pind som hidtil ,jeg kan jo ikke lukke af i midten af arbejdet, jeg ved godt at jeg skal lukke 2 masker i begyndelsen af hv pind

08.11.2021 - 14:51

DROPS Design answered:

Hej Marianne, ja du tager ind i hver side ifølge indtagningstipset. Vi kan ikke se hvor du læser aflukning i siden, skriv gerne nøjagtig hvor du er, så er det lettere for os at hjælpe til :)

11.11.2021 - 15:30

country flag Marianne wrote:

Hvordan kan jeg få maskeantal til at passe på ærmerne str.L man har 97 m fra tråden og skal samle 10 m op under ærmet og så skriver i at det skal give 104 m . der er også problemer med indtagningerne på ærmet i skriver at der skal tages på hver omgang 22 x ialt 22 m taget ind men man tager jo en masker ind på hver side af mærketråden og det skal give 85 m

12.10.2021 - 16:08

country flag Marianne Lange wrote:

Når man tager ud til str M passer maskeantallet ikke . str S = 416 m og det passer fint ,der skal så være 452 m i str m ,men det kan jo ikke passe da man tager 8 m ud på omg . skal det så være 4 mindre eller 4 mere

08.10.2021 - 16:48

country flag Tamara Voll wrote:

Halbes vordeteils/rückendeteils stricke ich,wo muss Maschen abnehmen?

07.09.2021 - 09:58

DROPS Design answered:

Liebe Frau Voll, abnehmen wird es wie zuvor beidseitig von der Markierung an der Seite, und dazu wird es je 2 M am Anfang jeder Reihe (Hin- sowie Rückreihe) abgekettet. Viel Spaß beim stricken!

07.09.2021 - 15:59

country flag Jasmine wrote:

I am knitting the XL size and just divided the sweater for the sleeves, but my eyelet columns are not lining up correctly like in the photo. When counting the stitches that are worked, do I begin counting from the original beginning of round (ie, 51 stitches from the first increase marker) or do I begin counting from the first increase marker and split the first sleeve 82 stitches from the first marker? I am concerned because my eyelets are not lining up evenly at all.

10.08.2021 - 05:09

DROPS Design answered:

Dear Jasmine, the number of stitches starts from beg of the round, ie from the stitch on mid back (first marker), then count 81 more sts (= 1/2 back piece), count 101 sts (= 50 sts + mid st on shoulder with marker + 50 sts), count 163 sts (= 81 sts + mid st with marker + 81 sts = front piece), count 101 sts as before for 2nd sleeve and 81 sts to the end of the round for 2nd half back piece. Happy knitting!

10.08.2021 - 14:03

country flag Vibeke wrote:

Mit farveskifte bliver ikke pænt, når der både skal skiftes garn og tages ud, nogen tricks? Hulmønsteret blive meget ujævnt i forhold til de 3 andre.

08.06.2021 - 12:19

DROPS Design answered:

Hej Vibeke, du kan justere hullerne når du hæfter trådene fra striberne. Lav en lille prøve først, så du kan se hvordan det bliver :)

11.06.2021 - 08:26

country flag Marion Krämer wrote:

Hallo brauche Hilfe beim Ärmel stricken, verstehe das nicht. Rumpf habe ich fertig

28.04.2021 - 16:08