Clicking the ORDER button will redirect you to Wool Warehouse Direct Ltd website
The yarn cost is calculated from the pattern’s smallest size and the yarn’s cheapest product type. Looking for an even better price? You might find it on the DROPS Deals!
-------------------------------------------------------
Alternative Yarn – See how to change yarns here
Yarn Groups A to F – Use the same pattern and change the yarn here
Yarn usage using an alternative yarn – Use our yarn converter here
-------------------------------------------------------
Clicking the ORDER button will redirect you to Wool Warehouse Direct Ltd website
The yarn cost is calculated from the pattern’s smallest size and the yarn’s cheapest product type. Looking for an even better price? You might find it on the DROPS Deals!
= knit from the right side, purl from the wrong side |
|
= purl from the right side, knit from the wrong side |
|
= between 2 stitches make 1 yarn over, work yarn over twisted on next row; it should not make a hole |
|
= slip 5 stitches on cable needle behind piece, knit 5, knit 5 from cable needle |
|
= slip 5 stitches on cable needle in front of piece, knit 5, knit 5 from cable needle |
Each of our patterns has specific tutorial videos to help you.
These step-by-step tutorials might also help you:
Why is the knitting/crochet tension so important?
Knitting tension is what determines the final measurements of your work, and is usually measured per 10 x 10 cm. It is provided like so: number of stitches in width x number of rows in height - eg: 19 stitches x 26 rows = 10 x 10 cm.
The knitting tension is very individual; some people knit/crochet loosely while others work tightly. You adjust the knitting tension with the needle size, which is why the suggested needle size only serve as a guide! You need to adjust this (up or down) to ensure that YOUR knitting tension matches the knitting tension provided in the pattern. If you work with a different knitting tension than provided you will have a different yarn consumption, and your work will have different measurements than what the pattern suggests.
The knitting tension also determines which yarns can replace each other. As long as you achieve the same knitting tension you can replace one yarn with another.
See DROPS lesson: How to measure your tension/gauge
See DROPS video: How to make a gauge tension swatch
How do I know how many balls of yarn I need?
The required amount of yarn is provided in grams, eg: 450 g. To calculate how many balls you’ll need you first need to know how many grams are in 1 ball (25g, 50g or 100g). This information is available if you click on the individual yarn quality on our pages. Divide the amount required with the amount of each ball. For example, if each ball is 50g (the most common amount), the calculation will be as follows: 450 / 50 = 9 balls.
Can I use a different yarn than what the pattern suggests?
The important thing when changing from one yarn to another is that the knitting/crochet tension remains the same. This is so that the measurements of the finished piece will be the same as on the sketch provided. It is easier to achieve the same knitting tension using yarns from the same yarn group. It is also possible to work with multiple strands of a thinner yarn to achieve the knitting tension of a thicker one. Please try our yarn converter. We recommend you to always work a test swatch.
Please NOTE: when changing yarn the garment might have a different look and feel to the garment in the photo, due to individual properties and qualities of each yarn.
See DROPS lesson: Can I use a different yarn than the one mentioned in the pattern?
What are the yarn groups?
All our yarns are categorised into yarn groups (from A to F) according to thickness and knitting tension – group A contains the thinnest yarns and group F the thickest. This makes it easier for you to find alternative yarns to our patterns, should you wish to switch yarn. All yarns within the same group have a similar knitting tension and can easily replace each other. However, different yarn qualities have different structures and properties which will give the finished work a unique look and feel.
How do I use the yarn converter?
At the top of all our patterns you’ll find a link to our yarn converter, which is a helpful tool should you wish to use a different yarn than suggested. By filling in the yarn quality you wish to replace, the amount (in your size) and number of strands, the converter will present good alternative yarns with the same knitting tension. Additionally it will tell you how much you’ll require in the new qualities and whether you’ll need to work with multiple strands. Most skeins are 50g (some are 25g or 100g).
If the pattern is worked with multiple colours, every colour will have to be converted separately. Similarly, if the pattern is worked with several strands of different yarns (for example 1 strand Alpaca and 1 strand Kid-Silk) you will have to find alternatives for each, individually.
Why do you show discontinued yarns in the patterns?
Since different yarns have different qualities and textures we have chosen to keep the original yarn in our patterns. However, you can easily find options among our available qualities by using our yarn converter, or simply pick a yarn from the same yarn group.
It is possible that some retailers still have discontinued yarns in stock, or that someone has a few skeins at home that they would like to find patterns for.
The yarn converter will provide both alternative yarn as well as required amount in the new quality.
What size should I knit?
If you think it's hard to decide what size to make, it can be a good idea to measure a garment you own already and like the size of. Then you can pick the size by comparing those measures with the ones available in the pattern's size chart.
You'll find the size chart at the bottom of the pattern.
See DROPS lesson: How to read size chart
Why do I get the wrong knitting tension with the suggested needle size?
The needle size provided in the pattern serves only as a guide, the important thing is to follow the knitting tension. And since knitting tension is very individual, you will have to adjust the needle size to ensure that YOUR tension is the same as in the pattern – maybe you’ll have to adjust 1, or even 2 needle sizes, up or down to achieve the correct tension. For this, we recommend that you work test swatches.
Should you work with a different knitting tension than the one provided, the measurements of the finished garment might deviate from the measurement sketch.
See DROPS lesson: How to measure your tension/gauge
See DROPS video: How to make a gauge tension swatch
Why is the pattern worked top-down?
Working a garment top-down provides more flexibility and room for personal adjustment. For example it is easier to try the garment on while working, as well as making adjustments to length of yoke and shoulder caps.
The instructions are carefully explaining every step, in the correct order. Diagrams are adjusted to the knitting direction and are worked as usual.
How do I work according to a knitting diagram?
The diagram depicts all rows/rounds, and every stitch seen from the right side. It is read from bottom to top, from right to left. 1 square = 1 stitch.
When working back and forth, every other row is worked from the right side and every other row is worked from the wrong side. When working from the wrong side, the diagram will have to be worked reversed: from left to right, knit stitches are purled, purl stitches are knit etc.
When working in the round every round is worked from the right side and the diagram are worked from right to left on all rounds.
See DROPS lesson: How to read knitting diagrams
How do I work according to a crochet diagram?
The diagram depicts all rows/rounds, and every stitch seen from the right side. It is worked from bottom to top, from right to left.
When working back and forth every other row is worked from the right side: from right to left and every other row is worked from the wrong side: from left to right.
When working in the round, every row in the diagram are worked from the right side, from right to left.
When working a circular diagram you start in the middle and work your way outwards, counter clockwise, row by row.
The rows usually start with a given number of chain stitches (equivalent to the height of the following stitch), this will either be depicted in the diagram or explained in the pattern.
See DROPS lesson: How to read crochet diagrams
How do I work several diagrams simultaneously on the same row/round?
Instructions for working several diagrams after each other on the same row/round, will often be written like so: “work A.1, A.2, A.3 a total of 0-0-2-3-4 times". This means you work A.1 once, then A.2 is worked once, and A.3 is repeated (in width) the number of times provided for your size – in this case like so: S = 0 times, M = 0 times, L=2 times, XL= 3 times and XXL = 4 times.
The diagrams are worked as usual: begin with the first row in A.1, then work the first row in A.2 etc.
See DROPS lesson: How to read knitting diagrams
See DROPS lesson: How to read crochet diagrams
Why are the sleeves shorter in larger sizes?
The total width of the garment (from wrist-to-wrist) will be larger in the larger sizes, despite the actual sleeves being shorter. The larger sizes have longer sleeve caps and wider shoulders, so there will be a good fit in all sizes.
Where on the garment is the length measured?
The measurement sketch/schematic drawing provides information regarding the full length of the garment. If it’s a jumper or a jacket the length is measured from the highest point on the shoulder (usually closest to the neckline), and straight down to the bottom of the garment. It is NOT measured from the tip of shoulder. Similarly, the length of yoke is measured from the highest point on the shoulder and down to where yoke is split into body and sleeves.
See DROPS lesson: How to read a schematic drawing
What is a repeat?
Diagrams are often repeated on the round or in height. 1 repeat is the diagram the way it appears in the pattern. If it says to work 5 repeats of A.1 in the round, then you work A.1 a total of 5 times after/next to each other in the round. If it says to work 2 repeats of A.1 vertically/in height you work the entire diagram once, then begin again at the start and work the entire diagram one more time.
Why does the piece start with more chain stitches than it’s worked with?
Chain stitches are slightly narrower than other stitches and to avoid working the cast-on edge too tight, we simply chain more stitches to begin with. The stitch count will be adjusted on the following row to fit the pattern and measurement sketch.
Why increase before the rib edge when the piece is worked top-down?
The rib edge is more elastic and will contract slightly compared to, for example, stocking stitch. By increasing before the rib edge, you avoid a visible difference in width between the rib edge and the rest of the body.
Why increase in the cast-off edge?
It’s very easy to cast off too tightly, and by making yarn overs while casting off (and simultaneously casting these off) you avoid a too tight cast off edge.
See DROPS video: How to bind off with yarn overs (yo)
How do I increase/decrease on every 3rd and 4th row/round alternately?
To achieve an even increase (or decrease) you can increase on, for example: every 3rd and 4th row alternately, like so: work 2 rows and increase on the 3rd row, work 3 rows and increase on the 4th. Repeat this until the increase is complete.
See DROPS lesson: Increase or decrease 1 st on every 3rd and 4th row alternately
How can I work a jacket in the round instead of back and forth?
Should you prefer to work in the round instead of back and forth, you may of course adjust the pattern. You’ll need to add steeks mid-front (usually 5 stitches), and follow the instructions. When you would normally turn and work from the wrong side, simply work across the steek and continue in the round. At the end you’ll cut the piece open, pick up stitches to work bands, and cover the cut edges.
See DROPS video: How to knit steeks and cut open
Can I work a jumper back and forth instead of in the round?
Should you prefer to work back and forth instead of in the round, you may of course adjust the pattern so you work the pieces separately and then assemble them at the end. Divide the stitches for the body in 2, add 1 edge stitch in each side (for sewing) and work the front and back pieces separately.
See DROPS lesson: Can I adapt a pattern for circular needles into straight needles?
Why is the pattern slightly different than what I see in the photo?
Pattern repeats can vary slightly in the different sizes, in order to get the correct proportions. If you’re not working the exact same size as the garment in the photo, yours might deviate slightly. This has been carefully developed and adjusted so that the complete impression of the garment is the same in all sizes.
Make sure to follow instructions and diagrams for your size!
How do I make a women’s size garment into a men’s size one?
If you have found a pattern you like which is available in women’s size it’s not very difficult to convert it to men’s size. The biggest difference will be the length of sleeves and body. Start working on the women size that you think would fit across the chest. The additional length will be worked right before you cast off for the armhole/sleeve cap. If the pattern is worked top-down you can add the length right after the armhole or before the first decrease on sleeve.
Regarding additional yarn amount, this will depend on how much length you add, but it is better with a skein too many than too few.
How do I prevent a hairy garment from shedding?
All yarns will have excess fibres (from production) that might come off as lint or shedding. Brushed yarns (ie hairier yarns) have more of these loose, excess fibres, causing more shedding.
Shedding also depends on what is worn under or over the garment, and whether this pulls at the yarn fibres. It’s therefore not possible to guarantee that there will be no shedding
Below are some tips on how to get the best result when working with hairier yarns:
1. When the garment is finished (before you wash it) shake it vigorously so the looser hairs come off. NOTE: do NOT use a lint roller, brush or any method that pulls at the yarn.
2. Place the garment in a plastic bag and put it in your freezer - the temperature will cause the fibres to become less attached to each other, and excess fibres will come off easier.
3. Leave in the freezer for a few hours before taking it out and shaking it again.
4. Wash the garment according to the instructions on the yarn label.
Why does my garment pill?
Pilling is a natural process that happens to even the most exclusive of fibers. It's a natural sign of wear and tear that is hard to avoid, and that is most visible in high friction areas of your garment like a sweater's arms and cuffs.
You can make your garment look as new by removing the pilling, using a fabric comb or a pill/lint remover.
Mountain Meanderings |
||||||||||||||||
|
|
|||||||||||||||
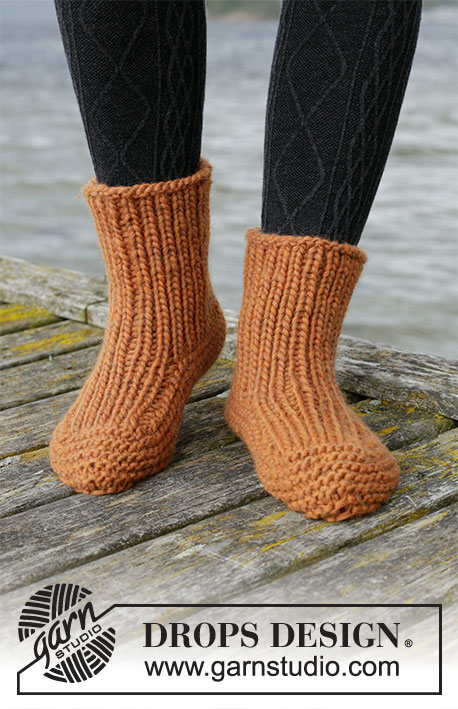
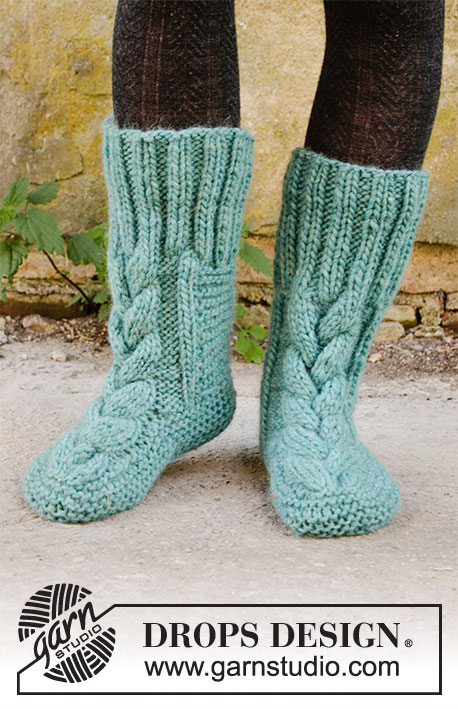
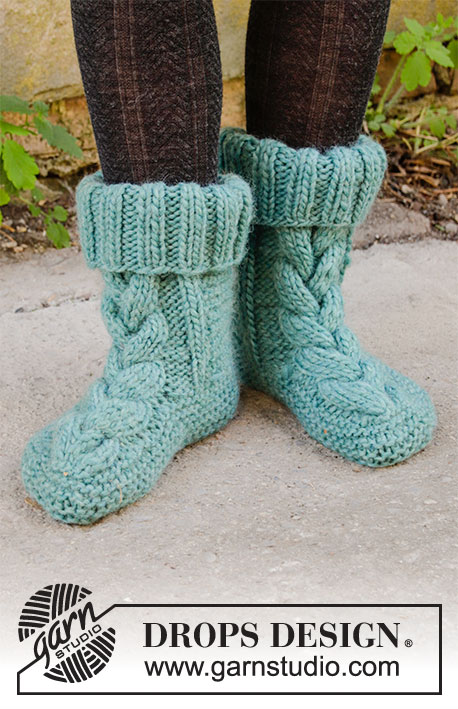
Knitted slippers with cables in DROPS Snow. Size: 35-43 = 5-10 1/2.
DROPS 203-34 |
||||||||||||||||
---------------------------------------------------------- EXPLANATION FOR THE PATTERN: ---------------------------------------------------------- GARTER STITCH (back and forth): 1 ridge = knit 1 row from right side and knit 1 row from wrong side. PATTERN: See diagrams A.1 A.2a, A.2b and A.3. Diagrams show all rows in pattern seen from the right side. ---------------------------------------------------------- START THE PIECE HERE: ---------------------------------------------------------- SLIPPER: Worked back and forth on circular needle, top down. First work the leg, then work the foot. LEG: Cast on 50-50-58 stitches on circular needle size 6 mm = US 10 with Snow. Work as follows from wrong side: Work 1 edge stitch in garter stitch, rib with knit 2 and purl 2 until 1 stitch remains and work 1 stitch in garter stitch. Continue rib like this until piece measures approx. 12 cm = 4¾" and next row is from right side (= row beginning with 1 stitch in garter stitch and purl 2). Work as follows from right side: Knit 3, knit 2 together, knit 2, knit 2 together, knit 4-4-8, work A.1 over 7 stitches, work A.2a over 10 stitches, work A.3 over 7 stitches, knit 4-4-8, knit 2 together, knit 2, knit 2 together and finish with 3 stitches in garter stitch = 51-51-59 stitches including the 5 yarn overs in A.2a. REMEMBER THE KNITTING GAUGE! On next row from wrong side continue with garter stitch, A.1 and A.3, but work A.2b (= 15 stitches) over A.2a. Continue pattern like this until piece measures 26 cm = 10¼", adjust so that next row is from right side. Cut the yarn, slip the outermost 17-17-21 stitches in each side of stitch holders. FOOT: Now continue over the 17 stitches on needle (= top side of foot), begin from right side by casting on 1 new stitch on needle, purl 1, A.2b over 15 stitches, purl 1 and cast on 1 new stitch at the end of row = 19-19-19 stitches. Continue pattern A.2b as before with purl 2 at the edge in each side until piece measures 9-10-11 cm = 3½"-4"-4⅜" from division, adjust so that next row is from right side. Knit 1 and knit the remaining stitches together 2 by 2 = 10-10-10 stitches. Cut the yarn. Slip the 17-17-21 stitches from stitch holder back on needle, insert them on each side of the stitches already on the needle. Work as follows from right side: Knit the first 17-17-21 stitches, pick up 12-14-16 stitches along the top side, knit 10-10-10 (at the edge of top side), pick up 12-14-16 stitches along the top side and knit 17-17-21 = 68-72-84 stitches. Knit 1 row from wrong side. Now continue in garter stitch and decrease stitches to shape the foot. Insert a marker to make it easier to where middle of piece is, insert it so that there are 34-36-42 stitches on each side of marker. Knit 1 row from right side, AT THE SAME TIME decrease 8 stitches evenly (distribute them to decrease 4 stitches evenly on each side of marker) = 60-64-76 stitches. Work in garter stitch over all stitches until piece measures 2-3-2 cm = ¾"-1⅛"-¾" (i.e. 2-3-2 ridges) from where stitches were picked up. Decrease as follows from right side: Knit 2 together on each side of the middle 6 stitches (= 2 stitches decreased), decrease on every row from right side 2 times in total = 56-60-72 stitches. Decrease as follows from right side: Knit 2 together on each side of the middle 4 stitches (= 2 stitches decreased), decrease on every row from right side 2-3-4 times in total = 52-54-64 stitches. Decrease as follows from right side: Knit 2 together on each side of marker (= 2 stitches decreased), decrease on every row from right side 2 times in total = 48-50-60 stitches. BIND-OFF: Bind off as follows from right side: Knit 2 together 2 times, then pass the first of these stitches over the second (= 3 stitches decreased). Continue to bind off by knitting over the other stitches until 4 stitches remain, knit 2 together 2 times, then slip the first of these stitches over the second. Cut the yarn and pull it through the last stitch. Work the other slipper the same way. ASSEMBLY: Fold the slipper double so that it lies flat. Sew in outer loop of edge stitches along the bind-off mid under foot. Then sew up the heel and the leg. Cut and fasten the yarn. |
||||||||||||||||
Diagram explanations |
||||||||||||||||
|
||||||||||||||||
Have you made this or any other of our designs? Tag your pictures in social media with #dropsdesign so we can see them! Do you need help with this pattern?You'll find tutorial videos, a Comments/Questions area and more by visiting the pattern on garnstudio.com. © 1982-2024 DROPS Design A/S. We reserve all rights. This document, including all its sub-sections, has copyrights. Read more about what you can do with our patterns at the bottom of each pattern on our site. |
With over 40 years in knitting and crochet design, DROPS Design offers one of the most extensive collections of free patterns on the internet - translated to 17 languages. As of today we count 304 catalogs and 11422 patterns - 11417 of which are translated into English (US/in).
We work hard to bring you the best knitting and crochet have to offer, inspiration and advice as well as great quality yarns at incredible prices! Would you like to use our patterns for other than personal use? You can read what you are allowed to do in the Copyright text at the bottom of all our patterns. Happy crafting!
Comments / Questions (12)
Kathy Watson wrote:
I am having a difficulty with the pattern A.2a portion. On the mountain meanderings slippers..please be more specific on it. Maybe a video tutorial?
02.03.2024 - 04:16DROPS Design answered:
Dear Kathy, in A.2a you have a knit row, which includes 5 yarn overs. You work the rest of the charts as indicated and, when working A.2a, simply knit all stitches and increase where indicated. Since it's only 1 row, on the next row you will work A.2b over these stitches instead of repeating A.2a. Happy knitting!
03.03.2024 - 19:35Poinsot Annie wrote:
Bonjour pour le modèle Mauntain 203 34 pour rabattre 2/ 2 mailles et passer par dessus la maille j'ai compris mais la suite du rang. ,je sèche .
29.01.2023 - 11:18DROPS Design answered:
Bonjour Mme Poinsot, vous en êtes à la toute fin, exact? Pour rabattre les mailles procédez ainsi: tricotez 2 m ens à l'end, tricotez encore 1 fois 2 m ens à l'end, passez la 1ère m par-dessus la 2ème maille (vous avez d'abord diminué 2 fois 1 m, puis vous rabattez la 1ère m par-dessus la 2ème m), rabattez les mailles suivantes à l'endroit et terminez les 4 dernières mailles comme au début: tricotez 2 m ens à l'end, encore 1 fois 2 m ens à l'end, passez la 1ère de ces m par-dessus la 2ème. Bon tricot!
30.01.2023 - 09:20Poinsot Annie wrote:
Bonjour je voudrais juste savoir pour pour le à 2 après les jetés du premier rang ,je tricoté comment ensuite merci
16.01.2023 - 16:03DROPS Design answered:
Bonjour Mme Poinsot, les jetés de A.2a se tricotent torse à l'envers sur l'envers au 1er rang de A.2b. Bon tricot!
16.01.2023 - 16:55Brunet Cathy wrote:
Je viens de faire un essai je terminé mon rang avec 2 mailles envers une maille endroit donc au rang suivant je commence forcemwnt oar 1m lisiere et 2 endroit et non 2 env il y a un souci dans vos explications
13.01.2023 - 11:08DROPS Design answered:
Bonjour Mme Brunet, tricotez vos 50 ou 58 mailles ainsi, vu sur l'envers: 1 m lis au point mousse, (2 m end, 2 m env) x 12 ou 14 fois, 1 m lis au point mousse, soit 1+ 48-56+ 1 =50-58 mailles. Ainsi, vu sur l'endroit, les côtes commencent par 2 m end après la maille lisière, et se terminent par 2 m env avant la m lisère à la fin du rang. Bon tricot!
13.01.2023 - 15:32Brunet Cathy wrote:
Je viens de faire un essai je terminé mon rang avec 2 mailles envers une maille endroit donc au rang suivant je commence forcemwnt oar 1m lisiere et 2 endroit et non 2 env il y a un souci dans vos explications
13.01.2023 - 10:51Brunet Cathy wrote:
Bonjour Quel diference entre 1 maille point mousse et 1 naille endroit svp? Et apres kes 12 cm je suis sur l endroit nausée pas avec 2 maille envers je duis avec 2 maille endroit je be comprends pas merci
13.01.2023 - 10:33DROPS Design answered:
Bonjour Mme Brunet, 1 m point mousse se tricote à l'endroit sur l'endroit et sur l'envers; 1 m endroit des côtes va se tricoter à l'envers sur l'envers et à l'endroit sur l'endroit. Attention, le tout premier rang se tricote sur l'envers, en commençant par 2 m end (après la m lisière), autrement dit, vu sur l'endroit, les côtes commenceront par 2 m end (après la m lisière). Bon tricot!
13.01.2023 - 15:33Ginette Poirier wrote:
Après les 12 cm de côtes, sur un rang end, mon tricot commence par 1 m pt mousse et 2 m end ,et non pas par 2 m env, comme le patron l’indique. Quand je regarde le rang envers, c’est la même chose, ça commence par 2 m end. J’ai monté 50 m. Aurais-je dû faire 2 m env, 2 m end au début des côtes?
12.10.2022 - 20:41DROPS Design answered:
Bonjour Mme Poirier, le 1er rang des côtes se tricote sur l'envers en commençant par 2 mailles endroit après 1 maille point mousse, autrement dit, le 1er rang des côtes sur l'endroit va commencer par 2 mailles envers après 1 maille point mousse. Bon tricot!
13.10.2022 - 09:14Rebecca Sandström wrote:
Jag blir inte riktigt klok på detta mönster... Arbetet ska ju stickas så mönstren stickas "på varandra": A1 på A1, A3 på A3 och A2a på A2b . Men hur blir det på den räta sidan (efter att jag stickat ett varv rätt och ett varv avigt)? Då har ju A2b stickats med 15 maskor men sedan på den räta sidan så ska A2a stickas ovanpå trots att enbart är 10 maskor som stickas (omslagen räknas ju först som en maska som stickas på nästa varv, den aviga sidan). Tack på förhand!
30.12.2020 - 21:54DROPS Design answered:
Hej Rebecca, nej du börjar med A.1, sedan A.2a, A.3. När du har ökat enligt A.2a (från 10 till 15 m) fortsätter du med A.2b. men fortfarande A.1 och A.3 på varje sida om flätan :)
14.01.2021 - 12:55Sigrid Philippsen wrote:
Danke für die tolle Anleitung! Ist super geworden.
24.12.2020 - 09:40Stine Åsheim wrote:
Men man legger opp 50 masker når man starter prosjektet, og etter man har strikket den første runden på rettsiden med kastene skal man sitte igjen med 51 masker inkludert kastene. Men den neste runden fra vrangen krever vel 55 masker?
26.11.2020 - 08:47DROPS Design answered:
Hej Stine. Nej neste runden krever kun 51 masker. Du startar med 50 m, sedan på förste runden felles 4 m (du stickar 2 m sammen 4 gånger) och det ökas 5 (genom kasten i A.2a) så efter första rundan sitter du igjen med 51 masker. Du har sedan 51 masker helt fram till du delar arbetet och stickar vidare under "FOTEN". Du stickar rille där du tidigare stickat rille (inkl. där du stickade 2 m sammen), A.1 over A.1, A.3 over A.3 och A.2b over A.2a. Mvh DROPS Design
26.11.2020 - 10:55