Popular categories
Looking for a yarn?

65% Wool, 35% Alpaca
from 2.60 € /50g
The yarn cost is calculated from the pattern’s smallest size and the yarn’s cheapest product type. Looking for an even better price? You might find it on the DROPS Deals!
Afternoon Playdate
Knitted jumpsuit for babies in DROPS Flora. The piece is worked with rib and stocking stitch. Sizes: Premature – 4 years.
DROPS Design: Pattern no fl-003-by
Yarn group A
-----------------------------------------------------------
SIZES:
(<0) 0/1 - 1/3 - 6/9 - 12/18 months (2 - 3/4) years
Size equivalent to approx. height of baby:
(40/44) 48/52 - 56/62 - 68/74 - 80/86 (92 - 98/104) cm
MATERIALS:
DROPS FLORA from Garnstudio (belongs to yarn group A)
(100) 100-100-100-100 (150-150) g colour 13, denim blue
KNITTING TENSION:
24 stitches in width and 32 rows in height with stocking stitch = 10 x 10 cm.
NEEDLES:
DROPS DOUBLE POINTED NEEDLES SIZE 3 MM.
DROPS CIRCULAR NEEDLE SIZE 3 MM: Length 40 cm for stocking stitch.
DROPS DOUBLE POINTED NEEDLES SIZE 2.5 MM.
DROPS CIRCULAR NEEDLE SIZE 2.5 MM: Length 40 cm for rib.
Needle size is only a guide. If you get too many stitches on 10 cm, change to a larger needle size. If you get too few stitches on 10 cm, change to a smaller needle size.
DROPS MOTHER OF PEARL BUTTONS, Arched (white) NO 521: 2 items in all sizes.
-------------------------------------------------------
Alternative Yarn – See how to change yarns here
Yarn Groups A to F – Use the same pattern and change the yarn here
Yarn usage using an alternative yarn – Use our yarn converter here
-------------------------------------------------------

65% Wool, 35% Alpaca
from 2.60 € /50g
The yarn cost is calculated from the pattern’s smallest size and the yarn’s cheapest product type. Looking for an even better price? You might find it on the DROPS Deals!
- English (UK/cm), Latvia
- Česky
- Dansk
- Deutsch
- Eesti keel
- English (UK/cm)
- English (US/in)
- Español
- Français
- Íslenska
- Italiano
- Magyar
- Nederlands
- Norsk
- Polski
- Português
- Suomi
- Svenska
- English (UK/cm), Bulgaria
- English (UK/cm), Croatia
- English (UK/cm), Greece
- English (UK/cm), Lithuania
- English (UK/cm), Romania
- English (UK/cm), Slovenia
- Česky, Slovakia
Pattern instructions
EXPLANATIONS FOR THE PATTERN:
-------------------------------------------------------
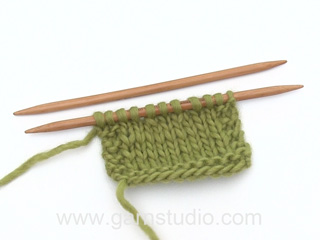
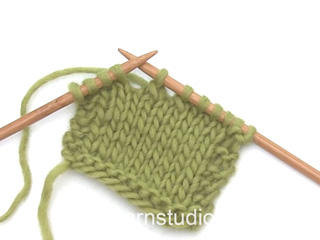
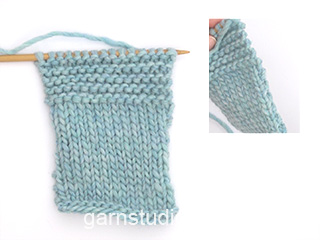
RIDGE/GARTER STITCH (worked back and forth):
1 ridge in height = Knit 2 rows.
INCREASE TIP (for sides of legs):
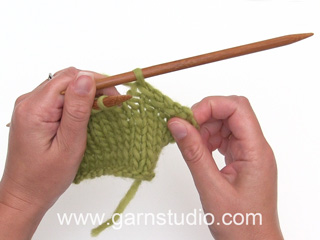
Work until there is 1 stitch left before the marker, 1 yarn over, knit 2 (marker sits between these 2 stitches), 1 yarn over. On the next round knit the yarn overs twisted to avoid holes. Then work the new stitches in stocking stitch.
DECREASE TIP:
Decrease 1 stitch on each side of the marker as follows: Work until there are 3 stitches left before the marker, knit 2 together, knit 2 (marker sits between these 2 stitches), slip 1 stitch as if to knit, knit 1, pass the slipped stitch over the knitted stitch. Decrease like this at both markers.
-------------------------------------------------------
START THE PIECE HERE:
-------------------------------------------------------
TROUSERS – SHORT OVERVIEW OF THE PIECE:
Each leg is worked separately with double pointed needles before putting them together and casting on stitches for the crutch. The piece is continued in the round with short circular needle. Front and back pieces are worked back and forth.
LEG:
Cast on (40) 44-48-48-56 (60-64) stitches with double pointed needles size 2.5 mm and Flora. Knit 1 round. Then work rib (= knit 2, purl 2). When the piece measures 5 cm, change to double pointed needles size 3 mm and continue with stocking stitch.
Insert 1 marker at the beginning of the round. Allow the marker to follow your work onwards; it marks the inside of the leg and will be used when increasing later. REMEMBER THE KNITTING TENSION!
When the piece measures 10 cm, increase (0) 1-1-1-1 (1-1) stitch on each side of the marker – read INCREASE TIP.
Increase like this every (0) 2-2-2-3 (5-7) cm a total of (0) 4-7-8-7 (6-5) times = (40) 52-62-64-70 (72-74) stitches.
Work stocking stitch until the piece measures (16) 18-25-26-31 (39-42) cm.
Move the marker (20) 26-31-32-35 (36-37) stitches (= outside of leg). Allow the marker to follow your work onwards; it marks the outside of the leg and will be used when decreasing later. Cut the strand.
Work the other leg in the same way.
JUMP SUIT:
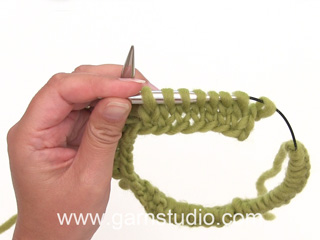
Now place both legs on circular needle size 3 mm and continue in the round as follows:
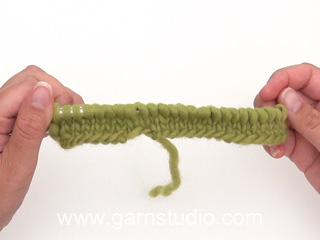
Cast on (8) 8-8-10-10 (12-12) stitches, work the stitches from the one leg, cast on (8) 8-8-10-10 (12-12) stitches and work the stitches from the other leg = (96) 120-140-148-160 (168-172) stitches. The round starts mid-back, between the first (8) 8-8-10-10 (12-12) stitches.
Continue in the round with stocking stitch.
When the piece measures 2 cm from where the legs were joined, decrease (0) 1-1-1-1 (1-1) stitch on each side of both markers – read DECREASE TIP. Decrease like this every (0) 8-3-6-4 (8-10) cm a total of (0) 2-5-3-4 (3-2) times = (96) 112-120-136-144 (156-164) stitches.
Work stocking stitch until the piece measures (11) 13-14-17-18 (19-20) cm from the join.
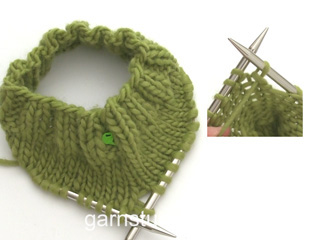
Now work an elevation at the back as follows:
Knit (7) 7-9-9-9 (9-9), turn, tighten the strand and purl (14) 14-18-18-18 (18-18) stitches, turn, tighten the strand and knit (20) 20-26-26-26 (26-26) stitches, turn, tighten the strand and purl (26) 26-34-34-34 (34-34) stitches back. Continue like this, working (6) 6-8-8-8 (8-8) more stitches each time you turn and until you have worked over a total of (50) 50-66-66-82 (82-82) stitches. Turn, work to beginning of the round (= mid back).
Knit 1 round and adjust the number of stitches to (95) 115-120-140-145 (160-165) stitches (i.e. increase (0) 3-0-4-1 (4-1) stitches and decrease (1) 0-0-0-0 (0-0) stitch).
To make sure the front piece and back piece are placed correctly, the start of the round is now displaced as follows:
Move size premature: Knit until 1 stitch remains on round, now round starts here.
Move size 0/1 - 1/3 - 6/9 - 12/18 months (2 - 3/4) years: Knit 1, now round starts here.
Change to short circular needle size 2.5 mm.
Work as follows in all sizes: Work rib (= purl 2, knit 3) over all stitches. When the rib measures 4 cm, cast off stitches as follows:
Purl 2, knit 3, purl 2, knit 3, work 1 stitch in GARTER STITCH – read description above, cast off the next (19) 24-24-34-34 (39-39) stitches, work 2 stitches in garter stitch, continue with rib over the next (33) 38-43-43-48 (53-58) stitches, work 2 stitches in garter stitch (= front piece), cast off the next (19) 24-24-34-34 (39-39) stitches, work 1 stitch in garter stitch and work rib over the remaining (8) 13-13-13-13 (13-13) stitches.
BACK PIECE:
= (20) 25-25-25-25 (25-25) stitches. Continue back and forth with rib and 1 edge stitch in garter stitch on each side until the piece measures (2) 3-3-4-4 (5-5) cm from the division. The next row is worked as follows:
Work 1 stitch in garter stitch, knit 3, purl 2, knit 3, 1 stitch in garter stitch, cast off the next (0) 5-5-5-5 (5-5) stitches, work 1 stitch in garter stitch, knit 3, purl 2, knit 3 and 1 stitch in garter stitch = 10 stitches left for each shoulder strap.
SHOULDER STRAP:
Continue with rib and 1 edge stitch in garter stitch on each side, back and forth until the strap measures approx. 18-24 cm (or to desired length). Cast off and repeat on the other side.
FRONT PIECE:
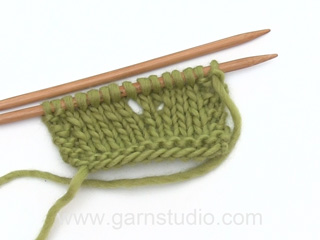
= (37) 42-47-47-52 (57-62) stitches. Continue back and forth with rib and 2 edge stitches in garter stitch on each side until the piece measures (4) 6-7-9-10 (11-12) cm, work 2 buttonholes from the right side as follows:
Work 2 stitches in garter stitch, knit 3, purl 2, knit 2 together, 1 yarn over, work as before until there are 10 stitches left, knit 2 together, 1 yarn over, knit 1, purl 2, knit 3, 2 stitches in garter stitch.
When the piece measures (5) 7-8-10-11 (12-13) cm, change to circular needle size 2.5 mm and work 2 ridges over all stitches. Cast off.
ASSEMBLY:
Sew together the stitches in the crutch. Sew 1 button on each strap.
This pattern has been corrected. Click here to see the correction/s.
Reformulated text under:
JUMP SUIT:
... Cast on (8) 8-8-10-10 (12-12) stitches, work the stitches from the one leg, cast on (8) 8-8-10-10 (12-12) stitches and work the stitches from the other leg = (96) 120-140-148-160 (168-172) stitches. The round starts mid-back, between the first (8) 8-8-10-10 (12-12) stitches.
Correction:
JUMP SUIT:
... Turn, work to beginning of the round (= mid back)...
Correction:
JUMP SUIT:
... To make sure the front piece and back piece are placed correctly, the start of the round is now displaced as follows:
Move size premature: Knit until 1 stitch remains on round, now round starts here.
Move size 0/1 - 1/3 - 6/9 - 12/18 months (2 - 3/4) years: Knit 1, now round starts here.
Change to short circular needle size 2.5 mm.
Work as follows in all sizes:
FRONT PIECE:
= (37) 42-47-47-52 (57-62) stitches. Continue back and forth with rib and 2 edge stitches in garter stitch on each side...
Diagram

|
= knitting direction |

What can you do with our patterns? You can share DROPS patterns online, using the pattern original picture, materials, name and number. But you are NOT ALLOWED to reproduce the complete pattern digitally in any way. Yarn stores are welcome to use the DROPS pattern database to promote the sale of our assortment. You can print out our patterns, make as many copies as you’d like. The only thing we ask is that you don't make any changes / additions to the original printed document. And that the patterns according to the DROPS philosophy are given out to the consumers for free. Editorials that wish to publish our patterns in printed books or magazines can contact us for more information. The sale of garments based on DROPS patterns is permitted as long as they are sold as single items or per order. Further commercial use of the patterns is not permitted. It has to be clearly stated that the garment is made based on a design from DROPS DESIGN. The use of clothing labels of which DROPS DESIGN forms part is conditioned by the inclusion of the following text: “A DROPS DESIGN made by …..”. The use of DROPS photos for marketing purposes/sales is only permitted in connection with the use/sale of DROPS products. The photos may not be cut or edited and the logo should be clearly visible.
We reserve the right to withdraw the permission for use of our patterns at any time, notwithstanding the reason.
Each of our patterns has specific tutorial videos to help you.
These step-by-step tutorials might also help you:
Why is the knitting/crochet tension so important?
Knitting tension is what determines the final measurements of your work, and is usually measured per 10 x 10 cm. It is provided like so: number of stitches in width x number of rows in height - eg: 19 stitches x 26 rows = 10 x 10 cm.
The knitting tension is very individual; some people knit/crochet loosely while others work tightly. You adjust the knitting tension with the needle size, which is why the suggested needle size is only meant as a guide! You need to adjust this (up or down) to ensure that YOUR knitting tension matches the knitting tension provided in the pattern. If you work with a different knitting tension than provided you will have a different yarn consumption, and your work will have different measurements than what the pattern suggests.
The knitting tension also determines which yarns can replace each other. As long as you achieve the same knitting tension you can replace one yarn with another.
See DROPS lesson: How to measure your tension/gauge
See DROPS video: How to make a gauge tension swatch
How do I know how many balls of yarn I need?
The required amount of yarn is provided in grams, eg: 450 g. To calculate how many balls you’ll need you first need to know how many grams are in 1 ball (25g, 50g or 100g). This information is available if you click on the individual yarn quality on our pages. Divide the amount required with the amount of each ball. For example, if each ball is 50g (the most common amount), the calculation will be as follows: 450 / 50 = 9 balls.
Can I use a different yarn than what the pattern suggests?
The important thing when changing from one yarn to another is that the knitting/crochet tension remains the same. This is so that the measurements of the finished piece will be the same as on the sketch provided. It is easier to achieve the same knitting tension using yarns from the same yarn group. It is also possible to work with multiple strands of a thinner yarn to achieve the knitting tension of a thicker one. Please try our yarn converter. We recommend you to always work a test swatch.
Please NOTE: when changing yarn the garment might have a different look and feel to the garment in the photo, due to individual properties and qualities of each yarn.
See DROPS lesson: Can I use a different yarn than the one mentioned in the pattern?
What are the yarn groups?
All our yarns are categorised into yarn groups (from A to F) according to thickness and knitting tension – group A contains the thinnest yarns and group F the thickest. This makes it easier for you to find alternative yarns to our patterns, should you wish to switch yarn. All yarns within the same group have a similar knitting tension and can easily replace each other. However, different yarn qualities have different structures and properties which will give the finished work a unique look and feel.
How do I use the yarn calculator?
At the top of all our patterns you’ll find a link to our yarn calculator, which is a helpful tool should you wish to use a different yarn than suggested. By filling in the yarn quality you wish to replace, the amount (in your size) and number of strands, the calculator will present good alternative yarns with the same knitting tension. Additionally it will tell you how much you’ll require in the new qualities and whether you’ll need to work with multiple strands. Most skeins are 50g (some are 25g or 100g).
If the pattern is worked with multiple colours, every colour will have to be calculated separately. Similarly, if the pattern is worked with several strands of different yarns (for example 1 strand Alpaca and 1 strand Kid-Silk) you will have to find alternatives for each, individually.
Why do you show discontinued yarns in the patterns?
Since different yarns have different qualities and textures we have chosen to keep the original yarn in our patterns. However, you can easily find options among our available qualities by using our yarn calculator, or simply pick a yarn from the same yarn group.
It is possible that some retailers still have discontinued yarns in stock, or that someone has a few skeins at home that they would like to find patterns for.
The yarn calculator will provide both alternative yarn as well as required amount in the new quality.
What size should I knit?
If you think it's hard to decide what size to make, it can be a good idea to measure a garment you own already and like the size of. Then you can pick the size by comparing those measures with the ones available in the pattern's size chart.
You'll find the size chart at the bottom of the pattern.
See DROPS lesson: How to read size chart
Why do I get the wrong knitting tension with the suggested needle size?
The needle size provided in the pattern serves only as a guide, the important thing is to follow the knitting tension. And since knitting tension is very individual, you will have to adjust the needle size to ensure that YOUR tension is the same as in the pattern – maybe you’ll have to adjust 1, or even 2 needle sizes, up or down to achieve the correct tension. For this, we recommend that you work test swatches.
Should you work with a different knitting tension than the one provided, the measurements of the finished garment might deviate from the measurement sketch.
See DROPS lesson: How to measure your tension/gauge
See DROPS video: How to make a tension/gauge swatch
Why is the pattern worked top-down?
Working a garment top-down provides more flexibility and room for personal adjustment. For example it is easier to try the garment on while working, as well as making adjustments to length of yoke and shoulder caps.
The instructions are carefully explaining every step, in the correct order. Diagrams are adjusted to the knitting direction and are worked as usual.
How do I work according to a knitting diagram?
The diagram depicts all rows/rounds, and every stitch seen from the right side. It is read from bottom to top, from right to left. 1 square = 1 stitch.
When working back and forth, every other row is worked from the right side and every other row is worked from the wrong side. When working from the wrong side, the diagram will have to be worked reversed: from left to right, knit stitches are purled, purl stitches are knit etc.
When working in the round every round is worked from the right side and the diagram are worked from right to left on all rounds.
See DROPS lesson: How to read knitting diagrams
How do I work according to a crochet diagram?
The diagram depicts all rows/rounds, and every stitch seen from the right side. It is worked from bottom to top, from right to left.
When working back and forth every other row is worked from the right side: from right to left and every other row is worked from the wrong side: from left to right.
When working in the round, every row in the diagram are worked from the right side, from right to left.
When working a circular diagram you start in the middle and work your way outwards, counter clockwise, row by row.
The rows usually start with a given number of chain stitches (equivalent to the height of the following stitch), this will either be depicted in the diagram or explained in the pattern.
See DROPS lesson: How to read crochet diagrams
How do I work several diagrams simultaneously on the same row/round?
Instructions for working several diagrams after each other on the same row/round, will often be written like so: “work A.1, A.2, A.3 a total of 0-0-2-3-4 times". This means you work A.1 once, then A.2 is worked once, and A.3 is repeated (in width) the number of times provided for your size – in this case like so: S = 0 times, M = 0 times, L=2 times, XL= 3 times and XXL = 4 times.
The diagrams are worked as usual: begin with the first row in A.1, then work the first row in A.2 etc.
See DROPS lesson: How to read knitting diagrams
See DROPS lesson: How to read crochet diagrams
Why are the sleeves shorter in larger sizes?
The total width of the garment (from wrist-to-wrist) will be larger in the larger sizes, despite the actual sleeves being shorter. The larger sizes have longer sleeve caps and wider shoulders, so there will be a good fit in all sizes.
Where on the garment is the length measured?
The measurement sketch/schematic drawing provides information regarding the full length of the garment. If it’s a jumper or a jacket the length is measured from the highest point on the shoulder closest to the neckline, and straight down to the bottom of the garment. It is NOT measured from the tip of shoulder. Similarly, the length of yoke is measured from the highest point on the shoulder and down to where yoke is split into body and sleeves.
On a jacket measures are never taken along bands, unless specifically stated. Always measure inside band stitches when measuring the length.
See DROPS lesson: How to read a schematic drawing
What is a repeat?
Diagrams are often repeated on the round or in height. 1 repeat is the diagram the way it appears in the pattern. If it says to work 5 repeats of A.1 in the round, then you work A.1 a total of 5 times after/next to each other in the round. If it says to work 2 repeats of A.1 vertically/in height you work the entire diagram once, then begin again at the start and work the entire diagram one more time.
Why does the piece start with more chain stitches than it’s worked with?
Chain stitches are slightly narrower than other stitches and to avoid working the cast-on edge too tight, we simply chain more stitches to begin with. The stitch count will be adjusted on the following row to fit the pattern and measurement sketch.
Why increase before the rib edge when the piece is worked top-down?
The rib edge is more elastic and will contract slightly compared to, for example, stocking stitch. By increasing before the rib edge, you avoid a visible difference in width between the rib edge and the rest of the body.
Why increase in the cast-off edge?
It’s very easy to cast off too tightly, and by making yarn overs while casting off (and simultaneously casting these off) you avoid a too tight cast off edge.
See DROPS video: How to bind off with yarn overs (yo)
How do I increase/decrease on every 3rd and 4th row/round alternately?
To achieve an even increase (or decrease) you can increase on, for example: every 3rd and 4th row alternately, like so: work 2 rows and increase on the 3rd row, work 3 rows and increase on the 4th. Repeat this until the increase is complete.
See DROPS lesson: Increase or decrease 1 st on every 3rd and 4th row alternately
How can I work a jacket in the round instead of back and forth?
Should you prefer to work in the round instead of back and forth, you may of course adjust the pattern. You’ll need to add steeks mid-front (usually 5 stitches), and follow the instructions. When you would normally turn and work from the wrong side, simply work across the steek and continue in the round. At the end you’ll cut the piece open, pick up stitches to work bands, and cover the cut edges.
See DROPS video: How to knit steeks and cut open
Can I work a jumper back and forth instead of in the round?
Should you prefer to work back and forth instead of in the round, you may of course adjust the pattern so you work the pieces separately and then assemble them at the end. Divide the stitches for the body in 2, add 1 edge stitch in each side (for sewing) and work the front and back pieces separately.
See DROPS lesson: Can I adapt a pattern for circular needles into straight needles?
Why is the pattern slightly different than what I see in the photo?
Pattern repeats can vary slightly in the different sizes, in order to get the correct proportions. If you’re not working the exact same size as the garment in the photo, yours might deviate slightly. This has been carefully developed and adjusted so that the complete impression of the garment is the same in all sizes.
Make sure to follow instructions and diagrams for your size!
How do I make a women’s size garment into a men’s size one?
If you have found a pattern you like which is available in women’s size it’s not very difficult to convert it to men’s size. The biggest difference will be the length of sleeves and body. Start working on the women size that you think would fit across the chest. The additional length will be worked right before you cast off for the armhole/sleeve cap. If the pattern is worked top-down you can add the length right after the armhole or before the first decrease on sleeve.
Regarding additional yarn amount, this will depend on how much length you add, but it is better with a skein too many than too few.
How do I prevent a hairy garment from shedding?
All yarns will have excess fibres (from production) that might come off as lint or shedding. Brushed yarns (ie hairier yarns) have more of these loose, excess fibres, causing more shedding.
Shedding also depends on what is worn under or over the garment, and whether this pulls at the yarn fibres. It’s therefore not possible to guarantee that there will be no shedding
Below are some tips on how to get the best result when working with hairier yarns:
1. When the garment is finished (before you wash it) shake it vigorously so the looser hairs come off. NOTE: do NOT use a lint roller, brush or any method that pulls at the yarn.
2. Place the garment in a plastic bag and put it in your freezer - the temperature will cause the fibres to become less attached to each other, and excess fibres will come off easier.
3. Leave in the freezer for a few hours before taking it out and shaking it again.
4. Wash the garment according to the instructions on the yarn label.
Why does my garment pill?
Pilling is a natural process that happens to even the most exclusive of fibers. It's a natural sign of wear and tear that is hard to avoid, and that is most visible in high friction areas of your garment like a sweater's arms and cuffs.
You can make your garment look as new by removing the pilling, using a fabric comb or a pill/lint remover.
In the meantime, you can read the questions and answers that others have left to this pattern or join the DROPS Workshop on Facebook to get help from fellow knitters/crocheters!
You might also like...
Afternoon Playdate
Afternoon Playdate
Afternoon Playdate
Afternoon Playdate
Afternoon Playdate
Afternoon Playdate
Afternoon Playdate
Afternoon Playdate
Afternoon Playdate
Afternoon Playdate
Afternoon Playdate
Afternoon Playdate
Afternoon Playdate
Afternoon Playdate
Afternoon Playdate |
||||
 |
 |
|||
Knitted jumpsuit for babies in DROPS Flora. The piece is worked with rib and stocking stitch. Sizes: Premature – 4 years.
DROPS Baby 36-4 |
||||
|
------------------------------------------------------- EXPLANATIONS FOR THE PATTERN: ------------------------------------------------------- RIDGE/GARTER STITCH (worked back and forth): 1 ridge in height = Knit 2 rows. INCREASE TIP (for sides of legs): Work until there is 1 stitch left before the marker, 1 yarn over, knit 2 (marker sits between these 2 stitches), 1 yarn over. On the next round knit the yarn overs twisted to avoid holes. Then work the new stitches in stocking stitch. DECREASE TIP: Decrease 1 stitch on each side of the marker as follows: Work until there are 3 stitches left before the marker, knit 2 together, knit 2 (marker sits between these 2 stitches), slip 1 stitch as if to knit, knit 1, pass the slipped stitch over the knitted stitch. Decrease like this at both markers. ------------------------------------------------------- START THE PIECE HERE: ------------------------------------------------------- TROUSERS – SHORT OVERVIEW OF THE PIECE: Each leg is worked separately with double pointed needles before putting them together and casting on stitches for the crutch. The piece is continued in the round with short circular needle. Front and back pieces are worked back and forth. LEG: Cast on (40) 44-48-48-56 (60-64) stitches with double pointed needles size 2.5 mm and Flora. Knit 1 round. Then work rib (= knit 2, purl 2). When the piece measures 5 cm, change to double pointed needles size 3 mm and continue with stocking stitch. Insert 1 marker at the beginning of the round. Allow the marker to follow your work onwards; it marks the inside of the leg and will be used when increasing later. REMEMBER THE KNITTING TENSION! When the piece measures 10 cm, increase (0) 1-1-1-1 (1-1) stitch on each side of the marker – read INCREASE TIP. Increase like this every (0) 2-2-2-3 (5-7) cm a total of (0) 4-7-8-7 (6-5) times = (40) 52-62-64-70 (72-74) stitches. Work stocking stitch until the piece measures (16) 18-25-26-31 (39-42) cm. Move the marker (20) 26-31-32-35 (36-37) stitches (= outside of leg). Allow the marker to follow your work onwards; it marks the outside of the leg and will be used when decreasing later. Cut the strand. Work the other leg in the same way. JUMP SUIT: Now place both legs on circular needle size 3 mm and continue in the round as follows: Cast on (8) 8-8-10-10 (12-12) stitches, work the stitches from the one leg, cast on (8) 8-8-10-10 (12-12) stitches and work the stitches from the other leg = (96) 120-140-148-160 (168-172) stitches. The round starts mid-back, between the first (8) 8-8-10-10 (12-12) stitches. Continue in the round with stocking stitch. When the piece measures 2 cm from where the legs were joined, decrease (0) 1-1-1-1 (1-1) stitch on each side of both markers – read DECREASE TIP. Decrease like this every (0) 8-3-6-4 (8-10) cm a total of (0) 2-5-3-4 (3-2) times = (96) 112-120-136-144 (156-164) stitches. Work stocking stitch until the piece measures (11) 13-14-17-18 (19-20) cm from the join. Now work an elevation at the back as follows: Knit (7) 7-9-9-9 (9-9), turn, tighten the strand and purl (14) 14-18-18-18 (18-18) stitches, turn, tighten the strand and knit (20) 20-26-26-26 (26-26) stitches, turn, tighten the strand and purl (26) 26-34-34-34 (34-34) stitches back. Continue like this, working (6) 6-8-8-8 (8-8) more stitches each time you turn and until you have worked over a total of (50) 50-66-66-82 (82-82) stitches. Turn, work to beginning of the round (= mid back). Knit 1 round and adjust the number of stitches to (95) 115-120-140-145 (160-165) stitches (i.e. increase (0) 3-0-4-1 (4-1) stitches and decrease (1) 0-0-0-0 (0-0) stitch). To make sure the front piece and back piece are placed correctly, the start of the round is now displaced as follows: Move size premature: Knit until 1 stitch remains on round, now round starts here. Move size 0/1 - 1/3 - 6/9 - 12/18 months (2 - 3/4) years: Knit 1, now round starts here. Change to short circular needle size 2.5 mm. Work as follows in all sizes: Work rib (= purl 2, knit 3) over all stitches. When the rib measures 4 cm, cast off stitches as follows: Purl 2, knit 3, purl 2, knit 3, work 1 stitch in GARTER STITCH – read description above, cast off the next (19) 24-24-34-34 (39-39) stitches, work 2 stitches in garter stitch, continue with rib over the next (33) 38-43-43-48 (53-58) stitches, work 2 stitches in garter stitch (= front piece), cast off the next (19) 24-24-34-34 (39-39) stitches, work 1 stitch in garter stitch and work rib over the remaining (8) 13-13-13-13 (13-13) stitches. BACK PIECE: = (20) 25-25-25-25 (25-25) stitches. Continue back and forth with rib and 1 edge stitch in garter stitch on each side until the piece measures (2) 3-3-4-4 (5-5) cm from the division. The next row is worked as follows: Work 1 stitch in garter stitch, knit 3, purl 2, knit 3, 1 stitch in garter stitch, cast off the next (0) 5-5-5-5 (5-5) stitches, work 1 stitch in garter stitch, knit 3, purl 2, knit 3 and 1 stitch in garter stitch = 10 stitches left for each shoulder strap. SHOULDER STRAP: Continue with rib and 1 edge stitch in garter stitch on each side, back and forth until the strap measures approx. 18-24 cm (or to desired length). Cast off and repeat on the other side. FRONT PIECE: = (37) 42-47-47-52 (57-62) stitches. Continue back and forth with rib and 2 edge stitches in garter stitch on each side until the piece measures (4) 6-7-9-10 (11-12) cm, work 2 buttonholes from the right side as follows: Work 2 stitches in garter stitch, knit 3, purl 2, knit 2 together, 1 yarn over, work as before until there are 10 stitches left, knit 2 together, 1 yarn over, knit 1, purl 2, knit 3, 2 stitches in garter stitch. When the piece measures (5) 7-8-10-11 (12-13) cm, change to circular needle size 2.5 mm and work 2 ridges over all stitches. Cast off. ASSEMBLY: Sew together the stitches in the crutch. Sew 1 button on each strap. |
||||
Diagram explanations |
||||
|
||||

|
||||
|
Have you made this or any other of our designs? Tag your pictures in social media with #dropsdesign so we can see them! Do you need help with this pattern?You'll find tutorial videos, a Comments/Questions area and more by visiting the pattern on garnstudio.com. © 1982-2024 DROPS Design A/S. We reserve all rights. This document, including all its sub-sections, has copyrights. Read more about what you can do with our patterns at the bottom of each pattern on our site. |
||||
With over 40 years in knitting and crochet design, DROPS Design offers one of the most extensive collections of free patterns on the internet - translated to 17 languages. As of today we count 304 catalogues and 11422 patterns - 11422 of which are translated into English (UK/cm).
We work hard to bring you the best knitting and crochet have to offer, inspiration and advice as well as great quality yarns at incredible prices! Would you like to use our patterns for other than personal use? You can read what you are allowed to do in the Copyright text at the bottom of all our patterns. Happy crafting!







Comments / Questions (75)
Thanks for the very cute free pattern. Although, this seems a very odd shape! I followed the pattern exactly and the legs are alarmingly long compared to the torso. I see that the cuffs are turned up in the modelled pictures, but still. I made the 1-3 months size. Are the rest like this?
17.03.2024 - 22:25DROPS Design answered:
Dear Hanna, please check your knitting gauge, and compare your piece to the measurements given on the schematic drawing at the bottom of the pattern. At the same time, we have to note that the legs are intentionally longer than usual, because they are turned up, so the garnment fits the small ones for longer time. Happy Knitting!
17.03.2024 - 22:55Hei! Jeg har kommet til dette punktet i oppskriften: «Strikk 1 omgang rett og juster maskeantallet til (95) 115-120-140-145 (160-165) masker (dvs det økes (0) 3-0-4-1 (4-1) masker og felles (1) 0-0-0-0 (0-0) maske).» Spørsmålet mitt er nå i dette tilfellet ang størrelse 3/4 år, men er like gjeldene for de andre gangene det skal økes (og den ene fellingen). Hvor skal økningene skje for at det skal stemme ut videre i oppskriften?
10.02.2024 - 21:27DROPS Design answered:
Hei Marita, I størrelsen 3/4 år øker du bare 1 maske (ingen felte masker). Denne masken kan økes på begynnelsen av omgangen. God fornøyelse!
12.02.2024 - 08:172 vragen; 1; Plaats je de markeerder in tweede pijp in spiegelbeeld t.o.v. de eerste pijp? 2; komt de markeerder na het verplaatsen in het midden van de pijp uit? Volgens de instucties namelijk niet (maat 80/86); na het meerderen heb ik 8 van de 70 steken rechts van de markeerder, dus als ik 35 steken verplaats heeft de markeerder 27 steken enerzijds en 43 steken anderzijds. Wat is de bedoeling?
15.01.2024 - 14:35Hallo, ich habe leider meinen Markierer für die hintere Mitte verloren, haben Sie vielleicht einen Tipp, wie ich die richtige Stelle abmessen kann, um Rücken- und Vorderteil korrekt zu platzieren? Liebe Grüße Katharina
06.12.2023 - 18:03DROPS Design answered:
Liebe Katharina, legen Sie die Arbeit flach und zählen Sie die Maschen so daß die hintere Mitte ist zwischen die beiden Markierungen an den Seiten. Viel Spaß beim stricken!
07.12.2023 - 08:31Je veux faire ce modèle mais pour une taille 3-6 mois. Comment je peux convertir votre modèle ? Merci
22.11.2023 - 16:34DROPS Design answered:
Bonjour Helen, nos modèles sont généralement disponibles uniquement soit en 1/3 mois soit en 6/9 mois; pour vous aider à mieux choisir la taille, vérifiez les mesures d'après le schéma en bas de page - retrouvez plus d'infos sur les tailles ici. Bon tricot!
23.11.2023 - 08:25Buonasera. Parlate di Ferri a doppia punta all inizio della gambina. Ma mi sembra di capire che devo lavorare in tondo. Sbaglio?
03.08.2023 - 19:45DROPS Design answered:
Buonasera Ilona, si, corretto, si lavora in tondo. Buon lavoro!
03.08.2023 - 20:26Hi, ich bin mit der Erhöhung fertig. Für mich ist unklar, wann die Teilung in Vorder- und Rückseite erfolgt. In einem Kommentar von 2020 steht, dass dies am Ende vom Abschnitt "Hose" erklärt wird, dieser Teil scheint aber nicht mehr in der Anleitung so vorhanden zu sein. Vielen Dank!
15.05.2023 - 00:00DROPS Design answered:
Liebe Lisa, wenn alle verkürzten Reihen fertig sind, stricken Sie 1 Reihe bis Anfang der Runde. Dann stricken Sie 1 Runde mit Zu- oder Abnahmen (siehe Größe) und dann wird der Anfang der Runde verschoben, so daß Vorderteil und Rückenteil richtig passen; stricken Sie dann 4 cm Rippenmuster und dann wird die Arbeit für Vorder- und Rückenteil verteilt. Viel Spaß beim stricken!
15.05.2023 - 09:00When increasing the stitch on the legs, does the marker stay where it is after the increase or move to back to the beginning of the round?
28.04.2023 - 12:07DROPS Design answered:
Dear Kristina, you work 1 yarn over before the last stitch on the round and after the first stitch in the round, so you shouldn't move the marker; otherwise the next increases would be misaligned. Only move the marker when it specifies so, later in the paragraph. Happy knitting!
30.04.2023 - 21:50Beste, Wat een ontzettend leuk patroon en fijne uitleg! Enkel aan het einde kom ik er niet uit. Bij het afkanten van het voorpand na twee ribbels, loopt het voorpand heel breed uit. Dit is natuurlijk doordat het hele deel ervoor in boordsteek is gebreid, maar bij het dragen blijft dit bovenste deel ‘flubberig’. Is het mogelijk om dmv minderen dit laatste deel (twee ribbels en afkanten) beter aan te laten sluiten op de rest van het voorpand? Met hartelijke groet!
17.03.2023 - 15:52DROPS Design answered:
Dag Fleur,
Wat je zou kunnen doen is steken minderen vlak voordat je de ribbels gaat breien. Bijvoorbeeld alle 2 averechte steken samenbreien. Het kan ook helpen om de bovenkant een beetje op te persen. Dit doe je door een natte theedoek erover te leggen en zeer voorzichtig te deppen op dat gebied. Let erop dat je dit heel voorzichtig doet, anders verniel je de structuur van het breiwerk.
19.03.2023 - 16:51Ich habe eine Frage bzgl. Der Knopflöcher. Muss ich nur eine Reihe mit Umschlag und Zusammenstricken machen? Oder mehrere? Und nur in der Hinreise jeweils? Wie Stricke ich dann in der Rückreihe? Was mache ich dann mit dem Umschlag? Danke für eine kurze Antwort.
12.03.2023 - 21:23DROPS Design answered:
Liebe Emma, dieses Video zeigt, wie man so ein Knopfloch strickt (2 M rechts zusammen, 1 Umschlag), bei der Rückreihe stricken Sie die Maschen wie zuvor, Umschläge stricken Sie in der vordere Maschenglied, damit ein Loch ensteht. Viel Spaß beim stricken!
13.03.2023 - 10:26