
Popular categories
Looking for a yarn?


|
||||||||||
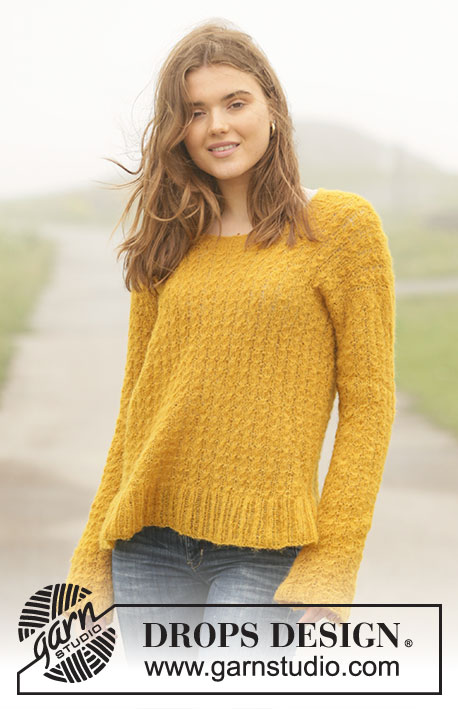
Golden Vintage |
||||||||||
 |
 |
|||||||||
Knitted sweater in DROPS Brushed Alpaca Silk. Piece is knitted with star pattern. Size: S - XXXL
DROPS 207-34 |
||||||||||
|
---------------------------------------------------------- EXPLANATION FOR THE PATTERN: ---------------------------------------------------------- GARTER STITCH (back and forth): Knit all rows. 1 ridge vertically = knit 2 rows. PATTERN: See diagram A.1. BIND OFF TIP: To avoid a tight bind-off edge you may use a needle ½ size larger. INCREASE TIP (applies to mid under sleeve): Begin 1 stitch before marker thread, make 1 yarn over, knit 2 (marker thread is in the middle of these 2 stitches), make 1 yarn over (= 2 stitches increased). On next round work yarn overs twisted to avoid holes. Then work the new stitches in stockinette stitch until there is room for 1 new repetition of A.1 in width. ---------------------------------------------------------- START THE PIECE HERE: ---------------------------------------------------------- SWEATER - SHORT OVERVIEW OF THE PIECE: Worked in the round on circular needle, from the bottom and up to armholes. Then work front and back piece back and forth on circular needle separately. Work sleeves in the round on double pointed needles/a short circular needle. BODY: Cast on 176-192-208-224-256-272 stitches on circular needle size 4.5 mm = US 7 with Brushed Alpaca Silk. Knit 1 round, then work rib = knit 2/purl 2 for 7 cm = 2¾". Switch to circular needle size 5.5 mm = US 9. Work A.1 in the round on round (= 44-48-52-56-64-68 repetitions of 4 stitches). Continue this pattern - REMEMBER THE KNITTING GAUGE! When piece measures 39-40-41-42-43-44 cm = 15¼"-15¾"-16⅛"-16½"-17"-17¼" - adjust according to 2nd or 4th round in A.1, bind-off for armholes, i.e. work next round as follows: Bind off the first 3-3-3-7-7-7 stitches for armhole, work 82-90-98-98-114-122 stitches as before, bind off the next 6-6-6-14-14-14 stitches for armhole, work 82-90-98-98-114-122 stitches as before, bind off the remaining 3-3-3-7-7-7 stitches. BACK PIECE: = 82-90-98-98-114-122 stitches. Begin from wrong side and continue pattern as before, with 1 edge stitch in each side in GARTER STITCH - read explanation above. When piece measures 54-56-58-60-62-64 cm = 21¼"-22"-22¾"-23⅝"-24⅜"-25¼", bind off the middle 28-28-30-30-32-32 stitches for neck and finish each shoulder separately. Bind off 1 stitch on next row towards the neck = 26-30-33-33-40-44 stitches remain on the shoulder. Work until piece measures 56-58-60-62-64-66 cm = 22"-22¾"-23⅝"-24⅜"-25¼"-26" – adjust to finish on 1 row without pattern, bind off - read BIND-OFF TIP. Work the other shoulder the same way. FRONT PIECE: = 82-90-98-98-114-122 stitches. Begin from wrong side and continue pattern as before, with 1 edge stitch in each side in garter stitch. When piece measures 46-48-49-51-52-54 cm = 18"-19"-19¼"-20"-20½"-21¼", slip the middle 14-14-16-16-18-18 stitches on 1 stitch holder for neck and finish each shoulder separately. Continue to bind off for neck at beginning of every row from neck as follows: Bind off 3 stitches 1 time, 2 stitches 2 times and 1 stitch 1 time = 26-30-33-33-40-44 stitches remain on shoulder. Continue until piece measures 56-58-60-62-64-66 cm = 22"-22¾"-23⅝"-24⅜"-25¼"-26" - adjust according to back piece, bind off. Work the other shoulder the same way. SLEEVE: Cast on 52-56-60-64-68-72 stitches on double pointed needles size 4.5 mm = US 7 with Brushed Alpaca Silk. Knit 1 round, then work rib = knit 2/purl 2 for 3 cm = 1⅛". Switch to double pointed needles size 5.5 mm = US 9 and knit 1 round while decreasing 4 stitches evenly = 48-52-56-60-64-68 stitches. Insert 1 marker thread at beginning of round, use this for increases mid under sleeve. Work A.1 in the round (= 12-13-14-15-16-17 repetitions of 4 stitches). Continue this pattern. When piece measures 43-42-41-40-35-36 cm = 17"-16½"-16⅛"-15¾"-13¾"-14¼", increase 1 stitch in each side - read INCREASE TIP (= 2 stitches increased). Increase like this every other row 8 times in total = 64-68-72-76-80-84 stitches. Continue until piece measures 53-52-51-50-45-46 cm = 21"-20½"-20"-19¾"-17¾"-18" - adjust according to 1st or 3rd row in A.1. Now work back and forth on circular needle. Begin from wrong side and continue on pattern as before. Continue back and forth for 2-2-2-4-4-4 cm = ¾"-¾"-¾"-1½"-1½"-1½" - adjust to finish on 1 row without pattern - bind off. Work the other sleeve the same way. ASSEMBLY: Sew shoulder seams inside bind-off edge. Sew in sleeves inside 1 edge stitch, and sew sleeve to the bottom of armhole. NECK EDGE: Begin at one shoulder and pick up from right side approx. 72 to 80 stitches around the neck (including stitches on stitch holders at the front) on circular needle size 4.5 mm = US 7 with Brushed Alpaca Silk - number of stitches should be divisible by 4. Work rib in the round for 3 cm = 1⅛". Bind off with knit over knit and purl. |
||||||||||
Diagram explanations |
||||||||||
|
||||||||||

|
||||||||||
|
Have you made this or any other of our designs? Tag your pictures in social media with #dropsdesign so we can see them! Do you need help with this pattern?You'll find tutorial videos, a Comments/Questions area and more by visiting the pattern on garnstudio.com. © 1982-2024 DROPS Design A/S. We reserve all rights. This document, including all its sub-sections, has copyrights. Read more about what you can do with our patterns at the bottom of each pattern on our site. |
||||||||||


With over 40 years in knitting and crochet design, DROPS Design offers one of the most extensive collections of free patterns on the internet - translated to 17 languages. As of today we count 304 catalogs and 11422 patterns - 11417 of which are translated into English (US/in).
We work hard to bring you the best knitting and crochet have to offer, inspiration and advice as well as great quality yarns at incredible prices! Would you like to use our patterns for other than personal use? You can read what you are allowed to do in the Copyright text at the bottom of all our patterns. Happy crafting!
Comments / Questions (19)
Prosty,fajny wzór.Właśnie nabyłam włóczkę i szukam inspiracji.Idę zrobić próbkę.Dziękuję
15.11.2019 - 12:26Synes den er mega flot. Vente på opskrift
26.10.2019 - 09:00Très envie de faire ce joli pull, attends avec impatience les explications
25.08.2019 - 11:06Sehr schön. Hoffe es gibt bald die Anleitung
14.08.2019 - 08:47Yellow bumper
16.07.2019 - 15:58Väga ilus konstruktsioon.
20.06.2019 - 08:34Lumineux, point dentelle, coupe évasée, un rayon de soleil dans l'hiver !
15.06.2019 - 13:05Easy and quick, again. simple for beginners, nice but not beautyfull
06.06.2019 - 20:26To może być ciekawy wzór!
06.06.2019 - 09:53