DROPS Air
DROPS Air
65% Alpaca, 28% Polyamide, 7% Wool
from 8.95 CAD /50g
Get the yarn to make this pattern from 53.70CAD.

The yarn cost is calculated from the pattern’s smallest size and the yarn’s cheapest product type. Looking for an even better price? You might find it on the DROPS Deals!

DROPS SS24

Weaving Memories

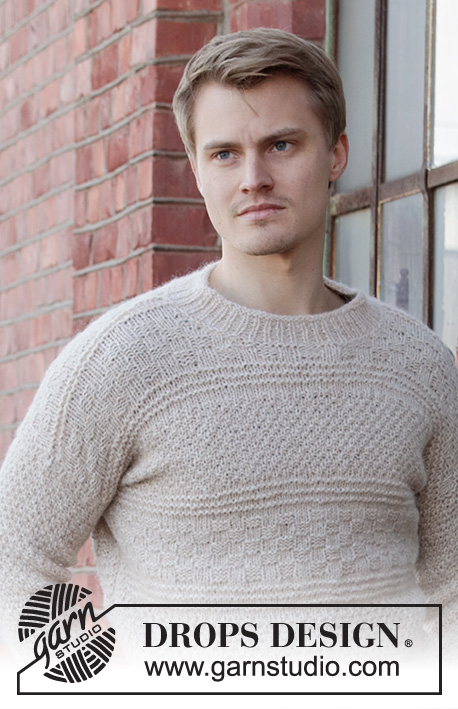
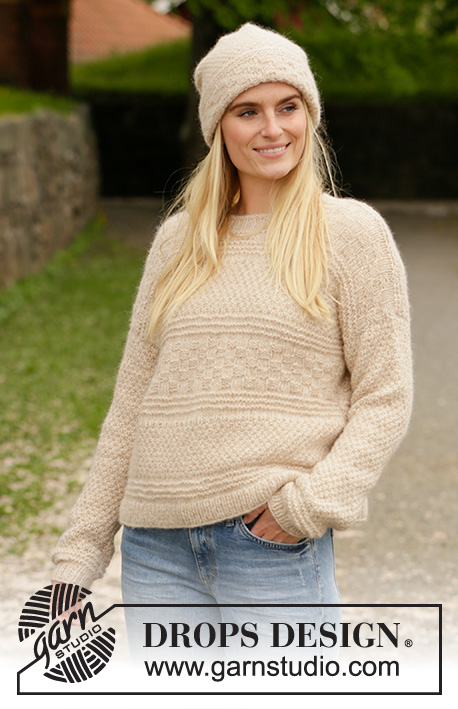
Knitted sweater in DROPS Air. Piece is knitted with textured pattern. Size: S - XXXL

DROPS 207-35
DROPS design: Pattern ai-226
Yarn group C or A + A
----------------------------------------------------------

SIZE:
S - M - L - XL - XXL – XXXL

Finished measurements:
Chest measurements: 98-106-120-128-136-148 cm = 38½"-41¾"-47¼"-50⅜"-53¼"-58⅛"
Full length: 50-52-54-56-58-60 cm = 19¾"-20½"-21¼"-22"-22¾"-23⅝"

All measurements in chart are in cm.

MATERIALS:
DROPS AIR from Garnstudio (belongs to yarn group C)
300-350-400-400-450-550 g color 02, wheat

KNITTING GAUGE:
16 stitches in width and 20 rows vertically in stockinette stitch = 10 x 10 cm = 4" x 4".

NEEDLES:
DROPS CIRCULAR NEEDLE SIZE 5.5 mm = US 9: Length 60 or 80 cm = 24" or 32".
DROPS CIRCULAR NEEDLE SIZE 4.5 mm = US 7: Length 40 and 60 or 80 cm = 16" and 24" or 32" for rib.
Needle size is only a suggestion! If you have too many stitches on 10 cm = 4" switch to larger needles. If you have too few stitches on 10 cm = 4" switch to smaller needles.

-------------------------------------------------------

Alternative Yarn – See how to change yarns here
Yarn Groups A to F – Use the same pattern and change the yarn here
Yarn usage using an alternative yarn – Use our yarn converter here

-------------------------------------------------------

DROPS Air
DROPS Air
65% Alpaca, 28% Polyamide, 7% Wool
from 8.95 CAD /50g
Get the yarn to make this pattern from 53.70CAD.

The yarn cost is calculated from the pattern’s smallest size and the yarn’s cheapest product type. Looking for an even better price? You might find it on the DROPS Deals!

Pattern instructions

NOTE: This pattern is written in American English. All measurements in charts are in cm. For conversion from inches to cm - click here. There are different terms for crocheting in American and British English. If this pattern includes crochet, click for "crochet terms" here. For this pattern in British English, please click here.
----------------------------------------------------------

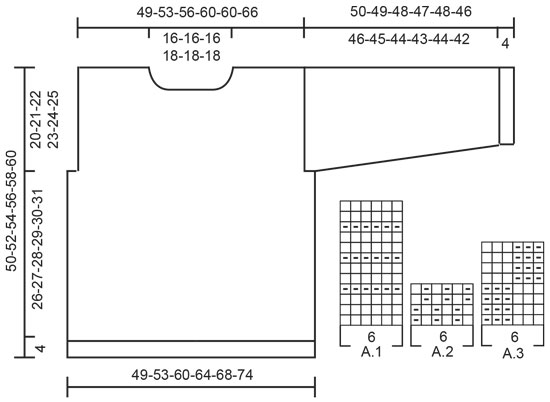
EXPLANATION FOR THE PATTERN:

----------------------------------------------------------

GARTER STITCH (back and forth):
Knit all rows.
1 ridge vertically = knit 2 rows.

PATTERN:
See diagrams A.1 to A.3. Diagrams show all rows in pattern seen from the right side.

TEXTURED PATTERN:
Work stripes in textured pattern. Work edge stitch in garter stitch in each side until finished measurements.
Work as follows:
STRIPE 1: Work A.1.
STRIPE 2: Continue A.2 for 7-8-8-9-9-9 cm = 2¾"-3⅛"-3⅛"-3½"-3½"-3½" - adjust to finish after 1st or 3rd row in diagram. Purl 1 row from wrong side.
STRIPE 3: Work A.1.
STRIPE 4: Continue A.3 for 8-8-8-8-10-10 cm = 3⅛"-3⅛"-3⅛"-3⅛"-4"-4" - adjust to finish after 4th or 8th row in pattern.
STRIPE 5: Work A.1.
STRIPE 6: Continue A.2 for 7-8-8-9-9-9 cm = 2¾"-3⅛"-3⅛"-3½"-3½"-3½" - adjust to finish after 1st or 3rd row in diagram. Purl 1 row from wrong side.
STRIPE 7: Work A.1.
STRIPE 8: Continue A.3 for 6-6-8-8-8-10 cm = 2⅜"-2⅜"-3⅛"-3⅛"-3⅛"-4" - adjust to finish after 4th or 8th row in pattern.
STRIPE 9: Work 2 rows in stockinette stitch.

DECREASE TIP (evenly):
To calculate how to decrease evenly, use the total number of stitches on row (e.g. 88 stitches), minus edge stitch in each side (e.g. 2 stitches) and divide the remaining stitches by number of decreases to be done (e.g. 8) = 10.8. In this example work alternately approx. every 9th and 10th stitch and every 10th and 11th stitch together and do not decrease over edge stitches in garter stitch.

INCREASE TIP-1 (evenly):
To calculate how to increase evenly, use the total number of stitches on row (e.g. 32 stitches), minus edge stitch in garter stitch (= 2 stitches) and divide the remaining stitches by number of increases to be done (e.g. 8) = 3.8.
In this example increase by making 1 yarn over after alternately every 3rd and 4th stitch. On next row work yarn overs twisted to avoid holes.

INCREASE TIP-2 (applies to sleeves):
Increase 1 stitch inside 1 edge stitch in garter stitch in each side by making 1 yarn over. On next row work yarn overs twisted to avoid holes. Then work the new stitches in pattern.

----------------------------------------------------------

START THE PIECE HERE:

----------------------------------------------------------

SWEATER - SHORT OVERVIEW OF THE PIECE:
Worked back and forth on circular needle in parts and sewn together when finished.

BACK PIECE:
Cast on 88-94-108-114-120-132 stitches on circular needle size 4.5 mm = US 7 with Air. Purl 1 row from wrong side. Then work rib as follows: 1 edge stitch in GARTER STITCH - read explanation above, (knit 1/purl 1) until 1 stitch remains on needle, 1 edge stitch in garter stitch. When rib measures 4 cm = 1½", switch to circular needle size 5.5 mm = US 9. Now work TEXTURED PATTERN – read explanation above, with 1 edge stitch in garter stitch in each side, AT THE SAME TIME on first row from right side decrease 8-8-10-10-10-12 stitches evenly - read DECREASE TIP = 80-86-98-104-110-120 stitches. REMEMBER THE KNITTING GAUGE! When piece measures 30-31-32-33-34-35 cm = 11 2/4"-12¼"-12½"-13"-13⅜"-13¾", bind off 0-0-3-3-6-6 stitches at the beginning of the next 2 rows for armholes = 80-86-92-98-98-108 stitches. Stitches are not bind off in size S and M but to mark armhole insert a marker thread in each side of piece. When 8th stripe has been worked, bind off the middle 24-24-24-26-26-26 stitches for neck and finish each shoulder separately. Then bind off 1 stitch on next row from the neck = 27-30-33-35-35-40 stitches. Work 1 ridge over all stitches. Bind off. Piece measures approx. 50-52-54-56-58-60 cm = 19¾"-20½"-21¼"-22"-22¾"-23⅝" from shoulder and down. Work the other shoulder the same way.

FRONT PIECE:
Cast on 88-94-108-114-120-132 stitches on circular needle size 4.5 mm = US 7 with Air. Purl 1 row from wrong side. Then work rib as follows: 1 edge stitch in garter stitch, (knit 1/purl 1) until 1 stitch remains, 1 edge stitch in garter stitch. When rib measures 4 cm = 1½", switch to circular needle size 5.5 mm = US 9. Now work textured pattern the same way as on back piece with 1 edge stitch in garter stitch in each side, AT THE SAME TIME on first row from right side decrease 8-8-10-10-10-12 stitches evenly = 80-86-98-104-110-120 stitches. When piece measures 30-31-32-33-34-35 cm = 11 2/4"-12¼"-12½"-13"-13⅜"-13¾", bind off 0-0-3-3-6-6 stitches at the beginning of the next 2 rows for armholes = 80-86-92-98-98-108 stitches. Stitches are not bind off in size S and M but to mark armhole insert a marker thread in each side of piece. When piece measures 44-46-46-48-50-50 cm = 17¼"-18"-18"-19"-19¾"-19¾", slip the middle 14-14-14-16-16-16 stitches on a stitch holder for neck and finish each shoulder separately. Then bind off stitches on every row from neck as follows: Bind off 3 stitches 1 time, 2 stitches 1 time and 1 stitch 1 time = 27-30-33-35-35-40 stitches for shoulder. When all stripes with textured pattern has been worked vertically, work 1 ridge over all stitches. Bind off. Piece measures approx. 50-52-54-56-58-60 cm = 19¾"-20½"-21¼"-22"-22¾"-23⅝" from shoulder and down. Work the other shoulder the same way.

SLEEVE:
Cast on 32-34-36-36-38-40 stitches on circular needle size 4.5 mm = US 7 with Air. Purl 1 row from wrong side, then work rib as follows back and forth: 1 edge stitch in garter stitch, (knit 1/purl 1) until 1 stitch remains, 1 edge stitch in garter stitch. Continue back and forth like this until rib measures 4 cm = 1½". Switch to circular needle size 5.5 mm = US 9. Work A.1 with 1 edge stitch in garter stitch in each side, at the same time increase 8 stitches evenly on first row - read INCREASE TIP-1 = 40-42-44-44-46-48 stitches. When A.1 has been worked vertically, continue with A.2 and 1 edge stitch in garter stitch in each side. When piece measures 9-11-11-11-11-7 cm = 3½"-4⅜"-4⅜"-4⅜"-4⅜"-2¾", increase 1 stitch in each side of piece – read INCREASE TIP-2. Increase like this approx. every 3-2½-2½-2-2-2 cm = 1⅛"-⅞"-⅞"-¾"-¾"-¾" 13-14-14-16-16-17 times in total = 66-70-72-76-78-82 stitches. When piece measures 50-49-48-47-48-46 cm = 19¾"-19 174"-19"-18½"-19"-18", bind off. Make sure that the bind-off edge is not too tight. Work the other sleeve the same way.

ASSEMBLY:
Sew shoulder seam inside bind-off edge so that there are 2 ridges mid on top of shoulder - make sure to avoid a tight seam. Sew sleeves in body inside 1 edge stitch in garter stitch on body and sew inside bind-off edge on sleeves. In size S and M the marker thread inserted in each side shows where armhole begins. In size L, XL, XXL and XXXL stitches were bind off for armhole in each side. Sew seam under sleeves and then down along side seam. Repeat in the other side.

NECK EDGE:
Begin from right side with Air and a short circular needle size 4.5 mm = US 7 and pick up approx. 76-90 stitches around the neck including stitches on stitch holder.
Work neck edge in the round as follows: Purl 1 round and knit 1 round. Now work rib (= knit 1/purl 1) in the round. When rib measures 4 cm = 1½", purl 1 round. Bind off by purling.

Diagram

symbols = knit from the right side, purl from the wrong side
symbols = purl from the right side, knit from the wrong side
diagram

Each of our patterns has specific tutorial videos to help you.

Do you have a question? See a list of frequently asked questions (FAQ)

Knitting tension is what determines the final measurements of your work, and is usually measured per 10 x 10 cm. It is provided like so: number of stitches in width x number of rows in height - eg: 19 stitches x 26 rows = 10 x 10 cm.

The knitting tension is very individual; some people knit/crochet loosely while others work tightly. You adjust the knitting tension with the needle size, which is why the suggested needle size only serve as a guide! You need to adjust this (up or down) to ensure that YOUR knitting tension matches the knitting tension provided in the pattern. If you work with a different knitting tension than provided you will have a different yarn consumption, and your work will have different measurements than what the pattern suggests.

The knitting tension also determines which yarns can replace each other. As long as you achieve the same knitting tension you can replace one yarn with another.

See DROPS lesson: How to measure your tension/gauge

See DROPS video: How to make a gauge tension swatch

The required amount of yarn is provided in grams, eg: 450 g. To calculate how many balls you’ll need you first need to know how many grams are in 1 ball (25g, 50g or 100g). This information is available if you click on the individual yarn quality on our pages. Divide the amount required with the amount of each ball. For example, if each ball is 50g (the most common amount), the calculation will be as follows: 450 / 50 = 9 balls.

The important thing when changing from one yarn to another is that the knitting/crochet tension remains the same. This is so that the measurements of the finished piece will be the same as on the sketch provided. It is easier to achieve the same knitting tension using yarns from the same yarn group. It is also possible to work with multiple strands of a thinner yarn to achieve the knitting tension of a thicker one. Please try our yarn converter. We recommend you to always work a test swatch.

Please NOTE: when changing yarn the garment might have a different look and feel to the garment in the photo, due to individual properties and qualities of each yarn.

See DROPS lesson: Can I use a different yarn than the one mentioned in the pattern?

All our yarns are categorised into yarn groups (from A to F) according to thickness and knitting tension – group A contains the thinnest yarns and group F the thickest. This makes it easier for you to find alternative yarns to our patterns, should you wish to switch yarn. All yarns within the same group have a similar knitting tension and can easily replace each other. However, different yarn qualities have different structures and properties which will give the finished work a unique look and feel.

Click here for an overview of the yarns in each yarn group

At the top of all our patterns you’ll find a link to our yarn converter, which is a helpful tool should you wish to use a different yarn than suggested. By filling in the yarn quality you wish to replace, the amount (in your size) and number of strands, the converter will present good alternative yarns with the same knitting tension. Additionally it will tell you how much you’ll require in the new qualities and whether you’ll need to work with multiple strands. Most skeins are 50g (some are 25g or 100g).

If the pattern is worked with multiple colours, every colour will have to be converted separately. Similarly, if the pattern is worked with several strands of different yarns (for example 1 strand Alpaca and 1 strand Kid-Silk) you will have to find alternatives for each, individually.

Click here to see our yarn converter

Since different yarns have different qualities and textures we have chosen to keep the original yarn in our patterns. However, you can easily find options among our available qualities by using our yarn converter, or simply pick a yarn from the same yarn group.

It is possible that some retailers still have discontinued yarns in stock, or that someone has a few skeins at home that they would like to find patterns for.

The yarn converter will provide both alternative yarn as well as required amount in the new quality.

If you think it's hard to decide what size to make, it can be a good idea to measure a garment you own already and like the size of. Then you can pick the size by comparing those measures with the ones available in the pattern's size chart.

You'll find the size chart at the bottom of the pattern.

See DROPS lesson: How to read size chart

The needle size provided in the pattern serves only as a guide, the important thing is to follow the knitting tension. And since knitting tension is very individual, you will have to adjust the needle size to ensure that YOUR tension is the same as in the pattern – maybe you’ll have to adjust 1, or even 2 needle sizes, up or down to achieve the correct tension. For this, we recommend that you work test swatches.

Should you work with a different knitting tension than the one provided, the measurements of the finished garment might deviate from the measurement sketch.

See DROPS lesson: How to measure your tension/gauge

See DROPS video: How to make a gauge tension swatch

Working a garment top-down provides more flexibility and room for personal adjustment. For example it is easier to try the garment on while working, as well as making adjustments to length of yoke and shoulder caps.

The instructions are carefully explaining every step, in the correct order. Diagrams are adjusted to the knitting direction and are worked as usual.

The diagram depicts all rows/rounds, and every stitch seen from the right side. It is read from bottom to top, from right to left. 1 square = 1 stitch.

When working back and forth, every other row is worked from the right side and every other row is worked from the wrong side. When working from the wrong side, the diagram will have to be worked reversed: from left to right, knit stitches are purled, purl stitches are knit etc.

When working in the round every round is worked from the right side and the diagram are worked from right to left on all rounds.

See DROPS lesson: How to read knitting diagrams

The diagram depicts all rows/rounds, and every stitch seen from the right side. It is worked from bottom to top, from right to left.

When working back and forth every other row is worked from the right side: from right to left and every other row is worked from the wrong side: from left to right.

When working in the round, every row in the diagram are worked from the right side, from right to left.

When working a circular diagram you start in the middle and work your way outwards, counter clockwise, row by row.

The rows usually start with a given number of chain stitches (equivalent to the height of the following stitch), this will either be depicted in the diagram or explained in the pattern.

See DROPS lesson: How to read crochet diagrams

Instructions for working several diagrams after each other on the same row/round, will often be written like so: “work A.1, A.2, A.3 a total of 0-0-2-3-4 times". This means you work A.1 once, then A.2 is worked once, and A.3 is repeated (in width) the number of times provided for your size – in this case like so: S = 0 times, M = 0 times, L=2 times, XL= 3 times and XXL = 4 times.

The diagrams are worked as usual: begin with the first row in A.1, then work the first row in A.2 etc.

See DROPS lesson: How to read knitting diagrams

See DROPS lesson: How to read crochet diagrams

The total width of the garment (from wrist-to-wrist) will be larger in the larger sizes, despite the actual sleeves being shorter. The larger sizes have longer sleeve caps and wider shoulders, so there will be a good fit in all sizes.

The measurement sketch/schematic drawing provides information regarding the full length of the garment. If it’s a jumper or a jacket the length is measured from the highest point on the shoulder (usually closest to the neckline), and straight down to the bottom of the garment. It is NOT measured from the tip of shoulder. Similarly, the length of yoke is measured from the highest point on the shoulder and down to where yoke is split into body and sleeves.

See DROPS lesson: How to read a schematic drawing

Diagrams are often repeated on the round or in height. 1 repeat is the diagram the way it appears in the pattern. If it says to work 5 repeats of A.1 in the round, then you work A.1 a total of 5 times after/next to each other in the round. If it says to work 2 repeats of A.1 vertically/in height you work the entire diagram once, then begin again at the start and work the entire diagram one more time.

Chain stitches are slightly narrower than other stitches and to avoid working the cast-on edge too tight, we simply chain more stitches to begin with. The stitch count will be adjusted on the following row to fit the pattern and measurement sketch.

The rib edge is more elastic and will contract slightly compared to, for example, stocking stitch. By increasing before the rib edge, you avoid a visible difference in width between the rib edge and the rest of the body.

It’s very easy to cast off too tightly, and by making yarn overs while casting off (and simultaneously casting these off) you avoid a too tight cast off edge.

See DROPS video: How to bind off with yarn overs (yo)

To achieve an even increase (or decrease) you can increase on, for example: every 3rd and 4th row alternately, like so: work 2 rows and increase on the 3rd row, work 3 rows and increase on the 4th. Repeat this until the increase is complete.

See DROPS lesson: Increase or decrease 1 st on every 3rd and 4th row alternately

Should you prefer to work in the round instead of back and forth, you may of course adjust the pattern. You’ll need to add steeks mid-front (usually 5 stitches), and follow the instructions. When you would normally turn and work from the wrong side, simply work across the steek and continue in the round. At the end you’ll cut the piece open, pick up stitches to work bands, and cover the cut edges.

See DROPS video: How to knit steeks and cut open

Should you prefer to work back and forth instead of in the round, you may of course adjust the pattern so you work the pieces separately and then assemble them at the end. Divide the stitches for the body in 2, add 1 edge stitch in each side (for sewing) and work the front and back pieces separately.

See DROPS lesson: Can I adapt a pattern for circular needles into straight needles?

Pattern repeats can vary slightly in the different sizes, in order to get the correct proportions. If you’re not working the exact same size as the garment in the photo, yours might deviate slightly. This has been carefully developed and adjusted so that the complete impression of the garment is the same in all sizes.

Make sure to follow instructions and diagrams for your size!

If you have found a pattern you like which is available in women’s size it’s not very difficult to convert it to men’s size. The biggest difference will be the length of sleeves and body. Start working on the women size that you think would fit across the chest. The additional length will be worked right before you cast off for the armhole/sleeve cap. If the pattern is worked top-down you can add the length right after the armhole or before the first decrease on sleeve.

Regarding additional yarn amount, this will depend on how much length you add, but it is better with a skein too many than too few.

All yarns will have excess fibres (from production) that might come off as lint or shedding. Brushed yarns (ie hairier yarns) have more of these loose, excess fibres, causing more shedding.

Shedding also depends on what is worn under or over the garment, and whether this pulls at the yarn fibres. It’s therefore not possible to guarantee that there will be no shedding

Below are some tips on how to get the best result when working with hairier yarns:

1. When the garment is finished (before you wash it) shake it vigorously so the looser hairs come off. NOTE: do NOT use a lint roller, brush or any method that pulls at the yarn.

2. Place the garment in a plastic bag and put it in your freezer - the temperature will cause the fibres to become less attached to each other, and excess fibres will come off easier.

3. Leave in the freezer for a few hours before taking it out and shaking it again.

4. Wash the garment according to the instructions on the yarn label.

Pilling is a natural process that happens to even the most exclusive of fibers. It's a natural sign of wear and tear that is hard to avoid, and that is most visible in high friction areas of your garment like a sweater's arms and cuffs.

You can make your garment look as new by removing the pilling, using a fabric comb or a pill/lint remover.

Still can't find the answer you need? Then scroll down and leave your question so one of our experts can try to help you. This will be done normally within 5 to 10 working days.
In the meantime, you can read the questions and answers that others have left to this pattern or join the DROPS Workshop on Facebook to get help from fellow knitters/crocheters!

You might also like...

Post a comment to pattern DROPS 207-35

We would love to hear what you have to say about this pattern!

If you want to leave a question, please make sure you select the correct category in the form below, to speed up the answering process. Required fields are marked *.

Comments / Questions (16)

country flag Dorothy Francone wrote:

I am doing DROPS 207-35. I am about to finish the 8th stripe on the back and am confused by the following: When 8th stripe has been worked, cast off the middle 24-24-24-26-26-26 stitches for neck and finish each shoulder separately. Then cast off 1 stitch on next row from the neck = 27-30-33-35-35-40 stitches. Work 1 ridge over all stitches. Cast off. Piece measures approx. 50-52-54-56-58-60 cm from shoulder and down. Work the other shoulder the same way.

27.11.2023 - 21:54

DROPS Design answered:

Dear Mrs Francone, on the next row after the 8th stripe, ie on the first row of the 9th stripe, cast off the middle stitches for neck, then finish each shoulder separately. Cast off 1 stitch at the beg of next row from neck (from WS on right shoulder/from RS on left shoulder back piece). After the 2 rows stocking st of 9th stripe are done, knit 2 rows (- 1 ridge) and cast off. work the 2nd shoulder the same way. Happy knitting!

28.11.2023 - 08:46

country flag Krentner Maréka wrote:

Bonsoir, pouvez vous me confirmer si le col doit se tricoter en aller et retour, ou en Rond . Je vous remercie de votre réponse .🌼🌺

24.05.2022 - 18:24

DROPS Design answered:

Bonjour Mme Krentner, le col se tricote effectivement en rond. Bon tricot!

25.05.2022 - 07:16

country flag Mme Krentner wrote:

Bonsoir, je fais le modèle 207 35, j’ai un petit soucis avec le diagramme, vous dites que ce diagramme montrent uniquement les rangs vus sur l’endroit donc si je comprends bien, pour la rayure. 1 il faut faire le double de rangs à chaque fois donc 24 rangs, endroits et envers. Merci de votre réponse

01.05.2022 - 17:20

DROPS Design answered:

Bonjour Mme Krentner, les diagrammes montrent tous les rangs, mais vus sur l'endroit, autrement dit vous lisez les diagrammes de bas en haut, puis de droite à gauche sur l'endroit et de gauche à droite sur l'envers. A.1 se tricote ainsi sur 12 rangs, A.2 sur 4 et A.3 sur 8 rangs. Bon tricot!

02.05.2022 - 10:12

country flag Kp wrote:

Why is the body length from cast on to armhole so different on Weaving Memories and Rainy Day patterns even though the length looks similar for both on the models. One is around 30 cms the other is around 40 cms

27.04.2022 - 12:51

DROPS Design answered:

Dera Kp, Rainy Day is much longer: total length is 62-64-66-68-70-72 cm from cast on edge to shoulder, while this jumper is shorter: 50-52-54-56-58-60 cm from cast on edge to shoulder. You can adjust length but you will then require much yarn. Happy knitting!

27.04.2022 - 15:24

country flag Vera Van Veenendaal wrote:

Bij A 2 staat brei 9 cm en pas aan op het einde na de 1e en 3de naald in het telpatroon wat moet er worden aangepast??? zo staat dat er nog een paar keer bij voorbaat mijn grote dank Vera van Veenendaal

13.03.2022 - 21:56

DROPS Design answered:

Dag Vera,

Het is de bedoeling dat de laatste naald de 1e of 3e naald in het telpatroon is, dus het is de bedoeling dat je 9 cm breit en dat je op dat moment óf de 1e of de 3e naald in het patroon hebt gebreid.

14.03.2022 - 12:24

country flag Jacqueline Gross wrote:

I cannot use circular needles. the knitting becomes too heavy for my hands. Can I knit this using ordinary needles. Which patterns of this type use ordinary needles ?

20.09.2021 - 21:24

DROPS Design answered:

Dear Mrs Gross, for this jumper, each piece is worked back and forth on circular needle to have enough room for all stitches, only neck edge will be worked in the round, it will be then easy to adapt; this lesson will help you to adapt patterns into straight needles. Happy knitting!

21.09.2021 - 09:03

country flag Laura wrote:

I have just finished knitting this jumper and am really excited to wear it. The yarn says not to soak it so I was wondering if anyone had any advice about blocking it. I would normally soak the item and then stretch it out to dry but I am hesitant given the label on the yarn.

31.07.2020 - 09:07

DROPS Design answered:

Dear Laura, First of all, congratulations on your finished project! We would love to see it! You can share photos with us on our Drops Gallery here on the site or on your social media using the hashtag #dropsfan, About blocking: you can wet the garment but not leave it to soak or steam block it. Use the steam of your iron to wet the entire garment and then block it. The important issue is not relax too much the fibres. Do not leave the garment to soak not use fabric conditioner. Just wet the garment until it's wet, remove all excess water and then block it. Happy Knitting!

31.07.2020 - 10:54

country flag Hild wrote:

Hei. Nettopp kjøpt garn, men lurer på om den kan strikkes rundt? Liker ikke frem og tilbake ☺️

16.07.2020 - 09:38

DROPS Design answered:

Hej Hild. Ja det kan du godt - god fornøjelse! :)

28.07.2020 - 14:05

country flag Sylvia Lindoe wrote:

Please can you tell me where to find weaving Memories hat? I’ve knitted the sweater which is lovely and would like to make the hat, but I can’t find the pattern. Thanks!

01.03.2020 - 23:16

DROPS Design answered:

Hi Sylvia, Pattern ai-227 is the set with the hat and neck warmer. Happy knitting!

02.03.2020 - 10:21

country flag Anne wrote:

Pourquoi le patron indique de faire des diminutions dès les premiers rangs points texturés alors que le diagramme montre a diminution à partir de 26 cm?

02.01.2020 - 05:52

DROPS Design answered:

Bonjour Anne, vous le faites pour les côtes d'en bas ne resserre pas votre ouvrage, ainsi la largeur du pull est le meme jusqu'a 26 cm. Bon tricot!

02.01.2020 - 09:42