
Popular categories
Looking for a yarn?


|
|||||||
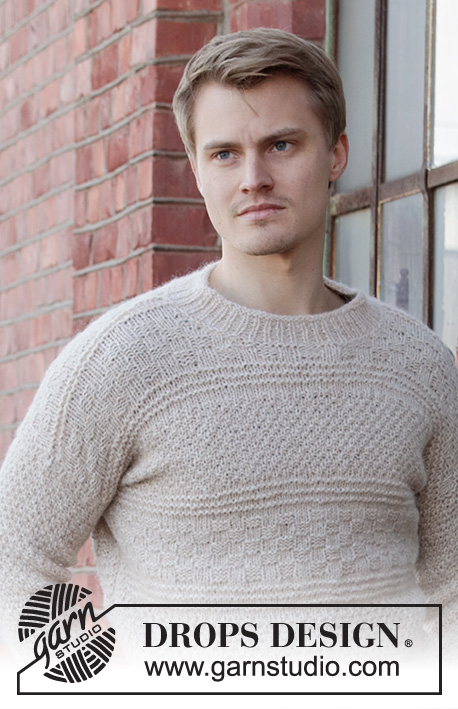
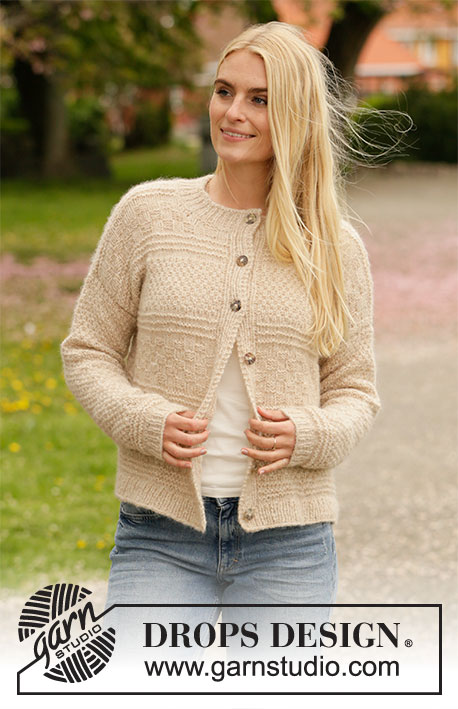
Weaving Memories Jacket |
|||||||
 |
 |
||||||
Knitted jacket in DROPS Air. Piece is knitted with textured pattern. Size: S - XXXL
DROPS 207-36 |
|||||||
|
---------------------------------------------------------- EXPLANATION FOR THE PATTERN: ---------------------------------------------------------- GARTER STITCH (back and forth): Knit all rows. 1 ridge vertically = knit 2 rows. PATTERN: See diagrams A.1 to A.5. Diagrams show all rows in pattern seen from the right side. TEXTURED PATTERN: Work stripes in textured pattern. On back piece work edge stitch in garter stitch in each side until finished measurements. On front pieces work edge stitch in the side in garter stitch and work the 8 band stitches towards mid front in A.4/A.5 until finished measurements. Work as follows: STRIPE 1: Work A.1. STRIPE 2: Continue A.2 for 7-8-8-9-9-9 cm - adjust to finish after 1st or 3rd row in diagram. Purl 1 row from wrong side. STRIPE 3: Work A.1. STRIPE 4: Continue A.3 for 8-8-8-8-10-10 cm - adjust to finish after 4th or 8th row in pattern. STRIPE 5: Work A.1. STRIPE 6: Continue A.2 for 7-8-8-9-9-9 cm - adjust to finish after 1st or 3rd row in diagram. Purl 1 row from wrong side. STRIPE 7: Work A.1. STRIPE 8: Continue A.3 for 6-6-8-8-8-10 cm - adjust to finish after 4th or 8th row in pattern. STRIPE 9: Work 2 rows in stocking stitch. DECREASE TIP-1 (evenly): To calculate how to increase evenly, use the total number of stitches on row (e.g. 95 stitches), minus 1 edge stitch in garter stitch in each side (= 2 stitches) and divide the remaining stitches by number of decreases to be done (e.g. 15) = 6.2. In this example decrease by knitting approx. every 5th and 6th stitch together. INCREASE TIP-1 (evenly): To calculate how to increase evenly, use the total number of stitches on row (e.g. 32 stitches), minus edge stitch in garter stitch (= 2 stitches) and divide the remaining stitches by number of increases to be done (e.g. 8) = 3.8. In this example increase by making 1 yarn over after alternately every 3rd and 4th stitch. On next row work yarn overs twisted to avoid holes. INCREASE TIP-2 (applies to sleeves): Increase 1 stitch inside 1 edge stitch in garter stitch in each side by making 1 yarn over. On next row work yarn overs twisted to avoid holes. Then work the new stitches in pattern. BUTTONHOLES: Decrease for buttonholes on right band. 1 BUTTONHOLE = knit third and fourth stitch from edge together and make 1 yarn over. On next row knit yarn over = hole. Decrease for buttonholes when piece measures: NOTE: Decrease the last button hole on the neckline. S: 4, 11, 18, 25, 32, 39 and 46 cm M: 3, 11, 18, 26, 33, 41 and 48 cm L: 3, 11, 18, 26, 33, 41 and 48 cm XL: 2, 10, 18, 26, 34, 42 and 50 cm XXL: 4, 12, 20, 28, 36, 44 and 52 cm XXXL: 4, 12, 20, 28, 36, 44 and 52 cm ---------------------------------------------------------- START THE PIECE HERE: ---------------------------------------------------------- JACKET - SHORT OVERVIEW OF THE PIECE: Worked back and forth on circular needle in parts and sewn together when finished. BACK PIECE: Cast on 95-103-117-123-131-143 stitches on circular needle size 4.5 mm with Air. Purl 1 row from wrong side. Then work rib as follows: 1 edge stitch in GARTER STITCH - see explanation above, (knit 1/purl 1) until 2 stitches remain on needle, knit 1, 1 edge stitch in garter stitch. Continue back and forth like this until rib measures 4 cm. Switch to circular needle size 5.5 mm. Now work TEXTURED PATTERN – read explanation above, with 1 edge stitch in garter stitch in each side, AT THE SAME TIME on first row from right side decrease 15-17-19-19-21-23 stitches evenly - read DECREASE TIP = 80-86-98-104-110-120 stitches. REMEMBER THE KNITTING TENSION! When piece measures 30-31-32-33-34-35 cm, cast off 0-0-3-3-6-6 stitches at the beginning of the next 2 rows for armholes = 80-86-92-98-98-108 stitches. Stitches are not cast off in size S and M but to mark armhole insert a marker thread in each side of piece. When 8th stripe has been worked, piece measures approx. 48-50-52-54-56-58 cm. Now cast off the middle 24-24-24-26-26-26 stitches for neck and finish each shoulder separately. Then cast off 1 stitch on next row from the neck = 27-30-33-35-35-40 stitches. Work 1 ridge over all stitches. Cast off. Piece measures approx. 50-52-54-56-58-60 cm from shoulder and down. Work the other shoulder the same way. RIGHT FRONT PIECE: Cast on 55-59-67-71-75-81 stitches on circular needle size 4.5 mm with Air. Purl 1 row from wrong side. Then work rib as follows (1st row = right side): Work A.4 over the first 8 stitches (= band), (knit 1/purl 1) until 1 stitch remains, 1 edge stitch in garter stitch. REMEMBER BUTTONHOLES on band - Read explanation above. When rib measures 4 cm, switch to circular needle size 5.5 mm. Now work textured pattern the same way as on back piece but work A.4 over the first 8 band stitches at beginning of row and work 1 edge stitch in garter stitch towards the side, i.e. Finish at the end of row seen from right side. AT THE SAME TIME on first row from right side decrease 7-8-10-11-12-12 stitches evenly (but not over the 8 band stitches and edge stitch in garter stitch) = 48-51-57-60-63-69 stitches. When piece measures 30-31-32-33-34-35 cm, cast off 0-0-3-3-6-6 stitches at the beginning of the next row from wrong side (i.e. from the side of piece) = 48-51-54-57-57-63 stitches. Stitches are not cast off in size S and M but to mark armhole insert a marker thread in the side of piece. When piece measures 44-46-46-48-50-50 cm, work as follows from right side: Work the first 15-15-15-16-16-17 stitches before slipping them on a stitch holder for neck, and work textured pattern as before over the remaining stitches on needle. Then cast off stitches on every row from neck as follows: Cast off 3 stitches 1 time, 2 stitches 1 time and 1 stitch 1 time = 27-30-33-35-35-40 stitches for shoulder. When all stripes with textured pattern has been worked vertically, work 1 ridge over all stitches. Cast off. Piece measures approx. 50-52-54-56-58-60 cm from shoulder and down. LEFT FRONT PIECE: Cast on 55-59-67-71-75-81 stitches on circular needle size 4.5 mm with Air. Purl 1 row from wrong side. Then work rib as follows (1st row = right side): 1 edge stitch in garter stitch, (purl 1/knit 1) until 8 stitches remain on row, A.5 over the last 8 stitches (= band). When rib measures 4 cm, switch to circular needle size 5.5 mm. Now work textured pattern the same way as on back piece and on right front piece but work 1 edge stitch in garter stitch at beginning of row (seen from right side) and work A.5 over the last 8 band stitches at the end of row (seen from right side). AT THE SAME TIME on first row decrease 7-8-10-11-12-12 stitches evenly (but not over the 8 band stitches and edge stitch in garter stitch) = 48-51-57-60-63-69 stitches. When piece measures 30-31-32-33-34-35 cm, cast off 0-0-3-3-6-6 stitches at the beginning of the next row from right side (i.e. from the side of piece) = 48-51-54-57-57-63 stitches. Stitches are not cast off in size S and M but to mark armhole insert a marker thread in the side of piece. When piece measures 44-46-46-48-50-50 cm, adjust so that next row is worked from wrong side: Work the first 15-15-15-16-16-17 stitches before slipping them on a stitch holder for neck, then work textured pattern as before over the remaining stitches on needle. Then cast off stitches on every row from neck as follows: Cast off 3 stitches 1 time, 2 stitches 1 time and 1 stitch 1 time = 27-30-33-35-35-40 stitches for shoulder. When all stripes with textured pattern has been worked vertically, work 1 ridge over all stitches. Cast off. Piece measures approx. 50-52-54-56-58-60 cm from shoulder and down. SLEEVE: Cast on 32-34-36-36-38-40 stitches on circular needle size 4.5 mm with Air. Purl 1 row from wrong side, then work rib as follows back and forth: 1 edge stitch in garter stitch, (knit 1/purl 1) until 1 stitch remains, 1 edge stitch in garter stitch. Continue back and forth like this until rib measures 4 cm. Switch to circular needle size 5.5 mm. Work A.1 with 1 edge stitch in garter stitch in each side, at the same time increase 8 stitches evenly on first row - read INCREASE TIP-1 = 40-42-44-44-46-48 stitches. When A.1 has been worked vertically, continue with A.2 and 1 edge stitch in garter stitch in each side. When piece measures 9-11-11-11-11-7 cm, increase 1 stitch in each side of piece – read INCREASE TIP-2. Increase like this approx. every 3-2½-2½-2-2-2 cm 13-14-14-16-16-17 times in total = 66-70-72-76-78-82 stitches. When piece measures 50-49-48-47-48-46 cm, cast off. Make sure that the cast-off edge is not too tight. Work the other sleeve the same way. ASSEMBLY: Sew shoulder seam inside cast-off edge so that there are 2 ridges mid on top of shoulder - make sure to avoid a tight seam. Sew sleeves in body. Sew inside 1 edge stitch in garter stitch on body and sew inside cast-off edge on sleeves. In size S and M the marker thread inserted in each side shows where armhole begins. In size L, XL, XXL and XXXL stitches were cast off for armhole in each side. Sew seam under sleeves and then down along side seam. Repeat in the other side. Sew the buttons on to left band. NECK EDGE: Begin from right side with Air and a short circular needle size 4.5 mm and pick up approx. 91-105 stitches around the neck including stitch on stitch holders. NOTE. Pick up an uneven number of stitch so that rib fits the entire row. ROW 1 (= wrong side): Work A.5 over the first 8 stitches on row, knit until 8 stitches remain, work A.4 over the last 8 stitches. ROW 2 (= right side): Work A.4 over the first 8 stitches, knit until 8 stitches remain, work A.5 over the last 8 stitches. Now work rib (= knit 1/purl 1) with A.4 and A.5 in each side. Adjust so that rib fit the entire way (with knit over knit and purl over purl over bands). Remember last buttonhole on right band. When piece measures 4 cm - adjust so that next row is worked from wrong side, knit 1 row over all stitches. Cast off by purling from right side. |
|||||||
Diagram explanations |
|||||||
|
|||||||

|
|||||||

|
|||||||
|
Have you made this or any other of our designs? Tag your pictures in social media with #dropsdesign so we can see them! Do you need help with this pattern?You'll find tutorial videos, a Comments/Questions area and more by visiting the pattern on garnstudio.com. © 1982-2024 DROPS Design A/S. We reserve all rights. This document, including all its sub-sections, has copyrights. Read more about what you can do with our patterns at the bottom of each pattern on our site. |
|||||||


With over 40 years in knitting and crochet design, DROPS Design offers one of the most extensive collections of free patterns on the internet - translated to 17 languages. As of today we count 304 catalogues and 11422 patterns - 11422 of which are translated into English (UK/cm).
We work hard to bring you the best knitting and crochet have to offer, inspiration and advice as well as great quality yarns at incredible prices! Would you like to use our patterns for other than personal use? You can read what you are allowed to do in the Copyright text at the bottom of all our patterns. Happy crafting!
Comments / Questions (29)
Kan jeg kjøpe oppskrift på papir ? Jeg har ikke skriver …….
15.11.2023 - 10:10DROPS Design answered:
Hej Sidsel, spørg hos din DROPS forhandler, eller så ved vi at man kan få biblioteket til at skrive ud, hvis du ikke vil læse opskriften direkte på din mobil eller dator :)
16.11.2023 - 14:21Bonjour chère équipe de DROPS, lorsque je fais les boutonnières, dois-je tricoter les 2 mailles ensemble et faire un jeté sur un rang envers? ou sur un rang endroit? merci.
05.06.2021 - 20:10DROPS Design answered:
Bonjour Mme Wilmo, ouvrez les boutonnières sur l'endroit, et tricotez la 3ème et la 4ème maille à partir du bord = de A.4 (= 1 m end + 1 m env) ensemble à l'endroit et faites 1 jeté. Bon tricot!
07.06.2021 - 07:18Hej ! Skulle vilja sticka denna kofta i ett något tunnare garn. ex. Drops puna ,brun. Kan man göra det ?? ex. genom att sticka en storlek större ??
07.02.2021 - 16:18DROPS Design answered:
Hei Ulla. Ved å bruke et tynnere garn vil ikke strikkefastheten eller målene stemme, så det anbefales ikke. Men om du føler deg komfortabel med å regne om strikkefastheten, målene osv, kan du jo prøve. mvh DROPS design
08.02.2021 - 14:00Bonjour, Je cherche un modèle simple de cardigan tricot col plutôt rond et taille légèrement cintrée. Laine Air ou autre. Je peine à trouver. Pourriez-vous svp me suggérer 1-2 modèles ou me dire comment je peux réaliser les diminutions et augmentations (nombres et à quelle hauteur) pour un effet légèrement cintré sur d'autres modèles (taille M/L) ? Avec mes remerciements et cordiales salutations Marie-Laure
06.02.2021 - 13:12DROPS Design answered:
Bonjour Marie-Laure, vous trouverez ici tous nos modèles de gilets avec taille ajustée/cintré - tricotés dans une laine du groupe C - Bon tricot!
08.02.2021 - 08:24Hi this is the second drops pattern that i am attempting to knit and i am a bit confused why i am using a circular needle, and after casting on it says purl 1 row from the wrong side, and i have no idea how to do this as after casting on you are then about to commencing on the right side so how do you starting knitting on wrong side, can this jumper be knitted on normal needles not a circular as i dont undertand the circular sense thanks heaps jo.
21.07.2020 - 14:16DROPS Design answered:
Hi Jo, We recommend use of circular needle as there are so many stitches that they can fall off a straight needle. You can work back and forth with circular needle by turning at the end of the row and working back from the wrong side. Happy knitting!
22.07.2020 - 07:20Bonjour, J'aimerais faire ce modèle en coton, mais le convertisseur m'indique 800g de Drops Paris. Mon gilet ne va-t-il pas être trop lourd ? Pensez-vous que c'est possible de le faire avec ce type de fil ? Merci !
21.05.2020 - 19:02DROPS Design answered:
Bonjour Charlotte, il est tout à fait normal que la quantité soit différente car le métrage de Paris est plus court que celui de Air - vous trouverez ici d'autres modèles de gilets et de vestes tricotés en Paris pour vous donner une idée. Bon tricot!
22.05.2020 - 09:50Hello at Garn Studio andthank you for all your lovely free patterns. My question about the weaving memory jacket is this: For the back piece there is no mention of stripe 9 even if it is a part of the textured pattern. So my first question is do I include stripe 9 or not for the back piece? What about the front pieces ? Here the directions talk about "all stripes" - is stripe 9 inlcuded here? Thank you ahead of time!
28.03.2020 - 09:53DROPS Design answered:
Dear Daniela, yes sure, when stripe-8 has been worked, continue with stripe-9 as explained = 2 rows with stocking stitch, ie on back piece, work 1 row casting off the middle stitches for neck, and 1 row back, then knit 1 ridge over all stitches. Happy knitting!
30.03.2020 - 09:24A1. Stickar man en rad räta, en rad aviga och en rad räta först. ( för att få tre rader räta) Sedan en rad aviga. Sedan en rad räta och en rad aviga (för att få två rader räta) och sedan en rad aviga osv
14.01.2020 - 00:43DROPS Design answered:
Hej A.1 stickas så här: första varvet räta, andra varvet aviga, tredje varvet räta, fjärde varet räta, femte varvet räta, sjätte varet aviga, sjunde varvet aviga osv Lycka till!
29.01.2020 - 11:14A1. doit in faire un rang droit, un rang envers et un rang droit pour avoir 3 rangs droit. Et ensuite un rang envers. Et ensuite?
14.01.2020 - 00:39DROPS Design answered:
Bonjour Mme Robert, tricotez comme indiqué dans la légende, 1er rang de A.1 = sur l'endroit, donc R1 = à l'end, R2 = à l'env, R3 = à l'end, R4= à l'end, R5 = à l'end, etc.. Un carré blanc se tricote à l'endroit sur l'endroit et à l'enver sur l'envers (= jersey endroit) et un tiret se tricote en jersey envers = à l'envers sur l'endroit et à l'endroit sur l'envers. Bon tricot!
14.01.2020 - 08:22I am unable to understand where the instructions for the textured patterns are. I see the diagrams, and have the ribbing done, but completely fail to see where your instructions are for which stitches go where. I understand the garter stitch and the front bands, but where are the directions for the patterned boxes? The videos do not address this problem.
10.01.2020 - 21:20DROPS Design answered:
Dear Mrs Colby, you will find some explanations to the diagrams here. Happy knitting!
13.01.2020 - 08:23