DROPS Karisma
DROPS Karisma
100% Wool
from 3.00 $ /50g
Get the yarn to make this pattern from 15.00$.

The yarn cost is calculated from the pattern’s smallest size and the yarn’s cheapest product type. Looking for an even better price? You might find it on the DROPS Deals!

DROPS SS24

Herring Bone Thermals

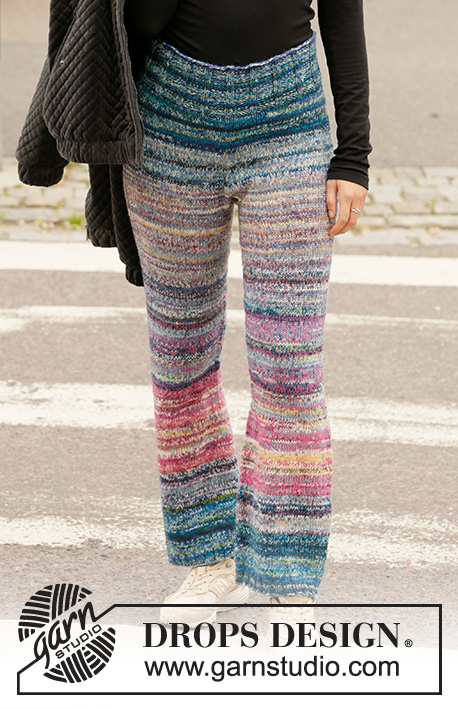
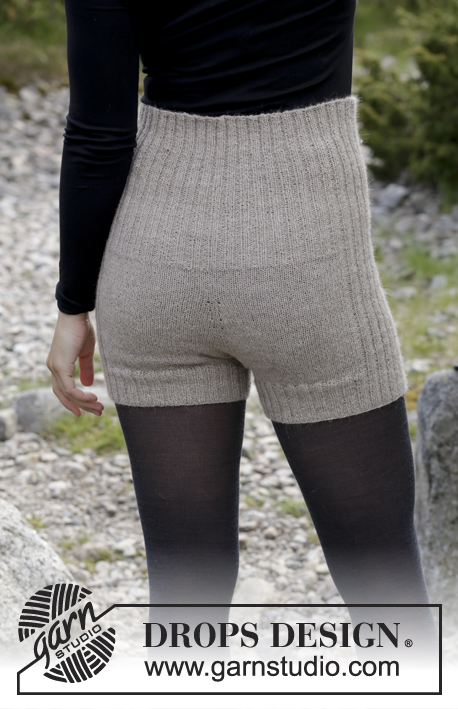
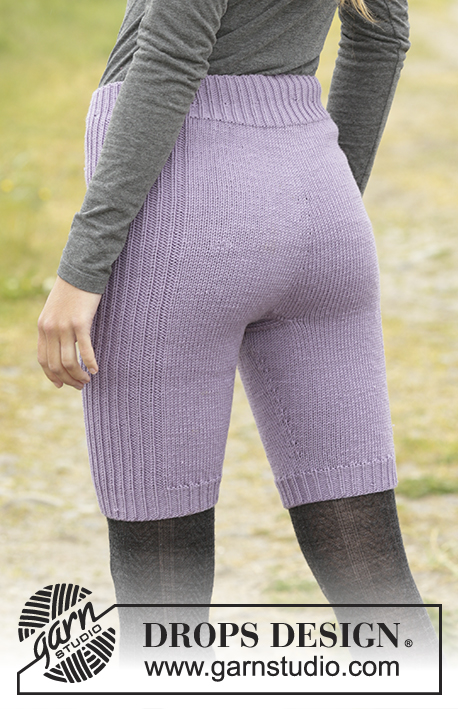
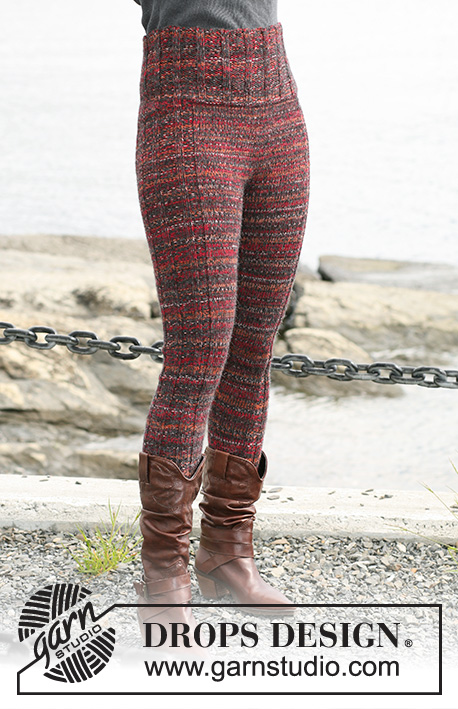
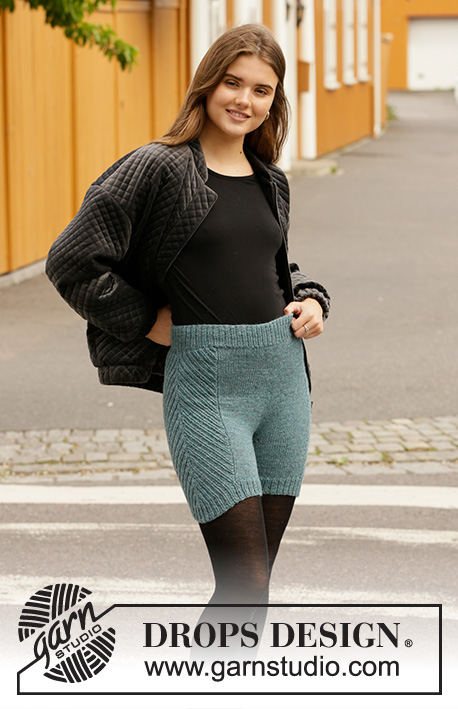
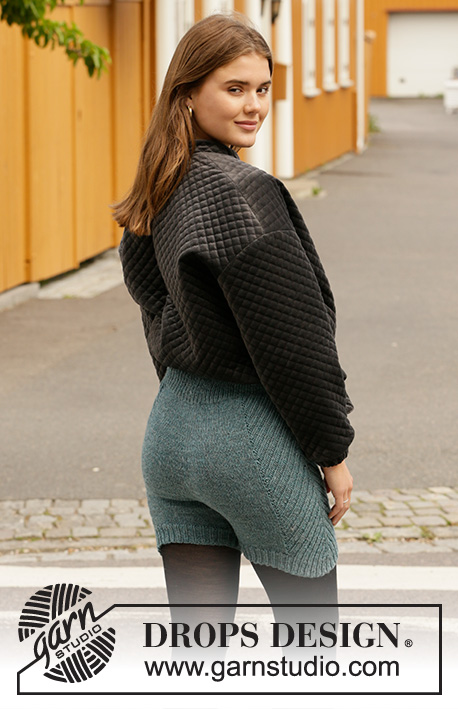
Knitted shorts in DROPS Karisma. Piece is knitted top down with rib. Size: S - XXXL

DROPS 207-43
DROPS design: Pattern u-887
Yarn group B
----------------------------------------------------------

SIZE:
S - M/L - XL – XXL/XXXL
Hip circumference: approx. 92/96 - 104/108 - 114/123 - 123/133 cm = 36¼"/37¾" – 41"/42½" – 45"/48½" – 48½"/52⅜".
NOTE! Because of rib in the sides the shorts are elastic. Pick the size you normally use.

MATERIALS:
DROPS KARISMA from Garnstudio (belongs to yarn group B)
250-300-350-400 g color 50, sea green

KNITTING GAUGE:
22 stitches in width and 30 rows vertically in stockinette stitch = 10 x 10 cm = 4" x 4".

NEEDLES:
DROPS DOUBLE POINTED NEEDLES SIZE 3.5 mm = US 4
DROPS CIRCULAR NEEDLE SIZE 3.5 mm = US 4: Length 40 and 60 or 80 cm = 16" and 24" or 32" for stockinette stitch.
DROPS DOUBLE POINTED NEEDLES SIZE 2.5 mm = US 1,5
DROPS CIRCULAR NEEDLE SIZE 2.5 mm = US 1,5: Length 80 cm = 32" for rib.
Needle size is only a suggestion! If you have too many stitches on 10 cm = 4" switch to larger needles. If you have too few stitches on 10 cm = 4" switch to smaller needles.

-------------------------------------------------------

Alternative Yarn – See how to change yarns here
Yarn Groups A to F – Use the same pattern and change the yarn here
Yarn usage using an alternative yarn – Use our yarn converter here

-------------------------------------------------------

DROPS Karisma
DROPS Karisma
100% Wool
from 3.00 $ /50g
Get the yarn to make this pattern from 15.00$.

The yarn cost is calculated from the pattern’s smallest size and the yarn’s cheapest product type. Looking for an even better price? You might find it on the DROPS Deals!

Pattern instructions

NOTE: This pattern is written in American English. All measurements in charts are in cm. For conversion from inches to cm - click here. There are different terms for crocheting in American and British English. If this pattern includes crochet, click for "crochet terms" here. For this pattern in British English, please click here.
----------------------------------------------------------

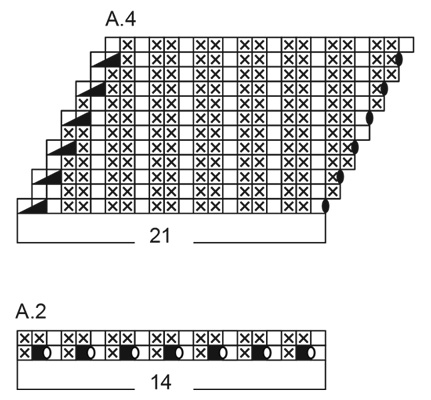
EXPLANATION FOR THE PATTERN:

----------------------------------------------------------

INCREASE TIP:
Increase 1 stitch on each side of every marker as follows: Work until 1 stitch remains before marker, make 1 yarn over, knit 2 (marker is between these 2 stitches), make 1 yarn over. On next round knit yarn overs twisted to avoid holes.

DECREASE TIP (applies to legs):
Decrease on each side of marker as follows:
Decrease as follows before marker: Knit 2 together.
Decrease as follows after marker: Slip 1 stitch knitwise, knit 1, pass slipped stitch over.

PATTERN:
See diagrams A.1 to A.4.

----------------------------------------------------------

START THE PIECE HERE:

----------------------------------------------------------

SHORTS - SHORT OVERVIEW OF THE PIECE:
Worked in the round on circular needles/double pointed needles, top down. Work an elevation at the back:

SHORTS:
Cast on 144-168-192-216 stitches on circular needle size 2.5 mm = US 1,5 with Karisma. Insert 1 marker at beginning of round (= mid back) and 1 marker after 72-84-96-108 stitches (= mid front). Work rib (purl 1/knit 1) in the round for 6 cm = 2⅜". Then work an elevation at the back of rib as follows: Work 9 stitches rib, turn, tighten yarn, work 17 stitches rib, turn, tighten yarn, work 26 stitches rib. Continue like this by working 9 stitches more on every turn until a total of 107-125-143-161 stitches have been worked. Turn one last time to get on the right side of piece. Work until marker mid back = beginning of round.
Switch to circular needle size 3.5 mm = US 4. Continue working in the round over all stitches as follows: Knit 22-28-34-40, A.1 over the next 14 stitches (is increased to 21 stitches), knit 1, A.2 over the next 14 stitches (is increased to 21 stitches), knit 43-55-67-79, A.1 over the next 14 stitches (is increased to 21 stitches), knit 1, A.2 over the next 14 stitches (is increased to 21 stitches), knit 21-27-33-39 = 172-196-220-244 stitches. Then work A.3 over A.1 and A.4 over A.2 - work in stockinette stitch over the remaining stitches.
REMEMBER THE KNITTING GAUGE! When piece measures 12-12-11-14 cm = 4¾"-4¾"-4⅜"-5½" mid front (measured from cast-on edge mid front and down), increase 2 stitches front and back – Read INCREASE TIP. Increase like this every 7th round 7-8-10-10 times in total = 200-228-260-284 stitches, work the increased stitches in stockinette stitch. When piece measures 29-31-34-36 cm = 11⅜"-12¼"-13⅜"-14¼" mid front, bind off the first 6-7-8-8 stitches after marker mid back, work the next 88-100-114-126 stitches and slip them on 1 stitch holder (= leg), work the next 12-14-16-16 stitch and keep them on the needle (= gusset), work the next 88-100-114-126 stitch and slip them on 1 stitch holder (= leg), bind off the remaining 6-7-8-8 stitches, cut the yarn. Then work 11-12-13-14 cm = 4⅜"-4¾"-5⅛"-5½" in stockinette stitch back and forth over the 12-14-16-16 stitches on needle, bind off and sew gusset to the 12-14-16-16 stitches bind off mid back.

RIGHT LEG:
Slip the 88-100-114-126 stitches from stitch holder in the right side on a short circular needle size 3.5 mm = US 4, pick in addition up 25-26-28-31 stitches along one side of the gusset = 113-126-142-157 stitches. Insert 1 marker on the inside of leg (i.e. in the middle of the stitches picked up along gusset) = beginning of round. Then work pattern A.3, knit 1 and A.4 as before over the 43 stitches in the side, work the other stitches in stockinette stitch. When leg measures 4 cm = 1½", decrease 1 stitch on each side of marker - READ DECREASE TIP! Decrease like this every 6th-4th-3th-3th round 3-5-6-7 times in total = 107-116-130-143 stitches (switch to double pointed needles when needed). Work 1 round while increasing 1-1-2-1 stitches evenly over stitches in stockinette stitch = 108-117-132-144 stitches. When leg measures 10-11-11-12 cm = 4"-4⅜"-4⅜"-4¾", knit until beginning of A.3. Switch to double pointed needles size 2.5 mm = US 1,5. Now work rib = knit 1/purl 2 over all stitches, but adjust so that rib fits the entire round, and to work knit over knit and purl over purl over the 43 stitches in the side. When rib measures 4 cm = 1½", bind off with knit over knit and purl over purl. Shorts measures approx. 43-46-49-52 cm = 17"-18"-19¼"-20½" measured from cast-on edge mid front and down.

LEFT LEG:
Slip stitches from the other stitch holder back on needle and work as first leg.

Diagram

All measurements in charts are in cm.

symbols = knit
symbols = purl
symbols = between 2 stitches make 1 yarn over. On next round purl or knit yarn over twisted - see next row in pattern
symbols = between 2 stitches make 1 yarn over. On next round purl yarn over twisted to avoid holes
symbols = purl 2 together
symbols = no stitch, skip this square!
diagram
diagram

Each of our patterns has specific tutorial videos to help you.

Do you have a question? See a list of frequently asked questions (FAQ)

Knitting tension is what determines the final measurements of your work, and is usually measured per 10 x 10 cm. It is provided like so: number of stitches in width x number of rows in height - eg: 19 stitches x 26 rows = 10 x 10 cm.

The knitting tension is very individual; some people knit/crochet loosely while others work tightly. You adjust the knitting tension with the needle size, which is why the suggested needle size only serve as a guide! You need to adjust this (up or down) to ensure that YOUR knitting tension matches the knitting tension provided in the pattern. If you work with a different knitting tension than provided you will have a different yarn consumption, and your work will have different measurements than what the pattern suggests.

The knitting tension also determines which yarns can replace each other. As long as you achieve the same knitting tension you can replace one yarn with another.

See DROPS lesson: How to measure your tension/gauge

See DROPS video: How to make a gauge tension swatch

The required amount of yarn is provided in grams, eg: 450 g. To calculate how many balls you’ll need you first need to know how many grams are in 1 ball (25g, 50g or 100g). This information is available if you click on the individual yarn quality on our pages. Divide the amount required with the amount of each ball. For example, if each ball is 50g (the most common amount), the calculation will be as follows: 450 / 50 = 9 balls.

The important thing when changing from one yarn to another is that the knitting/crochet tension remains the same. This is so that the measurements of the finished piece will be the same as on the sketch provided. It is easier to achieve the same knitting tension using yarns from the same yarn group. It is also possible to work with multiple strands of a thinner yarn to achieve the knitting tension of a thicker one. Please try our yarn converter. We recommend you to always work a test swatch.

Please NOTE: when changing yarn the garment might have a different look and feel to the garment in the photo, due to individual properties and qualities of each yarn.

See DROPS lesson: Can I use a different yarn than the one mentioned in the pattern?

All our yarns are categorised into yarn groups (from A to F) according to thickness and knitting tension – group A contains the thinnest yarns and group F the thickest. This makes it easier for you to find alternative yarns to our patterns, should you wish to switch yarn. All yarns within the same group have a similar knitting tension and can easily replace each other. However, different yarn qualities have different structures and properties which will give the finished work a unique look and feel.

Click here for an overview of the yarns in each yarn group

At the top of all our patterns you’ll find a link to our yarn converter, which is a helpful tool should you wish to use a different yarn than suggested. By filling in the yarn quality you wish to replace, the amount (in your size) and number of strands, the converter will present good alternative yarns with the same knitting tension. Additionally it will tell you how much you’ll require in the new qualities and whether you’ll need to work with multiple strands. Most skeins are 50g (some are 25g or 100g).

If the pattern is worked with multiple colours, every colour will have to be converted separately. Similarly, if the pattern is worked with several strands of different yarns (for example 1 strand Alpaca and 1 strand Kid-Silk) you will have to find alternatives for each, individually.

Click here to see our yarn converter

Since different yarns have different qualities and textures we have chosen to keep the original yarn in our patterns. However, you can easily find options among our available qualities by using our yarn converter, or simply pick a yarn from the same yarn group.

It is possible that some retailers still have discontinued yarns in stock, or that someone has a few skeins at home that they would like to find patterns for.

The yarn converter will provide both alternative yarn as well as required amount in the new quality.

If you think it's hard to decide what size to make, it can be a good idea to measure a garment you own already and like the size of. Then you can pick the size by comparing those measures with the ones available in the pattern's size chart.

You'll find the size chart at the bottom of the pattern.

See DROPS lesson: How to read size chart

The needle size provided in the pattern serves only as a guide, the important thing is to follow the knitting tension. And since knitting tension is very individual, you will have to adjust the needle size to ensure that YOUR tension is the same as in the pattern – maybe you’ll have to adjust 1, or even 2 needle sizes, up or down to achieve the correct tension. For this, we recommend that you work test swatches.

Should you work with a different knitting tension than the one provided, the measurements of the finished garment might deviate from the measurement sketch.

See DROPS lesson: How to measure your tension/gauge

See DROPS video: How to make a gauge tension swatch

Working a garment top-down provides more flexibility and room for personal adjustment. For example it is easier to try the garment on while working, as well as making adjustments to length of yoke and shoulder caps.

The instructions are carefully explaining every step, in the correct order. Diagrams are adjusted to the knitting direction and are worked as usual.

The diagram depicts all rows/rounds, and every stitch seen from the right side. It is read from bottom to top, from right to left. 1 square = 1 stitch.

When working back and forth, every other row is worked from the right side and every other row is worked from the wrong side. When working from the wrong side, the diagram will have to be worked reversed: from left to right, knit stitches are purled, purl stitches are knit etc.

When working in the round every round is worked from the right side and the diagram are worked from right to left on all rounds.

See DROPS lesson: How to read knitting diagrams

The diagram depicts all rows/rounds, and every stitch seen from the right side. It is worked from bottom to top, from right to left.

When working back and forth every other row is worked from the right side: from right to left and every other row is worked from the wrong side: from left to right.

When working in the round, every row in the diagram are worked from the right side, from right to left.

When working a circular diagram you start in the middle and work your way outwards, counter clockwise, row by row.

The rows usually start with a given number of chain stitches (equivalent to the height of the following stitch), this will either be depicted in the diagram or explained in the pattern.

See DROPS lesson: How to read crochet diagrams

Instructions for working several diagrams after each other on the same row/round, will often be written like so: “work A.1, A.2, A.3 a total of 0-0-2-3-4 times". This means you work A.1 once, then A.2 is worked once, and A.3 is repeated (in width) the number of times provided for your size – in this case like so: S = 0 times, M = 0 times, L=2 times, XL= 3 times and XXL = 4 times.

The diagrams are worked as usual: begin with the first row in A.1, then work the first row in A.2 etc.

See DROPS lesson: How to read knitting diagrams

See DROPS lesson: How to read crochet diagrams

The total width of the garment (from wrist-to-wrist) will be larger in the larger sizes, despite the actual sleeves being shorter. The larger sizes have longer sleeve caps and wider shoulders, so there will be a good fit in all sizes.

The measurement sketch/schematic drawing provides information regarding the full length of the garment. If it’s a jumper or a jacket the length is measured from the highest point on the shoulder (usually closest to the neckline), and straight down to the bottom of the garment. It is NOT measured from the tip of shoulder. Similarly, the length of yoke is measured from the highest point on the shoulder and down to where yoke is split into body and sleeves.

See DROPS lesson: How to read a schematic drawing

Diagrams are often repeated on the round or in height. 1 repeat is the diagram the way it appears in the pattern. If it says to work 5 repeats of A.1 in the round, then you work A.1 a total of 5 times after/next to each other in the round. If it says to work 2 repeats of A.1 vertically/in height you work the entire diagram once, then begin again at the start and work the entire diagram one more time.

Chain stitches are slightly narrower than other stitches and to avoid working the cast-on edge too tight, we simply chain more stitches to begin with. The stitch count will be adjusted on the following row to fit the pattern and measurement sketch.

The rib edge is more elastic and will contract slightly compared to, for example, stocking stitch. By increasing before the rib edge, you avoid a visible difference in width between the rib edge and the rest of the body.

It’s very easy to cast off too tightly, and by making yarn overs while casting off (and simultaneously casting these off) you avoid a too tight cast off edge.

See DROPS video: How to bind off with yarn overs (yo)

To achieve an even increase (or decrease) you can increase on, for example: every 3rd and 4th row alternately, like so: work 2 rows and increase on the 3rd row, work 3 rows and increase on the 4th. Repeat this until the increase is complete.

See DROPS lesson: Increase or decrease 1 st on every 3rd and 4th row alternately

Should you prefer to work in the round instead of back and forth, you may of course adjust the pattern. You’ll need to add steeks mid-front (usually 5 stitches), and follow the instructions. When you would normally turn and work from the wrong side, simply work across the steek and continue in the round. At the end you’ll cut the piece open, pick up stitches to work bands, and cover the cut edges.

See DROPS video: How to knit steeks and cut open

Should you prefer to work back and forth instead of in the round, you may of course adjust the pattern so you work the pieces separately and then assemble them at the end. Divide the stitches for the body in 2, add 1 edge stitch in each side (for sewing) and work the front and back pieces separately.

See DROPS lesson: Can I adapt a pattern for circular needles into straight needles?

Pattern repeats can vary slightly in the different sizes, in order to get the correct proportions. If you’re not working the exact same size as the garment in the photo, yours might deviate slightly. This has been carefully developed and adjusted so that the complete impression of the garment is the same in all sizes.

Make sure to follow instructions and diagrams for your size!

If you have found a pattern you like which is available in women’s size it’s not very difficult to convert it to men’s size. The biggest difference will be the length of sleeves and body. Start working on the women size that you think would fit across the chest. The additional length will be worked right before you cast off for the armhole/sleeve cap. If the pattern is worked top-down you can add the length right after the armhole or before the first decrease on sleeve.

Regarding additional yarn amount, this will depend on how much length you add, but it is better with a skein too many than too few.

All yarns will have excess fibres (from production) that might come off as lint or shedding. Brushed yarns (ie hairier yarns) have more of these loose, excess fibres, causing more shedding.

Shedding also depends on what is worn under or over the garment, and whether this pulls at the yarn fibres. It’s therefore not possible to guarantee that there will be no shedding

Below are some tips on how to get the best result when working with hairier yarns:

1. When the garment is finished (before you wash it) shake it vigorously so the looser hairs come off. NOTE: do NOT use a lint roller, brush or any method that pulls at the yarn.

2. Place the garment in a plastic bag and put it in your freezer - the temperature will cause the fibres to become less attached to each other, and excess fibres will come off easier.

3. Leave in the freezer for a few hours before taking it out and shaking it again.

4. Wash the garment according to the instructions on the yarn label.

Pilling is a natural process that happens to even the most exclusive of fibers. It's a natural sign of wear and tear that is hard to avoid, and that is most visible in high friction areas of your garment like a sweater's arms and cuffs.

You can make your garment look as new by removing the pilling, using a fabric comb or a pill/lint remover.

Still can't find the answer you need? Then scroll down and leave your question so one of our experts can try to help you. This will be done normally within 5 to 10 working days.
In the meantime, you can read the questions and answers that others have left to this pattern or join the DROPS Workshop on Facebook to get help from fellow knitters/crocheters!

You might also like...

Post a comment to pattern DROPS 207-43

We would love to hear what you have to say about this pattern!

If you want to leave a question, please make sure you select the correct category in the form below, to speed up the answering process. Required fields are marked *.

Comments / Questions (29)

country flag Sari Hautamäki wrote:

Ruutupiirroksessa ei ole kerrottu, mikä tuo yksi merkki on A1 ja a2:n alarivillä. Musta on tyhjä, mutta siinä on vielä soikio?

01.09.2020 - 05:31

DROPS Design answered:

Tämä soikio on langankierto, joka neulotaan seuraavalla kerroksella kiertäen nurin.

07.09.2020 - 17:15

country flag Anneli wrote:

Har strikket fortøyningen og tror det blir bra selvom jeg endte på rettsiden og med 159 masker? Er det feil i oppskriften?når jeg nå begynner med A1- skal jeg da nederst til høyre som andre mønstre?

24.06.2020 - 16:49

DROPS Design answered:

Hei Anneli. Hvilken str strikker du? Om du strikker str XXL/XXXL / lagt opp 216 masker, vil du etter 18 vendinger (der det snus etter 9 masker), strikke 161 masker. Så snus det en siste gang for å komme på rettsiden og det strikkes til merket bak. Når du begynner på A.1, begynner du nederst til høyre. God Fornøyelse!

29.06.2020 - 08:44

country flag Lens wrote:

Ich würde diese Hose gerne nachstricken um etwas warmes im Winter auf dem Fahrrad zu haben. Mein Hüftumfang ist allerdings 111cm also genau zwischen M/L und XL. Die Hose sollte schon eng sitzen. Sind die Bündchen so elastisch dass auch die kleine Größe passen würde? Vielen Dank für die Hilfe und die vielen tollen Anleitungen

24.11.2019 - 12:40

DROPS Design answered:

Liebe Frau Lens, ich vermute kleinere Größe sollte passen, sonnst würde die größere etwas zu breit. Viel Spaß beim stricken!
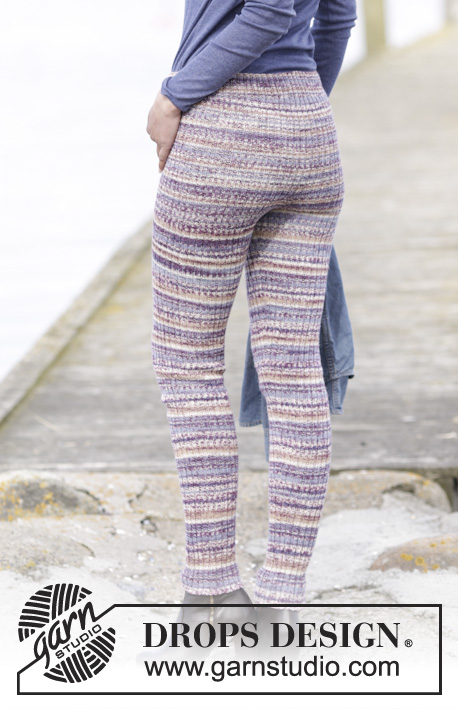
25.11.2019 - 09:55

country flag Emma Falch wrote:

Jeg ønsker meg denne som bukse, har dere noen tips til hvordan jeg kan felle videre nedover beina?

03.11.2019 - 21:46

DROPS Design answered:

Hej Emma, følg gerne indtagningerne fra nogle af vores andre bukser: Bukser

05.11.2019 - 09:03

country flag Martina wrote:

Ui, wie toll! Auf diese Anleitung habe ich lange gewartet. Ich will mir so ein Teil schon seit Jahren stricken - im Winter ist es hier nämlich manchmal arsch-kalt, könnte man sagen. Ich muss immer morgens raus, mit dem Fahrrad. Ich freu mich wie ein Schneekönig, dass ich mir diese warme Hose stricken kann.

22.10.2019 - 19:40

country flag Lisa wrote:

Ska man sticka båda varven i A1 och A2 innan man börjar sticka A3 och A4? Eller stickar man ett varv A1/A2 och sedan 1 varv A3/A4, sedan ett till varv med A1/A2, osv?

21.10.2019 - 20:32

DROPS Design answered:

Hej. Du stickar båda varven i A1 och A2 innan du börjar sticka A3 och A4. Lycka till!

22.10.2019 - 07:19

country flag Marie Godbold wrote:

Love those pants, when yaj going do wedding 👗am in los Angeles, calif 90059

05.09.2019 - 20:39

country flag Marie Godbold wrote:

Love those pants, when yaj going do wedding 👗

05.09.2019 - 20:38

country flag Silvana Cruz wrote:

Necesit el patrn cn medidas

03.09.2019 - 04:50

DROPS Design answered:

Hola Silvana. Tu sugerencia se ha enviado al departamento de diseño.

08.09.2019 - 13:17

country flag Karin wrote:

I materiallistan står det Karisma men när man ska lägga upp står det Merino Extra Fine. Är de utbytbara eller vilket garn ska jag använda Snygga är de

31.08.2019 - 16:39

DROPS Design answered:

Hei Karin. Det skal være DROPS Karisma. Man kan også bruke DROPS Merino Extra Fine, men for å få en bedre formstabiliteten til en shorts, er Karisma et bedre valg. mvh Drops design

02.09.2019 - 13:27