
Popular categories
Looking for a yarn?


|
||||||||||
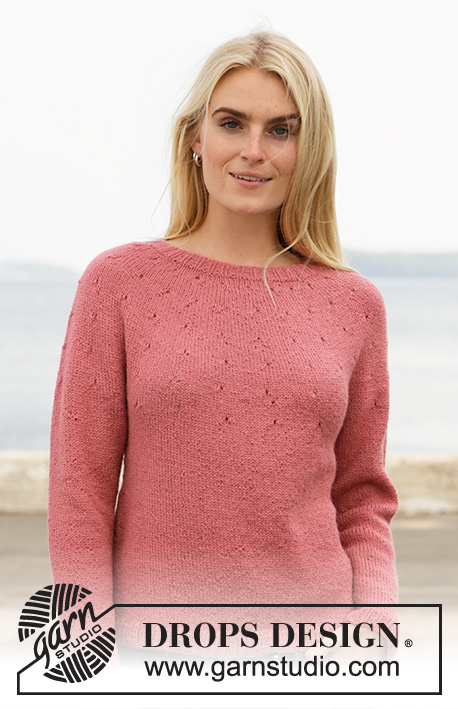
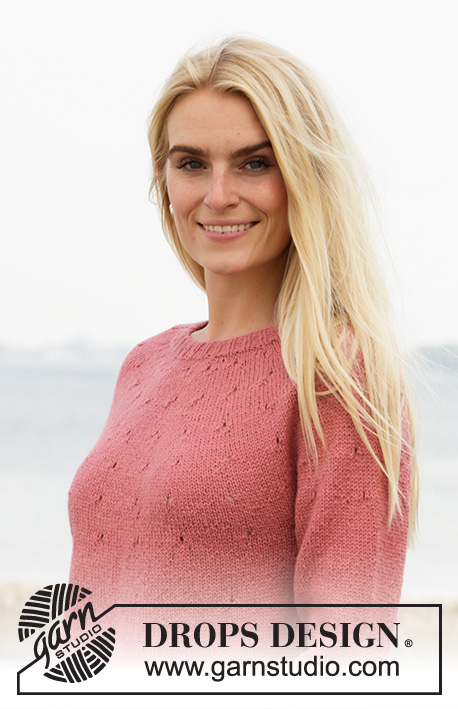
Strawberry Rain |
||||||||||
 |
 |
|||||||||
Knitted jumper with round yoke in DROPS Puna. Piece is knitted top down with lace pattern. Size: S - XXXL
DROPS 206-1 |
||||||||||
|
---------------------------------------------------------- EXPLANATION FOR THE PATTERN: ---------------------------------------------------------- PATTERN: See diagrams A.1 to A.3. Choose diagram for your size (applies to A.2/A.3). INCREASE TIP-1 (evenly): To calculate how to increase evenly, use the total number of stitches on row (e.g. 99 stitches) and divide stitches by number of increases to be done (e.g. 11) = 9. In this example increase by making 1 yarn over after every 9th stitch. On next round knit yarn overs twisted to avoid holes. INCREASE TIP-2 (applies to sides of body): Work until 2 stitches remain before marker thread, 1 yarn over, knit 4 (marker thread is in the middle of these stitches), 1 yarn over. On next round knit yarn overs twisted to avoid holes. Then work the new stitches in stocking stitch. DECREASE TIP (applies to sleeves): Decrease 1 stitch on each side of marker thread as follows: Work until 3 stitches remain before marker thread and knit 2 together, knit 2 (marker thread is between these stitches), slip 1 stitch knitwise, knit 1, pass slipped stitch over stitch worked. ---------------------------------------------------------- START THE PIECE HERE: ---------------------------------------------------------- JUMPER - SHORT OVERVIEW OF THE PIECE: Worked in the round on circular needle from mid back, work top down. Work sleeves in the round on double pointed needles/a short circular needle. NECK EDGE: Cast on 99-102-105-108-114-123 stitches on circular needle size 3 mm with Puna. Knit 1 round. Then work rib = knit 1/purl 2 until piece measures 3 cm. Knit 1 round while increasing 11-13-20-22-21-22 stitches evenly - read INCREASE TIP-1 = 110-115-125-130-135-145 stitches. Insert a marker thread here. NOW MEASURE PIECE FROM HERE! YOKE: Switch to circular needle size 4 mm. Now work pattern A.1 (= 5 stitches) 22-23-25-26-27-29 repetitions on round. REMEMBER THE KNITTING TENSION! Continue pattern in the round like this. When entire A.1 has been worked vertically, there are 286-299-325-338-351-377 stitches on the round. Now work in the different sizes as follows: SIZE S, M, L: Work pattern A.2 over each repetition of A.1. When it has been worked up to arrow for your size, there are 286-322-350 stitches on round. Size XL: Work * A.2, A.3 *, work from *-* the entire round 13 times in total. When it has been worked up to arrow for your size, there are 377 stitches on round. Size XXL and XXXL: Work pattern A.3 over each repetition of A.1. When it has been worked up to arrow for your size, there are 405-435 stitches on round. All sizes: Continue in the round with stocking stitch until piece measures 21-23-25-27-29-31 cm from marker thread, AT THE SAME TIME decrease 1 stitch on last round worked in XL, XXL and XXXL = 286-322-350-376-404-434 stitches. Work last round on yoke as follows: Work 42-46-50-55-61-66 stitches (= half back piece), slip the next 59-68-74-78-80-85 stitches on a stitch holder for sleeve, cast on 8-8-8-10-10-12 new stitches on row (= in the side under sleeve), work 84-93-101-110-122-132 stitches (= front piece), slip the next 59-68-74-78-80-85 stitches on a stitch holder for sleeve, cast on 8-8-8-10-10-12 new stitches on row (= in the side under sleeve) and work the remaining 42-47-51-55-61-66 stitches as before (= half back piece). Now finish body and sleeves separately. NOW MEASURE PIECE FROM HERE! BODY: There are now 184-202-218-240-264-288 stitches for body. Insert a marker thread in each side of piece, in the middle of the new stitches cast-on in the side under the sleeves (= 4-4-4-5-5-6 new stitches on each side of marker thread). Work in stocking stitch in the round. When piece measures 4 cm, increase 1 stitch on each side of marker thread in each side - read INCREASE TIP-2 (= 4 stitches increased on round). Increase like this approx. every 5 cm 4 times in total = 200-218-234-256-280-304 stitches. When piece measures 24 cm, increase 31-34-36-38-41-47 stitches evenly = 231-252-270-294-321-351 stitches. Switch to circular needle size 3 mm. Work rib (knit 1/purl 2) for 3 cm. Cast off stitches with knit over knit and purl over purl. Jumper measures approx. 52-54-56-58-60-62 cm from shoulder and down. SLEEVE: Slip the 59-68-74-78-80-85 stitches from stitch holder in one side of piece back on a short circular needle size 4 mm and pick in addition up 1 stitch in each of the 8-8-8-10-10-12 new stitches cast on under sleeve = 67-76-82-88-90-97 stitches. Insert a marker thread in the middle of the new stitches under sleeve (= 4-4-4-5-5-6 new stitches on each side of marker thread). Work in stocking stitch in the round. When piece measures 4 cm, decrease 1 stitch on each side of marker thread under sleeve - read DECREASE TIP. Decrease like this approx. every 4-2½-2-2-1½-1½ cm 9-13-15-17-17-19 times in total = 49-50-52-54-56-59 stitches. When sleeve measures 40-39-37-36-34-32 cm, increase 5-7-8-9-9-9 stitches evenly = 54-57-60-63-65-68 stitches. Switch to double pointed needles size 3 mm. Work rib (knit 1/purl 2) for 3 cm. Entire sleeve measures approx. 43-42-40-39-37-35 cm from division. Cast off stitches with knit over knit and purl over purl. Work the other sleeve the same way. |
||||||||||
Diagram explanations |
||||||||||
|
||||||||||

|
||||||||||

|
||||||||||

|
||||||||||
|
Have you made this or any other of our designs? Tag your pictures in social media with #dropsdesign so we can see them! Do you need help with this pattern?You'll find tutorial videos, a Comments/Questions area and more by visiting the pattern on garnstudio.com. © 1982-2024 DROPS Design A/S. We reserve all rights. This document, including all its sub-sections, has copyrights. Read more about what you can do with our patterns at the bottom of each pattern on our site. |
||||||||||


With over 40 years in knitting and crochet design, DROPS Design offers one of the most extensive collections of free patterns on the internet - translated to 17 languages. As of today we count 304 catalogues and 11415 patterns - 11415 of which are translated into English (UK/cm).
We work hard to bring you the best knitting and crochet have to offer, inspiration and advice as well as great quality yarns at incredible prices! Would you like to use our patterns for other than personal use? You can read what you are allowed to do in the Copyright text at the bottom of all our patterns. Happy crafting!
Comments / Questions (36)
Thank you for the previous reply, however I was looking for jumper z-862 from the Autumn/ Winter 2019 which I can’t find... I am unable to attach a photo, it’s a lilac v neck jumper made from Alpaca.
27.01.2020 - 04:59DROPS Design answered:
Dear Diana, sorry it looks like this pattern wasn't include in the collection. Hope you'll find another pattern you'll love. Happy knitting!
27.01.2020 - 10:04When will model z-862 be released please?
26.01.2020 - 08:50DROPS Design answered:
Dear Diana. Here's the link to the English pattern: https://www.garnstudio.com/pattern.php?id=9232&cid=19. Happy knitting!
26.01.2020 - 20:32Ora con le giuste ripetizioni mi ritrovo con le 286 maglie che corrispondono alla mia taglia la s ma come altezza mi ritrovo con 30 cm anziché 21 come descritto può essere forse che dipenda all'altezza della modella che è 1 e 70 mentre io sono 1 e 60 grazie per chi risponderà
07.01.2020 - 20:22DROPS Design answered:
Buongiorno Alma. Verifichi che il suo campione in verticale corrisponda a quello indicato nelle spiegazioni e di aver lavorato correttamente i diagrammi. Buon lavoro!
12.01.2020 - 08:41Chiedo scusa se pongo nuovamente una domanda ma probabilmente l'errore sta nel non aver capito le 22 ripetizioni all'inizio delle 5 maglie dello sprone cioè non capisco cosa significa 22 ripetizioni sul giro perché per me i primi giri significano tutti a dritto grazie e scusate ancora
03.01.2020 - 15:40DROPS Design answered:
Buongiorno Alma, il motivo A.1 sullo sprone è formato da 5 maglie, e viene ripetuto 22 volte sul giro. I primi giri sono tutti a diritto, poi deve seguire il diagramma. Dal momento che si parte con 5 maglie e si arriva con 13 maglie alla fine di A.1, forse è opportuno inserire un segnapunti alla fine di ogni ripetizione del motivo, in modo da seguire correttamente la lavorazione. Buon lavoro!
04.01.2020 - 11:10Buongiorno sono arrivata a lavorare lo schema A2 su taglia s ma mi ritrovo con 200 maglie anziché 286 come descritto non ho capito bene se devo iniziare degli aumenti anche sullo schema A2 perché non sono evidenziati grazie
03.01.2020 - 07:36DROPS Design answered:
Buongiorno Alma. Dovrebbe avere 286 maglie alla fine del diagramma A1. Quando lavora il diagramma A1, aumenta in tutto 8 maglie in ogni ripetizione del diagramma. In questo modo le maglie di ogni ripetizione passano da 5 a 13. Lavora A1 22 volte sulle maglie del giro, quindi 22 volte x 13 maglie = 286 maglie. Buon lavoro!
03.01.2020 - 10:10Non riesco a capire come proseguire con il diagramma A2 su ogni ripetizione di A1 sulla taglia s grazie
20.12.2019 - 18:49DROPS Design answered:
Buonasera Alma, deve semplicemente iniziare a lavorare A.2 sulle maglie su cui prima ha lavorato A.1. Buon lavoro!
20.12.2019 - 20:53Buonasera, sto eseguendo il modello x la taglia xl, sono arrivata a 338 punti ma non capisco come eseguire i diagrammi A2 e A3 x arrivare a 377. Ho 26 gruppi da 13 maglie , grazie
19.12.2019 - 22:38DROPS Design answered:
Buonasera Maria, quando inizia a lavorare *A.2-A.3* per tutto il giro ha 13+13 maglie x 26 volte = 338. All'altezza della freccia per la taglia XL, A.2 è formato da 14 maglie e A.3 da 15, per cui avrà 29 maglie x 13 ripetizioni = 377 maglie. Buon lavoro!
20.12.2019 - 20:59Hej . Jeg strikker str xl, og er nået til mønster A2 og A3, , forstår jeg det rigtig, at der skak være 26 masker imellem omslag , efter 10 pinde, men hvor mange skal der være ved den sidste mønster pind , den der er i A3, og hvor mange pinde skal der være imellem mønster pind i A2 og A3 der er 12 pinde i mønster A2 men kun 10 i mønster A3, Jeg regner med at , for str Xl skal mønster A2 og A3 lægges sammen Med venlig hilsen Birthe Erichsen
15.12.2019 - 17:31DROPS Design answered:
Hej Birthe, du strikker skiftevis A.2 og A.3 på omgangen og tager ud på 10.omgang i begge diagrammer, og du tager ud på 21.omgang i A.3. Sæt gerne et mærke imellem diagrammerne, så er det lettere at holde rede på udtagningerne. God fornøjelse!
17.12.2019 - 13:46I am trying to understand how to read the diagram A1. I understand that when we make the holes in yoke first time we knit 5 stitches between the holes but, when we make the holes the third time how many stitches are between the holes? 4 stitches? I feel like on the picture there are much more stitches between the holes. thank you
22.11.2019 - 20:57DROPS Design answered:
Dear Lana, there are two kinds of yarn overs in A.1: the blank ones which will be worked in front of loop to create holes for the lace pattern and the black ones which are worked twisted to avoid holes. On row 5 you make yarn overs for lace pattern = 6 sts in each A.1. On row 7 you work yarn overs twisted = 7 sts in each A.1. On 3rd yarn over (= lace) there are 8 sts in each A.1, on 4th yarn over (worked twisted), there are 9 sts in each A.1 and so on, so that there are 13 stitches in each A.1 when all increases have been worked and only 5 yarn overs that create holes. Happy knitting!
25.11.2019 - 08:14Bonjour Je ne comprends pas l'explication suivante. J'ai tricoté A2 et j'ai 364 mailles. Si je tricote A3 je vais augmenter de 26 mailles et non de 13 mailles. Soit 390 mailles. Pourquoi dites-vous Tricoter * A.2, A.3 *, répéter de *-* 13 fois au total tout le tour. Taille XL: Tricoter * A.2, A.3 *, répéter de *-* 13 fois au total tout le tour. Quand on a tricoté jusqu'à la flèche appropriée à la taille, on a 377 mailles.
05.11.2019 - 08:00DROPS Design answered:
Bonjour Fanny, en taille XL, quand on a tricoté 1 fois A.1, on doit avoir 338 m (26 x13 m), on tricote ensuite (A.2 = 13 m, A.3 = 13 m) et on répète de (à) tout le tour, quand les diagrammes sont terminés, on a (A.2 = 14 m, A.3 = 15 m) soit 29 m x 13=377 m. Bon tricot!
05.11.2019 - 09:13