
Popular categories
Looking for a yarn?


|
|
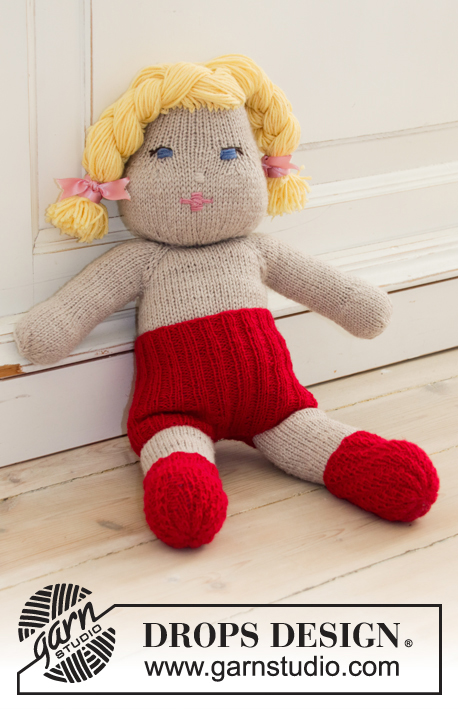
Cora |
|
 |
 |
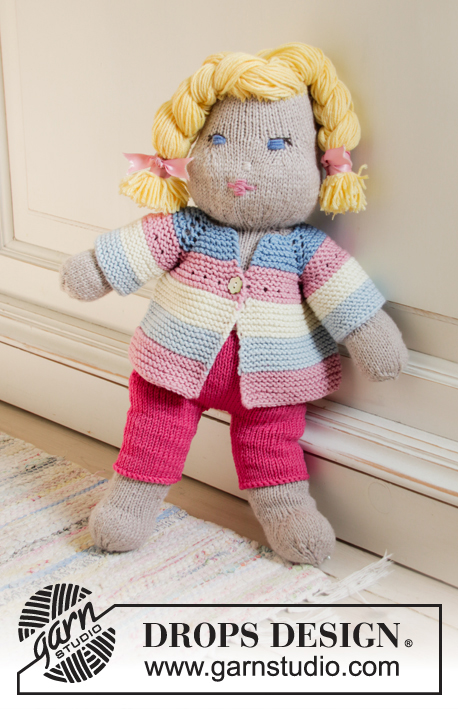
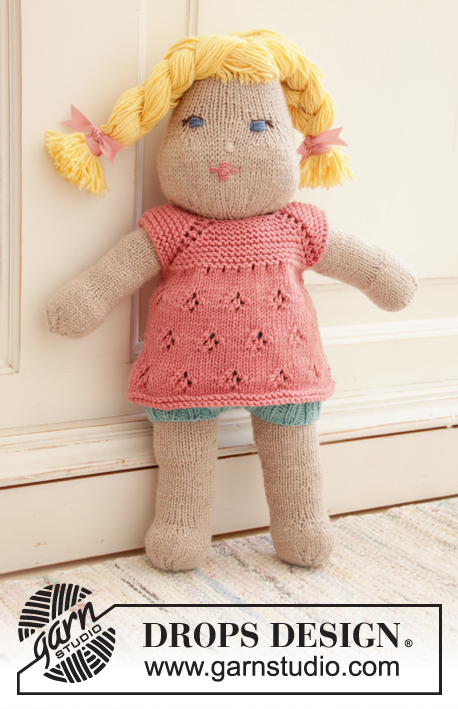
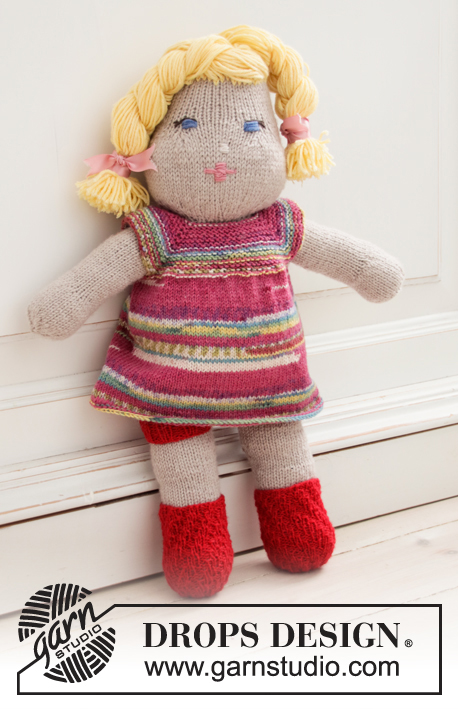
Knitted doll with short pants and tube socks. The doll is worked top down in stockinette stitch with 2 strands DROPS BabyMerino or 1 strand DROPS Big Merino, and DROPS Cotton Merino. Short pants and tube socks are worked in rib with 1 strand DROPS BabyMerino.
DROPS Children 35-12 |
|
|
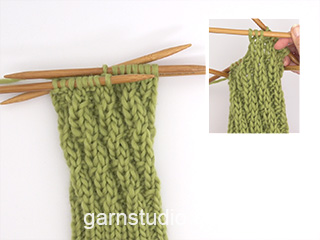
---------------------------------------------------------- EXPLANATION FOR THE PATTERN: ---------------------------------------------------------- KNITTING TIP: For an even hair colour the first 10 to 12 rounds on top of head are worked with the hair color – or work until desired length. DECREASE TIP: Decrease 1 stitch as follows: Knit 2 together (= 1 stitch decreased). INCREASE TIP: Increase 1 stitch by picking up 1 stitch from the row below as follows: Insert left needle into stitch from wrong side and slip stitch on to left needle, knit the stitch twisted (= in back loop) (= 1 stitch increased). INCREASE TIP-1: Work until 1 stitch remains before stitch with marker, increase 1 stitch, knit 3 (middle stitch = stitch with marker), increase 1 stitch (= 2 stitches increased). INCREASE TIP-2: Work until 1 stitch remains before marker thread, 1 yarn over (= 1 stitch increased), knit 2 (marker thread is in the middle of these stitches), 1 yarn over. Increase like this at both marker threads (= 4 stitches increased in total). Knit yarn overs twisted on next round to avoid holes. ---------------------------------------------------------- START THE PIECE HERE: ---------------------------------------------------------- DOLL - SHORT OVERVIEW OF THE PIECE: Work doll in the round in stockinette stitch, top down as follows: Gradually fill it with cotton wool as the parts are finished. Begin mid on top of head, increase out for head and decrease for neck, then increase for body and arms. Slip stitches for arms on stitch holders and continue body in the round. Then the divide the piece for legs. Finish leg separately. Slip stitches from stitch holders back on needles and knit the arms separately. HEAD: Cast on 8 stitches on 3 double pointed needles size 3.5 mm = US 4 with 2 strands vanilla Cotton Merino – read KNITTING TIP. Knit 1 round. Then increase like this (work with 4 double pointed needles when there are enough stitches). Round starts mid back. ROUND 1: * Knit 1, 1 yarn over *, work from *-* over all stitches = 16 stitches. ROUND 2: Knit all stitches, work yarn overs from previous round twisted to avoid holes. ROUND 3: * Knit 2, 1 yarn over *, work from *-* over all stitches = 24 stitches. ROUND 4: Knit all stitches, work yarn overs from previous round twisted to avoid holes. ROUND 5: * Knit 3, 1 yarn over *, work from *-* over all stitches = 32 stitches. ROUND 6: Knit all stitches, work yarn overs from previous round twisted to avoid holes. ROUND 7: * Knit 4, 1 yarn over *, work from *-* over all stitches = 40 stitches. REMEMBER THE KNITTING GAUGE! ROUND 8: Knit all stitches, work yarn overs from previous round twisted to avoid holes. ROUND 9: * Knit 5, 1 yarn over *, work from *-* over all stitches = 48 stitches. ROUND 10: Knit all stitches, work yarn overs from previous round twisted to avoid holes. Knit over all stitches until piece measures 6 cm = 2⅜". AT THE SAME TIME: Change to color light beige, after the first 10 to 12 rounds. Then work as follows: ROUND 1: Now increase 10 stitches evenly as follows: Work 1 stitch, 1 yarn over, work * 5 stitches, 1 yarn over *, work from *-* 8 times in total, work 4 stitches, 1 yarn over, work the last 3 stitches = 58 stitches. Knit yarn overs twisted on next round to avoid holes. Now increase for cheeks in each side as follows: ROUND 2: Knit 22, increase 1 stitch – read INCREASE TIP, knit 1, increase 1 stitch, knit 12 (= face), increase 1 stitch, knit 1, increase 1 stitch and finish with knit 22 = 62 stitches. ROUND 3: Knit all stitches. ROUND 4: Knit 22, * increase 1 stitch, knit 1, increase 1 stitch, knit 1, increase 1 stitch, knit 1, increase 1 stitch *, knit 12, work from *-* 1 more time and finish with knit 22 = 70 stitches. ROUND 5: Knit all stitches. ROUND 6: Knit 22, * increase 1 stitch, knit 1, increase 1 stitch, knit 5, increase 1 stitch, knit 1, increase 1 stitch *, knit 12, work from *-* 1 more time and finish with knit 22 = 78 stitches. Knit over all stitches until piece measures 12 cm = 4¾". Now decrease for neck as follows: ROUND 1: * Knit 2 together (= 1 stitch decreased), knit 4, knit 2 together (= 1 stitch decreased), knit 3 *, work from *-* until 1 stitch remains and finish with knit 1 = 64 stitches. ROUND 2: Insert 16 markers in the piece as follows: * Knit 4, insert 1 marker *, repeat from *-* the entire round. Then decrease 1 stitch after 1st, 3rd, 5th, 7th, 9th, 11th, 13th and 15th marker (= 8 stitches decreased) – read DECREASE TIP! On next round decrease 1 stitch after 2nd, 4th, 6th, 8th, 10th, 12th, 14th and 16th marker (= 8 stitches decreased). Continue decrease like this, i.e. decrease alternately on every other marker, 5 times in total = 24 stitches. Knit 2 rounds. The head is now done. BODY: = 24 stitches. Insert 4 markers as follows: Knit 3 (= half back piece), knit 1 and insert 1 marker in this stitch, knit 4, knit 1 and insert 1 marker in this stitch (= left arm), knit 6 (= front piece), knit 1 and insert 1 marker in this stitch, knit 4, knit 1 and insert 1 marker in this stitch (= right arm) and finish with knit 3 (= half back piece). On next round increase for raglan on each side of stitches with markers as follows: Increase 1 stitch on each side of stitch with marker – read INCREASE TIP-1 (= 2 stitches increase at every marker = 8 stitches increased in total on round). Increase like this on every round 6 times in total, then on every other round 3 times in total = 96 stitches. Now divide piece for body and arms as follows: Knit 12 (= half back piece), slip the next 24 stitches on a stitch holder for arm and cast on 2 stitches under arm, knit 24 stitches (= front piece), slip the next 24 stitches on a stitch holder for arm and cast on 2 stitches under arm, knit the last 12 stitches (= half back piece) = 52 stitches. Insert 1 marker thread between the 2 new stitches under each arm (= 26 stitches on each side). On next round increase 2 stitches under each arm – read INCREASE TIP-2. Increase like this 2 times in total = 60 stitches. Knit until piece measures 6 cm = 2⅜" from where stitches were cast on under each arm, now increase 1 stitch on each side of each marker thread (= 4 stitches increased). Increase like this every cm = ⅜" 4 times in total = 76 stitches. When body measures 12 cm = 4¾", divide the piece in 2 legs as follows: Bind off 2 stitches for crotch, knit the next 34 stitches, bind off the next 4 stitches for crotch, knit the next 34 stitches, bind off the last 2 stitches for crotch = 34 stitches for each leg. Cut and fasten the yarn. RIGHT LEG: = 34 stitches. Begin round inside the leg and work in the round. When leg measures 4 cm = 1½" from the division from body, decrease inside the leg (i.e. at beginning and end of round) as follows: Knit 1, knit 2 together, work until 3 stitches remain, slip next stitch as if to knit, knit 1, pass slipped stitch over stitch knitted, knit 1 (= 2 stitches decreased). Decrease like this every 2 cm = ¾" 3 times in total = 28 stitches. Knit until piece measures approx. 11 cm = 4⅜" from division from body. Now increase stitches for foot as follows: Knit 19 and insert 1 marker on needle here, * 1 yarn over, knit 1 *, work from *-* 4 times in total, insert 1 marker here (there are 8 stitches between markers) and finish with knit 5 = 32 stitches. Knit 1 round, work yarn overs twisted. Work next round as follows: Knit 19 (until marker), * 1 yarn over, knit 2 *, work from *-* 4 times in total (there are 12 stitches between markers) and finish with knit 5 = 36 stitches. Continue to work without increase until leg measures 14 cm = 5½". Now decrease stitches at the front of foot as follows: Knit 19 (until marker), * knit 2 together, knit 1 *, work from *-* 4 times in total (there are 8 stitches between markers) and finish with knit 5 = 32 stitches. Knit 1 round. Knit 19 (until marker), * knit 2 together *, work from *-* 4 times in total (there are 4 stitches between markers) and knit 5 = 28 stitches. Knit 1 round and remove the markers. Knit 18, * knit 2 together *, work from *-* 3 times in total and work the rest of round = 25 stitches. Knit 1 round. Insert 1 marker in the 20th stitch on round = mid front on foot. Now decrease on each side of this stitch as follows: Work until 2 stitches before stitch with marker, knit 2 together, knit 1 (= stitch with marker), knit 2 together and work the rest of round = 23 stitches. Knit 1 round. Repeat decrease on each side of stitch with marker 1 more time = 21 stitches. Knit 1 round. On next round knit stitches together 2 by 2 until 1 stitch remains, knit this stitch = 11 stitches. Knit 1 round. Knit stitches together 2 by 2 until 1 stitch remains, knit this stitch = 6 stitches. Cut the yarn and pull it through the remaining stitches and tighten together. Fasten yarn tightly. LEFT LEG: Work as right leg until piece measures approx. 11 cm = 4⅜" (= 28 stitches), now increase stitch for foot as follows: Knit 5 and insert 1 marker on needle here, * knit 1, 1 yarn over *, work from *-* 4 times in total. Insert 1 marker on needle here (there are 8 stitches between markers) and finish with knit 19 = 32 stitches. Knit 1 round, work yarn overs twisted. Work next round as follows: Knit 5 (until marker) * knit 2, 1 yarn over *, work from *-* 4 times in total and knit the rest of round (there are 12 stitches between markers) = 36 stitches. Continue to work without increase until leg measures 14 cm = 5½". Now decrease stitches at the front of foot as follows: Knit 5 (until marker) * knit 1, knit 2 together *, work from *-* 4 times in total and knit the rest of round (there are 8 stitches between markers) = 32 stitches. Knit 1 round. Knit 5 (until marker) * knit 2 together *, work from *-* 4 times in total and knit the rest of round (there are 4 stitches between markers) = 28 stitches. Knit 1 round and remove the markers. Knit 4, * knit 2 together *, work from *-* 3 times in total and work the rest of round = 25 stitches. Knit 1 round. Insert 1 marker in the 6th stitch on round = mid front on foot. Now decrease on each side of this stitch as follows: Work until 2 stitches before stitch with marker, knit 2 together, knit 1 (= stitch with marker), knit 2 together and work the rest of round = 23 stitches. Knit 1 round. Repeat decrease on each side of stitch with marker 1 more time = 21 stitches. Knit 1 round. On next round knit stitches together 2 by 2 until 1 stitch remains, knit this stitch = 11 stitches. Knit 1 round. Knit stitches together 2 by 2 until 1 stitch remains, knit this stitch = 6 stitches. Cut the yarn and pull it through the remaining stitches and tighten together. Fasten yarn tightly. RIGHT ARM: Slip the 24 stitches from stitch holder in one side of piece back on double pointed needles size 3.5 mm = US 4 and pick up 1 new stitch in each of the 2 stitches cast on under arm = 26 stitches. Beginning of round is mid under arm. Knit all stitches in the round. When arm measures 8 cm = 3⅛", increase on next round as follows: Knit 18, 1 yarn over, * knit 1, 1 yarn over *, work from *-* 3 times in total (= 4 stitches increased in total), and finish with knit 5 = 30 stitches. When arm measures 12 cm = 4¾", insert 5 markers 6 stitches apart. On next round decrease 1 stitch after every marker (= 5 stitches decreased). Decrease like this every round 5 times in total = 5 stitches. Cut the yarn and pull it through the remaining stitches and tighten together. Fasten yarn tightly. LEFT ARM: Work as right arm but reversed. I.e. when piece measures 8 cm = 3⅛", work next round as follows: Knit 5, 1 yarn over, * knit 1, 1 yarn over *, work from *-* 3 times in total (= 4 stitches increased in total), and finish with knit 18. ASSEMBLY: Sew stitches bind off for crotch together on the front and back of body. Sew stitch from cast-on edge together to avoid a hole at the top of the head. FACE: Embroider eyes with blue and a couple of eye lashes with brown. Embroider a small nose with light beige and a mouth with light old pink. HAIR: Fasten hair in the round at the top of head, begin by fastening strands in a round where you think the hair should start at the top of face. Cut length of light vanilla of approx. 55 cm = 21⅝". Place them double, thread loop through 1 stitch. Then pull strands through loop and tighten. When the first round around head has been fastened, fasten more rounds with hair until top of head is covered. Then divide the hair into 2 parts, 1 on each side of head. Braid each part before tying a ribbon at the ends. Then cut the tips so that they are the same length. ---------------------------------------------------------- SHORT PANTS - SHORT OVERVIEW OF THE PIECE: Work pants in the round on double pointed needles and sew together to make the leg at the end. Work the entire piece in 1 strand. SHORT PANTS: Cast on 80 stitches on double pointed needles size 2.5 mm = US 1,5 with red. Work rib in the round with knit 2/purl 2. REMEMBER THE KNITTING GAUGE! Bind off with knit over knit and purl over purl when piece measures approx. 11 cm = 4⅜". Place piece flat so that there are 40 stitches on each side of piece - adjust so that there are 2 knit stitches in the middle. Then sew the middle 10 stitches at the front together with the 10 middle stitches on the back for crotch. Cut and fasten the yarn. ---------------------------------------------------------- TUBE SOCKS - SHORT OVERVIEW OF THE PIECE The socks are worked in the round with double pointed needles, top down. Rib is worked with displacements every 3rd round. TUBE SOCKS: Cast on 36 stitches with double pointed needles size 2.5 mm = US 1,5 and red. Work rib in the round with knit 2/ purl 2 for 1 cm = ⅜". On the next round displace the rib 1 stitch to the left as follows: Over knit 2 and purl 2, work purl 1, knit 2, purl 1; continue like this to end of round. * Work 2 rounds with knit over knit and purl over purl. On the next round displace the rib again, by 1 stitch to the left *. Repeat from *-* until the piece measures 9 cm = 3½". On the next round work all stitches together 2 and 2 = 18 stitches. Cut the strand and pull it through the remaining 18 stitches 2 times, pull tight and fasten the strand well. Work 1 more sock in the same way. |
|
|
Have you made this or any other of our designs? Tag your pictures in social media with #dropsdesign so we can see them! Do you need help with this pattern?You'll find tutorial videos, a Comments/Questions area and more by visiting the pattern on garnstudio.com. © 1982-2024 DROPS Design A/S. We reserve all rights. This document, including all its sub-sections, has copyrights. Read more about what you can do with our patterns at the bottom of each pattern on our site. |
|


With over 40 years in knitting and crochet design, DROPS Design offers one of the most extensive collections of free patterns on the internet - translated to 17 languages. As of today we count 304 catalogs and 11422 patterns - 11417 of which are translated into English (US/in).
We work hard to bring you the best knitting and crochet have to offer, inspiration and advice as well as great quality yarns at incredible prices! Would you like to use our patterns for other than personal use? You can read what you are allowed to do in the Copyright text at the bottom of all our patterns. Happy crafting!
Comments / Questions (18)
Bonjour Je ne suis pas très forte en anglais, mais j'arrive quand même à suivre les explications. Je demande juste si je peux tricoter avec les aiguilles ordinaires Merci pour tout
29.04.2023 - 20:46Ég held að fæturnir séu víxlaðir, hægri fyrir vinstri og öfugt vinstri fyrir hægri. Það vantar úrtökurnar fremst á hendurnar (ég fann þær í ensku uppskriftinni)
08.01.2023 - 17:47DROPS Design answered:
Blessuð Jónína. Takk fyrir ábendinguna.
09.01.2023 - 12:23Hello! Do you think it is possible to knit the doll using cotton yarn? Will it be ok or it is better use the wool one? Thank you.
21.12.2022 - 10:28DROPS Design answered:
Dear Victoria, you can use cotton if you like to - check the suggested alternatives and new matching amount using our yarn converter. Happy knitting!
21.12.2022 - 11:11Wat is het beste vulmiddel om te gebruiken?
24.08.2022 - 21:00DROPS Design answered:
Dag Marian,
Goede vraag! We hebben niet echt een vulmiddel op de site staan, maar je kunt via internet vulling vinden voor bijvoorbeeld amigurumi of voor poppen.
25.08.2022 - 11:24Hej! Ni skriver "För att hårfärgen ska bli jämnast möjlig " menar ni inte hårfästet, inte hårfärgen? Sen skriver ni ärmarna. Då menar ni väl armarna?
09.01.2022 - 11:26Ciao parte testa guance Giro 3 62 maglie Giro 4 non viene 70 maglie ma 78. Non ho capito Grazie
13.09.2021 - 11:32DROPS Design answered:
Buonasera Giovanna, sul giro 4 in quel punto si aumentano 8 maglie, passando da 62 a 70. Buon lavoro!
14.09.2021 - 22:02Hello. I live in Germany and want to knit this doll but with black hair and light beige skin. Is there a way to order it as a kit with all of the necessary yarn and accessories? That would be much easier for me to get it as a kit. Thank you. Jean Linehan.
17.07.2021 - 09:22DROPS Design answered:
Dear Mrs Linehan, you will find the list of DROPS Stores in Germany here - you are welcome to ask them if they have a kit of this pattern. Happy knitting!
19.07.2021 - 09:28Wo finde i h die ganze Strickanleitunge.
01.02.2021 - 22:09DROPS Design answered:
Liebe Frau Vaith, dieses Modell enthält die gestrickte Puppe mit kurzer Hose und Spiralsocken - um die Sprache zu ändern klicken Sie auf das Menu unten das Bild - die unterschiedlichen Kleidungen finden Sie beim klicken auf das gewünschte Bild (Hose/Jake, rosa Kleid usw). Viel Spaß beim stricken!
02.02.2021 - 10:21I found this pattern in my Knitting magazine and purchased the wool online as I wanted to make two dolls for my neighbour's twin girls for Christmas. I managed to knit the dolls but as I am fairly new to knitting with double pointed needles did not understand the instructions for making the hair! I tried looking online as I find it easier to watch someone explain and making it at the same time a lot easier. I could not find the technique explained and as most of the comments are foreign,
09.11.2020 - 17:55DROPS Design answered:
Dear Mrs Watkins, hair are attached to the head just as fringes - start on the round you'd like the hair to start and fasten fringes around the head to the very top. Then divide them into 2 bounches and plait them together. Happy knitting!
10.11.2020 - 08:56Hallo Müssen die Garne Baby Merino und Cotton Merino tatsächlich doppelt (mit 2 Fäden) verstrickt werden? Danke für die Antwort Jolanda
13.10.2020 - 12:09DROPS Design answered:
Liebe Jolanda, BabyMerino wird entweder doppelt (= mit 2 Fäden) für die Puppe oder einseln (= 1 Faden) für die Hose/die Socken gestrickt - siehe die jeweilige Maschenprobe - Cotton Merino wird nur für die Haaren benutzt (damit gibt es keine Maschenprobe). Viel Spaß beim stricken!
13.10.2020 - 12:59