
Popular categories
Looking for a yarn?


|
||||||||||||||||||||||||||||||||||
Summer Twinkle |
||||||||||||||||||||||||||||||||||
 |
 |
|||||||||||||||||||||||||||||||||
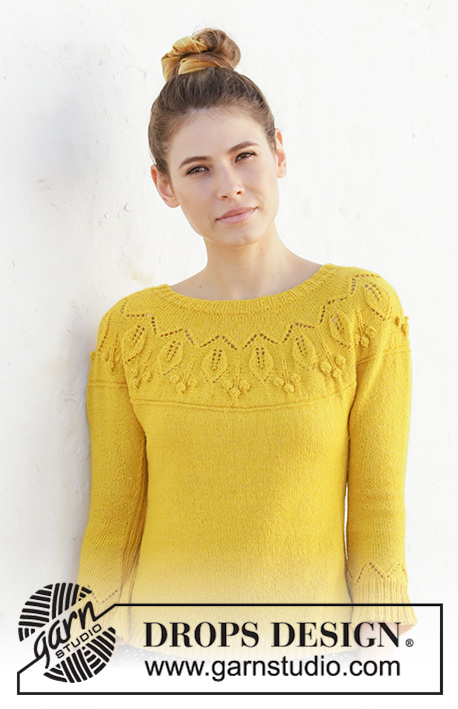
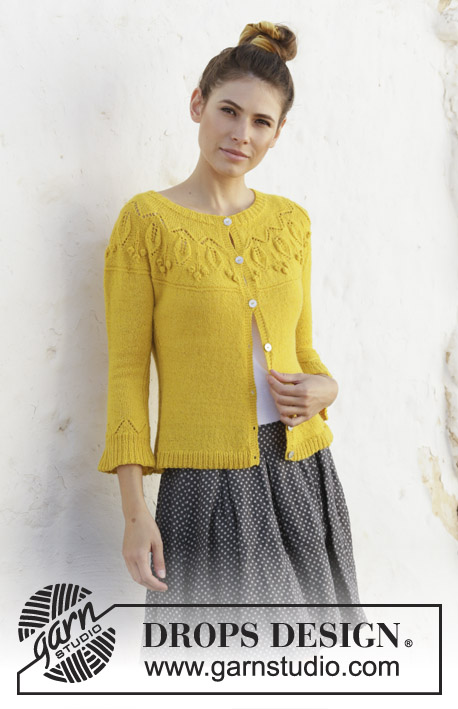
Knitted jacket with leaf pattern, bobbles, round yoke and ¾-length sleeves. The piece is worked in DROPS Flora, top down. Sizes S - XXXL.
DROPS 200-11 |
||||||||||||||||||||||||||||||||||
|
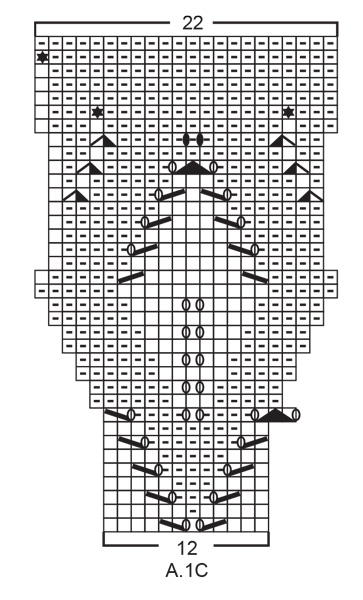
------------------------------------------------------- EXPLANATIONS FOR THE PATTERN: ------------------------------------------------------- RIDGE/GARTER STITCH (worked back and forth): Knit all rows. 1 ridge in height = Knit 2 rows. PATTERN: See diagrams A.1 to A.4. Choose diagram for your size (applies to A.2 and A.3) The diagrams show all rows in pattern seen from the right side. INCREASE TIP-1 (evenly spaced): All increases are worked from the right side! To work out how to increase evenly, count the total number of stitches on the needle (e.g. 128 stitches) minus bands (e.g. 10 stitches) and divide the remaining stitches by the number of increases to be made (e.g. 38) = 3.1. In this example, increase by making 1 yarn over after approx. every 3rd stitch. Do not increase on bands. On the next row (wrong side) purl the yarn overs twisted to avoid holes. INCREASE TIP-2 (for sides of body and mid under sleeves): All increases are worked from the right side and increase on each side of the rib as described below: Work as far as A.3, make 1 yarn over, work A.3 (= 16-16-16-22-22-22 stitches - marker thread sits in middle of these 16-16-16-22-22-22 stitches), make 1 yarn over (= 2 stitches increased). On the next row/round work the yarn overs twisted to avoid holes. Then work the new stitches in stocking stitch. DECREASE TIP (for sides of body and mid under sleeves): All decreases are worked from the right side and decrease on each side of the rib as described below: Work until there are 2 stitches left before A.3, knit 2 together, work A.3 (= 16-16-16-22-22-22 stitches - marker thread sits in middle of these 16-16-16-22-22-22 stitches), slip 1 stitch as if to knit, knit 1 and pass the slipped stitch over the knitted stitch (= 2 stitches decreased). BUTTONHOLES: Work buttonholes on right band (when garment is worn). Work from the right side when there are 3 stitches left on row as follows: Make 1 yarn over, knit 2 together and knit the last stitch. On the next row (wrong side) knit the yarn over to leave a hole. The first buttonhole is worked when the neck measures 1½-2 cm. Then work the other 6 buttonholes with approx. 7½-8-8½-8½-9-9½ cm between each one. ------------------------------------------------------- START THE PIECE HERE: ------------------------------------------------------- JACKET - SHORT OVERVIEW OF THE PIECE: Neck and yoke are worked back and forth with circular needle from mid front and top down. The yoke is divided for body and sleeves. The body is continued back and forth with circular needle from mid front and top down. The sleeves are worked in the round with short circular needle/double pointed needles, top down. NECK: Cast on 128-131-134-140-143-149 stitches (including 5 band stitches on each side towards mid front) with circular needle size 2.5 mm and Flora. Purl 1 row (= wrong side). The next row is worked as follows from the right side: 5 band stitches in GARTER STITCH – read description above, * knit 1, purl 2 *, work from *-* until there are 6 stitches left on row, knit 1 and finish with 5 band stitches in garter stitch. Continue this rib for approx. 3-3-3-4-4-4 cm – remember BUTTONHOLE on right band – read description above. When the rib is finished, knit 1 row from the right side where you increase 38-40-42-44-48-52 stitches evenly spaced – read INCREASE TIP-1 = 166-171-176-184-191-201 stitches. Purl 1 row from the wrong side (bands worked in garter stitch and yarn overs purled twisted). Then work yoke as described below. YOKE: Change to circular needle size 3 mm and work stocking stitch back and forth with 5 band stitches in garter stitch on each side towards mid front. REMEMBER THE KNITTING TENSION! When the piece measures 4-5-6-6-7-7 cm from the cast-on edge increase 13-32-39-43-48-50 stitches evenly spaced = 179-203-215-227-239-251 stitches. When the piece measures 5-6-7-8-9-9 cm from the cast-on edge start the leaf pattern and the first row is worked as follows from the right side: 5 band stitches in garter stitch, work A.1A (= 13 stitches), A.1B until there are 17 stitches left on row (= 12-14-15-16-17-18 repeats of 12 stitches), work A.1C (= 12 stitches) and finish with 5 band stitches in garter stitch. Continue this pattern. When A.1 has been completed there are 319-363-385-407-429-451 stitches on the needle. The next row is worked as follows from the right side: 5 band stitches in garter stitch, work A.2 until there are 5 stitches left on row and finish with 5 band stitches in garter stitch. Continue this pattern AT THE SAME TIME on the row marked with an arrow in A.2, increase 16-8-10-28-34-40 stitches evenly spaced = 335-371-395-435-463-491 stitches. When A.2 has been completed continue with stocking stitch and 5 band stitches in garter stitch on each side towards mid front. When the piece measures 21-23-25-27-29-31 cm from the cast-on edge divide the yoke for body and sleeves. Work as follows from the wrong side: Work 54-59-62-68-74-80 stitches as before (= front piece), place the next 65-73-79-87-89-91 stitches on 1 thread for sleeve, cast on 8-8-12-12-14-16 new stitches on needle (= in side under sleeve), purl 97-107-113-125-137-149 stitches (= back piece), place the next 65-73-79-87-89-91 stitches on 1 thread for sleeve, cast on 8-8-12-12-14-16 new stitches on needle (= in side under sleeve) and work the remaining 54-59-62-68-74-80 stitches as before (= front piece). Body and sleeves are finished separately. THE PIECE IS NOW MEASURED FROM HERE! BODY: = 221-241-261-285-313-341 stitches. Insert 1 marker thread 58-63-68-74-81-88 stitches in from each side (= 105-115-125-137-151-165 stitches between marker threads on back piece). The threads mark the side of the body. Work stocking stitch back and forth with 5 band stitches in garter stitch on each side towards mid front and A.3 over the middle 16-16-16-22-22-22 stitches under each sleeve (marker threads sit in middle of A.3). Continue this pattern. When the piece measures 2 cm from the division, decrease 1 stitch on each side of A.3 on each side – READ DECREASE TIP (= 4 stitches decreased). Decrease like this every 1½ cm a total of 5 times on each side = 201-221-241-265-293-321 stitches. When the piece measures 13 cm from the division increase 1 stitch on each side of A.3 on each side – read INCREASE TIP-2 (= 4 stitches increased). Increase like this every 2½ cm a total of 5 times on each side = 221-241-261-285-313-341 stitches. Continue working until the piece measures 25 cm from the division in all sizes (or to desired length; there is 3 cm left to finished length). On the next row from the right side increase as follows: Work 5 band stitches in garter stitch, 45-50-55-58-65-72 stitches in stocking stitch and increase 12-16-17-20-19-21 stitches evenly spaced over these 45-50-55-58-65-72 stitches, continue A.3 over the next 16-16-16-22-22-22 stitches as before, work 89-99-109-115-129-143 stitches in stocking stitch and increase 27-26-31-34-35-39 stitches evenly spaced over these 89-99-109-115-129-143 stitches, continue A.3 over the next 16-16-16-22-22-22 stitches as before, work 45-50-55-58-65-72 stitches in stocking stitch and increase 12-16-17-20-19-21 stitches evenly spaced over these 45-50-55-58-65-72 stitches and finish with 5 band stitches in garter stitch = 272-299-326-359-386-422 stitches. These increases are worked to prevent the rib being tight. Change to circular needle size 2.5 mm and work rib as follows from the wrong side: 5 band stitches in garter stitch, * purl 1, knit 2 *, work from *-* until there are 6 stitches left on row, purl 1 and finish with 5 band stitches in garter stitch (the rib fits neatly over A.3 on each side). Continue this rib for 3 cm. Change to circular needle size 3 mm and loosely cast off with garter stitch over garter stitch, knit over knit and purl over purl. The jacket measures approx. 52-54-56-58-60-62 cm from the shoulder down. SLEEVE: Place the 65-73-79-87-89-91 stitches from the thread on the one side of the piece on double pointed needles size 3 mm and knit up 1 stitch in each of the 8-8-12-12-14-16 stitches cast on under the sleeve = 73-81-91-99-103-107 stitches. Insert 1 marker thread in the middle of the 8-8-12-12-14-16 new stitches. The marker thread marks mid under sleeve and the start of the round. Work A.3 mid under sleeve (marker thread sits in middle of A.3) and the remaining stitches in stocking stitch. When the piece measures 2-2-1-1-1-1 cm from the division decrease 1 stitch on each side of A.3 – read DECREASE TIP (= 2 stitches decreased). Decrease like this every 1½-1-1-1-1-1 cm a total of 6-9-13-12-12-13 times = 61-63-65-75-79-81 stitches. When the piece measures 13-13-15-14-14-15 cm from the division increase 1 stitch on each side of A.3 – read INCREASE TIP-2 (= 2 stitches increased). Increase like this every 1½-1½-1-1-1-1 cm a total of 8-7-6-7-5-4 times = 77-77-77-89-89-89 stitches. Continue working until the sleeve measures 25-24-22-22-20-19 cm from the division (shorter measurements in larger sizes due to wider neck and longer yoke). The increases are now finished and the lace pattern at bottom of sleeves starts here. Work the next round as follows: Continue with A.3 as before over the first 8-8-8-11-11-11 stitches, work 0-0-0-3-3-3 stitches in stocking stitch, A.4 over the next 60 stitches (= 5 repeats of 12 stitches in all sizes), work 1-1-1-4-4-4 stitches in stocking stitch and finish with A.3 over the remaining 8-8-8-11-11-11 stitches as before. When A.4 has been completed in height, work 1 round with stocking stitch and A.3 as before where you increase 19-19-19-25-25-25 stitches evenly spaced over the 61-61-61-67-67-67 stitches which are not rib = 96-96-96-114-114-114 stitches. Change to short circular needle/double pointed needles size 2.5 mm and work rib in the round (= knit 1, purl 2 – the rib fits neatly over A.3 mid under sleeve). When the rib measures 2 cm increase every other purl 2 to purl 3 = 112-112-112-133-133-133 stitches. When the rib measures 4 cm increase the remaining purl 2 to purl 3 = 128-128-128-152-152-152 stitches. Continue working until the sleeve measures approx. 34-33-31-31-29-28 cm from the division (rib measures approx. 6 cm). Change to short circular needle size 3 mm and loosely cast off with knit over knit and purl over purl. Work the other sleeve in the same way. ASSEMBLY: Sew buttons onto left band. |
||||||||||||||||||||||||||||||||||
Diagram explanations |
||||||||||||||||||||||||||||||||||
|
||||||||||||||||||||||||||||||||||

|
||||||||||||||||||||||||||||||||||

|
||||||||||||||||||||||||||||||||||
|
||||||||||||||||||||||||||||||||||

|
||||||||||||||||||||||||||||||||||

|
||||||||||||||||||||||||||||||||||

|
||||||||||||||||||||||||||||||||||
|
Have you made this or any other of our designs? Tag your pictures in social media with #dropsdesign so we can see them! Do you need help with this pattern?You'll find tutorial videos, a Comments/Questions area and more by visiting the pattern on garnstudio.com. © 1982-2024 DROPS Design A/S. We reserve all rights. This document, including all its sub-sections, has copyrights. Read more about what you can do with our patterns at the bottom of each pattern on our site. |
||||||||||||||||||||||||||||||||||


With over 40 years in knitting and crochet design, DROPS Design offers one of the most extensive collections of free patterns on the internet - translated to 17 languages. As of today we count 304 catalogues and 11422 patterns - 11422 of which are translated into English (UK/cm).
We work hard to bring you the best knitting and crochet have to offer, inspiration and advice as well as great quality yarns at incredible prices! Would you like to use our patterns for other than personal use? You can read what you are allowed to do in the Copyright text at the bottom of all our patterns. Happy crafting!
Comments / Questions (41)
Hei igjen😊 Ble så glad da alt stemte. Skal begynne på diagram A.1A på rad 9, så stemmer ikke raporten, hva gjør jeg feil? Alt stemmer ellers så langt.
31.10.2019 - 18:27DROPS Design answered:
Hej Tove, Jo men diagrammet stemmer, du er på pind 9 A.1A, når du har strikket de 11 masker, fortsætter du med pind 9 i A.1B, her kan du se at de 2 første masker i B passer ind i "hullet" i diagram A, således fortsætter du til du har 14 masker tilbage, så afslutter du med A.1C og mønsteret vil da blive ens i begge sider mod midt foran. God fornøjelse!
01.11.2019 - 09:37Har plagdes litt med oppskriften, men tror det løser seg etter hvert. Etter som jeg har forstått skal mønsteret strikkes på retten, og vrang tilbake. Det jeg savner er en film som viser hvordan kastene skal strikkes på vrangen, får ikke det til🤔
30.10.2019 - 20:58DROPS Design answered:
Hej. Du stickar vissa kast rett eller vrang och vissa vridd rett eller vridd vrang (se diagram och diagramförklaring) på nästa pinne. Du kan se video på hur du stickar en vridd maske vrang här och hur du stickar en vridd maske rett här. Lycka till!
31.10.2019 - 07:22J ai 12 m pour les dessous de bras (T XL)\au rang suivant diagramme A3 , au-dessus des -22 mailles au milieu sous chaque manche j 'ai 12 mailles , comment faire le diagramme sur 22 mailles?
21.06.2019 - 17:53DROPS Design answered:
Bonjour Marinette, vous commencez A.3 11 mailles avant le marqueur (au milieu des 12 nouvelles mailles) et tricotez ainsi les 11 premières m de A.3 sur les 11 dernières mailles du tour, puis les 11 dernières mailles de A.3 sur les 11 premières mailles du tour. Bon tricot!
24.06.2019 - 07:00Ik ben aan het diagram begonnen, herhalend 13 en12 steken, ik heb 203 min 10 kantsteken, beginnend met 13 stk zou ik ook moeten eindigen met 13 stk, maar ik kom uit met fig B, 12 stk, en houd er nog vier over. (Plus vijfkantsteken). Wat begrijp ik niet.
09.05.2019 - 15:14DROPS Design answered:
Dag Bianca,
Het is de bedoeling dat je eerst A.1a 1 keer breit en daarna steeds A.1b herhaalt tot er 12 steken over zijn.
09.05.2019 - 19:47Ik vind dit een heel mooi vest. Brei ik bij de ribbel aan de voorkant de eerste steek of is het mooier als ik de eerste steek afhaal? Omdat ik het vest wil kunnen wassen heb ik voor fabel gekozen, echter die draad valt veel dunner uit en nu heb op bij 24 st op nld nr 3,5 slechts 9 cm breed, zou ik dan beter een maat groter breien, want op nld nr4 wordt het werk te los.
18.04.2019 - 17:06DROPS Design answered:
Dag Marga,
Het is de bedoeling dat je de eerste steek ook breit. Je zou inderdaad een maat groter kunnen breien, maar dan zou je dit even om moeten rekenen of je dan nog op de juiste breedte komt (dus de maat die je wilt breien x 0,9) . Houd ook even de hoogte in de gaten tijdens het breien.
21.04.2019 - 17:12Kevdes Anett! A vállrész mintakezdésénél - német fordítást olvasva-kimaradt az A.1B mintarész,az 1db A.1A után rögtön az A.1C minta jön.Éppen kezdeném ezt a részt és nem volt magyarul egyértelmű azért néztem meg a németet.Üdvözlettel!
09.04.2019 - 09:22Hallo, es gibt jetzt einige schöne TopDowns bei Ihnen. Die Diagramme zeigen vorne tiefere Halsausschnitte. Aber ich finde keine verkürzten Reihen. Habe ich etwas falsch verstanden?
06.04.2019 - 15:21DROPS Design answered:
Liebe Kate, herzlichen Dank! Die Maßskizze werden immer "standard", bei diesem Modell strickt man keine verkürzten Reihen = Hals wird hinten und vorne gleich sein. Viel Spaß beim stricken!
08.04.2019 - 09:15Bonjour je souhaite avoir une explication sur les mots qui se trouvent dans le paragraphe EMPIECEMENT "continuer ainsi en MÊME TEMPS au rang avec une flèche dans A2" Merci
01.04.2019 - 09:19DROPS Design answered:
Bonjour Annie, vous continuez à tricoter comme indiqué précédemment, c'est-à-dire: 5 m point mousse, A.2, 5 m point mousse, et au rang de A.2 avec une flèche, augmentez le nombre de mailles correspondant à votre taille. Bon tricot!
01.04.2019 - 15:06Hallo, eine Frage zur Noppe. Die findet ja in einer Hinreihe statt. Das Video ist ein wenig anders als die Beschreibung der Anleitung. Also, in der Hinreihe 5 aus einer. Dann wenden, 5 links, wenden, 5 rechts und nich je 1x so?und dann in meiner Hinreihe die Maschen nacheinander von hinten wie in der Anleitung oder von vorn nach hinten wie im Video ziehen? Danke,
11.03.2019 - 13:12DROPS Design answered:
Liebe Sabine, das Video zeigt wie man eine Nope strickt, aber je nach der Anleitung kann Sie unterschiedlich gestrickt werden. In diesem Modell wird sie bei einer Hinreihe gestrickt und 4 Reihen werden über die 5 Maschen gestrickt. Viel Spaß beim stricken!
11.03.2019 - 14:52Superbe. J’adore le côté manches 3/4 idéal au printemps, la couleur, la forme bien féminine et les jours..
07.03.2019 - 14:42