
Popular categories
Looking for a yarn?


|
|||||||||||||||||||
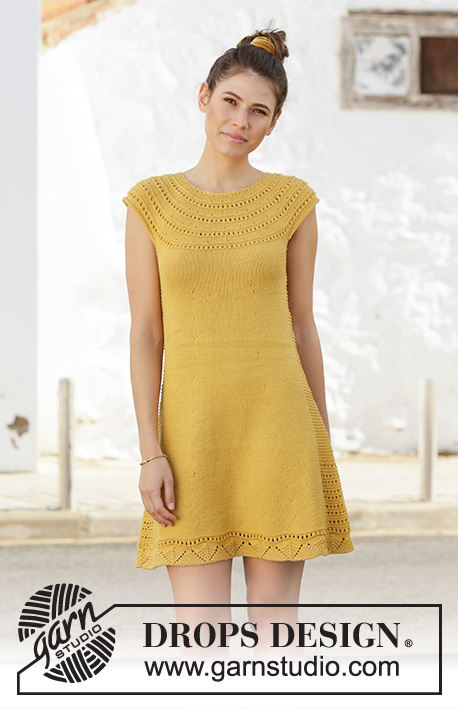
Summer Shells |
|||||||||||||||||||
 |
 |
||||||||||||||||||
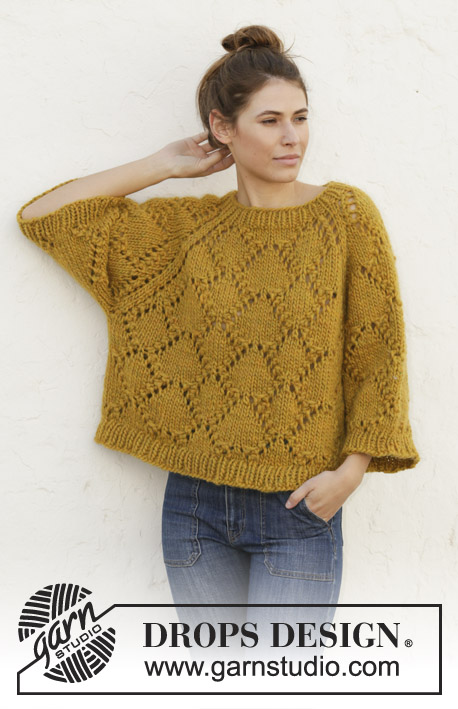
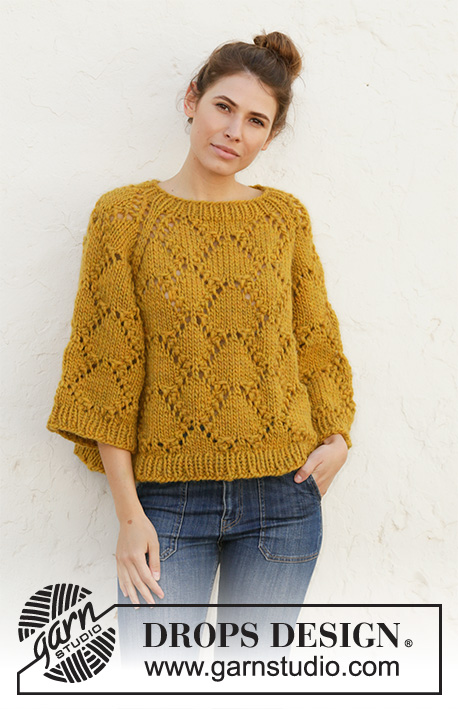
Knitted jumper with raglan with 1 thread DROPS Snow or 1 thread SROPS Wish or 2 threads Air. The piece is worked top down with lace pattern. Sizes S - XXXL.
DROPS 200-5 |
|||||||||||||||||||
|
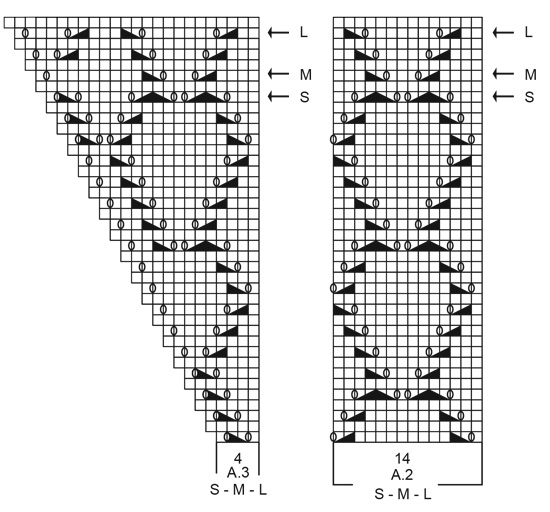
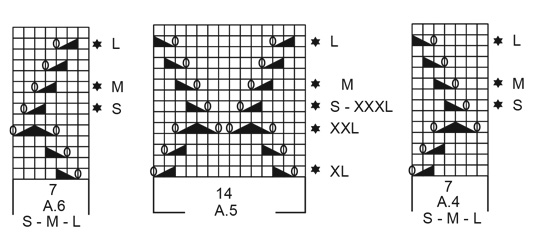
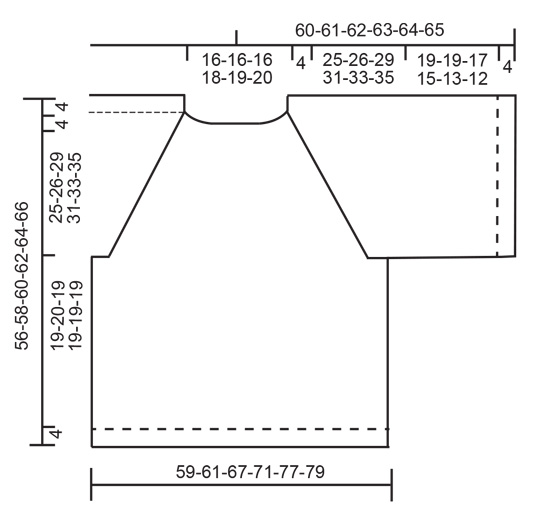
------------------------------------------------------- EXPLANATIONS FOR THE PATTERN: ------------------------------------------------------- PATTERN: See diagrams A.1 to A.6 (A.4 and A.6 apply to sizes S, M and L). Choose diagram for your size. DECREASE TIP (evenly spaced): To work out how to decrease evenly, count the total number of stitches on the needle (e.g. 58 stitches) and divide by the number of decreases to be made (e.g. 2) = 29. In this example decrease by knitting each 28th and 29th stitch together. INCREASE TIP (evenly spaced): To work out how to increase evenly, count the total number of stitches on the needle (e.g. 118 stitches) and divide by the number of increases to be made (e.g. 24) = 4.9. In this example increase by making 1 yarn over after approx. each 5th stitch. On the next row work the yarn overs twisted to avoid holes. ------------------------------------------------------- START THE PIECE HERE: ------------------------------------------------------- JUMPER - SHORT OVERVIEW OF THE PIECE: The piece is worked in the round with circular needle top down. Sleeves are worked in the round with short circular needle. JUMPER: NECK: Cast on 56-58-60-64-64-68 stitches with circular needle size 8 mm and 1 thread Snow, 1 thread Wish or 2 threads Air. Knit 1 round. Then work rib (knit 1, purl 1) for 4 cm. YOKE: Change to circular needle size 9 mm. Knit 1 round where you decrease 0-2-4-0-0-4 stitches evenly spaced – read DECREASE TIP = 56-56-56-64-64-64 stitches. Now work pattern – choose diagram for your size, as follows: * insert a marker thread here, A.1 over the first 3-3-3-4-4-4 stitches, A.2 over the next 14 stitches, A.3 over the next 4-4-4-5-5-5 stitches (= back/ front piece), insert a marker thread here, A.1 over the next 3-3-3-4-4-4 stitches, A.3 over the next 4-4-4-5-5-5 stitches (= sleeve) *, work from *-* 1 more time on the round. There are now 4 marker threads in the piece. They follow your work onwards and mark the transitions between body and sleeves. Continue this pattern in the round. Increase on each side of the diagrams to raglan (increases are drawn into the diagrams). REMEMBER THE KNITTING TENSION! When you have worked as far as the round with an arrow in the diagrams (see arrow for your size), there are 192-200-216-232-248-256 stitches on the round. The piece measures approx. 29-30-33-35-37-39 cm from the cast-on edge and down mid front. The next round is worked as follows: Work the first 55-57-61-65-69-71 stitches (= back piece), place the next 41-43-47-51-55-57 stitches on a thread (= sleeve), cast on 4-4-6-6-8-8 new stitches on the needle (= in side under sleeve), work the next 55-57-61-65-69-71 stitches (= front piece), place the next 41-43-47-51-55-57 stitches on a thread (= sleeve), cast on 4-4-6-6-8-8 new stitches under sleeve. THE PIECE IS NOW MEASURED FROM HERE! BODY: = 118-122-134-142-154-158 stitches. Insert a marker thread in each side, in the middle of the 4-4-6-6-8-8 new stitches cast on under the sleeves (= 2-2-3-3-4-4 new stitches on each side of the marker thread). Start the round by the marker thread on one side of the piece and work pattern, beginning on the round marked with a star for your size in the diagram(s) as follows: Sizes S, M and L: * Knit 1-2-5 stitches, A.4 over the next 7 stitches, A.5 over the next 42 stitches (= 3 repeats of 14 stitches), A.6 over the next 7 stitches, knit 2-3-6 stitches *, work from *-* 1 more time on the round. Sizes XL, XXL and XXXL: * Knit 0-3-4 stitches, A.5 over the next 70 stitches (= 5 repeats of 14 stitches), knit 1-4-5 stitches *, work from *-* 1 more time on the round. Continue in the round like this until the piece measures approx. 19-20-19-19-19-19 cm – adjust so that you finish after round 5 or 13 in A.5. Knit 1 round where you increase 24-24-26-28-30-32 stitches evenly spaced – read INCREASE TIP = 142-146-160-170-184-190 stitches. Change to circular needle size 8 mm. Work rib (knit 1, purl 1) in the round for 4 cm. Cast off with knit over knit and purl over purl. Make sure that the cast-off edge is not tight. Use a size larger needle if necessary. The jumper measures approx. 56-58-60-62-64-66 cm from the shoulder down. SLEEVE: Place the 41-43-47-51-55-57 stitches from the thread on the one side of the piece back on short circular needle size 9 mm and knit up 1 stitch in each of the 4-4-6-6-8-8 stitches cast on under the sleeve = 45-47-53-57-63-65 stitches. Insert a marker thread in the middle of the 4-4-6-6-8-8 stitches cast on under the sleeve (= 2-2-3-3-4-4 new stitches on each side of the marker thread). Start the round by the marker thread and work pattern, beginning on the round marked with a star for you size in the diagram(s) as follows: Sizes S, M and L: Knit 1-2-5 stitches, A.4 over the next 7 stitches, A.5 over the next 28 stitches (= 2 repeats of 14 stitches), A.6 over the next 7 stitches, knit 2-3-6 stitches. Sizes XL, XXL and XXXL: Knit 0-3-4 stitches, A.5 over the next 56 stitches (= 4 reports of 14 stitches), knit 1-4-5 stitches. Continue in the round like this until the piece measures approx. 19-19-17-15-13-12 cm – adjust so that you finish after round 5 or 13 in A.5. Knit 1 round where you increase 9-9-11-11-13-13 stitches evenly spaced = 54-56-64-68-76-78 stitches. Change to circular needle size 8 mm. Work rib (knit 1, purl 1) in the round for 4 cm. Cast off with knit over knit and purl over purl. Make sure that the cast-off edge is not tight. Use a size larger needle if necessary. The sleeve measures approx. 23-23-21-19-17-16 cm. Work the other sleeve in the same way. |
|||||||||||||||||||
Diagram explanations |
|||||||||||||||||||
|
|||||||||||||||||||
|
|||||||||||||||||||

|
|||||||||||||||||||

|
|||||||||||||||||||
|
|||||||||||||||||||
|
|||||||||||||||||||
|
Have you made this or any other of our designs? Tag your pictures in social media with #dropsdesign so we can see them! Do you need help with this pattern?You'll find tutorial videos, a Comments/Questions area and more by visiting the pattern on garnstudio.com. © 1982-2024 DROPS Design A/S. We reserve all rights. This document, including all its sub-sections, has copyrights. Read more about what you can do with our patterns at the bottom of each pattern on our site. |
|||||||||||||||||||


With over 40 years in knitting and crochet design, DROPS Design offers one of the most extensive collections of free patterns on the internet - translated to 17 languages. As of today we count 304 catalogues and 11422 patterns - 11422 of which are translated into English (UK/cm).
We work hard to bring you the best knitting and crochet have to offer, inspiration and advice as well as great quality yarns at incredible prices! Would you like to use our patterns for other than personal use? You can read what you are allowed to do in the Copyright text at the bottom of all our patterns. Happy crafting!
Comments / Questions (199)
Ik maak deze prachtige trui in maat M en ben aangekomen in het patroon waarin in de tekst word gesproken over; als u TOT de naald met de pijl van uw maat (M) dan moet u 200 steken hebben. Echter heb ik 192 steken. Maar de som zou wel kloppen als ik naald 35 wel nog brei met de meerdering. Dan heb ik 200 steken. Naald 36 is dan enkel recht breien. Is dit de naald waarin je de steken gaat verdelen over de hulpdraden? En daarna weer volgens telpatroon ? Ben wat verward door tekst en telpatroon
10.07.2023 - 13:14Hi, I am about to divide the work. So I'll knit the last row with the stars and then I'll start dividing the work, right? Then I can start with the new diagrams for the body, without doing any adjustement, that is, the patterns will automatically line up? Many thanks!
19.04.2023 - 11:02DROPS Design answered:
Dear Mary, to line up the diagram, work as explained for your size, with some knitted stitches mid under the sleeve, then A.4, repeat A.5, work A.6 and work knitted stitches under the other sleeve, and repeat this. Starting these diagrams on the row with a black star will allow you to line up the patterns. Happy knitting!
19.04.2023 - 13:06Hi! I am finding a bit difficult to go for a purl 2 twisted together if there is a yarn over before. Normally, for a purl you must have to yarn in front of you, that is. above the needle, but after a yarn over the yarn is behind the needle. Is it normal or am I doing something wrong?
05.02.2023 - 13:59DROPS Design answered:
Dear Mary, maybe this video might help you, we are showing there how to make a yarn over when purling. Happy knitting!
06.02.2023 - 09:58Hello, is there a written pattern for the lace instead of the chart that would go row by row? I prefer written instructions over the chart. Thank you,
20.01.2023 - 16:55DROPS Design answered:
Hi Sarah, Sadly, we do not have a written pattern for the lace at this time. Happy crafting!
22.01.2023 - 09:01Salve, Ho iniziato a lavorare il corpo. Il pattern dice di cominciare il giro con le 2 nuove maglie aggiunte(dopo il marker) quindi su quel primo giro da eseguire secondo lo schema (A4,A5,A6) quelle prime due maglie non vengono lavorate, perchè sono state appena aggiunte...tutte le altre invece verranno lavorate perché aggiunte precedentemente. Ma così non avrò sempre un giro in meno per quelle 2 maglie iniziali? Non crea problemi?
20.10.2022 - 16:52I am confused about your "Increase Tip" and how it relates to the 200-5 pattern. In the comment you say to work the YOs twisted to avoid holes, but the yoke pattern says the "increases are drawn into the diagrams," And it seems counter to the pattern to then work them twisted on the knit round. Is the Increase tip only relevant to the increases in the Body section?
28.09.2022 - 18:28DROPS Design answered:
Dear Mrs Shaw, the INCREASE TIP only applies to stitches increased evenly spaced at the bottom of body (where it says read INCREASE TIP ; work the yarn overs in the lace pattern and for the raglan just as explained in the pattern. Happy knitting!
29.09.2022 - 08:24Hej jag skulle gärna vilja ha mönstret i xs. Hur många maskor för upplägg och ökningar är det då och de olika måtten i cm. Vore toppen . Tack!
13.09.2022 - 05:23DROPS Design answered:
Hej Anna, vi kan desværre ikke regne opskriften om, prøv selv med at fjerne antal masker modsvarende 1 rapport :)
15.09.2022 - 15:27Hei, Når man skal sette av masker til ermer og det står strikk maskene over bakstykket, sett av til ermer, strikk maskene over forstykket osv. Skal disse maskene (på forstykket og bakstykket) strikkes rett eller skal man fortsette i mønster? Om man skal fortsette i mønster blir det ikke da en runde mindre på ermene med mønster? På forhånd takk!
05.09.2022 - 15:17DROPS Design answered:
Hej Heidi, fortsæt i mønster, det er muligt at du får 1 pind mindre lige under ærmet, men det vil du ikke kunne se :)
07.09.2022 - 09:32Tere. Tundub, et eesti keelses tõlkes on skeemil "purl 2 twisted together" tõlgitud valesti "2 parempidi keerdsilmustena kokku". Kui on purl, siis peaks ju olema parempidi asemel pahempidi?
19.08.2022 - 11:57Love this sweater. Could you please include written instructions? It would be wonderful as I would love to make it. Thank you.
05.07.2022 - 01:33DROPS Design answered:
Dear Mrs Petruskie, we only have diagrams to this pattern, but this lesson might help you understanding how to read diagrams. Happy knitting!
05.07.2022 - 09:22