DROPS Belle
DROPS Belle
53% Cotton, 33% Viscose, 14% Linen
from 2.00 £ /50g
Get the yarn to make this pattern from 12.00£.

The yarn cost is calculated from the pattern’s smallest size and the yarn’s cheapest product type. Looking for an even better price? You might find it on the DROPS Deals!

DROPS SS24

Raspberry Kiss Jumper

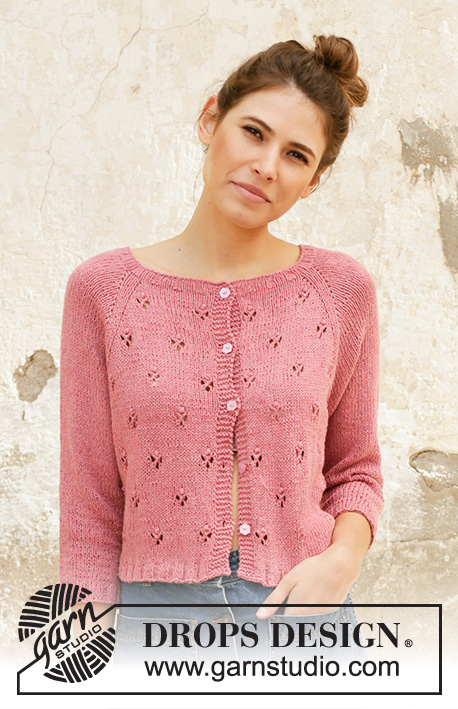
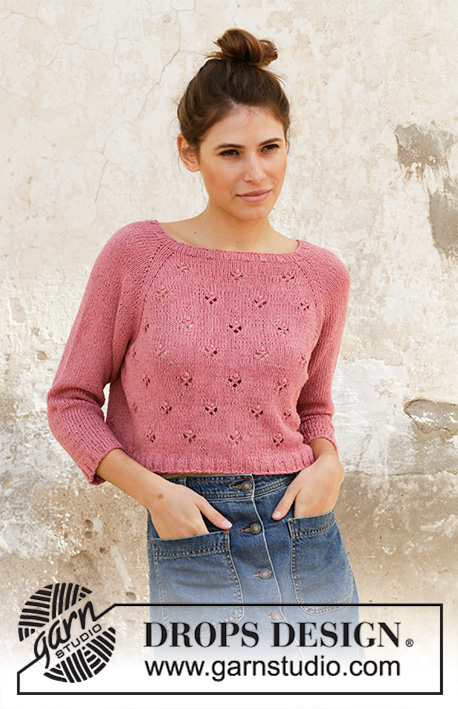
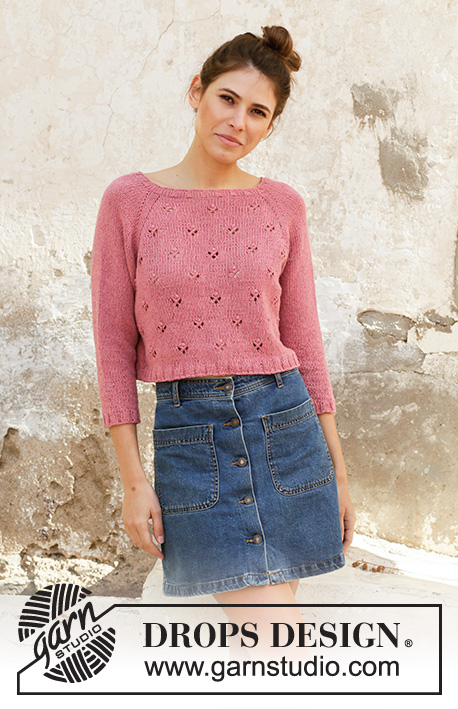
Knitted jumper with raglan in DROPS Belle. The piece is worked top down with lace pattern. Sizes S - XXXL.

DROPS 202-5
DROPS Design: Pattern no vs-059
Yarn group B
-------------------------------------------------------

SIZES:
S - M - L - XL - XXL - XXXL

MATERIALS:
DROPS BELLE from Garnstudio (belongs to yarn group B)
300-350-400-400-450-500 g colour 11, old pink

KNITTING TENSION:
21 stitches in width and 28 rows in height with stocking stitch = 10 x 10 cm.

NEEDLES:
DROPS DOUBLE POINTED NEEDLES SIZE 4 MM.
DROPS CIRCULAR NEEDLE SIZE 4 MM: length 40 cm and 80 cm for stocking stitch.
DROPS DOUBLE POINTED NEEDLES SIZE 3 MM.
DROPS CIRCULAR NEEDLE SIZE 3 MM: length 40 cm and 80 cm for rib.
Needle size is only a guide. If you get too many stitches on 10 cm, change to a larger needle size. If you get too few stitches on 10 cm, change to a smaller needle size.

-------------------------------------------------------

Alternative Yarn – See how to change yarns here
Yarn Groups A to F – Use the same pattern and change the yarn here
Yarn usage using an alternative yarn – Use our yarn converter here

-------------------------------------------------------

DROPS Belle
DROPS Belle
53% Cotton, 33% Viscose, 14% Linen
from 2.00 £ /50g
Get the yarn to make this pattern from 12.00£.

The yarn cost is calculated from the pattern’s smallest size and the yarn’s cheapest product type. Looking for an even better price? You might find it on the DROPS Deals!

Pattern instructions

NOTE: This pattern is written in British English. All measurements in charts are in cm. For conversion from cm to inches - click here. There are different terms for crocheting in British and American English. If this pattern includes crochet, click for "crochet terms" here. For this pattern in American English, please click here.
-------------------------------------------------------

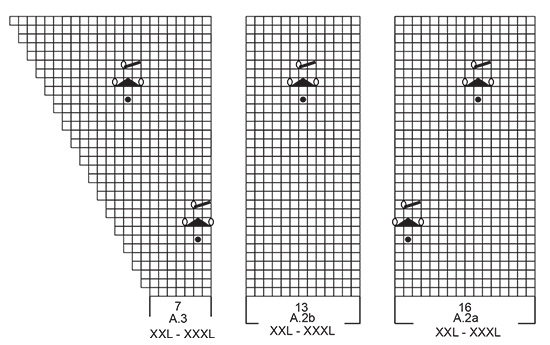
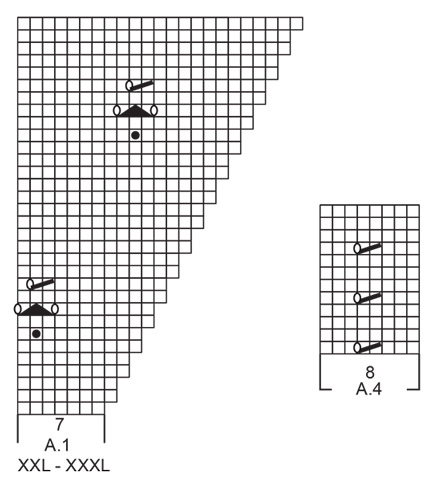
EXPLANATIONS FOR THE PATTERN:

-------------------------------------------------------

PATTERN: 
See diagrams A.1 to A.4. Choose diagram for your size.

DECREASE TIP-1 (evenly spaced):
To work out how to decrease evenly, count the total number of stitches on the needle (e.g. 110 stitches) and divide by the number of decreases to be made (e.g. 6) = 18.3. 
In this example, decrease by knitting together approx. each 17th and 18th stitch.

DECREASE TIP-2 (for body and sleeves): 
Decrease 1 stitch on each side of A.4 as follows: Work until there are 2 stitches left before A.4, knit 2 together, work A.4, slip 1 stitch as if to knit, knit 1 and pass the sipped stitch over the knitted stitch.

INCREASE TIP (evenly spaced):
To work out how to increase evenly, count the total number of stitches on the needle (e.g. 82 stitches) and divide by the number of increases to be made (e.g. 4) = 20.5. 
In this example, increase by making 1 yarn over after alternately each 20th stitch and each 21st stitch. On the next round knit the yarn overs twisted to avoid holes.

RAGLAN:
Increase 1 stitch on each side of the 3 knitted stitches in each transition between body and sleeves (= 8 stitches increased on round). Increase 1 stitch by making 1 yarn over. On the next round knit the yarn overs twisted to avoid holes. Then work the new stitches in stocking stitch on the sleeves and in pattern on front and back pieces. 

-------------------------------------------------------

START THE PIECE HERE:

-------------------------------------------------------

JUMPER - SHORT OVERVIEW OF THE PIECE:
The piece is worked in the round with circular needle, top down. The sleeves are worked in the round with short circular needle/double pointed needles, top down.

JUMPER:
NECK:
Cast on 105-110-115-120-130-135 stitches with circular needle size 3 mm and Belle. Knit 1 round. Then work rib (knit 3, purl 2) for 2 cm. Knit 1 round where you decrease 1-6-3-8-2-7 stitches evenly spaced – read DECREASE TIP-1 = 104-104-112-112-128-128 stitches.

YOKE:
Change to circular needle size 4 mm. Work PATTERN – read description above, as follows: * Insert a marker thread here, knit 2, 1 yarn over, work A.1 over the next 3-3-5-5-7-7 stitches, A.2a over the next 14-14-14-14-16-16 stitches, A.2b over the next 11-11-11-11-13-13 stitches, A.3 over the next 3-3-5-5-7-7 stitches, 1 yarn over, knit 2 and insert a marker thread here (= back/front piece), knit 1, 1 yarn over, knit 15 , 1 yarn over, knit 1 (= sleeve) *, work from *-* 1 more time on the round. You have increased 8 stitches to RAGLAN – read description above. Continue this pattern in the round and increase to raglan every 2nd round a total of 24-26-29-32-35-38 times = 296-312-344-368-408-432 stitches. REMEMBER THE KNITTING TENSION. When A.1 to A.3 have been completed in height, continue the pattern in the same way; i.e. work A.1/A.3 towards each raglan on front/back piece; there is room for 2 more repeats of A.2a in width. When all the increases to raglan are finished, the piece measures approx. 19-21-23-25-27-29 cm from the cast-on edge and down mid front. The next round is worked as follows: NOTE: in sizes S and L the piece is now divided for sleeves and body at the marker threads. In sizes M, XL, XXL and XXXL work a few stitches (= 1-2-1-3 stitches) from the sleeves onto the needle for the body, so that the transition between body and sleeves is no longer by the marker threads: Work the first 83-88-97-105-118-126 stitches, place the next 65-67-75-77-85-87 stitches on a thread (= sleeve), cast on 8-10-12-12-12-14 new stitches on the needle (= in side under sleeve), work the next 83-89-97-107-119-129 stitches, place the next 65-67-75-77-85-87 stitches on a thread (= sleeve), cast on 8-10-12-12-12-14 new stitches on the needle (= in side under sleeve) and work the remaining 0-1-0-2-1-3 stitches on the round. THE PIECE IS NOW MEASURED FROM HERE!

BODY:
= 182-198-218-238-262-286 stitches. Work pattern A.4 (= 8 stitches) over the middle 8 stitches under the sleeves and continue with as many repeats of lace pattern in A.2a/A.2b as there is room for out towards the sides (the pattern should be directly over the pattern on the yoke!) and the remaining stitches are worked in stocking stitch.
When the piece measures 4 cm decrease 1 stitch on each side of A.4 on each side – read DECREASE TIP-2 = 178-194-214-234-258-282 stitches. When the piece measures 15 cm – adjust so that you finish after a complete repeat of lace pattern in height (or a few rounds of stocking stitch if necessary) knit 1 round where you increase 27-31-36-41-47-48 stitches evenly spaced – read INCREASE TIP = 205-225-250-275-305-330 stitches. Change to circular needle size 3 mm. Work rib (knit 3, purl 2) for 2 cm. Cast off with knit over knit and purl over purl. Make sure the cast-off edge is not tight; you can increases a needle size when casting off if this is a problem. The jumper measures approx. 40-42-44-46-48-50 cm from the shoulder down.

SLEEVE:
Place the 65-67-75-77-85-87 stitches from the thread on one side of the piece on short circular needle/double pointed needles size 4 mm and knit up 1 stitch in each of the 8-10-12-12-12-14 stitches under the sleeve = 73-77-87-89-97-101 stitches. Continue in the round with stocking stitch and work A.4 over the middle 8 stitches under the sleeve. When the piece measures 4-4-3-3-3-2 cm decrease 2 stitches under the sleeve - remember DECREASE TIP-2. Decrease in the different sizes as follows:
Size S: Decrease like this alternately every 2 and 3 cm a total of 11 times.
Size M: Decrease like this every 2 cm a total of 12 times.
Size L: Decrease like this on every 1.5 cm a total of 16 times.
Size XL: Decrease like this every 1.5 cm a total of 16 times.
Size XXL: Decrease like this every cm a total of 19 times.
Size XXXL: Decrease like this every cm a total of 20 times.
When all the decreases are finished there are 51-53-55-57-59-61 stitches on the needles. Continue working until the sleeve measures 32-30-29-27-25-23 cm. Now increase 4-7-5-8-6-9 stitches evenly spaced = 55-60-60-65-65-70 stitches. Change to double pointed needles size 3 mm. Work rib (knit 3, purl 2) for 2 cm. Cast off with knit over knit and purl over purl. Make sure the cast-off edge is not tight; you can increases a needle size when casting off if this is a problem. The sleeve measures approx. 34-32-31-29-27-25 cm. Work the other sleeve in the same way.

Diagram

symbols = knit
symbols = between 2 stitches make 1 yarn over; on the next round knit the yarn over to leave a hole
symbols = knit 2 together
symbols = slip 1 stitch as if to knit, knit 2 together and pass the slipped stitch over the knitted together stitches
symbols = Knot: Knit 1 in both front and back of same stitch until you have increased from 1 to 5 stitches. The 5 stitches are on the right needle. Pass stitch 2 (the next outermost stitch on right needle) over the outermost stitch, pass stitch 3 over the outermost stitch, pass stitch 4 over the outermost stitch and pass stitch 5 over the outermost stitch (= 1 knot).
diagram
diagram
diagram
diagram
diagram

Each of our patterns has specific tutorial videos to help you.

Do you have a question? See a list of frequently asked questions (FAQ)

Knitting tension is what determines the final measurements of your work, and is usually measured per 10 x 10 cm. It is provided like so: number of stitches in width x number of rows in height - eg: 19 stitches x 26 rows = 10 x 10 cm.

The knitting tension is very individual; some people knit/crochet loosely while others work tightly. You adjust the knitting tension with the needle size, which is why the suggested needle size is only meant as a guide! You need to adjust this (up or down) to ensure that YOUR knitting tension matches the knitting tension provided in the pattern. If you work with a different knitting tension than provided you will have a different yarn consumption, and your work will have different measurements than what the pattern suggests.

The knitting tension also determines which yarns can replace each other. As long as you achieve the same knitting tension you can replace one yarn with another.

See DROPS lesson: How to measure your tension/gauge

See DROPS video: How to make a gauge tension swatch

The required amount of yarn is provided in grams, eg: 450 g. To calculate how many balls you’ll need you first need to know how many grams are in 1 ball (25g, 50g or 100g). This information is available if you click on the individual yarn quality on our pages. Divide the amount required with the amount of each ball. For example, if each ball is 50g (the most common amount), the calculation will be as follows: 450 / 50 = 9 balls.

The important thing when changing from one yarn to another is that the knitting/crochet tension remains the same. This is so that the measurements of the finished piece will be the same as on the sketch provided. It is easier to achieve the same knitting tension using yarns from the same yarn group. It is also possible to work with multiple strands of a thinner yarn to achieve the knitting tension of a thicker one. Please try our yarn converter. We recommend you to always work a test swatch.

Please NOTE: when changing yarn the garment might have a different look and feel to the garment in the photo, due to individual properties and qualities of each yarn.

See DROPS lesson: Can I use a different yarn than the one mentioned in the pattern?

All our yarns are categorised into yarn groups (from A to F) according to thickness and knitting tension – group A contains the thinnest yarns and group F the thickest. This makes it easier for you to find alternative yarns to our patterns, should you wish to switch yarn. All yarns within the same group have a similar knitting tension and can easily replace each other. However, different yarn qualities have different structures and properties which will give the finished work a unique look and feel.

Click here for an overview of the yarns in each yarn group

At the top of all our patterns you’ll find a link to our yarn calculator, which is a helpful tool should you wish to use a different yarn than suggested. By filling in the yarn quality you wish to replace, the amount (in your size) and number of strands, the calculator will present good alternative yarns with the same knitting tension. Additionally it will tell you how much you’ll require in the new qualities and whether you’ll need to work with multiple strands. Most skeins are 50g (some are 25g or 100g).

If the pattern is worked with multiple colours, every colour will have to be calculated separately. Similarly, if the pattern is worked with several strands of different yarns (for example 1 strand Alpaca and 1 strand Kid-Silk) you will have to find alternatives for each, individually.

Click here to see our yarn calculator

Since different yarns have different qualities and textures we have chosen to keep the original yarn in our patterns. However, you can easily find options among our available qualities by using our yarn calculator, or simply pick a yarn from the same yarn group.

It is possible that some retailers still have discontinued yarns in stock, or that someone has a few skeins at home that they would like to find patterns for.

The yarn calculator will provide both alternative yarn as well as required amount in the new quality.

If you think it's hard to decide what size to make, it can be a good idea to measure a garment you own already and like the size of. Then you can pick the size by comparing those measures with the ones available in the pattern's size chart.

You'll find the size chart at the bottom of the pattern.

See DROPS lesson: How to read size chart

The needle size provided in the pattern serves only as a guide, the important thing is to follow the knitting tension. And since knitting tension is very individual, you will have to adjust the needle size to ensure that YOUR tension is the same as in the pattern – maybe you’ll have to adjust 1, or even 2 needle sizes, up or down to achieve the correct tension. For this, we recommend that you work test swatches.

Should you work with a different knitting tension than the one provided, the measurements of the finished garment might deviate from the measurement sketch.

See DROPS lesson: How to measure your tension/gauge

See DROPS video: How to make a tension/gauge swatch

Working a garment top-down provides more flexibility and room for personal adjustment. For example it is easier to try the garment on while working, as well as making adjustments to length of yoke and shoulder caps.

The instructions are carefully explaining every step, in the correct order. Diagrams are adjusted to the knitting direction and are worked as usual.

The diagram depicts all rows/rounds, and every stitch seen from the right side. It is read from bottom to top, from right to left. 1 square = 1 stitch.

When working back and forth, every other row is worked from the right side and every other row is worked from the wrong side. When working from the wrong side, the diagram will have to be worked reversed: from left to right, knit stitches are purled, purl stitches are knit etc.

When working in the round every round is worked from the right side and the diagram are worked from right to left on all rounds.

See DROPS lesson: How to read knitting diagrams

The diagram depicts all rows/rounds, and every stitch seen from the right side. It is worked from bottom to top, from right to left.

When working back and forth every other row is worked from the right side: from right to left and every other row is worked from the wrong side: from left to right.

When working in the round, every row in the diagram are worked from the right side, from right to left.

When working a circular diagram you start in the middle and work your way outwards, counter clockwise, row by row.

The rows usually start with a given number of chain stitches (equivalent to the height of the following stitch), this will either be depicted in the diagram or explained in the pattern.

See DROPS lesson: How to read crochet diagrams

Instructions for working several diagrams after each other on the same row/round, will often be written like so: “work A.1, A.2, A.3 a total of 0-0-2-3-4 times". This means you work A.1 once, then A.2 is worked once, and A.3 is repeated (in width) the number of times provided for your size – in this case like so: S = 0 times, M = 0 times, L=2 times, XL= 3 times and XXL = 4 times.

The diagrams are worked as usual: begin with the first row in A.1, then work the first row in A.2 etc.

See DROPS lesson: How to read knitting diagrams

See DROPS lesson: How to read crochet diagrams

The total width of the garment (from wrist-to-wrist) will be larger in the larger sizes, despite the actual sleeves being shorter. The larger sizes have longer sleeve caps and wider shoulders, so there will be a good fit in all sizes.

The measurement sketch/schematic drawing provides information regarding the full length of the garment. If it’s a jumper or a jacket the length is measured from the highest point on the shoulder closest to the neckline, and straight down to the bottom of the garment. It is NOT measured from the tip of shoulder. Similarly, the length of yoke is measured from the highest point on the shoulder and down to where yoke is split into body and sleeves.

On a jacket measures are never taken along bands, unless specifically stated. Always measure inside band stitches when measuring the length.

See DROPS lesson: How to read a schematic drawing

Diagrams are often repeated on the round or in height. 1 repeat is the diagram the way it appears in the pattern. If it says to work 5 repeats of A.1 in the round, then you work A.1 a total of 5 times after/next to each other in the round. If it says to work 2 repeats of A.1 vertically/in height you work the entire diagram once, then begin again at the start and work the entire diagram one more time.

Chain stitches are slightly narrower than other stitches and to avoid working the cast-on edge too tight, we simply chain more stitches to begin with. The stitch count will be adjusted on the following row to fit the pattern and measurement sketch.

The rib edge is more elastic and will contract slightly compared to, for example, stocking stitch. By increasing before the rib edge, you avoid a visible difference in width between the rib edge and the rest of the body.

It’s very easy to cast off too tightly, and by making yarn overs while casting off (and simultaneously casting these off) you avoid a too tight cast off edge.

See DROPS video: How to bind off with yarn overs (yo)

To achieve an even increase (or decrease) you can increase on, for example: every 3rd and 4th row alternately, like so: work 2 rows and increase on the 3rd row, work 3 rows and increase on the 4th. Repeat this until the increase is complete.

See DROPS lesson: Increase or decrease 1 st on every 3rd and 4th row alternately

Should you prefer to work in the round instead of back and forth, you may of course adjust the pattern. You’ll need to add steeks mid-front (usually 5 stitches), and follow the instructions. When you would normally turn and work from the wrong side, simply work across the steek and continue in the round. At the end you’ll cut the piece open, pick up stitches to work bands, and cover the cut edges.

See DROPS video: How to knit steeks and cut open

Should you prefer to work back and forth instead of in the round, you may of course adjust the pattern so you work the pieces separately and then assemble them at the end. Divide the stitches for the body in 2, add 1 edge stitch in each side (for sewing) and work the front and back pieces separately.

See DROPS lesson: Can I adapt a pattern for circular needles into straight needles?

Pattern repeats can vary slightly in the different sizes, in order to get the correct proportions. If you’re not working the exact same size as the garment in the photo, yours might deviate slightly. This has been carefully developed and adjusted so that the complete impression of the garment is the same in all sizes.

Make sure to follow instructions and diagrams for your size!

If you have found a pattern you like which is available in women’s size it’s not very difficult to convert it to men’s size. The biggest difference will be the length of sleeves and body. Start working on the women size that you think would fit across the chest. The additional length will be worked right before you cast off for the armhole/sleeve cap. If the pattern is worked top-down you can add the length right after the armhole or before the first decrease on sleeve.

Regarding additional yarn amount, this will depend on how much length you add, but it is better with a skein too many than too few.

All yarns will have excess fibres (from production) that might come off as lint or shedding. Brushed yarns (ie hairier yarns) have more of these loose, excess fibres, causing more shedding.

Shedding also depends on what is worn under or over the garment, and whether this pulls at the yarn fibres. It’s therefore not possible to guarantee that there will be no shedding

Below are some tips on how to get the best result when working with hairier yarns:

1. When the garment is finished (before you wash it) shake it vigorously so the looser hairs come off. NOTE: do NOT use a lint roller, brush or any method that pulls at the yarn.

2. Place the garment in a plastic bag and put it in your freezer - the temperature will cause the fibres to become less attached to each other, and excess fibres will come off easier.

3. Leave in the freezer for a few hours before taking it out and shaking it again.

4. Wash the garment according to the instructions on the yarn label.

Pilling is a natural process that happens to even the most exclusive of fibers. It's a natural sign of wear and tear that is hard to avoid, and that is most visible in high friction areas of your garment like a sweater's arms and cuffs.

You can make your garment look as new by removing the pilling, using a fabric comb or a pill/lint remover.

Still can't find the answer you need? Then scroll down and leave your question so one of our experts can try to help you. This will be done normally within 5 to 10 working days.
In the meantime, you can read the questions and answers that others have left to this pattern or join the DROPS Workshop on Facebook to get help from fellow knitters/crocheters!

You might also like...

Raspberry Kiss Jumper

Vanessa, United States

Raspberry Kiss Jumper

Christina, Canada

Raspberry Kiss Jumper

Joyce, United States

Raspberry Kiss

Ana, Spain

Summer knit

Sif, Denmark

Cute Cotton Sweater

Ingrid, United States

my summer sweater

@cohlb, Hungary

Post a comment to pattern DROPS 202-5

We would love to hear what you have to say about this pattern!

If you want to leave a question, please make sure you select the correct category in the form below, to speed up the answering process. Required fields are marked *.

Comments / Questions (43)

country flag Karine wrote:

Bonjour! Dans la partie empiècement, comment ajouter le motif A2a en largeur tél que décrit dans le texte suivant : « Quand A.1 à A.3 sont terminés, continuer de la même façon; c'est-à-dire tricoter A.1/A.3 après/avant chaque raglan du devant/dos; on a suffisamment de mailles pour tricoter 2 motifs de A.2a en plus en largeur. » Au début du rang et à la fin ou bien on le tricote 3 fois de suite, ce n’est pas clair. Merci!

28.07.2023 - 18:22

DROPS Design answered:

Bonjour Karine, quand les diagrammes ont été tricotés 1 fois en hauteur, vous avez augmenté suffisamment de mailles pour tricoter 2 motifs de plus de A.2a, autrement dit, vous allez ensuite tricoter:A.1 puis 3 fois A.2a, tricotez ensuite A.2b et terminez par A.3. Si vous n'avez pas encore terminé les augmentations du raglan après cette 2ème fois, recommencez les diagrammes et cette fois, tricotez 5 fois A.2a. Bon tricot!

31.07.2023 - 09:59

country flag Vladimíra Fidrmucová wrote:

Dobrý den, děkuji za vaše krásné stránky o pletení a háčkování. Některé modely ze starších katalogů nejsou přeloženy do českého jazyka . Mohla bych vás poprosit o přeložení tohoto svetru do českého návodu ? Děkuji Vlaďka

23.05.2023 - 15:47

DROPS Design answered:

Dobrý den, Vlaďko, díky za zpráci a za tip - český návod přidáme během 1-2 dnů. Hezký den! Hana

23.05.2023 - 18:06

country flag Sophie D wrote:

Merci de votre réponse mais je ne suis pas plus avancée dans ma problématique ! Pourriez_vous au moins dire quelle est la taille du mannequin et celle tricotée du modèle qu'elle porte ?

01.03.2023 - 11:35

DROPS Design answered:

Bonjour Sophie, nos modèles portent en général soit du S soit du M, mais comme chacune a sa propre morphologie, seules comptent les mesures d'un vêtement analogue que vous avez déjà et dont vous aimez la forme, vous pourrez ainsi choisir la taille et l'aisance qui vous correspondent. Bon tricot!

01.03.2023 - 13:28

country flag Sophie D wrote:

Bonjour, Je voudrais tricoter ce très joli modèle mais j'ai un gros doute sur la taille à choisir. Le schéma indique un tour de poitrine, (exemple pour la taille S : 43*2 = 84 cm): les mesures ainsi écrites comportent-elles déjà l'aisance du pull ou bien faut-il rajouter une aisance et si oui de combien pour avoir le même rendu que le modèle de présentation ? Merci d'avance et bonne journée Sophie

01.03.2023 - 10:00

DROPS Design answered:

Bonjour Sophie D, mesurez un vêtement similaire que vous avez et dont vous aimez la forme et comparez ces mesures à celles du schéma, vous pourrez ainsi choisir la taille qui convient ainsi que l'aisance que vous souhaitez. Retrouvez plus d'infos ici. Bon tricot!

01.03.2023 - 10:08

country flag Anna wrote:

Witam, jeszcze jedno pytanie, jak rozdziele już rękawy to jak ułożyć schematy? Na przodzie i tyle mam po 95 oczek. Jak ułożę tak jak wcześniej wielokrotność A2a i na końcu A2b to z jednej strony nie będzie wzoru.Dodam że robię ażur tylko z przodu.

09.01.2023 - 19:58

DROPS Design answered:

Witaj Aniu, schemat jest już wykonywany w robótce jakiś czas, więc po prostu możesz go dopasować, tak aby dobrze wyglądał na sweterku. Pozdrawiamy!

10.01.2023 - 08:28

country flag Anna wrote:

Witam, jak skończę przerabiać schemat A1-A3 to zaczynam schematem A1 i powtarzam schemat A2a odpowiednia ilość razy, następnie schemat A2b i schemat A3, zgadza się? Jeśli po schemacie A2a będzie schemat A3 to dwa kwiatki będą obok siebie.

05.01.2023 - 20:12

DROPS Design answered:

Witaj Anno, jest dokładnie tak jak piszesz. Ten kwiatek w schemacie A.2a i następnie kolejny w A.2b nie będą obok siebie, będzie między nimi różnica 11 oczek. W schemacie A.2b jest tylko jeden kwiatek, zaś w schemacie A.2a jest ich 2. Pozdrawiamy!

06.01.2023 - 17:53

country flag Eef wrote:

Kloppen het aantal steken voor het achterpand en voorpand wel ? Ik ben al lang voorbij de 83, maar nog niet aan mijn 19 cm. Mijn stekenverhouding is correct.

21.12.2022 - 21:36

DROPS Design answered:

Dag Eef,

Ja, het aantal steken zouden moeten kloppen. Komt jouw stekenverhouding overeen met die in het patroon? Heb je iedere 2e naald gemeerderd voor de raglan? Dus de ene naald wel en de andere naald niet.

22.12.2022 - 07:50

country flag Halina wrote:

Dziekuje, a co robie z motywem A 2b?

14.06.2022 - 17:16

DROPS Design answered:

Witaj Halino, jest przerabiany jak wcześniej. Pozdrawiamy!

15.06.2022 - 08:20

country flag Halina wrote:

Przerobilam schemat A1 do A3 jeden raz. Jak dalej robic schemat? A1, A2a, a dalej jak? Mam przeciesz wiecej oczek, prosze o wyjasnienie

13.06.2022 - 18:29

DROPS Design answered:

Witaj Halino, Gdy schematy A.1 - A.3 są zakończone, dalej przerabiać w taki sam sposób; tj. przerobić schematy A.1/A.3 za/przed każdym reglanem przodu/tyłu; jest teraz wystarczająca liczba oczek, aby przerobić o 2 motywy wg schematu A.2a więcej na szerokość. Czyli te dodatkowe oczka, które masz będziesz przerabiać wg schematu A.2a, będzie tych powtórzeń A.2a coraz więcej wraz postępem robótki. Pozdrawiamy!

14.06.2022 - 08:13

country flag Halina wrote:

Det gäller Ok. När a1 till a3 är klara en gång på höjden finns det plats för 2 rapporter med 2a på bredden står det i beskrivningen men vad gör jag med 2b, ska det fortsättas med bara en rapport av 2b

12.06.2022 - 07:22

DROPS Design answered:

Hej Halina, diagrammerne hører sammen, når du er klar med A.1 og A.3 så er du også klar med raglanudtagningerne :)

16.06.2022 - 09:04