
Popular categories
Looking for a yarn?


|
|
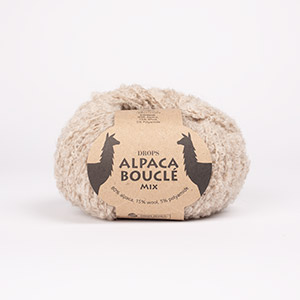
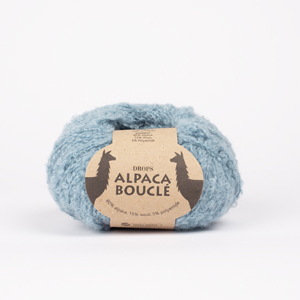
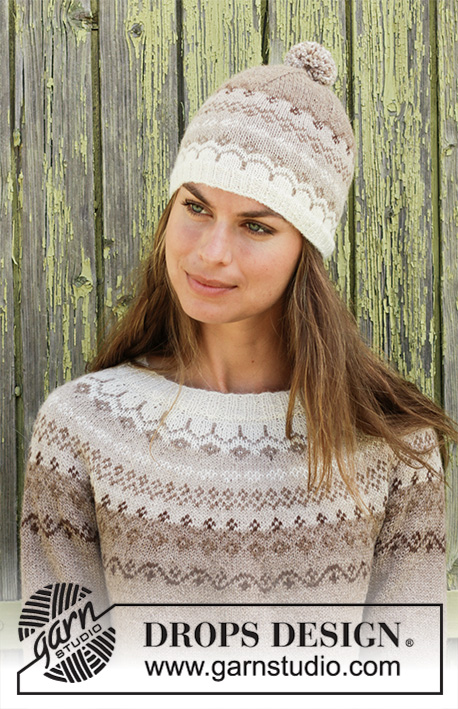
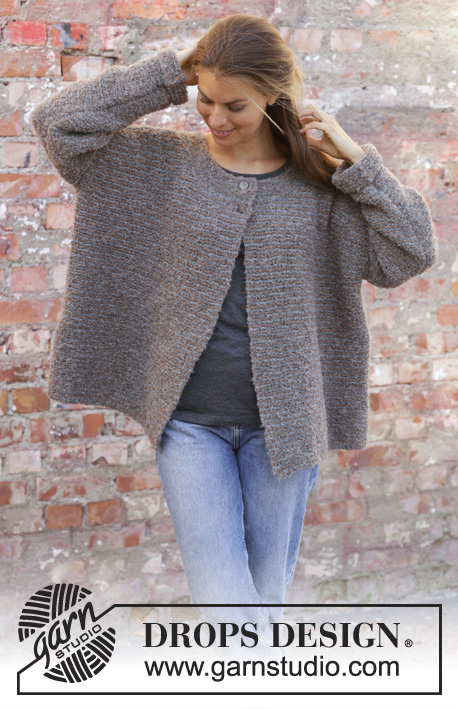
Willow Lane Jacket |
|
 |
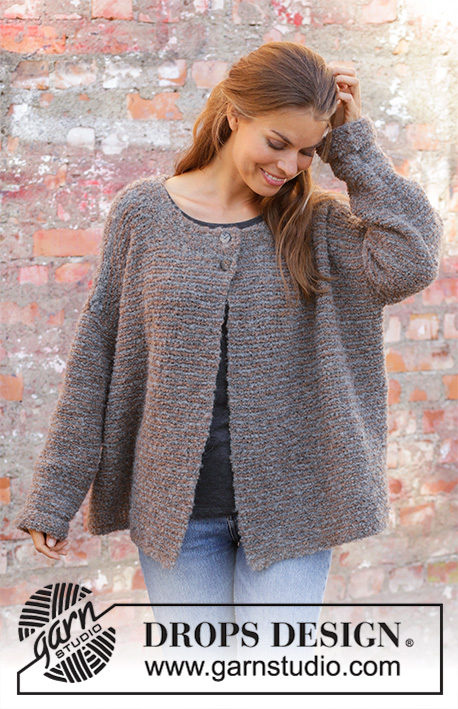 |
Knitted jacket in DROPS Alpaca Bouclé. Worked back and forth in garter stitch and stripes. Size: S - XXXL
DROPS 197-36 |
|
|
---------------------------------------------------------- EXPLANATION FOR THE PATTERN: ---------------------------------------------------------- GARTER STITCH (back and forth): 1 ridge = knit 2 rows. STRIPES: * Work 1 ridge brown, 1 ridge grey *, work from *-*. DECREASE TIP-1 (applies to sleeves): Decrease 1 stitch inside 1 edge stitch in garter stitch in each side by knitting 2 stitches together. DECREASE TIP-2 (evenly): To calculate how to decrease evenly, use the total number of stitches on row (e.g. 92 stitches), minus bands (e.g. 10 stitches) and divide the remaining stitches by number of decreases to be done (e.g. 4) = 20.5. In this example work alternately approx. every 19th and 20th stitch and every 20th and 21st stitch together and do not decrease over bands. BUTTONHOLES: Decrease for buttonholes on right band. 1 BUTTONHOLE = knit third and fourth stitch from edge together and make 1 yarn over. On next row knit yarn over = hole. Bind off decrease for buttonholes when piece measures 45-47-48-50-51-53 cm = 17¾"-18½"-19"-19¾"-20"-21" In addition decrease for a buttonhole on neck edge. ---------------------------------------------------------- START THE PIECE HERE: ---------------------------------------------------------- JACKET - SHORT OVERVIEW OF THE PIECE: Worked back and forth on circular needle in parts and sewn together when finished. The entire jacket is worked in garter stitch and stripes. Sleeves are worked back and forth on circular needle, top down. Decrease for a buttonhole on band and 1 buttonhole on neck edge. JACKET: BACK PIECE: Cast on 98-104-110-118-126-136 stitches (including 1 edge stitch in each side) on circular needle size 5.5 mm = US 9 with 1 strand of each color (= 2 strands). Work 2 ridges in GARTER STITCH - read explanation above. Then work with 1 strand Alpaca Bouclé. Now work in garter stitch and STRIPES - read explanation above, until piece measures 39-40-41-42-43-44 cm = 15¼"-15¾"-16⅛"-16½"-17"-17¼". REMEMBER THE KNITTING GAUGE! At the beginning of the next 2 rows bind off 2-2-3-3-4-4 stitches for armholes = 94-100-104-112-118-128 stitches. Continue back and forth in garter stitch and stripes. When piece measures 50-52-54-56-58-60 cm = 19¾"-20½"-21¼"-22"-22¾"-23⅝", bind off the middle 32-32-34-34-36-36 stitches for neck and finish each shoulder separately. Then bind off 1 stitch at the beginning of next row from neck = 30-33-34-38-40-45 stitches. Continue to work until piece measures 56-58-60-62-64-66 cm = 22"-22¾"-23⅝"-24⅜"-25¼"-26. Bind off, but make sure to avoid a tight bind-off edge by making 1 yarn over after approx. every 5th stitch. Bind off yarn over as stitch. Work the other shoulder the same way. RIGHT FRONT PIECE: Cast on 53-56-59-63-67-72 stitches (including 1 edge stitch in the side and 5 band stitches towards mid front) on circular needle size 5.5 mm = US 9 with 1 strand of each color (= 2 strands). Work 2 ridges. Then work with 1 strand Alpaca Bouclé. Now work in garter stitch and stripes, until piece measures 39-40-41-42-43-44 cm = 15¼"-15¾"-16⅛"-16½"-17"-17¼". On next row from wrong side bind off 2-2-3-3-4-4 stitches for armholes in the side = 51-54-56-60-63-68 stitches. Continue back and forth in garter stitch and stripes. Remember BUTTONHOLES – read explanation above, when piece measures 45-47-48-50-51-53 cm = 17¾"-18½"-19"-19¾"-20"-21". When piece measures 47-49-50-52-53-55 cm = 18½"-19¼"-19¾"-20½"-21"-21⅝", slip the first 13-13-14-14-15-15 stitches (from right side) on a stitch holder for neck. Then bind off stitches on every row from neck as follows: Bind off 3 stitches 2 times and 1 stitch 2 times = 30-33-34-38-40-45 stitches. Continue to work until piece measures 56-58-60-62-64-66 cm = 22"-22¾"-23⅝"-24⅜"-25¼"-26". Bind off, but make sure to avoid a tight bind-off edge by making 1 yarn over after approx. every 5th stitch. Bind off yarn over as stitch. LEFT FRONT PIECE: Cast on 53-56-59-63-67-72 stitches (including 1 edge stitch in the side and 5 band stitches towards mid front) on circular needle size 5.5 mm = US 9 with 1 strand of each color (= 2 strands). Work 2 ridges. Then work with 1 strand Alpaca Bouclé. Now work in garter stitch and stripes, until piece measures 39-40-41-42-43-44 cm =15¼"-15¾"-16⅛"-16½"-17"-17 1/4. On next row from right side bind off 2-2-3-3-4-4 stitches for armholes in the side = 51-54-56-60-63-68 stitches. Continue back and forth in garter stitch and stripes. When piece measures 47-49-50-52-53-55 cm = 18½"-19¼"-19¾"-20½"-21"-21⅝", slip the first 13-13-14-14-15-15 stitches (from wrong side) on a stitch holder for neck. Then bind off stitches on every row from neck as follows: Bind off 3 stitches 2 times and 1 stitch 2 times = 30-33-34-38-40-45 stitches. Continue to work until piece measures 56-58-60-62-64-66 cm = 22"-22¾"-23⅝"-24⅜"-25¼"-26".. Bind off, but make sure to avoid a tight bind-off edge by making 1 yarn over after approx. every 5th stitch. Bind off yarn over as stitch. SLEEVE: Cast on 53-56-59-62-65-68 stitches on circular needle size 5.5 mm = US 9 with 1 strand brown. Work in garter stitch and stripes back and forth. When piece measures 4 cm = 1½", decrease 1 stitch inside 1 edge stitches in garter stitch in each side - read DECREASE TIP-1! Decrease like this approx. every 4-3-3-3-3-2 cm = 1½"-1⅛"-1⅛"-1⅛"-1⅛"-¾" 7-8-8-9-10-11 times in total = 39-40-43-44-45-46 stitches. Continue until sleeve measures 41-40-40-38-37-35 cm = 16⅛"-15¾"-15¾"-15"-14½"-13¾". Work 2 ridges with 1 strand of each color (= 2 strands). Bind off, but make sure to avoid a tight bind-off edge by making 1 yarn over after approx. every 5th stitch. Work the other sleeve the same way. ASSEMBLY: Sew shoulder seams inside bind-off edge. Sew sleeves in body down to stitches bind off for armhole. Sew inside 1 edge stitch in garter stitch on body and inside cast-on edge on sleeves. Sew seam under sleeve and side seams in one inside 1 edge stitch in garter stitch. Repeat in the other side. NECK EDGE: Work neck edge back and forth on circular needle. Begin with circular needle size 5.5 mm = US 9 and 1 strand in each color (= 2 strands) and pick up from right side 92-92-97-97-102-102 stitches (including stitches from stitch holders). Knit 1 row from wrong side. Continue by knitting 8 rows (= 4 ridges), AT THE SAME TIME on every row from right side decrease 4 stitches evenly - read DECREASE TIP-2. When neck edge measures 1 cm = ⅜", decrease for buttonholes at the beginning of row from right side as follows: Knit third and fourth stitch from edge together and make 1 yarn over (on next row knit yarn over = hole) = 76-76-81-81-86-86 stitches. Work 2 more ridges. Bind off - make sure that the bind-off edge is not too tight. |
|

|
|
|
Have you made this or any other of our designs? Tag your pictures in social media with #dropsdesign so we can see them! Do you need help with this pattern?You'll find tutorial videos, a Comments/Questions area and more by visiting the pattern on garnstudio.com. © 1982-2024 DROPS Design A/S. We reserve all rights. This document, including all its sub-sections, has copyrights. Read more about what you can do with our patterns at the bottom of each pattern on our site. |
|


With over 40 years in knitting and crochet design, DROPS Design offers one of the most extensive collections of free patterns on the internet - translated to 17 languages. As of today we count 304 catalogs and 11422 patterns - 11417 of which are translated into English (US/in).
We work hard to bring you the best knitting and crochet have to offer, inspiration and advice as well as great quality yarns at incredible prices! Would you like to use our patterns for other than personal use? You can read what you are allowed to do in the Copyright text at the bottom of all our patterns. Happy crafting!
Comments / Questions (17)
Hi, On Willow Lane Jacket, am I decreasing from the (15) sts on stitch holder or from the remaining sts on needle? I cannot see any reference to rejoining yarn to 15 sts on stitch holder… Many thanks.
04.11.2023 - 15:54DROPS Design answered:
Dear Susie, if you are talking about the times when you slip stitches, you will slip them for the neck from the sts in the needle and then pick them up when you work the neck at the end. Happy knitting!
05.11.2023 - 20:07Hello, I am so sorry that I don't understand Danish. Would it be possible to have the instructions for this lovely garment in English, please? Many thanks Christina
25.10.2021 - 19:08Bonjour, Pour les devants il est noté de faire 5 mailles de bordure devant. Je ne comprends pas comment elles doivent se faire. Merci pour votre réponse.
20.10.2021 - 17:44DROPS Design answered:
Bonjour Mme Tercier, elles se tricotent au point mousse comme les autres mailles, mais ces 5 mailles sont pour la bordure des devant: pour les boutonnières et les boutons. Bon tricot!
21.10.2021 - 06:52Hallo, heißt in Streifen stricken, dass in je einer Farbe 1x hin- und zurück gestrickt wird, z.B. in Grau, und dann in der anderen Farbe, also in Braun auch wieder hin- und zurück gestrickt wird? Vielen Dank und liebe Grüße, Ilsemarie Weber
22.09.2021 - 13:19DROPS Design answered:
Liebe Ilsemarie, für die Streifen stricken Sie jeweils 1 krausrippe = 2 Reihen rechts mit braun/ 1 krausrippe = 2 Reihen rechts mit grau (oder die gewüsnchten Fraben). Viel Spaß beim stricken!
22.09.2021 - 17:14Les manches: après avoir tricoté 40cm je ne comprends pas ce qui suit : tricoter 2 cotes mousse st ce que ca veut dire 2 rangs . Il m semble que la grandeur des manches n'est pas très longue 41 cm elle v a en bas des épaules est-ce correct
21.09.2021 - 02:27DROPS Design answered:
Bonjour Mme Gagnon, pour obtenir 1 côte mousse, on doit tricoter 2 rangs endroit cf POINT MOUSSE (en allers et retours):, pour tricoter 2 côtes mousse, on va devoir tricoter 4 rangs endroit. Retrouvez toutes les mesures finales par taille dans le schéma en bas de page, comparez-les à un vêtement analogue dont vous aimez la forme pour ajuster si besoin (n'oubliez pas que les épaules sont larges et qu'elles influencent automatiquement la longueur des manches). Bon tricot!
21.09.2021 - 09:11Bonjour, Pour ce modele, doit on monter les mailles avec les deux fils ensembles? Est-ce qu´il y a des cotes dans le bas de la veste et au poignets? Car 1 cote de mousse et un point de mousse pour moi c´est toujours tricote en endroit sur les deux cotes...c´est un peu confus. Merci de me repondre sous peu, Sylvie
18.06.2021 - 20:54DROPS Design answered:
Bonjour Mme Vaillancourt, on monte effectivement les mailles avec 2 fils en même temps (= 1 de chaque couleur) pour que le montage soit suffisamment souple, et on tricote 2 côtes mousse (= 4 rangs endroit - cf POINT MOUSSE) puis on continue avec juste 1 seul fil en suivant les rayures. Bon tricot!
21.06.2021 - 07:23Jeg er igang med at strikke denne i den største størrelse.....kan ikke forstå opskriften. Det virker som om, ærmet skal være kortere i de store størrelser end i de små størrelser.....Er det ikke en fejl ? Det virker ikke logisk for mig:-)
26.03.2020 - 08:43DROPS Design answered:
Hei Lise. Man har ikke lengre armer selv om man bruker større plagg. Vidden på plagget + ermlengden på den største størrelsen blir større enn vidden + ermlengden på den minste størrelsen. God Fornøyelse!
30.03.2020 - 13:22Ik heb nog heel veel laine coton van Phildar 50% wol 50% katoen , 22 st 2n 29 nl zijn 10x10 cm, naalden 3,5 , kan ik dat gebruiken?
09.03.2020 - 16:36DROPS Design answered:
Dag Petra,
Het beste is om even een proeflapje te maken en te kijken wat de stekenverhouding is. Op basis daarvan kun je een patroon uitzoeken.
10.03.2020 - 20:03Stricke die Jacke bereits zum zweiten Mal. Diesmal in eine anderen Farbkombi. Lässt sich sehr schön tragen und ist kuschelweich.
20.02.2020 - 12:57Is de kantsteek voor de voorpanden de eerste en laatste steek recht breien? Of anders?
19.01.2020 - 14:41DROPS Design answered:
Dag Hanneke,
Bij de voorpanden zitten de kantsteken alleen in de zijkanten (dus waar de zijnaden komen) en niet bij midden voor. De kantsteken worden altijd in ribbelsteek gebreid
19.01.2020 - 18:02