
Popular categories
Looking for a yarn?


|
|||||||||||||||||||
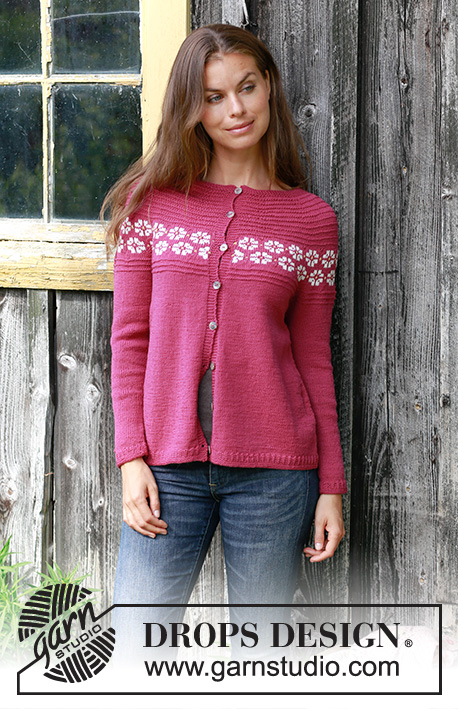
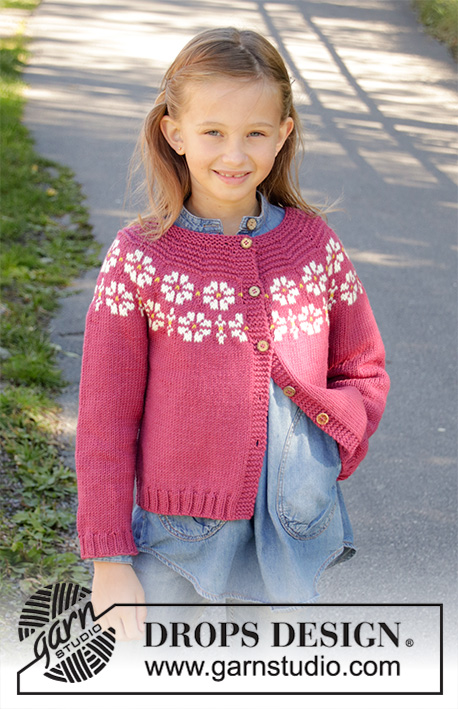
Daisy Delight Cardigan |
|||||||||||||||||||
 |
 |
||||||||||||||||||
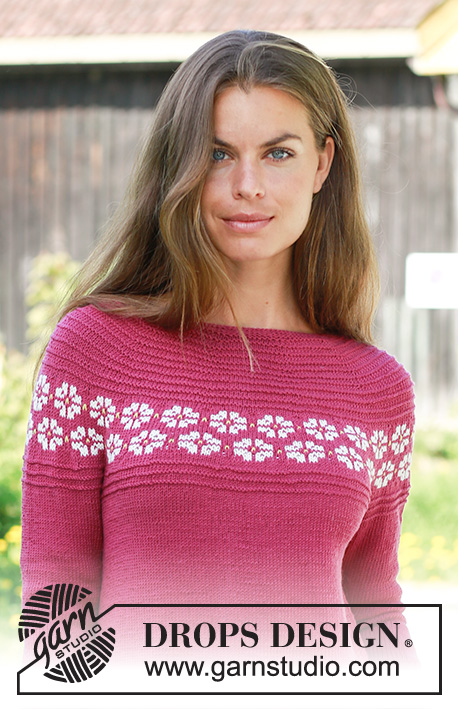
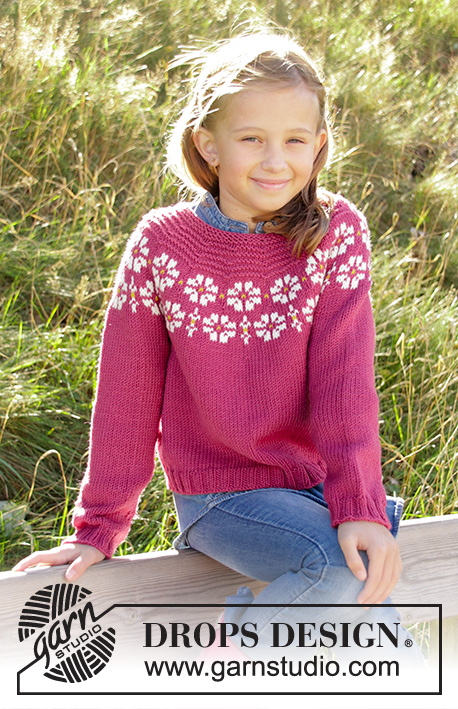
Knitted jacket for children in DROPS Merino Extra Fine. DROPS Lima or DROPS Cotton Light. The piece is worked top down with flowers, coloured pattern, garter stitch and stocking stitch. Sizes 3-12 years.
DROPS Children 34-5 |
|||||||||||||||||||
|
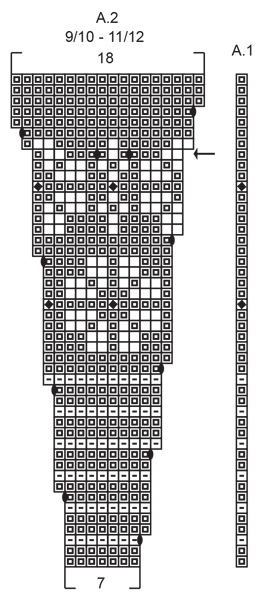
EXPLANATIONS FOR THE PATTERN: ------------------------------------------------------- RIDGE/GARTER STITCH (worked back and forth): 1 ridge = Knit 2 rows. PATTERN: See diagrams A.1 and A.2. Choose diagram for your size. The diagrams show all the rows in the pattern seen from the right side. INCREASE TIP-1 (evenly spaced): To work out how to increase evenly, count the total number of stitches on the needle (e.g. 72 stitches) and divide by the number of increases to be made (e.g. 17) = 4.2. In this example increase by making 1 yarn over after approx. each 4th stitch. On the next row work the yarn overs twisted to avoid holes. INCREASE TIP-2 (for sides of body): Work until there is 1 stitch left before the marker thread, 1 yarn over, knit 2 (marker thread sits in the middle of these 2 stitches), 1 yarn over = 2 stitches increased. On the next row work the yarn overs twisted to avoid holes. Then work the new stitches in stocking stitch. DECREASE TIP (for sleeves): Decrease 1 stitch on each side of the marker thread as follows: Work until there are 3 stitches left before the marker thread, knit 2 together, knit 2 (marker thread sits in the middle of these 2 stitches), slip 1 stitch as if to knit, knit 1 and pass the slipped stitch over the knitted stitch = 2 stitches decreased. BUTTONHOLES: Work buttonholes on the right band (when garment is worn). 1 buttonhole = start from the wrong side and knit together stitches 2 and 3 from the edge, make 1 yarn over. On the next row knit the yarn over to leave a hole. The first buttonhole is worked after 1 cm on the neck and then the other 4-4-5-5-5 buttonholes are worked every 6-6-6-7-7 cm. ------------------------------------------------------- START THE PIECE HERE: ------------------------------------------------------- JACKET - SHORT OVERVIEW OF THE PIECE: The piece is worked back and forth with circular needle, top down, then the front and back pieces are worked back and forth. The sleeves are worked in the round with short circular needle/double pointed needles. YOKE: Cast on 72-76-80-86-92 stitches with circular needle size 4 and heather/cerise/dark red. Work 2 RIDGES – see description above – remember BUTTONHOLES on right band – see description above. Knit 1 row where you increase 17-19-21-23-24 stitches evenly on row - READ INCREASE TIP-1! = 89-95-101-109-116 stitches on needle. Knit 1 row from the wrong side. Insert a marker in this row and measure onwards from here. Work according to diagrams A.1 and A.2 from the right side as follows: Work 5 band stitches in GARTER STITCH, A.1 over 1 stitch, A.2 a total of 13-14-15-14-15 times on the row and 5 band stitches in garter stitch. REMEMBER THE KNITTING TENSION! When diagrams A.1 and A.2 have been completed in height there are 219-235-251-263-281 stitches on the needle. On the next row from the right side increase 3-3-5-1-5 stitches evenly on row = 222-238-256-264-286 stitches. Continue with stocking stitch and 5 band stitches in garter stitch on each side until the piece measures 15-15-16-17-18 cm from the marker. The next row from the right side is worked as follows: Work 5 band stitches in garter stitch, 31-33-36-37-38 stitches in stocking stitch (= front piece), place the next 44-48-51-53-62 stitches on a thread (= sleeve), cast on 6 new stitches under the sleeve, work 62-66-72-74-76 stitches in stocking stitch (= back piece), place the next 44-48-51-53-62 stitches on a new thread (= sleeve), cast on 6 new stitches, work 31-33-36-37-38 stitches (= front piece) and 5 band stitches in garter stitch. BODY: There are 146-154-166-170-174 stitches on the needle. THE PIECE IS NOW MEASURED FROM HERE! Insert 1 marker thread in the middle of the 6 new stitches cast on under each sleeve. Work stocking stitch back and forth, with 5 band stitches in garter stitch on each side. When the piece measures 3 cm increase 1 stitch on each side of each marker (= 4 stitches increased) READ INCREASE TIP–2! Repeat the increase every 3-4-5-6-7 cm a total of 3 times = 158-166-178-182-186 stitches on the needle. Continue working as before until the piece measures 12-16-19-22-25 cm. Work 1 row from the right side where you increase 10-10-10-10-10 stitches evenly on row (do not increase on the bands) = 168-176-188-192-196 stitches. The next row is worked as follows from the right side: Work 5 band stitches in garter stitch, purl 2, * knit 2, purl 2 *. Work from *-* until there are 5 stitches left and work 5 band stitches in garter stitch. Continue this rib for 3 cm. On the next row from the right side cast off with garter stitch over garter stitch, knit over knit and purl over purl. Cut and fasten the strand. SLEEVE: Place the stitches from one thread on short circular needle/double pointed needles size 4 mm (= 44-48-51-53-62 stitches) and knit up 1 stitch in each of the 6 stitches cast on under the sleeve (= 50-54-57-59-68 stitches). Insert 1 marker thread in the middle of these 6 stitches. Work stocking stitch in the round for 2 cm. Now decrease 1 stitch on each side of the marker thread - READ DECREASE TIP. Continue with stocking stitch and repeat the decrease every 4-3½-4-4-3½ cm until you have decreased a total of 5-7-7-8-10 times = 40-40-43-43-48 stitches on the needles. Work stocking stitch until the sleeve measures 22-27-30-34-37 cm. Work 1 round and increase 4-4-5-5-4 stitches evenly on the round = 44-44-48-48-52 stitches. Work rib in the round with knit 2 / purl 2 for 3 cm. Loosely cast off with knit over knit and purl over purl. Cut and fasten strand. Work the other sleeve in the same way. ASSEMBLY: Sew opening under sleeves. Sew buttons onto left band. |
|||||||||||||||||||
Diagram explanations |
|||||||||||||||||||
|
|||||||||||||||||||
|
|||||||||||||||||||

|
|||||||||||||||||||

|
|||||||||||||||||||
|
Have you made this or any other of our designs? Tag your pictures in social media with #dropsdesign so we can see them! Do you need help with this pattern?You'll find tutorial videos, a Comments/Questions area and more by visiting the pattern on garnstudio.com. © 1982-2024 DROPS Design A/S. We reserve all rights. This document, including all its sub-sections, has copyrights. Read more about what you can do with our patterns at the bottom of each pattern on our site. |
|||||||||||||||||||


With over 40 years in knitting and crochet design, DROPS Design offers one of the most extensive collections of free patterns on the internet - translated to 17 languages. As of today we count 304 catalogues and 11422 patterns - 11422 of which are translated into English (UK/cm).
We work hard to bring you the best knitting and crochet have to offer, inspiration and advice as well as great quality yarns at incredible prices! Would you like to use our patterns for other than personal use? You can read what you are allowed to do in the Copyright text at the bottom of all our patterns. Happy crafting!
Comments / Questions (31)
Bonjour, Je vais commencé le tricot du gilet mais je voulais savoir si je devais faire mon échantillon en rond ou bien à plat?! Merci. Cordialement. Stéphanie
21.03.2024 - 11:21DROPS Design answered:
Bonjour Stéphanie, le gilet va se tricoter en allers et retours, vous pouvez ainsi tricoter votre échantillon en rangs, veillez juste bien à conserver la même tension pour les manches, quand vous tricoterez en rond (vous pouvez du coup en faire un en rond si vous pensez avoir une façon différente de tricoter). Bon tricot!
21.03.2024 - 15:52Hello! Sleeve question- when knitting the sleeve, where do I do the measurements from? Is it along the underarm? I’m almost to the cuff.
25.02.2024 - 18:50DROPS Design answered:
Dear Mrs Casteneda, measure along mid top on sleeve from where you started sleeve, ie from after the division. Happy knitting!
26.02.2024 - 09:33Hello! I have a question regarding the Daisy Delight Cardigan. On the A.2 stitch chart, sizes 3/4-7/8, on the row that contains the last stitch increases (8 rows) from the top of the chart) there are two yarnovers that come between 2 colors of yarn. Which color do I use to do the yarnover with? The off-white or the heather? Thank you fir your help!
23.02.2024 - 03:03DROPS Design answered:
Hi Cathie, You use the background colour (heather) both to make the yarn overs and to work the new stitches on the next row. This maintains the shape of the white pattern. Happy knitting
23.02.2024 - 07:18Dobrý den, prosím kterou řadou se začíná? Líc nebo Rub? ...Děkuji
27.12.2023 - 14:50DROPS Design answered:
Dobrý den, Anno, 1. pletená řada je lícová. Přidávání (po dokončení 2 vroubků) je také v lícové řadě. Hodně zdaru! Hana
30.12.2023 - 09:01Can I use Paintbox Simply Aran DK yarn for this garment?
10.06.2023 - 04:57DROPS Design answered:
Dear Suzie Rose, we unfortunately do not know this yarn, you can use our yarn converter to get alternative and new amount - or you are welcome to ask the store where you bought your yarn; they should be able to help you even per mail or telephone. Happy knitting!
12.06.2023 - 09:40I am knitting the 7-8yr size but when starting the daisy pattern I only have 13 repeats not the 15 stated on the pattern - I have 179 stitches on row 18. I have started this twice and stil getting the same result. It's there something I'm doing wrong ? Many thanks
02.03.2023 - 17:31DROPS Design answered:
Dear Christine, in size 7/8 years there are 101 sts worked as follows, seen from RS: 5 front band sts, A.1 (= 1 st), then repeat the 6 sts in A.2 until 5 sts remain (= a total of 15 times), finish with 5 front band sts; Row 18 should be worked over 12 sts (6 sts have been increased before as shown in diagram, alternately at the end + at the beg of each A.2), so that you should have: 5 + 1 + (12x15) + 5 = 191 sts. When A.2 is done there are 16 sts in each A.2 and 251 sts in total. Adding marker between each A.2 might help you to check your number of stitches after every round. Happy knitting!
03.03.2023 - 08:52Please can you tell me how I know how many balls of wool to order for this pattern? Thank you. Julie
03.02.2023 - 08:51DROPS Design answered:
Hi Julie, if you choose for example size 7/8 years that means you will need the 3rd amount of each colour, counting from the left (under MATERIALS). Each ball weighs 50 g. Please see also the lesson DROPS HERE. Happy knitting!
03.02.2023 - 09:23Bonjour, Je fais le modèle en 9/10 ans. Je ne comprends pas ce que veut dire dans l’empiècement après 5 mailles de bordure devant au point mousse : A.1 au dessus de la maille suivante. (Que veut dire cette phrase) Comment procéder ? En vous remerciant Bonne journée
12.04.2022 - 17:33DROPS Design answered:
Bonjour Mme Varain, tricotez simplement la maille suivante en suivant le diagramme A.1 , autrement dit, sur l'endroit, terminez par A.1 avant la bordure devant et sur l'envers, commencez par A.1 après la bordure devant. Le motif sera ainsi symétrique. Bon tricot!
19.04.2022 - 08:54Hej, mina knapphål hamnar inte på mitten av de fem kantmaskorna. Det ser ut som att de ska vara i mitten på bilderna tycker jag. Gör jag fel?
03.02.2022 - 11:25DROPS Design answered:
Hej Karin. Du ska sticka ihop 2:a och 3:e maskan och sedan göra ett omslag och då ska knapphålet hamna i mitten av kantmaskorna. Mvh DROPS Design
04.02.2022 - 12:19Working on the child's cardigan, on row 22 of A.2. there is no white, only the yellow centers. Do you recommend I carry the white across row 22 from row 21 so it is in place for row 23, or stop/start the white over again on row 23. I see no other way to carry it up beyond carrying it across or cutting and restarting. Thanks for the advice and wonderful patterns.
15.10.2021 - 01:56DROPS Design answered:
Dear Mrs Miller, that's only 2 sts difference, you can carry the white yarn at the end of row 22 so that it's on the right place at the beg of row 23 or just carry the yarn 1 stitch before the first stitch in white at the beg of first A.2. Your yarn store might have even more tips for you, do not hesitate to ask them, even per mail or telephone. Happy knitting!
15.10.2021 - 08:07