
Popular categories
Looking for a yarn?


|
|||||||||||||||||||
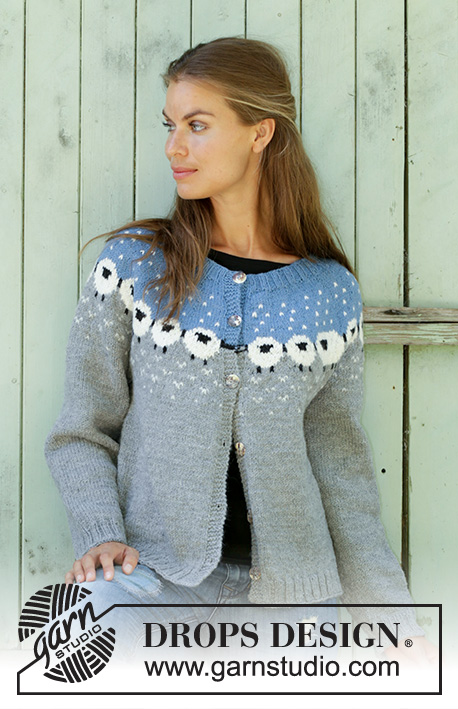
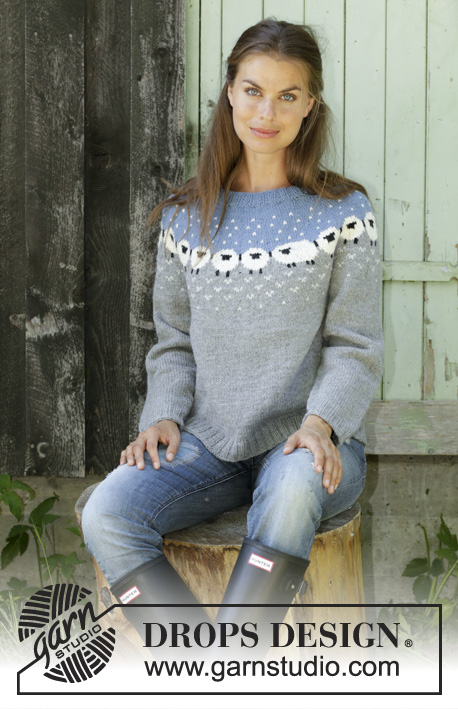
Lamb Dance Sweater |
|||||||||||||||||||
 |
 |
||||||||||||||||||
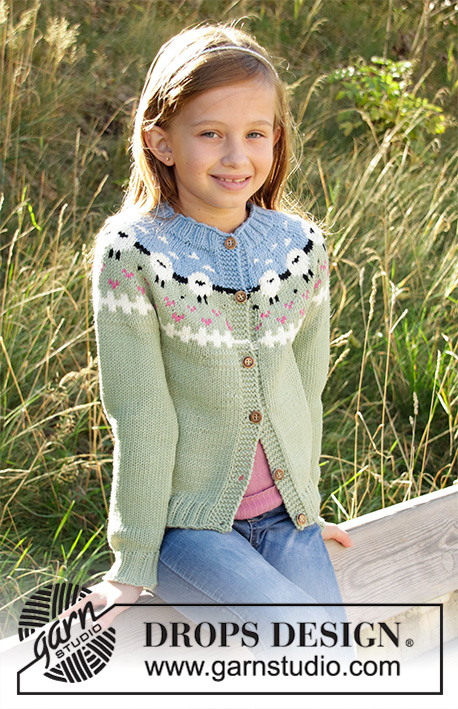
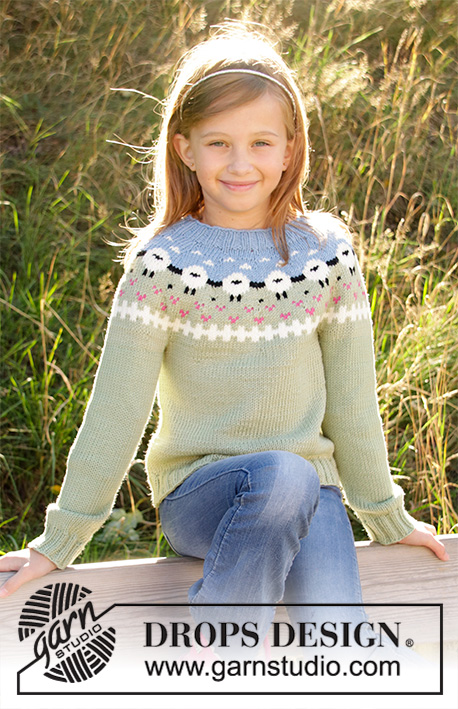
Knitted jumper for kids in DROPS Merino Extra Fine or DROPS Lima. Piece is knitted top down with sheep, colour pattern, ribs and stocking stitch. Size 3-12 years
DROPS Children 34-3 |
|||||||||||||||||||
|
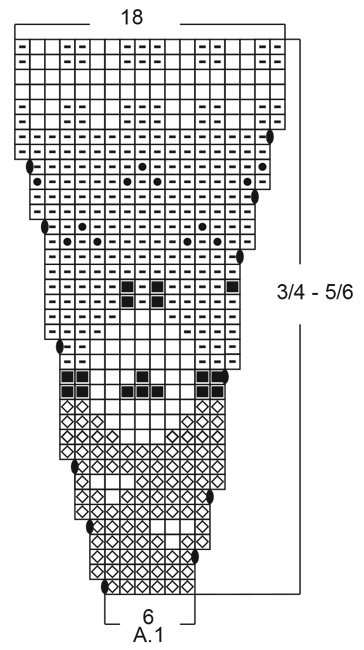
---------------------------------------------------------- EXPLANATION FOR THE PATTERN: ---------------------------------------------------------- PATTERN: See diagrams A.1. Choose diagram for your size. Diagram show all rows in pattern seen from the right side. DECREASE/INCREASE TIP (evenly): To calculate how to decrease evenly, use the total number of stitches on round (e.g. 84 stitches) and divide stitches by number of decreases to be done (e.g. 7) = 12. In this example decrease by knitting every 11th and 12th stitch together. To increase use the same calculation but make instead a yarn over after every 12th stitch. Knit yarn overs twisted on next round to avoid holes. INCREASE TIP-2 (applies to sides of body): Work until 1 stitch remains before marker thread, 1 yarn over, knit 2 (marker thread is in the middle of these stitches), 1 yarn over = 2 stitches increased. On next round work yarn over twisted to avoid hole. Then work the new stitches in stocking stitch. DECREASE TIP-2 (applies to sleeves): Decrease 1 stitch on each side of marker thread as follows: Work until 3 stitches remain before marker thread, knit 2 together, knit 2 stitches (marker thread is between these stitches), slip 1 stitch knitwise, knit 1, pass slipped stitch over stitch worked = 2 stitches decreased. ---------------------------------------------------------- START THE PIECE HERE: ---------------------------------------------------------- JUMPER - SHORT OVERVIEW OF THE PIECE: Worked in the round on circular needle, top down. When dividing for sleeves, work body in the round on circular needle, work sleeves in the round on double pointed needles/short circular needle. YOKE: Cast on 80-84-96-108-112 stitches on circular needle size 3 mm with light grey blue. Join to work in the round and work 1 round in stocking stitch. Work rib in the round with knit 2/purl 2 for 3 cm (neck edge). Switch to circular needle size 4 mm. Work 1 round in stocking stitch while decreasing 14-12-12-17-14 stitches evenly - read DECREASE/INCREASE TIP = 66-72-84-91-98 stitches. Then work according to diagram A.1, work diagram 11-12-12-13-14 times on round. NOTE: Choose diagram for correct size. REMEMBER THE KNITTING TENSION! When entire A.1 has been worked there are 198-216-240-260-280 stitches on round. On next round work with pistachio and stocking stitch and increase 14-8-2-2-2 stitches evenly on round = 212-224-242-262-282 stitches. Continue with pistachio and in stocking stitch until piece measures approx. 18-18-19-20-21 cm from cast-on edge. Work next round as follows: Knit 62-64-70-77-79 stitches (= back piece), slip the next 44-48-51-54-62 stitches on a stitch holder (= sleeve), cast on 6 new stitches under sleeve, work 62-64-70-77-79 stitches in stocking stitch (= front piece), slip the next 44-48-51-54-62 stitches on a new stitch holder (= sleeve), cast on 6 new stitches under sleeve. BODY: There are now 136-140-152-166-170 stitches on round. NOW MEASURE PIECE FROM HERE! Insert 1 marker thread in the middle of the 6 new stitches cast on. Continue in stocking stitch and pistachio. When piece measures 3 cm, increase 1 stitch on each side of each marker (= 4 stitches increased) - read INCREASE TIP-2! Repeat increase 1 more time after 4 cm = 144-148-160-174-178 stitches on needle. Work until piece measures approx. 12-16-19-22-25 cm (or to desired length, there is approx. 4 cm until finished measurements). Work 1 round in stocking stitch and increase 12-12-12-10-10 stitches evenly = 156-160-172-184-188 stitches. Switch to circular needle size 3 mm and work rib with knit 2/purl 2. Work rib for 4 cm. Loosely cast off stitches with knit over knit and purl over purl. Cut and fasten the yarn. SLEEVE: Slip stitches from on stitch holder back on a short circular needle/double pointed needles size 4 mm (= 44-48-51-54-62 stitches), pick up 1 stitch in each of the 6 stitches cast on on body (= 50-54-57-60-68 stitches). Insert 1 marker thread in the middle of these 6 stitches. Work in stocking stitch in the round until sleeve measures 2 cm. Now decrease 1 stitch on each side of marker thread - read DECREASE TIP-2! Continue in stocking stitch and repeat decrease every 4-3½-4-4-3½ cm until decrease has been done 5-7-7-8-10 times in total = 40-40-43-44-48 stitches on needle. Work in stocking stitch until sleeve measures 21-26-29-33-36 cm. Knit 1 round and increase 4-4-5-4-4 stitches on round = 44-44-48-48-52 stitches. Switch to double pointed needles size 3 mm and work rib in the round with knit 2/purl 2 for 4 cm. Loosely cast off stitches with knit over knit and purl over purl. Cut and fasten the yarn. Work the other sleeve the same way. |
|||||||||||||||||||
Diagram explanations |
|||||||||||||||||||
|
|||||||||||||||||||
|
|||||||||||||||||||

|
|||||||||||||||||||

|
|||||||||||||||||||
|
Have you made this or any other of our designs? Tag your pictures in social media with #dropsdesign so we can see them! Do you need help with this pattern?You'll find tutorial videos, a Comments/Questions area and more by visiting the pattern on garnstudio.com. © 1982-2024 DROPS Design A/S. We reserve all rights. This document, including all its sub-sections, has copyrights. Read more about what you can do with our patterns at the bottom of each pattern on our site. |
|||||||||||||||||||


With over 40 years in knitting and crochet design, DROPS Design offers one of the most extensive collections of free patterns on the internet - translated to 17 languages. As of today we count 304 catalogues and 11422 patterns - 11422 of which are translated into English (UK/cm).
We work hard to bring you the best knitting and crochet have to offer, inspiration and advice as well as great quality yarns at incredible prices! Would you like to use our patterns for other than personal use? You can read what you are allowed to do in the Copyright text at the bottom of all our patterns. Happy crafting!
Comments / Questions (41)
In size 11/12 it says to cast on 110 stitches and starts with a knit round and continues with 2 knits and 2 purls, it doesn't work for me because in the end it ends with two knits the same as at the beginning, that is to say there would be 4 knits in a row.No I know if I understand it correctly, greetings
25.02.2024 - 19:50DROPS Design answered:
Dear Marie, in size 11/12 you should cast on 112 st then after the first knitted round, work (K2, P2) a total of 28 times in the round, so that you get 4 x 28 = 112 sts. Happy knitting!
26.02.2024 - 09:43J'aime vos laines et regrette de ne plus en trouver au magasin diffuse laine de pornic 44210 France. Dommage donc. Jolis jacquards aussi.
14.11.2023 - 22:06Lamb dance, maat 9/10 jaar, daarvoor heb je al 300 gram pistache kleur nodig, Ben deze aan het breien en had maar 250 gram pistache gekocht in merino extra fine. Best dit aanpassen aub, want velen zullen wol tekort heb als ze deze mooie trui breien, heb het opgelost door in de mouwen witte en zwarte strepen te steken en eindigen met blauw. Maar toch spijtig. Gelieve op de site te corrigeren aub.
21.10.2023 - 15:25Maat 9/10 jaar, voor de pistache kleur en in merino extra fine, heb je bij deze maat ook al 300 gram wol nodig. Zou het corrigeren, want ik had zeker duidelijk tekort, heb het opgelost met witte, zwarte strepen in de mouw en blauw onderaan de mouw. Maar vind dit wel spijtig.
21.10.2023 - 15:17Hola. Estoy tejiendo el modelo para 5 años. Observé en el diagrama que al hacer el penúltimo aumento en el canesú se estaría agregando un punto en el dibujo de la flor de tres puntos. Es un error del diagrama o hay algo que no comprendí?
03.06.2023 - 06:26¿Do you have the pattern for babies?
31.05.2023 - 04:58DROPS Design answered:
Dear Mrs Lira, sorry we only start with size 2 years for this pattern. You will find all our baby jumpers with animals here if it can help. Happy knitting!
31.05.2023 - 08:28Bonsoir, veuillez ne pas tenir compte du précédent commentaire que j’ai fait, c’est mon erreur à moi.
14.04.2023 - 03:28Bonjour, j’aimerais faire ce patron en taille 3/4 mais il y a un problème . Dans le diagramme A1 il y a 12 fois des augmentations de 12, ce qui fait 144 mailles plus les 66, ce qui donne 210 et non pas 198. Quelqu’un peut m’expliquer s’il y a une erreur ou si j’ai mal compris? Merci
13.04.2023 - 21:23DROPS Design answered:
Bonjour Mme Leblanc, vous commencez par 11 motifs de A.1 (soit 11 x 6 = 66 mailles), augmentez 12 m dans chaque A.1 comme indiqué pour terminer avec 18 mailles dans chaque A.1 soit 11 fois 18 m = 198 mailles. Bon tricot!
14.04.2023 - 07:54Hej Er der mon opskrift på Lamb Dance Cardigan til et barn på 1-2 år? Hilsen Christa
02.03.2023 - 15:34DROPS Design answered:
Hei Christa. Nei, det har vi dessverre ikke. mvh DROPS Design
06.03.2023 - 13:45Har i en guide til hvordan man kan lave den med præcis samme mønster i voksen størrelser? Jeg har svært ved at få diagrammet til at passe
21.01.2023 - 16:14DROPS Design answered:
Hei Anna. Ikke helt lik, men ta en titt på DROPS 194-2. mvh DROPS Design
23.01.2023 - 13:03