
Popular categories
Looking for a yarn?


|
||||
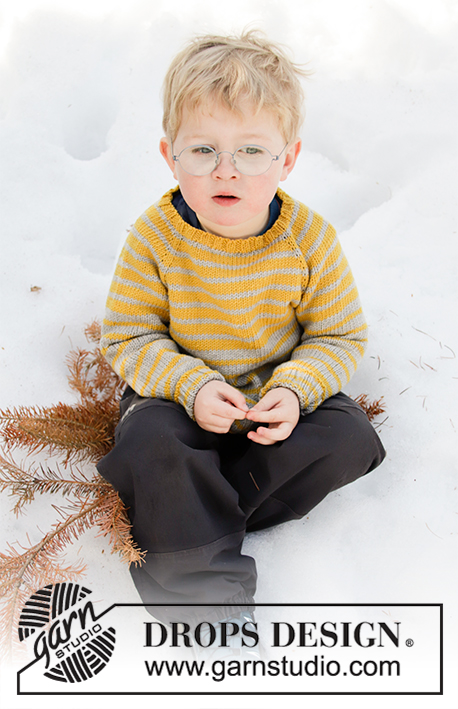
Sunny Day Stripes |
||||
 |
 |
|||
Knitted sweater for children with raglan in DROPS Lima or DROPS Muskat. The piece is worked top down with stripes. Sizes 2 – 12 years.
DROPS Children 32-13 |
||||
|
------------------------------------------------------- EXPLANATIONS FOR THE PATTERN: ------------------------------------------------------- STRIPES: The piece is worked in stripes, with different stripes on yoke and body/sleeves. Do not cut the strand after each stripe - allow it to follow your work onwards. Stripes on yoke: Work * 4 rounds with goldenrod, 2 rounds with light grey / light grey *, work from *-* until the yoke is finished. Adjust so that you finish with 4 rounds of goldenrod / vanilla yellow (in other words you may need to divide the piece for body and sleeves and continue the yoke-stripes until you have worked 4 rounds with goldenrod / vanilla yellow). Then continue with stripes on body and sleeves as follows: Work * 4 rounds with light grey / light grey, 2 rounds with goldenrod / vanilla yellow *, work from *-* until body/sleeves are finished. INCREASE TIP-1 (for raglan): Work until there is 1 stitch left before the marker thread, 1 yarn over (= 1 stitch increased), knit 2 (the marker sits between these 2 stitches), 1 yarn over (= 1 stitch increased). Increase like this at all marker threads (= a total of 8 stitches increased). The yarn overs are worked twisted on the next round to avoid holes. INCREASE TIP-2 (evenly spaced): To work out how to increase evenly, count the total number of stitches on the needle (e.g. 128 stitches) and divide by the number of increases to be made (e.g. 30) = 4.3. In this example increase by making 1 yarn over after approx. each 4th stitch. On the next round work the yarn overs twisted to avoid holes. DECREASE TIP (for sleeves): Decrease 1 stitch on each side of the marker thread as follows: Work until there are 3 stitches left before the marker thread, knit 2 together, knit 2 (the marker thread sits between these 2 stitches), slip 1 stitch as if to knit, knit 1 and pass the slipped stitch over the knitted stitch. ------------------------------------------------------- START THE PIECE HERE: ------------------------------------------------------- SWEATER - SHORT OVERVIEW OF THE PIECE: The piece is worked in the round, top down. The yoke is worked first, starting mid back and then divided for body and sleeves. The body is continued in the round with circular needle. The sleeves are worked in the round with double pointed needles. YOKE: Cast on 76-80-84-88-92-96 stitches with double pointed needles/short circular needle size 3 MM = US 2.5 and goldenrod / vanilla yellow (in the 2 smallest sizes you need to cast on and work with double pointed needles until you have enough stitches to use a circular needle; the other sizes can be cast on and worked with circular needle). The piece is worked in STRIPES – read description above. Work rib (= knit 2 / purl 2). When you have worked 4 rounds change to double pointed needles/short circular needle size 4 MM = US 6. Now continue with stockinette stitch and insert 4 marker threads for raglan on the next round as follows: Work 13-13-13-13-17-17 stitches, insert 1 marker, work 12 stitches AT THE SAME TIME as you increase 4 stitches evenly over these stitches, insert 1 marker, work 24-28-30-32-32-36 stitches, insert 1 marker, work 12 stitches AT THE SAME TIME as you increase 4 stitches evenly over these stitches, insert 1 marker and work 15-15-17-19-19-19 stitches = 84-88-92-96-100-104 stitches. Knit 1 round. On the next round start to increase to raglan. Increase 1 stitch on each side of each marker – read INCREASE TIP-1, every 2nd round a total of 15-16-17-18-19-20 times = 204-216-228-240-252-264 stitches. Continue with stockinette stitch and stripes as before until the piece measures 13-14-15-16-17-18 cm = 5⅛"-5½"-6"-6¼"-6¾"-7" from the cast-on edge. On the next round divide the piece for body and sleeves as follows: Work 28-30-31-32-36-38 stitches in stockinette stitch, place the next 44-46-48-50-52-54 stitches on a thread for sleeve and cast on 6 stitches under the sleeve, 58-62-66-70-74-78 stitches in stockinette stitch, place the next 44-46-48-50-52-54 stitches on a thread for sleeve, cast on 6 stitches under the sleeve and finish with 30-32-35-38-38-40 stitches in stockinette stitch = 128-136-144-152-160-168 stitches. BODY: Continue working in stockinette stitch and stripes. When the piece measures 15-17-20-23-26-29 cm = 6"-6¾"-8"-9"-10¼"-11⅜" from where body and sleeves were divided, increase 28-32-32-36-40-40 stitches evenly on next round – read INCREASE TIP-2 = 156-168-176-188-200-208 stitches. Change to circular needle size 3 MM = US 2.5. Work rib (= knit 2 / purl 2). Bind off with knit when the piece measures 17-19-22-25-28-31 cm = 6¾"-7½"-8¾"-9¾"-11"-12¼" from where body and sleeves were divided; make sure the bind-off edge is not tight - you can use a size larger needle if this is a problem when binding off. The sweater measures approx. 33-36-40-44-48-52 cm = 13"-14¼"-15¾"-17¼"-19"-20½", measured from shoulder down. SLEEVE: Place the 44-46-48-50-52-54 stitches from the thread on the one side of the body on double pointed needles size 4 MM = US 6 and knit up 1 stitch in each of the 6 stitches cast on under the sleeve = 50-52-54-56-58-60 stitches. Continue with stripes as on the body, in stockinette stitch and in the round. Insert 1 marker thread mid under sleeve. When the sleeve measures 2 cm = ¾" from where body and sleeve were divided, decrease 1 stitch on each side of the marker thread (= 2 stitches decreased) – read DECREASE TIP. Decrease like this every 4-4-5-5-7-6 cm = 1½"-1½"-2"-2"-2¾"-2⅜" a total of 5-6-5-6-5-6 times = 40-40-44-44-48-48 stitches. When the piece measures 19-23-27-31-35-38 cm = 7½"-9"-10⅝"-12¼"-13¾"-15" from where body and sleeve were divided, change to double pointed needles size 3 MM = US 2.5 and work rib over all stitches (= knit 2 / purl 2) for 4 cm = 1½". Bind off with knit. The sleeve measures a total of approx. 23-27-31-35-39-42 cm = 9"-10⅝"-12¼"-13¾"-15¼"-16½" from where body and sleeve were divided. Work the other sleeve in the same way. |
||||
Diagram explanations |
||||
|
||||

|
||||
|
Have you made this or any other of our designs? Tag your pictures in social media with #dropsdesign so we can see them! Do you need help with this pattern?You'll find tutorial videos, a Comments/Questions area and more by visiting the pattern on garnstudio.com. © 1982-2024 DROPS Design A/S. We reserve all rights. This document, including all its sub-sections, has copyrights. Read more about what you can do with our patterns at the bottom of each pattern on our site. |
||||


With over 40 years in knitting and crochet design, DROPS Design offers one of the most extensive collections of free patterns on the internet - translated to 17 languages. As of today we count 304 catalogs and 11422 patterns - 11417 of which are translated into English (US/in).
We work hard to bring you the best knitting and crochet have to offer, inspiration and advice as well as great quality yarns at incredible prices! Would you like to use our patterns for other than personal use? You can read what you are allowed to do in the Copyright text at the bottom of all our patterns. Happy crafting!
Comments / Questions (18)
Hi, Is it possible to make the increases by making stitches and not with yarn overs? Thank you.
06.10.2022 - 20:32DROPS Design answered:
Dear Annamaria, yes, you can increase making stitches (pick up the thread between stitches and work a stitch). Ensure that picking up the thread does not tighten the knitting too much. Happy knitting!
07.10.2022 - 00:08Tack för snabbt svar på min fråga igår, men jag stickar inte runt. Jag stickar koftan fram och tillbaka på rundsticka och tolkar då ert svar som att det är på varje rätt varv jag ska öka. Korrekt? Hälsningar Monica
30.06.2022 - 12:15DROPS Design answered:
Hei Monica. Ja, hver rad det strikkes rett økes det. mvh DROPS Design
04.07.2022 - 10:28Hej! Ökningar för raglan görs vartannat varv. Menas varje rätt varv = från rätsidan varje varv och att man inte ökar på avigsidan. Jag förstår att man bara ökar på rätsidan, men ökar man varje rätt varv när det står att ökningen görs vartannat varv? Tacksam för hjälp! Monica
29.06.2022 - 21:56DROPS Design answered:
Hej Monica. Denna tröja stickas runt och du ökar på vartannat varv, dvs ett varv med ökning, nästa varv utan ökning, nästa varv med ökning osv. Mvh DROPS Design
30.06.2022 - 12:06Hej! Jeg er ved at strikke denne model, men da der skal tages ud, før rib på ryg/forstykke, så kommer maskeantallet ikke til at passe, når der skal strikkes 2 ret /2 vrang - tag 2 masker mindre ud - gælder alle størrelser og så passer det, så man ikke begynder og slutter med 2 ret på omgangen. Hvad den første rettelse, der er lavet ang. bærestykket, så giver det da ingen mening - noget mangelfuld! Venlig hilsen Susanne Bækgaard
28.06.2022 - 09:47DROPS Design answered:
Hej Susanne, tak for info, vi skal få rettet så ribben nederst passer. Det er kun selve rettelsen vi noterer nederst. Den er rettet i mønsteret på nettet, så det skal stemme :)
29.06.2022 - 10:54Toiseksi pienimmässä koossa silmukoita on ohjeen mukaan 170 ennen resorin aloittamista. Tämä johtaa siihen, että resori loppuu 2 oikeaan silmukkaan.
03.06.2022 - 20:33DROPS Design answered:
Ohje on korjattu. Ennen joustinneuleen neulomista työhön lisätään silmukoita siten, että kyseisessä koossa on 168 silmukkaa.
05.09.2022 - 17:47Det er penere å la omgangsskiftet følge en raglan-"søm" bak og etter inndeling til bol og ermer omdefinere omgangens begynnelse til midt under ermet/ i siden (det blir en forflytning på 3 masker). Jeg håper dere gjr noe for å rydde opp i oppskriften!
05.02.2022 - 12:52DROPS Design answered:
Hei Marit. Noen oppskrifter har omgangskiftet i raglanlinjen, mens noen midt bak, smak og behag hva man syns er penest. Vi prøver å tilfredstille alle. Om du ser på vårt svar under ditt første Spørsmål, så ser vi ingen nødvendighet til å "rydde" opp i en riktig skrevet oppskrift. mvh DROPS Design
07.02.2022 - 14:32For å ende opp på det angitte masketallet til rygg, ermer og front må ermeøkninger avsluttes først (etter 14 økinger ) og deretter må det økes en ekstra omgang til rygg (15 ganger totalt) og tre ekstra til front (17 ganger). Hvis dette stemmer, burde det vært angitt i oppskrift. Det er veldig uklart slik som det er nå. En anna "merkelig" greie, er å la omgangen begynne midt på bakstykket (eller misforstår jeg alt og det er egentlig frontstykket?). ...Se forts. i neste kommentar!
05.02.2022 - 12:51DROPS Design answered:
Hei Marit. Se vårt svart på ditt Spørsmål under. mvh DROPS Design
07.02.2022 - 14:29Er dere sikker på at oppskriften er rett , selv etter "oppdateringen"? Jeg tror ikke det. Der er noe med masketall som ikke stemmer. Mitt utgangspunkt er den minste størrelsen. Antar omgangen begynner "midt bak" -eller egentlig et par maske til høyre for midt bak. Det er av en eller anna grunn 4 masker mer over nakken enn det er til front. Likevel ender rygg- og frontdel opp med likt masketall etter likt antall økninger til raglan. ....se forts. i neste kommentar!
05.02.2022 - 12:48DROPS Design answered:
Hei Marit. Noen oppskrifter har omgangskiftet i raglanlinjen, mens noen midt bak, smak og behag. I denne oppskriften er det flere masker over ryggen enn fremstykket. Man starter ca. midt bak. 28 masker bak, 24 masker foran og 16 masker til hvert erme = 84 masker. Man øker med 8 masker på hver omgang med raglansøkninger og man øker 15 ganger, = 58 masker på bakstykket (15+28+15), 54 masker på forstykket (15+24+15) og 46 masker på hver erme (15+16+15). Når arbeidet skal deles, tar man litt av ermmaskene til front (pga passform). Da vil maskeantallet bli det samme på forstykket og bakstykket, og ermene har det samme maskeantallet. mvh DROPS Design
07.02.2022 - 14:28Hej! Hur många nystan behöver jag om jag vill sticka modellen enfärgad? Tack på förhand.
15.12.2021 - 16:40DROPS Design answered:
Hej Vera. Det har vi dessvärre ingen uppgift på, men jag hade nog köpt lika många gram som i originalet för att vara säker på att ha tillräckligt. Mvh DROPS Design
20.12.2021 - 09:48Hallo, ich bin gerade bei "Passe" ...beim letzten Absatz, da passt doch die Gesamtmaschenzahl nicht ...egal welche Größe (ich stricke 122/128), hatte vor dem Aufteilen der Maschen für Ärmel ...240 M das passt, danach sind es 252 - nicht wie in der Anleitung 152 ...da ist ein Fehler. Viele Grüße Judith
29.03.2021 - 19:15DROPS Design answered:
Liebe Judith, die Maschenzahl "152" bezieht sich auf die Maschen, die noch auf der Nadel sind - ohne die stillgelegten Maschen für die Ärmel. Dann stimmt diese Zahl. Mit den stillgelegten Maschen haben Sie insgesamt 252 Maschen - 152 Maschen auf der Nadel + 100 stillgelegte Maschen (= 50 pro Ärmel). Weiterhin gutes Gelingen!
03.04.2021 - 11:03