DROPS Lace
DROPS Lace
70% Alpaca, 30% Silk
Discontinued
find alternatives
DROPS SS24

Daydreamer

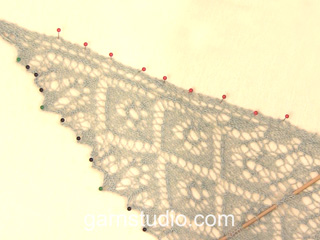
Knitted shawl in DROPS Lace or BabyAlpaca Silk with garter stitch and lace pattern.

DROPS 195-17
DROPS design: Pattern la-037
Yarn group A
----------------------------------------------------------

Measurements:
Height measured in the middle: approx. 38 cm
Length measured along the top side: approx. 184 cm
Materials:
DROPS LACE from Garnstudio (belongs to yarn group A)
100 g colour 7120, light grey green
Or use:
DROPS BABYALPACA SILK from Garnstudio (belongs to yarn group A)
250 g colour 7402, light sea green

----------------------------------------------------------
ACCESSORIES FOR THE PIECE:

KNITTING TENSION:
23 stitches in width and 45 rows vertically in garter stitch = 10 x 10 cm.

NOTE: If using DROPS Lace soak and stretch the shawl to size afterwards, the knitting tension is thus not that important. But to get a sense of whether you are working too loose/tight, work a test on needle size 3.5 mm in garter stitch to make sure that the knitting tension is correct.

NEEDLES:
DROPS CIRCULAR NEEDLE SIZE 3.5 mm, length 80 cm.
Needle size is only a suggestion! If you have too many stitches on 10 cm switch to larger needles. If you have too few stitches on 10 cm switch to smaller needles.

CROCHET HOOK SIZE 3,5 mm (OPTIONAL).

-------------------------------------------------------

Alternative Yarn – See how to change yarns here
Yarn Groups A to F – Use the same pattern and change the yarn here
Yarn usage using an alternative yarn – Use our yarn converter here

-------------------------------------------------------

DROPS Lace
DROPS Lace
70% Alpaca, 30% Silk
Discontinued
find alternatives

Pattern instructions

NOTE: This pattern is written in British English. All measurements in charts are in cm. For conversion from cm to inches - click here. There are different terms for crocheting in British and American English. If this pattern includes crochet, click for "crochet terms" here. For this pattern in American English, please click here.
----------------------------------------------------------

EXPLANATION FOR THE PATTERN:

----------------------------------------------------------

GARTER STITCH (back and forth):
Knit all rows.

PATTERN:
See diagrams A.1 and A.2. Diagrams show all rows in pattern seen from the right side.

BOBBLE:
A bobble can be made in different ways. Method 1 makes a bobble that is worked together on next row from wrong side. Method 2 makes a bobble with crochet hook and this bobble is done on this row. Choose the method that suits you best, make a test as there are many stitches on the needle when working the diagram.

METHOD 1:
Work 7 stitches in 1 stitch as follows: * Knit 1, 1 yarn over *, work from *-* 3 times in total and finish with knit 1 = 7 stitches. It is important to make the stitches somewhat loose (approx. 1 cm long) or it might be difficult to knit them together later. Do not turn piece but work the rest of row as explained in pattern/diagram. When working next row from wrong side, purl all the 7 stitches in each bobble together.

METHOD 2: Use a crochet hook in the same size as needle. Use the crochet hook as a knitting needle and work 7 stitches in 1 stitch as follows: * Knit 1, 1 yarn over *, work from *-* 3 times in total and finish with knit 1 = 7 stitches. It is important to work the stitches somewhat loose (approx. 1 cm long). Make 1 yarn over on hook and then pull it through all loops/stitches on hook, tighten yarn and slip loop on hook on to right needle.

CAST-OFF:
To avoid a tight cast-off edge make yarn overs when casting off. Make a yarn over over all yarn overs from previous row with yarn over, cast off yarn over as regular stitches along the way. Make sure not to tighten the yarn. If the edges still are tight use a larger needle size for cast-off.

SHAPING:
When using another yarn than Lace from yarn group A, there is no need to stretch to measurements, but place it gently out in shape. Leave to dry. Repeat the process when the shawl has been washed.

----------------------------------------------------------

START THE PIECE HERE:

----------------------------------------------------------

SHAWL - SHORT OVERVIEW OF THE PIECE:
Work back and forth, top down on circular needle in GARTER STITCH - see explanation above.

SHAWL:
Cast on 13 stitches on circular needle size 3.5 mm with Lace or BabyAlpaca Silk. Knit 1 row from wrong side. Work next row as follows:
ROW 1 (= right side): Make 1 yarn over, knit 1, 1 yarn over and knit the rest of stitches (= 2 stitches increased).
ROW 2 (= wrong side): Make 1 yarn over, knit 1, 1 yarn over and knit the rest of stitches (= 2 stitches increased).

Work ROWS 1-2 3 more times (4 times in total) = 29 stitches on needle.

Then work next row as follows from right side:
Make 1 yarn over, knit 1, 1 yarn over, knit 1, * 1 yarn over, knit 2 together, 1 yarn over, knit 1 *, work from *-* 8 times in total and knit 3 (= 10 stitches increased) = 39 stitches on needle.
Work next row as follows from wrong side: Make 1 yarn over, knit 1, 1 yarn over and knit the rest of stitches (= 2 stitches increased) = 41 stitches on needle.

Work ROWS 1-2 10 times in total = 81 stitches on needle.

Then work next row as follows from right side:
Make 1 yarn over, knit 1, 1 yarn over, knit 2, * 1 yarn over, knit 2 together, 1 yarn over, knit 1 *, work from *-* 25 times in total and knit 3 (= 27 stitches increased) = 108 stitches on needle.
Work next row as follows from wrong side: Make 1 yarn over, knit 1, 1 yarn over and knit the rest of stitches (= 2 stitches increased) = 110 stitches on needle.


Work ROWS 1-2 15 times in total = 170 stitches on needle.

Then work next row as follows from right side:
Make 1 yarn over, knit 1, 1 yarn over, knit 1, * 1 yarn over, knit 2 together, 1 yarn over, knit 1 *, work from *-* 55 times in total and knit 3 (= 57 stitches increased) = 227 stitches on needle.
Work next row as follows from wrong side: Make 1 yarn over, knit 1, 1 yarn over and knit the rest of stitches (= 2 stitches increased) = 229 stitches on needle.

Work ROWS 1-2 5 times in total = 249 stitches on needle.

NOTE: Now the increase in the side changes, work next row as follows:
ROW 3 (= right side): Knit 1, 1 yarn over and knit the rest of stitches (= 1 stitches increased).
ROW 4 (= wrong side): Knit 1, 1 yarn over and knit the rest of stitches (= 1 stitches increased).

Work ROWS 3-4 17 times in total = 283 stitches on needle.

Then work next row as follows from right side:
Knit 2 , * 1 yarn over, knit 2 together, 1 yarn over, knit 1 *, work from *-* 93 times in total and knit 2 (= 93 stitches increased) = 376 stitches on needle.
Work next row as follows from wrong side: Knit 1, 1 yarn over and knit the rest of stitches (= 1 stitch increased) = 377 stitches on needle.

Work ROWS 3-4 15 times in total = 407 stitches on needle.

then work according to diagram A.1 and A.2 – READ ALL OF THE FOLLOWING SECTION BEFORE CONTINUING! There are many stitches on the needle and we recommend that you use marker threads or markers to mark where each diagram begins and ends. Insert a marker thread/marker after every 14th stitch and move them upwards when working.

Next row is from right side and is worked as follows:
Work A.1 29 times in total in width, work A.2 over the last stitch. Work diagrams 1 time vertically. When diagrams are done, loosely cast off on next row from right side - read CAST-OFF in explanation above.

BLOCKING:
Place the shawl in lukewarm water until it is soaking wet. Carefully squeeze the water out of the shawl - do not twist the shawl - then roll the shawl in a towel and squeeze to remove more water - the shawl will now only be moist. Use another yarn than Lace from yarn group A - read SHAPING in explanation above. Place the shawl on a carpet or mattress - carefully stretch it out to size and fasten it with pins. Leave shawl to dry. Repeat the process when the shawl has been washed.

This pattern has been corrected.

Updated online: 19.09.2019
Correction:
Work ROWS 1-2 10 times in total = 81 stitches on needle.

Then work next row as follows from right side:
Make 1 yarn over, knit 1, 1 yarn over, knit 2, * 1 yarn over, knit 2 together, 1 yarn over, knit 1 *, work from *-* 25 times in total and knit 3 (= 27 stitches increased) = 108 stitches on needle
Updated online: 01.08.2022
SHAWL: ... = 283 stitches on needle.
Then work next row as follows from right side:
Knit 2 , * 1 yarn over, ...

Diagram

symbols = knit from right side, knit from wrong side
symbols = between 2 stitches make 1 yarn over, knit yarn over on next row to make a hole
symbols = knit 2 together
symbols = slip 1 stitch knitwise, knit 1, pass slipped stitch over stitch worked
symbols = slip 1 stitch knitwise, knit 2 together, pass slipped stitch over stitches worked
symbols = BOBBLE - see explanation in pattern
diagram

Each of our patterns has specific tutorial videos to help you.

Do you have a question? See a list of frequently asked questions (FAQ)

Knitting tension is what determines the final measurements of your work, and is usually measured per 10 x 10 cm. It is provided like so: number of stitches in width x number of rows in height - eg: 19 stitches x 26 rows = 10 x 10 cm.

The knitting tension is very individual; some people knit/crochet loosely while others work tightly. You adjust the knitting tension with the needle size, which is why the suggested needle size is only meant as a guide! You need to adjust this (up or down) to ensure that YOUR knitting tension matches the knitting tension provided in the pattern. If you work with a different knitting tension than provided you will have a different yarn consumption, and your work will have different measurements than what the pattern suggests.

The knitting tension also determines which yarns can replace each other. As long as you achieve the same knitting tension you can replace one yarn with another.

See DROPS lesson: How to measure your tension/gauge

See DROPS video: How to make a gauge tension swatch

The required amount of yarn is provided in grams, eg: 450 g. To calculate how many balls you’ll need you first need to know how many grams are in 1 ball (25g, 50g or 100g). This information is available if you click on the individual yarn quality on our pages. Divide the amount required with the amount of each ball. For example, if each ball is 50g (the most common amount), the calculation will be as follows: 450 / 50 = 9 balls.

The important thing when changing from one yarn to another is that the knitting/crochet tension remains the same. This is so that the measurements of the finished piece will be the same as on the sketch provided. It is easier to achieve the same knitting tension using yarns from the same yarn group. It is also possible to work with multiple strands of a thinner yarn to achieve the knitting tension of a thicker one. Please try our yarn converter. We recommend you to always work a test swatch.

Please NOTE: when changing yarn the garment might have a different look and feel to the garment in the photo, due to individual properties and qualities of each yarn.

See DROPS lesson: Can I use a different yarn than the one mentioned in the pattern?

All our yarns are categorised into yarn groups (from A to F) according to thickness and knitting tension – group A contains the thinnest yarns and group F the thickest. This makes it easier for you to find alternative yarns to our patterns, should you wish to switch yarn. All yarns within the same group have a similar knitting tension and can easily replace each other. However, different yarn qualities have different structures and properties which will give the finished work a unique look and feel.

Click here for an overview of the yarns in each yarn group

At the top of all our patterns you’ll find a link to our yarn calculator, which is a helpful tool should you wish to use a different yarn than suggested. By filling in the yarn quality you wish to replace, the amount (in your size) and number of strands, the calculator will present good alternative yarns with the same knitting tension. Additionally it will tell you how much you’ll require in the new qualities and whether you’ll need to work with multiple strands. Most skeins are 50g (some are 25g or 100g).

If the pattern is worked with multiple colours, every colour will have to be calculated separately. Similarly, if the pattern is worked with several strands of different yarns (for example 1 strand Alpaca and 1 strand Kid-Silk) you will have to find alternatives for each, individually.

Click here to see our yarn calculator

Since different yarns have different qualities and textures we have chosen to keep the original yarn in our patterns. However, you can easily find options among our available qualities by using our yarn calculator, or simply pick a yarn from the same yarn group.

It is possible that some retailers still have discontinued yarns in stock, or that someone has a few skeins at home that they would like to find patterns for.

The yarn calculator will provide both alternative yarn as well as required amount in the new quality.

If you think it's hard to decide what size to make, it can be a good idea to measure a garment you own already and like the size of. Then you can pick the size by comparing those measures with the ones available in the pattern's size chart.

You'll find the size chart at the bottom of the pattern.

See DROPS lesson: How to read size chart

The needle size provided in the pattern serves only as a guide, the important thing is to follow the knitting tension. And since knitting tension is very individual, you will have to adjust the needle size to ensure that YOUR tension is the same as in the pattern – maybe you’ll have to adjust 1, or even 2 needle sizes, up or down to achieve the correct tension. For this, we recommend that you work test swatches.

Should you work with a different knitting tension than the one provided, the measurements of the finished garment might deviate from the measurement sketch.

See DROPS lesson: How to measure your tension/gauge

See DROPS video: How to make a tension/gauge swatch

Working a garment top-down provides more flexibility and room for personal adjustment. For example it is easier to try the garment on while working, as well as making adjustments to length of yoke and shoulder caps.

The instructions are carefully explaining every step, in the correct order. Diagrams are adjusted to the knitting direction and are worked as usual.

The diagram depicts all rows/rounds, and every stitch seen from the right side. It is read from bottom to top, from right to left. 1 square = 1 stitch.

When working back and forth, every other row is worked from the right side and every other row is worked from the wrong side. When working from the wrong side, the diagram will have to be worked reversed: from left to right, knit stitches are purled, purl stitches are knit etc.

When working in the round every round is worked from the right side and the diagram are worked from right to left on all rounds.

See DROPS lesson: How to read knitting diagrams

The diagram depicts all rows/rounds, and every stitch seen from the right side. It is worked from bottom to top, from right to left.

When working back and forth every other row is worked from the right side: from right to left and every other row is worked from the wrong side: from left to right.

When working in the round, every row in the diagram are worked from the right side, from right to left.

When working a circular diagram you start in the middle and work your way outwards, counter clockwise, row by row.

The rows usually start with a given number of chain stitches (equivalent to the height of the following stitch), this will either be depicted in the diagram or explained in the pattern.

See DROPS lesson: How to read crochet diagrams

Instructions for working several diagrams after each other on the same row/round, will often be written like so: “work A.1, A.2, A.3 a total of 0-0-2-3-4 times". This means you work A.1 once, then A.2 is worked once, and A.3 is repeated (in width) the number of times provided for your size – in this case like so: S = 0 times, M = 0 times, L=2 times, XL= 3 times and XXL = 4 times.

The diagrams are worked as usual: begin with the first row in A.1, then work the first row in A.2 etc.

See DROPS lesson: How to read knitting diagrams

See DROPS lesson: How to read crochet diagrams

The total width of the garment (from wrist-to-wrist) will be larger in the larger sizes, despite the actual sleeves being shorter. The larger sizes have longer sleeve caps and wider shoulders, so there will be a good fit in all sizes.

The measurement sketch/schematic drawing provides information regarding the full length of the garment. If it’s a jumper or a jacket the length is measured from the highest point on the shoulder closest to the neckline, and straight down to the bottom of the garment. It is NOT measured from the tip of shoulder. Similarly, the length of yoke is measured from the highest point on the shoulder and down to where yoke is split into body and sleeves.

On a jacket measures are never taken along bands, unless specifically stated. Always measure inside band stitches when measuring the length.

See DROPS lesson: How to read a schematic drawing

Diagrams are often repeated on the round or in height. 1 repeat is the diagram the way it appears in the pattern. If it says to work 5 repeats of A.1 in the round, then you work A.1 a total of 5 times after/next to each other in the round. If it says to work 2 repeats of A.1 vertically/in height you work the entire diagram once, then begin again at the start and work the entire diagram one more time.

Chain stitches are slightly narrower than other stitches and to avoid working the cast-on edge too tight, we simply chain more stitches to begin with. The stitch count will be adjusted on the following row to fit the pattern and measurement sketch.

The rib edge is more elastic and will contract slightly compared to, for example, stocking stitch. By increasing before the rib edge, you avoid a visible difference in width between the rib edge and the rest of the body.

It’s very easy to cast off too tightly, and by making yarn overs while casting off (and simultaneously casting these off) you avoid a too tight cast off edge.

See DROPS video: How to bind off with yarn overs (yo)

To achieve an even increase (or decrease) you can increase on, for example: every 3rd and 4th row alternately, like so: work 2 rows and increase on the 3rd row, work 3 rows and increase on the 4th. Repeat this until the increase is complete.

See DROPS lesson: Increase or decrease 1 st on every 3rd and 4th row alternately

Should you prefer to work in the round instead of back and forth, you may of course adjust the pattern. You’ll need to add steeks mid-front (usually 5 stitches), and follow the instructions. When you would normally turn and work from the wrong side, simply work across the steek and continue in the round. At the end you’ll cut the piece open, pick up stitches to work bands, and cover the cut edges.

See DROPS video: How to knit steeks and cut open

Should you prefer to work back and forth instead of in the round, you may of course adjust the pattern so you work the pieces separately and then assemble them at the end. Divide the stitches for the body in 2, add 1 edge stitch in each side (for sewing) and work the front and back pieces separately.

See DROPS lesson: Can I adapt a pattern for circular needles into straight needles?

Pattern repeats can vary slightly in the different sizes, in order to get the correct proportions. If you’re not working the exact same size as the garment in the photo, yours might deviate slightly. This has been carefully developed and adjusted so that the complete impression of the garment is the same in all sizes.

Make sure to follow instructions and diagrams for your size!

If you have found a pattern you like which is available in women’s size it’s not very difficult to convert it to men’s size. The biggest difference will be the length of sleeves and body. Start working on the women size that you think would fit across the chest. The additional length will be worked right before you cast off for the armhole/sleeve cap. If the pattern is worked top-down you can add the length right after the armhole or before the first decrease on sleeve.

Regarding additional yarn amount, this will depend on how much length you add, but it is better with a skein too many than too few.

All yarns will have excess fibres (from production) that might come off as lint or shedding. Brushed yarns (ie hairier yarns) have more of these loose, excess fibres, causing more shedding.

Shedding also depends on what is worn under or over the garment, and whether this pulls at the yarn fibres. It’s therefore not possible to guarantee that there will be no shedding

Below are some tips on how to get the best result when working with hairier yarns:

1. When the garment is finished (before you wash it) shake it vigorously so the looser hairs come off. NOTE: do NOT use a lint roller, brush or any method that pulls at the yarn.

2. Place the garment in a plastic bag and put it in your freezer - the temperature will cause the fibres to become less attached to each other, and excess fibres will come off easier.

3. Leave in the freezer for a few hours before taking it out and shaking it again.

4. Wash the garment according to the instructions on the yarn label.

Pilling is a natural process that happens to even the most exclusive of fibers. It's a natural sign of wear and tear that is hard to avoid, and that is most visible in high friction areas of your garment like a sweater's arms and cuffs.

You can make your garment look as new by removing the pilling, using a fabric comb or a pill/lint remover.

Still can't find the answer you need? Then scroll down and leave your question so one of our experts can try to help you. This will be done normally within 5 to 10 working days.
In the meantime, you can read the questions and answers that others have left to this pattern or join the DROPS Workshop on Facebook to get help from fellow knitters/crocheters!

You might also like...

Post a comment to pattern DROPS 195-17

We would love to hear what you have to say about this pattern!

If you want to leave a question, please make sure you select the correct category in the form below, to speed up the answering process. Required fields are marked *.

Comments / Questions (33)

country flag Sharon Haworth wrote:

Hi, I'm really struggling with this, I'm always ending up with too many stitches. Now I've checked the maths isn't right? If you have 41 stitches on the needle, then repeat rows 1to 2 10 times total, you will have increased 60 stitches total. 41 + 60 = 101, not 81 as stated in the pattern. What am I doing wrong or is there an error? Help!!!!

31.10.2019 - 23:21

DROPS Design answered:

Hello Sharon. Each time you repeat rows 1 and 2, you increase 4 sts (2 sts increased on row 1, and 2 sts increased on row 2j. You repeat rows 1 and 2 10 times, so this means: 4 sts increased x 10 times = 40 sts increased in total, and that will bring you to 41 + 40 = 81 sts. Happy knitting!

01.11.2019 - 20:33

country flag Kathleen wrote:

Is there a mistake in the pattern? It appears to be knit entirely in the hole rows, but the picture only occasionally, and no parts that are knit in garter stitch. I am a little stumped.

23.09.2019 - 03:52

DROPS Design answered:

Dear Kathleen, the shawl is worked with sections in garter stitches and some rows with holes (yarn overs) - when you repeat the rows 1-2 you are working the garter stitch sections (= increase at the beg of the row and K all stitches). Happy knitting!

23.09.2019 - 10:00

country flag Dea wrote:

"Poi lavorare il ferro successivo come segue dal diritto del lavoro: 1 gettato, 1 maglia diritto, 1 gettato, 2 maglie insieme a diritto, * 1 gettato, 2 maglie insieme a diritto, 1 gettato, 1 maglia diritto *, lavorare *-* 25 volte in totale e lavorare 3 maglie diritto (= 27 aumenti) = 108 maglie sul ferro." Per me non sono 27 aum, ma 26 aum, uno dei primi due gettati va a morire con le due ass. Potete controllare?

30.08.2019 - 17:04

DROPS Design answered:

Buongiorno Dea. Abbiamo corretto un errore derivante dal testo inglese errato. All’inizio del ferro, deve lavorare 2 maglie diritto e non 2 maglie insieme a diritto. Gli aumenti sono quindi 27. Buon lavoro!

30.08.2019 - 18:27

country flag Caroline wrote:

Bonjour, le digramme Aé affiché se résume à une colonne de cases vide. Comment faire pour l'afficher en entier s'il vous plait ?

09.07.2019 - 15:02

DROPS Design answered:

Bonjour Caroline, le diagramme A.2 correspond à 1 maille jersey (= à tricoter à l'endroit sur l'endroit et à l'envers sur l'envers) pour que le motif soit symétrique des 2 côtés du châle, ainsi, sur l'endroit, vous répétez A.1 en largeur et terminez par A.2 (= 1 m jersey) ; sur l'envers, tricotez 1 m jersey (= A.2) et répétez A.1 (en lisant de gauche à droite). Bon tricot!

09.07.2019 - 16:16

country flag Leni wrote:

Hallo, wie werden die Umschläge in der Rückreihe gestrickt - ganz normal rechts oder verschränkt?

22.05.2019 - 10:26

DROPS Design answered:

Liebe Leni, die Umschläge sollten ganz normal gestrickt werden, dh sie sollen Löcher bilden. Viel Spaß beim stricken!

22.05.2019 - 10:46

country flag Eva wrote:

Leider komme ich mit der angegebenen Maschenanzahl nicht klar. Denn die Zunahmen in jeder Reihe bleiben doch nicht gleich, sondern erweitern sich, d.h. ich nehme in jeder Hinreihe nicht immer konstant 10, 27 bzw. 57 Maschen zu. Oder die Reihenangabe stimmt nicht. Stehe ich auf dem Schlauch?

30.04.2019 - 19:20

DROPS Design answered:

Liebe Eva, wenn Sie 29 M haben, stricken Sie wie folgt: 1 Umschlag, 1 Masche rechts, 1 Umschlag, 1 Masche rechts (= 4 M inkl. 2 Zunahmen) * 1 Umschlag, 2 Maschen rechts zusammenstricken, 1 Umschlag, 1 Masche rechts (= 4 M inkl. 1 Zunahme) *, von *-* insgesamt 8 x arbeiten (4 M x 8 = 32 M. inkl. 8 Zunahmen) und 3 Maschen rechts stricken (= 10 Maschen zugenommen) = 4 (2 Zunahmen) + 32 (8 Zunahmen) + 3 = 39 Maschen (10 Zunahmen). Dann werden die nächsten Zunahmenreihen ungefähr genauso gleich gearbeitet (mit dann aber 27, dann 57, usw Zunahmen). Viel Spaß beim stricken!

02.05.2019 - 09:02

country flag Marianne Hrouda-Rasmussen wrote:

Jeg prøver lige igen om I kan svare: 26.03.2019 - 15:32: Forstår ikke den række hulmønster kun skal laves 1 gang (den hvor der afsluttes med at være 377m). På billedet ser det ud som den skal strikes 4 gange men det fremgår ikke af opskriften ? Efter den ene række med hulmøsteret skal der igen strikes 3. og 4. p 15 gange = 407 m, og så starter det afsluttende mønster! med A1 og A2 ?

29.03.2019 - 12:22

DROPS Design answered:

Hei Marianne. Se svar under, hilsen DROPS

03.04.2019 - 09:41

country flag Marianne wrote:

Forstår ikke den række hulmønster kun skal laves 1 gang (den hvor der afsluttes med at være 377m). På billedet ser det ud som den skal strikes 4 gange men det fremgår ikke af opskriften ? Efter den ene række med hulmøsteret skal der igen strikes 3. og 4. p 15 gange = 407 m, og så starter det afsluttende mønster! med A1 og A2 ?

26.03.2019 - 15:32

DROPS Design answered:

Hei Marianne. Første strikker du 1. og 2. pinne 4 ganger (= 29 masker på pinnen) så strikkes 1 hullrad, så gjentar du 1. og 2. pinne totalt 10 ganger (=81 masker), så strikkes 1 ny hullrad, så gjentas 1. og 2 pinne 15 ganger (= 170 masker) så strikkes 1 ny hullrad osv. Det avsnittet der du ender på 377 masker, er altså forklaringen på siste/ fjerde hullrad. Alle radene der du skal strikke 1 kast, 2 rett sammen over alle maskene, blir en hullrad. God fornøyelse

02.04.2019 - 13:47

country flag Ingrid wrote:

Bedankt, had de beschrijving verkeerd gelezen. Alles is nu duidelijk. Alvast bedankt.

13.02.2019 - 20:39

country flag Ingrid wrote:

Ik heb de indruk dat na het tweede deel het aantal steken niet klopt. Is het de bedoeling dat in het 3de deel de omslagen doorlopen over de ganse breedte van het werk.

12.02.2019 - 19:47

DROPS Design answered:

Dag Ingrid,

Wat bedoel je met het derde deel?

Het patroon is a.h.w. opgeknipt in delen waarbij je steeds eerst twee naalden breit met het gaatjespatroon en daarna de ribbels steeds herhaalt met aan de zijkanten omslagen (naald 1 en 2 en later naald 3 en 4 met 1 omslag aan weerszijden)

13.02.2019 - 10:52