DROPS Sky
DROPS Sky
74% Alpaca, 18% Polyamide, 8% Wool
from 5.10 £ /50g
Get the yarn to make this pattern from 35.70£.

The yarn cost is calculated from the pattern’s smallest size and the yarn’s cheapest product type. Looking for an even better price? You might find it on the DROPS Deals!

DROPS SS24

Agnes

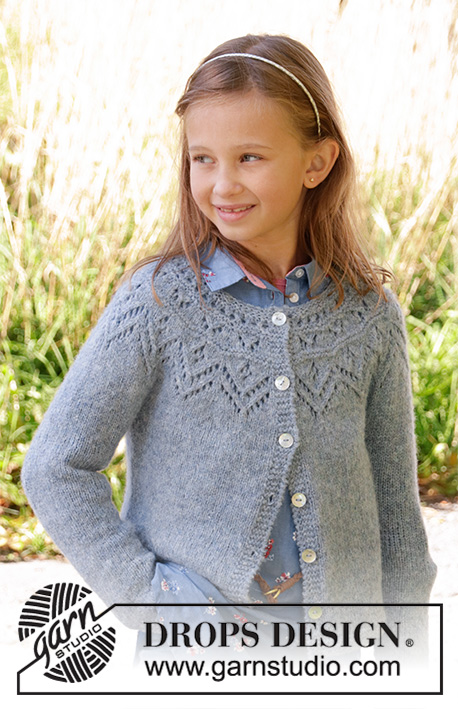
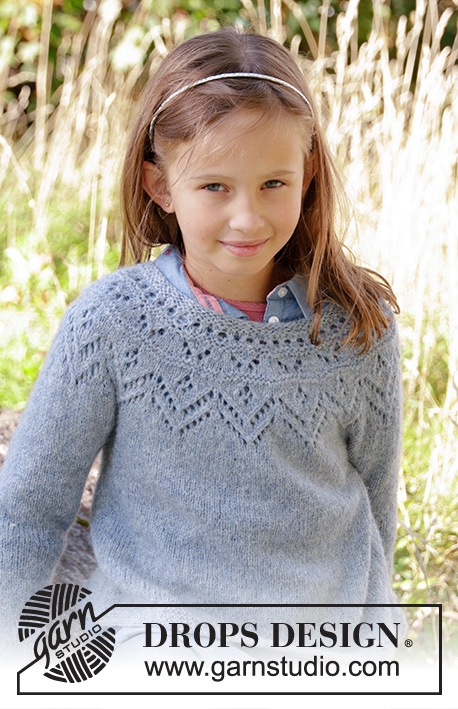
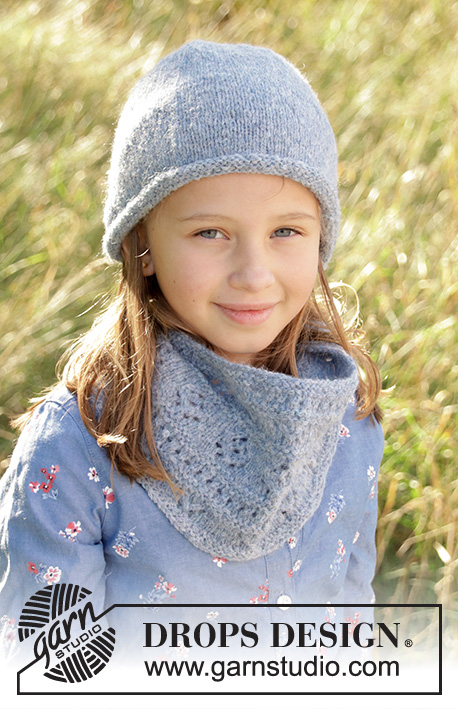
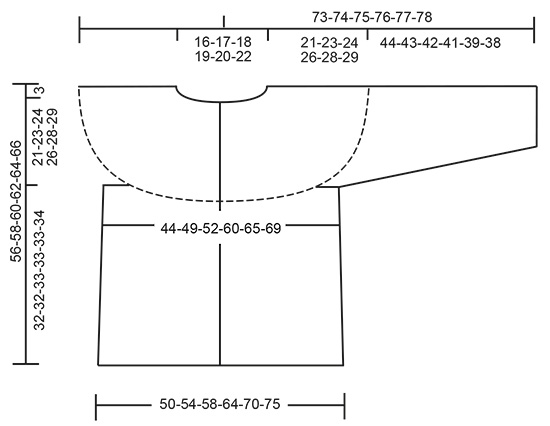
Knitted jacket with round yoke in DROPS Sky. Piece is knitted top down with lace pattern. Size: S - XXXL Knitted hat in DROPS Sky with rolling edge.

DROPS 197-15
DROPS design: Pattern sk-017
Yarn group B
----------------------------------------------------------

YARN FOR THE ENTIRE SET:
Size: S - M - L - XL - XXL – XXXL
Head circumference: 54/56 - 54/56 - 54/56 - 56/58 - 56/58 - 56/58 cm
Materials:
DROPS SKY from Garnstudio (belongs to yarn group B)
350-350-400-400-450-500 g colour 08, lavender

YARN FOR JACKET:
Size: S - M - L - XL - XXL - XXXL
Materials:
DROPS SKY from Garnstudio (belongs to yarn group B)
300-300-350-400-400-450 g colour 08, lavender

YARN FOR HAT:
Size: S/M - M/L
Head circumference: approx. 54/56 - 56/58 cm
Materials:
DROPS SKY from Garnstudio (belongs to yarn group B)
50-50 g colour 08, lavender

----------------------------------------------------------
ACCESSORIES FOR THE PIECE:

JACKET:

KNITTING TENSION:
21 stitches in width and 28 rows vertically in stocking stitch = 10 x 10 cm.

NEEDLES:
DROPS DOUBLE POINTED NEEDLES AND CIRCULAR NEEDLE SIZE 4 mm, length 80 cm for stocking stitch.
DROPS DOUBLE POINTED NEEDLES AND CIRCULAR NEEDLE SIZE 3.5 mm, length 80 cm for edge in garter stitch.
Needle size is only a suggestion! If you have too many stitches on 10 cm switch to larger needles. If you have too few stitches on 10 cm switch to smaller needles.

DROPS MOTHER-OF-PEARL BUTTON ARCHED (white), NO 521: 6-6-7-7-8-8 pieces

HAT:

KNITTING TENSION:
22 stitches in width and 30 rows vertically in stocking stitch = 10 x 10 cm.

NEEDLES:
DROPS DOUBLE POINTED NEEDLES AND CIRCULAR NEEDLE SIZE 3.5 mm, length 40 cm.
Needle size is only a suggestion! If you have too many stitches on 10 cm switch to larger needles. If you have too few stitches on 10 cm switch to smaller needles.

----------------------------------------------------------

-------------------------------------------------------

Alternative Yarn – See how to change yarns here
Yarn Groups A to F – Use the same pattern and change the yarn here
Yarn usage using an alternative yarn – Use our yarn converter here

-------------------------------------------------------

DROPS Sky
DROPS Sky
74% Alpaca, 18% Polyamide, 8% Wool
from 5.10 £ /50g
Get the yarn to make this pattern from 35.70£.

The yarn cost is calculated from the pattern’s smallest size and the yarn’s cheapest product type. Looking for an even better price? You might find it on the DROPS Deals!

Pattern instructions

NOTE: This pattern is written in British English. All measurements in charts are in cm. For conversion from cm to inches - click here. There are different terms for crocheting in British and American English. If this pattern includes crochet, click for "crochet terms" here. For this pattern in American English, please click here.
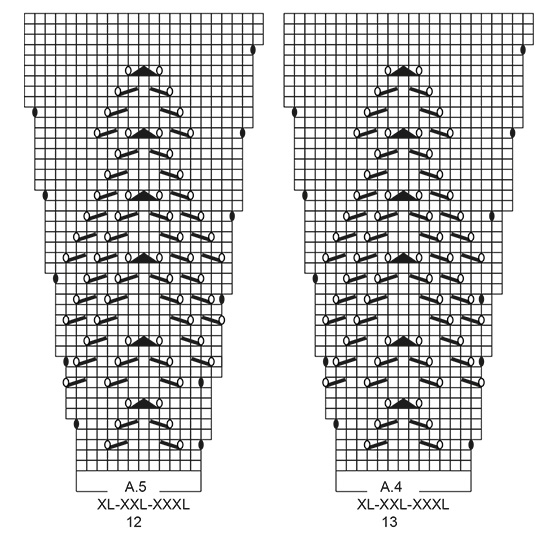
EXPLANATION FOR PATTERN:

----------------------------------------------------------

GARTER STITCH (back and forth):
1 ridge = knit 2 rows.

GARTER STITCH (worked in the round):
1 ridge = 2 rounds. Knit 1 round and purl 1 round.

PATTERN: 
See diagrams A.1 to A.5. Choose diagram for your size. Diagrams show all rows in pattern seen from the right side.

ELEVATION (applies to back of neck):
Work the elevation in garter stitch. Insert 1 marker thread after 63-66-69-72-75-78 stitches (= approx. mid back). Begin from right side and knit 7-8-8-9-9-10 stitches past marker thread, turn, tighten yarn and knit 14-16-16-18-18-20 stitches. Turn, tighten yarn and knit 21-24-24-27-27-30 stitches, turn, tighten yarn and knit 28-32-32-36-36-40 stitches. Turn, tighten yarn and knit 35-40-40-45-45-50 stitches, turn, tighten yarn and knit 42-48-48-54-54-60 stitches. Turn, tighten yarn and knit 49-56-56-63-63-70 stitches, turn, tighten yarn and knit the rest of row

INCREASE TIP-1 (evenly):
To calculate how to increase evenly, use the total number of stitches on row (e.g. 102 stitches), minus band (= 10 stitches in total = 92 stitches) and divide stitches by number of increases to be done (e.g. 25) = 3.68. 
In this example increase by making 1 yarn over after approx. every 4th stitch. On next row work yarn overs twisted to avoid holes.

INCREASE TIP-2 (applies to sides of body):
All increases are done from the right side.
Work until 2 stitches remain before marker thread, 1 yarn over, knit 4 (marker thread is in the middle of these stitches), 1 yarn over.
On next row work yarn over twisted to avoid holes Then work the new stitches in stocking stitch

DECREASE TIP-1 (applies to sleeves): 
Decrease 1 stitch on each side of marker thread as follows: Work until 3 stitches remain before marker thread and knit 2 together, knit 2 (marker thread is between these stitches), slip 1 stitch knitwise, knit 1, pass slipped stitch over stitch worked.

BUTTONHOLES:
Decrease for buttonholes on right band (when garment is worn). Decrease from right side when 3 stitches remain on row as follows: Make 1 yarn over, knit the next 2 stitches together, knit last stitch. On next row knit yarn over to make holes.
Decrease first buttonhole when piece measures approx. 1½-2 cm. Decrease for second buttonhole when piece measures 7 cm.
Then decrease the next 4-4-5-5-6-6 approx. 8½-8½-7½-7½-7-7 cm apart.

DECREASE TIP-2 (applies to hat):
Decrease 1 stitch after every marker thread as follows: Slip 1 stitch knitwise, knit 1, pass slipped stitch over stitch worked (= 1 stitch decreased = 6 stitches decreased in total).

----------------------------------------------------------

BEGIN PIECE HERE:

----------------------------------------------------------

JACKET - SHORT SUMMARY OF GARMENT:
Worked back and forth, top down on circular needle to armhole, then finish body and sleeves separately. Continue body back and forth. Sleeves are worked in the round on double pointed needles.

YOKE:
Cast on 102-106-110-118-122-128 stitches (including 5 band stitches in each side of piece) on circular needle size 3.5 mm with Sky. Work 2 ridges in GARTER STITCH - read explanation above.
Knit 1 row from right side and increase 25-27-29-27-29-29 stitches evenly - read INCREASE TIP-1 = 127-133-139-145-151-157 stitches. Knit 1 row from wrong side. Switch to circular needle size 4 mm.
For better fit work an elevation at the back of neck so that yoke is somewhat higher on back piece. This elevation can be skipped, to make the neck the same at the front and back - read ELEVATION.
Decrease for BUTTONHOLES on right band - read explanation above.
Then work pattern as follows from right side: Work 5 band stitches in garter stitch, A.1 (= 8 stitches), A.2 (= 6 stitches) over the next 102-108-114-120-126-132 stitches (= 17-18-19-20-21-22 times in width), A.3 (= 7 stitches) and finish with 5 band stitches in garter stitch.
On every row with star (= increase row) increase as follows:
REMEMBER THE KNITTING TENSION!
1ST INCREASE: Increase 24-24-24-24-30-30 stitches evenly = 151-157-163-169-181-187 stitches. Then repeat A.2 21-22-23-24-26-27 times in width.
2ND INCREASE: Increase 18-18-24-24-24-30 stitches evenly = 169-175-187-193-205-217 stitches. Then repeat A.2 24-25-27-28-30-32 times in width.
3RD INCREASE: Increase 12-18-18-24-24-24 stitches evenly = 181-193-205-217-229-241 stitches. Then repeat A.2 26-28-30-32-34-36 times in width.
When A.1 to A.3 have been worked 1 time vertically, piece measures approx. 8 cm from cast-on edge.
Then work as follows from right side:
Work 5 band stitches in garter stitch, 1 stitch in stocking stitch, A.4 (= 13 stitches), work A.5 (= 12 stitches) over the next 156-168-180-192-204-216 stitches (= 13-14-15-16-17-18 times in width), 1 stitch in stocking stitch and finish with 5 band stitches in garter stitch.
When A.4 and A.5 have been worked 1 time vertically, there are 307-343-365-404-427-450 stitches on needle. Piece measures approx. 21-22-22-24-24-24 cm. Continue back and forth in stocking stitch until piece measures 21-23-24-26-28-29 cm. Now divide the piece for sleeves and body as follows:
Work 5 band stitches in garter stitch, stocking stitch over the next 42-47-50-57-62-66 stitches, slip the next 64-72-78-82-84-88 stitches on a stitch holder for sleeve and cast on 8-8-10-10-12-12 stitches under sleeve, work stocking stitch over the next 85-95-99-116-125-132 stitches, slip the next 64-72-78-82-84-88 stitches on a stitch holder for sleeve and cast on 8-8-10-10-12-12 stitches under sleeve, work 42-47-50-57-62-66 stitches in stocking stitch and finish with 5 band stitches in garter stitch = 195-215-229-260-283-298 stitches.

BODY:
Insert 1 marker thread in the middle of the 8-8-10-10-12-12 stitches under each sleeve.
Work in stocking stitch with 5 band stitches in garter stitch in each side. When piece measures 2 cm from where body was divided for sleeves, increase 1 stitch on each side of every marker thread - read INCREASE TIP-2! Increase like this every 3½-4½-4-6-5-3½ cm 6-5-6-4-5-7 times in total = 219-235-253-276-303-326 stitches. Continue in stocking stitch until piece measures 30-30-31-31-31-32 cm from where body was divided from sleeves. Switch to circular needle size 3.5 mm and work in garter stitch until piece measures 32-32-33-33-33-34 cm from where body was divided from sleeves. Cast off by knitting. Piece measures 56-58-60-62-64-66 cm from shoulder.

SLEEVE:
Slip the 64-72-78-82-84-88 stitches from stitch holder in one side of piece on double pointed needles size 4 mm and pick up 1 stitch in each of the 8-8-10-10-12-12 stitches under sleeve = 72-80-88-92-96-100 stitches. Insert 1 marker thread in the middle of the 8-8-10-10-12-12 stitches under sleeve. Work in stocking stitch in the round.
When piece measures 3 cm, decrease 1 stitch on each side of marker thread - read DECREASE TIP-1.
Decrease like this every 2½-2-1½-1½-1½-1½ cm 13-16-19-19-20-21 times in total = 46-48-50-54-56-58 stitches. When sleeve measures 42-41-40-39-37-36 cm from where sleeve was divide from body, switch to double pointed needles size 3.5 mm and work 3 ridges in GARTER STITCH in the round - read explanation above. Then loosely cast off by knitting. Sleeve measures approx. 65-66-66-67-67-67 cm in total from cast-on edge. Work the other sleeve the same way.

ASSEMBLY:
Sew on buttons on left band.
----------------------------------------------------------

HAT - SHORT SUMMARY OF PIECE:
Worked in the round on circular needle, switch to double pointed needles when decreasing.

HAT:
Cast on 108-112 stitches with Sky on circular needle size 3.5 mm. Work 4 rounds in stocking stitch. Work next round as follows: * Knit 1, purl 1 *, repeat from *-* the entire round. Now work in stocking stitch over all stitches until finished measurements. REMEMBER THE KNITTING TENSION! When piece measures 20-22 cm, decrease 0-4 stitches evenly (i.e. knit every 27th and 28th stitch in size M/L together) = 108 stitches. Insert 6 markers in the piece, 18 stitches apart.
On next round, decrease 1 stitch at every marker thread – read DECREASE TIP-2. Decrease like this on every other round 8 times in total and then on every round 6 times in total = 24 stitches. On next round knit all stitches twisted together 2 by 2 = 12 stitches. Cut the yarn and pull it through the remaining stitches, tighten together and fasten. Piece measures approx. 27-29 cm from top and down.

Diagram

symbols = knit from the right side, purl from the wrong side
symbols = knit from wrong side
symbols = knit 2 together
symbols = slip 1 stitch knitwise, knit 1, pass slipped stitch over stitch worked
symbols = between 2 stitches make 1 yarn over
symbols = between 2 stitches make 1 yarn over, work yarn over twisted on next row; it should not make a hole
symbols = slip 1 stitch knitwise, knit 2 stitches together, pass slipped stitch over the 2 stitches worked together
symbols = increase row, on this round increase stitches evenly - see explanation in pattern
symbols = this square is not a stitch, go directly to next symbol in diagram
diagram
diagram
diagram
diagram

Each of our patterns has specific tutorial videos to help you.

Do you have a question? See a list of frequently asked questions (FAQ)

Knitting tension is what determines the final measurements of your work, and is usually measured per 10 x 10 cm. It is provided like so: number of stitches in width x number of rows in height - eg: 19 stitches x 26 rows = 10 x 10 cm.

The knitting tension is very individual; some people knit/crochet loosely while others work tightly. You adjust the knitting tension with the needle size, which is why the suggested needle size is only meant as a guide! You need to adjust this (up or down) to ensure that YOUR knitting tension matches the knitting tension provided in the pattern. If you work with a different knitting tension than provided you will have a different yarn consumption, and your work will have different measurements than what the pattern suggests.

The knitting tension also determines which yarns can replace each other. As long as you achieve the same knitting tension you can replace one yarn with another.

See DROPS lesson: How to measure your tension/gauge

See DROPS video: How to make a gauge tension swatch

The required amount of yarn is provided in grams, eg: 450 g. To calculate how many balls you’ll need you first need to know how many grams are in 1 ball (25g, 50g or 100g). This information is available if you click on the individual yarn quality on our pages. Divide the amount required with the amount of each ball. For example, if each ball is 50g (the most common amount), the calculation will be as follows: 450 / 50 = 9 balls.

The important thing when changing from one yarn to another is that the knitting/crochet tension remains the same. This is so that the measurements of the finished piece will be the same as on the sketch provided. It is easier to achieve the same knitting tension using yarns from the same yarn group. It is also possible to work with multiple strands of a thinner yarn to achieve the knitting tension of a thicker one. Please try our yarn converter. We recommend you to always work a test swatch.

Please NOTE: when changing yarn the garment might have a different look and feel to the garment in the photo, due to individual properties and qualities of each yarn.

See DROPS lesson: Can I use a different yarn than the one mentioned in the pattern?

All our yarns are categorised into yarn groups (from A to F) according to thickness and knitting tension – group A contains the thinnest yarns and group F the thickest. This makes it easier for you to find alternative yarns to our patterns, should you wish to switch yarn. All yarns within the same group have a similar knitting tension and can easily replace each other. However, different yarn qualities have different structures and properties which will give the finished work a unique look and feel.

Click here for an overview of the yarns in each yarn group

At the top of all our patterns you’ll find a link to our yarn calculator, which is a helpful tool should you wish to use a different yarn than suggested. By filling in the yarn quality you wish to replace, the amount (in your size) and number of strands, the calculator will present good alternative yarns with the same knitting tension. Additionally it will tell you how much you’ll require in the new qualities and whether you’ll need to work with multiple strands. Most skeins are 50g (some are 25g or 100g).

If the pattern is worked with multiple colours, every colour will have to be calculated separately. Similarly, if the pattern is worked with several strands of different yarns (for example 1 strand Alpaca and 1 strand Kid-Silk) you will have to find alternatives for each, individually.

Click here to see our yarn calculator

Since different yarns have different qualities and textures we have chosen to keep the original yarn in our patterns. However, you can easily find options among our available qualities by using our yarn calculator, or simply pick a yarn from the same yarn group.

It is possible that some retailers still have discontinued yarns in stock, or that someone has a few skeins at home that they would like to find patterns for.

The yarn calculator will provide both alternative yarn as well as required amount in the new quality.

If you think it's hard to decide what size to make, it can be a good idea to measure a garment you own already and like the size of. Then you can pick the size by comparing those measures with the ones available in the pattern's size chart.

You'll find the size chart at the bottom of the pattern.

See DROPS lesson: How to read size chart

The needle size provided in the pattern serves only as a guide, the important thing is to follow the knitting tension. And since knitting tension is very individual, you will have to adjust the needle size to ensure that YOUR tension is the same as in the pattern – maybe you’ll have to adjust 1, or even 2 needle sizes, up or down to achieve the correct tension. For this, we recommend that you work test swatches.

Should you work with a different knitting tension than the one provided, the measurements of the finished garment might deviate from the measurement sketch.

See DROPS lesson: How to measure your tension/gauge

See DROPS video: How to make a tension/gauge swatch

Working a garment top-down provides more flexibility and room for personal adjustment. For example it is easier to try the garment on while working, as well as making adjustments to length of yoke and shoulder caps.

The instructions are carefully explaining every step, in the correct order. Diagrams are adjusted to the knitting direction and are worked as usual.

The diagram depicts all rows/rounds, and every stitch seen from the right side. It is read from bottom to top, from right to left. 1 square = 1 stitch.

When working back and forth, every other row is worked from the right side and every other row is worked from the wrong side. When working from the wrong side, the diagram will have to be worked reversed: from left to right, knit stitches are purled, purl stitches are knit etc.

When working in the round every round is worked from the right side and the diagram are worked from right to left on all rounds.

See DROPS lesson: How to read knitting diagrams

The diagram depicts all rows/rounds, and every stitch seen from the right side. It is worked from bottom to top, from right to left.

When working back and forth every other row is worked from the right side: from right to left and every other row is worked from the wrong side: from left to right.

When working in the round, every row in the diagram are worked from the right side, from right to left.

When working a circular diagram you start in the middle and work your way outwards, counter clockwise, row by row.

The rows usually start with a given number of chain stitches (equivalent to the height of the following stitch), this will either be depicted in the diagram or explained in the pattern.

See DROPS lesson: How to read crochet diagrams

Instructions for working several diagrams after each other on the same row/round, will often be written like so: “work A.1, A.2, A.3 a total of 0-0-2-3-4 times". This means you work A.1 once, then A.2 is worked once, and A.3 is repeated (in width) the number of times provided for your size – in this case like so: S = 0 times, M = 0 times, L=2 times, XL= 3 times and XXL = 4 times.

The diagrams are worked as usual: begin with the first row in A.1, then work the first row in A.2 etc.

See DROPS lesson: How to read knitting diagrams

See DROPS lesson: How to read crochet diagrams

The total width of the garment (from wrist-to-wrist) will be larger in the larger sizes, despite the actual sleeves being shorter. The larger sizes have longer sleeve caps and wider shoulders, so there will be a good fit in all sizes.

The measurement sketch/schematic drawing provides information regarding the full length of the garment. If it’s a jumper or a jacket the length is measured from the highest point on the shoulder closest to the neckline, and straight down to the bottom of the garment. It is NOT measured from the tip of shoulder. Similarly, the length of yoke is measured from the highest point on the shoulder and down to where yoke is split into body and sleeves.

On a jacket measures are never taken along bands, unless specifically stated. Always measure inside band stitches when measuring the length.

See DROPS lesson: How to read a schematic drawing

Diagrams are often repeated on the round or in height. 1 repeat is the diagram the way it appears in the pattern. If it says to work 5 repeats of A.1 in the round, then you work A.1 a total of 5 times after/next to each other in the round. If it says to work 2 repeats of A.1 vertically/in height you work the entire diagram once, then begin again at the start and work the entire diagram one more time.

Chain stitches are slightly narrower than other stitches and to avoid working the cast-on edge too tight, we simply chain more stitches to begin with. The stitch count will be adjusted on the following row to fit the pattern and measurement sketch.

The rib edge is more elastic and will contract slightly compared to, for example, stocking stitch. By increasing before the rib edge, you avoid a visible difference in width between the rib edge and the rest of the body.

It’s very easy to cast off too tightly, and by making yarn overs while casting off (and simultaneously casting these off) you avoid a too tight cast off edge.

See DROPS video: How to bind off with yarn overs (yo)

To achieve an even increase (or decrease) you can increase on, for example: every 3rd and 4th row alternately, like so: work 2 rows and increase on the 3rd row, work 3 rows and increase on the 4th. Repeat this until the increase is complete.

See DROPS lesson: Increase or decrease 1 st on every 3rd and 4th row alternately

Should you prefer to work in the round instead of back and forth, you may of course adjust the pattern. You’ll need to add steeks mid-front (usually 5 stitches), and follow the instructions. When you would normally turn and work from the wrong side, simply work across the steek and continue in the round. At the end you’ll cut the piece open, pick up stitches to work bands, and cover the cut edges.

See DROPS video: How to knit steeks and cut open

Should you prefer to work back and forth instead of in the round, you may of course adjust the pattern so you work the pieces separately and then assemble them at the end. Divide the stitches for the body in 2, add 1 edge stitch in each side (for sewing) and work the front and back pieces separately.

See DROPS lesson: Can I adapt a pattern for circular needles into straight needles?

Pattern repeats can vary slightly in the different sizes, in order to get the correct proportions. If you’re not working the exact same size as the garment in the photo, yours might deviate slightly. This has been carefully developed and adjusted so that the complete impression of the garment is the same in all sizes.

Make sure to follow instructions and diagrams for your size!

If you have found a pattern you like which is available in women’s size it’s not very difficult to convert it to men’s size. The biggest difference will be the length of sleeves and body. Start working on the women size that you think would fit across the chest. The additional length will be worked right before you cast off for the armhole/sleeve cap. If the pattern is worked top-down you can add the length right after the armhole or before the first decrease on sleeve.

Regarding additional yarn amount, this will depend on how much length you add, but it is better with a skein too many than too few.

All yarns will have excess fibres (from production) that might come off as lint or shedding. Brushed yarns (ie hairier yarns) have more of these loose, excess fibres, causing more shedding.

Shedding also depends on what is worn under or over the garment, and whether this pulls at the yarn fibres. It’s therefore not possible to guarantee that there will be no shedding

Below are some tips on how to get the best result when working with hairier yarns:

1. When the garment is finished (before you wash it) shake it vigorously so the looser hairs come off. NOTE: do NOT use a lint roller, brush or any method that pulls at the yarn.

2. Place the garment in a plastic bag and put it in your freezer - the temperature will cause the fibres to become less attached to each other, and excess fibres will come off easier.

3. Leave in the freezer for a few hours before taking it out and shaking it again.

4. Wash the garment according to the instructions on the yarn label.

Pilling is a natural process that happens to even the most exclusive of fibers. It's a natural sign of wear and tear that is hard to avoid, and that is most visible in high friction areas of your garment like a sweater's arms and cuffs.

You can make your garment look as new by removing the pilling, using a fabric comb or a pill/lint remover.

Still can't find the answer you need? Then scroll down and leave your question so one of our experts can try to help you. This will be done normally within 5 to 10 working days.
In the meantime, you can read the questions and answers that others have left to this pattern or join the DROPS Workshop on Facebook to get help from fellow knitters/crocheters!

You might also like...

Post a comment to pattern DROPS 197-15

We would love to hear what you have to say about this pattern!

If you want to leave a question, please make sure you select the correct category in the form below, to speed up the answering process. Required fields are marked *.

Comments / Questions (30)

country flag Gisa wrote:

Wenn A 1 bis A3 einmal gestrickt ist, soll man wie folgt stricken. 5 Maschen glatt rechts, 1Masche glatt rechts ,A4 13, Maschen usw. Meine Frage ist, muss ich diese eine rechte Masche immer wieder stricken?

28.01.2021 - 11:54

DROPS Design answered:

Liebe Gisa, nach A.1-A.3 stricken Sie A.5 und A.5 mit 5 Blendemaschen kraus rechts (= wie zuvor) und 1 Masche glatt rechts beidseitig damit das Muster symetrisch wird. Viel Spaß beim stricken!

28.01.2021 - 13:50

country flag Susan McClure wrote:

Your answer makes perfect sense. Thanks so much for the quick reply!

13.11.2020 - 14:52

country flag Susan McClure wrote:

I made the Agnes Drops Children 34-9 for my granddaughter. It turned out beautifully. This is my first DROPS pattern, and I found it easy to understand and enjoyed making it very much.

13.11.2020 - 02:58

country flag Susan wrote:

Hello! In the 1st increase row, are the increases completed while also working chart A.2 in the same row? How is this accomplished? Thanks in advance for your help.

13.11.2020 - 02:55

DROPS Design answered:

Dear Susan, on 7th row in A.2 you will increase 24 or 30 (see size) sts evenly (read more here) then on next row you will have enough stitches to repeat A.2 4 or 5 more times. On 2nd increase row, you will increarse 18, 24 or 30 sts = 3, 4 or 5 more repeats of A.2 in width after this row and on 3rd increase row, you will increase 12, 18 or 24 sts = 2, 3 or 4 more repeats of A.2 in width after this row. Happy knitting!

13.11.2020 - 08:28

country flag Gabi wrote:

Vielen Dank für die rasche Hilfe. Jetzt habe ich meinen Fehler erkannt ;-) Und es kann weitergehen mit der wunderschönen Jacke .

06.07.2020 - 09:32

country flag Gabi wrote:

Ich habe ein Problem bei dem Musterübergang von A4 auf A5. Das Muster rutscht mir dort komplett weg ab Reihe 11. In Reihe 11 sollen (Größe M) 3 Maschen per Umschlag zugenommen werden: Am Anfang von Rapport A4 am Ende von Rapport A4 und am Ende von Rapport A5. Wie kann ich denn am Ende von A5 und am Anfang von A4 per Umschlag eine Masche zunehmen. Das wäre dann ja ein Doppelumschlag, der ein großes Loch hinterlässt. Was verstehe ich hier an dieser Stelle falsch? Danke für eure Hilfe.

05.07.2020 - 17:07

DROPS Design answered:

Liebe Gabi, A.4 wird nur einmal in der Breite gestrickt (= dann nehmen Sie bei der 11. Reihe 1 M am Anfang + 1 Masche am Ende vom Rapport) dann wierdeholen Sie A.5 (14 Mal in der Breite in M) = 1 Umschlag am Ende vom jeden A.5. Viel Spaß beim stricken!

06.07.2020 - 09:06

country flag Kristina wrote:

Den første pind efter opslagning er det ret eller vrangside? Jeg har taget den som værende retside, men så syntes jeg ydermere det er svært at aflure om der skal være en pind retstrik efter første knaphul eller om mønsteret starter på vrangsiden? Håber mine spørgsmål er til at forstå.

20.06.2020 - 17:14

DROPS Design answered:

Hei Kristina. Første rad i alle diagrammene strikkes fra retten, så både kast/omslag og de ulike ikonene i diagrammene gjøres fra retten. God Fornøyelse!

22.06.2020 - 13:22

country flag Carole Ratthe wrote:

Pourquoi a la 2e augmentation jai trop de mailles

26.03.2020 - 01:16

DROPS Design answered:

Bonjour Mme Ratthe, pouvez-vous nous indiquer quelle taille vous tricotez et où vous en êtes exactement? Merci!

26.03.2020 - 10:34

country flag Lea Groot wrote:

Mijn vraag gaat over het breien van patroon A4 en A5., Aan het begin A4 en A5 van de derde toer komt een omslag, in de volgende toer wordt deze gedraaid gebreid "zodat er een gaatje ontstaat". Moet dat niet zijn zodat er geen gaatje ontstaat??

31.10.2019 - 17:19

DROPS Design answered:

Dag Lea,

Je hebt gelijk, er moet inderdaad staan dat er geen gaatje ontstaat. Het is nu aangepast. Dankjewel!

05.11.2019 - 13:22

country flag Detlev wrote:

Hallo, recht herzlichen Dank. Jetzt hab ich meinen Fehler erkannt :-)

08.07.2019 - 18:38