
Popular categories
Looking for a yarn?


|
||||||||||||||||
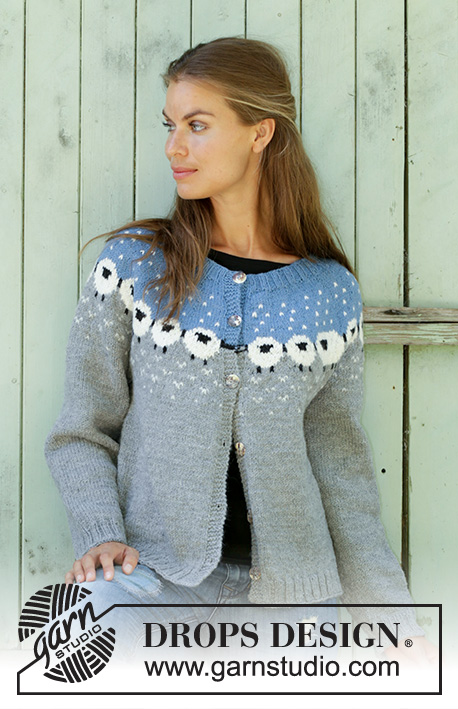
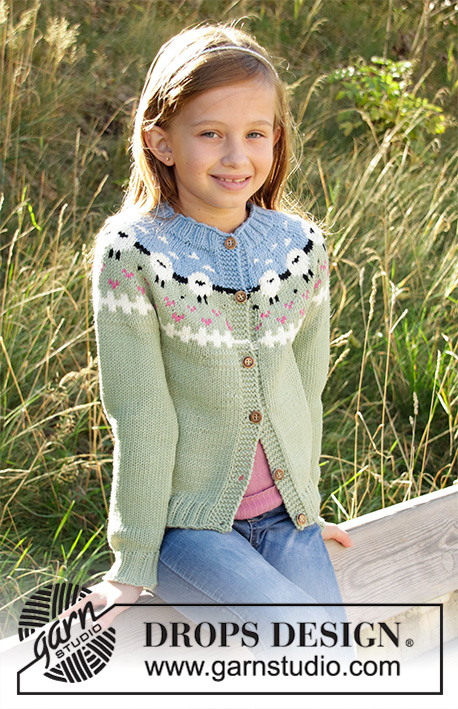
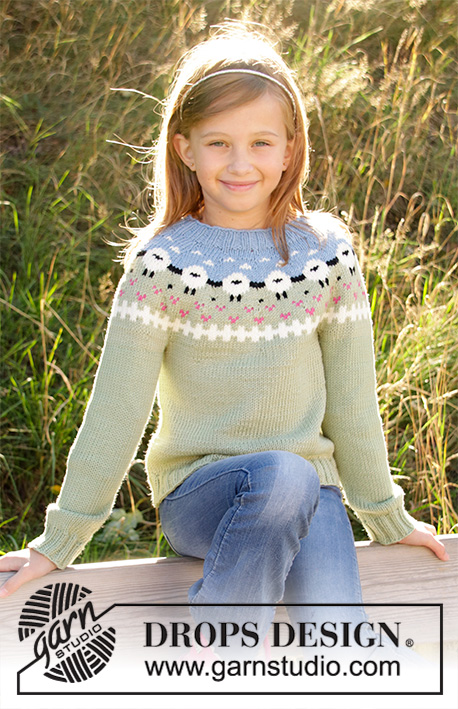
Sheep Happens! |
||||||||||||||||
|
|
||||||||||||||||
Knitted jumper with round yoke in DROPS Merino Extra Fine or Lima. The piece is worked top down in Nordic pattern with sheep S - XXXL.
DROPS 194-2 |
||||||||||||||||
|
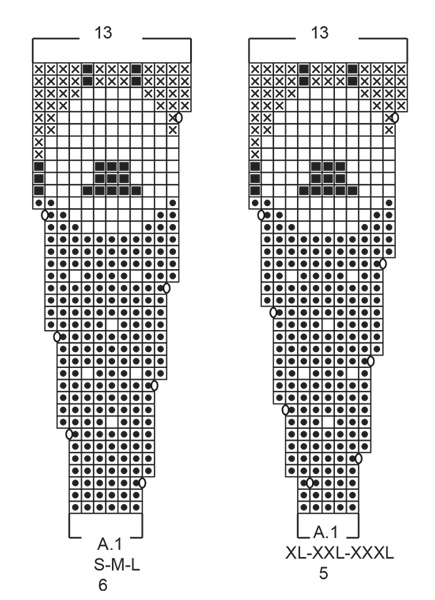
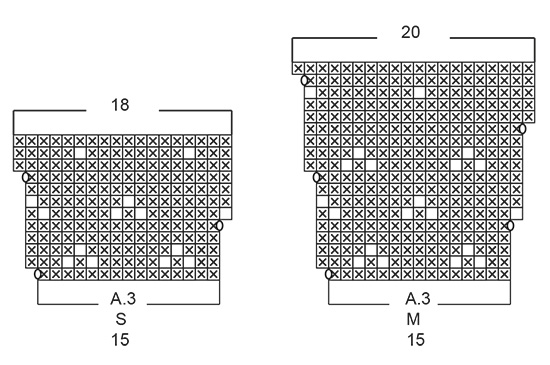
EXPLANATIONS FOR THE PATTERN: ------------------------------------------------------- PATTERN: See diagrams A.1 to A.3. Choose diagram for your size. The diagrams are worked in stocking stitch. As there are long spaces between colour changes, you should twist the strands together approx. every 7th stitch to avoid having long, loose strands at the back. INCREASE TIP (evenly spaced): To work out how to increase evenly, count the total number of stitches on the row (e.g. 90 stitches) and divide these stitches by the number of increases to be made (e.g. 31) = 2.9. In this example, make 1 yarn over after approx. each 3rd stitch. On the next row work the yarn overs twisted to avoid holes. DECREASE TIP (for sleeves): Decrease 1 stitch on each side of the marker thread as follows: Work until there are 3 stitches left before the marker thread, knit 2 together, knit 2 (the marker thread sits in the middle of these 2 stitches), slip 1 stitch as if to knit, knit 1, pass the slipped stitch over the knitted stitch (= 2 stitches decreased). ------------------------------------------------------- START THE PIECE HERE: ------------------------------------------------------- JUMPER - SHORT OVERVIEW OF THE PIECE: The yoke is worked in the round with circular needle, top down. The yoke is divided for body and sleeves and the body is continued in the round. The sleeves are worked in the round with double pointed needles. YOKE: Cast on 92-96-100-104-112-120 stitches with circular needle size 3 mm and light grey blue. Knit 1 round. Then work rib (= knit 2 / purl 2). Work rib for 3 cm. Change to circular needle size 4 mm. Knit 1 round and increase 28-24-32-30-32-34 stitches evenly spaced – read INCREASE TIP = 120-120-132-134-144-154 stitches. Then work pattern as follows (the round starts mid back): Work A.1 (= 6-6-6-5-5-5 stitches) over the first 12-12-12-10-10-10 stitches (= a total of 2 times), A.2 (= 12 stitches), A.1 over the next 42-42-48-50-55-60 stitches (= a total of 7-7-8-10-11-12 times), A.2 over the next 12 stitches, A.1 over the last 42-42-48-50-55-60 stitches (= a total of 7-7-8-10-11-12 times). REMEMBER THE KNITTING TENSION! When A.1 and A.2 have been worked 1 time in height there are 244-244-270-322-348-374 stitches on the needle. The piece measures approx. 16 cm (including the rib). Knit 1 round with light grey and increase 11-11-15-8-12-1 stitches evenly on round = 255-255-285-330-360-375 stitches. Work A.3 (= 15 stitches) over all stitches (= a total of 17-17-19-22-24-25 times in width). When A.3 has been worked 1 time in height there are 306-340-361-396-432-450 stitches on the needle. The piece is now worked with light grey to finished length. Work stocking stitch until the piece measures 21-23-25-26-28-30 cm (including the rib). Then divide the piece for body and sleeves as follows: Work 44-48-50-56-62-67 stitches stocking stitch (= half back piece), place the next 64-72-79-84-90-90 stitches on a thread for sleeve and cast on 8-8-10-10-10-14 new stitches under the sleeve, work 89-99-102-115-127-135 stitches stocking stitch (= front piece), place the next 64-72-79-84-90-90 stitches on a thread for sleeve and cast on 8-8-10-10-10-14 new stitches under the sleeve, finally work 45-49-51-57-63-68 stitches stocking stitch (= half back piece) = 194-212-223-248-272-298 stitches. BODY: Continue working in stocking stitch. When the piece measures 26-26-26-27-27-27 cm from where the body was divided from the sleeves, increase 26-32-33-32-40-42 stitches evenly on next round = 220-244-256-280-312-340 stitches. Change to circular needle size 3 mm and work rib (= knit 2 / purl 2) over all stitches (the yarn overs are worked twisted to avoid holes). Cast off with knit when the rib measures 4 cm (i.e. the piece measures a total of approx. 30-30-30-31-31-31 cm from where the body was divided from the sleeves). The jacket measures a total of 54-56-58-60-62-64 cm, measured from the shoulder. SLEEVE: Place the 64-72-79-84-90-90 stitches from the thread on the one side of the piece on double pointed needles size 4 mm and knit up 1 stitch in each of the 8-8-10-10-10-14 stitches cast on under the sleeve = 72-80-89-94-100-104 stitches. Insert 1 marker thread in the middle of the 8-8-10-10-10-14 stitches (= mid under sleeve). Work stocking stitch in the round with light grey. When the piece measures 1 cm from where the sleeve was divided from the body, decrease 2 stitches mid under sleeve – read DECREASE TIP. Decrease like this every 3-2-1½-1½-1½-1 cm a total of 11-15-18-19-22-23 times = 50-50-53-56-56-58 stitches. When the sleeve measures 40-38-37-36-35-33 cm from where the sleeve was divided from the body, increase 2-2-3-0-4-2 evenly on round = 52-52-56-56-60-60 stitches. Change to double pointed needles size 3 mm. Work rib in the round (= knit 2 / purl 2). Cast off with knit when the piece measures 44-42-41-40-39-37 cm from where the sleeve was divided from the body (approx. 4 cm rib). Work the other sleeve in the same way. |
||||||||||||||||
Diagram explanations |
||||||||||||||||
|
||||||||||||||||
|
||||||||||||||||

|
||||||||||||||||
|
||||||||||||||||

|
||||||||||||||||

|
||||||||||||||||
|
Have you made this or any other of our designs? Tag your pictures in social media with #dropsdesign so we can see them! Do you need help with this pattern?You'll find tutorial videos, a Comments/Questions area and more by visiting the pattern on garnstudio.com. © 1982-2024 DROPS Design A/S. We reserve all rights. This document, including all its sub-sections, has copyrights. Read more about what you can do with our patterns at the bottom of each pattern on our site. |
||||||||||||||||


With over 40 years in knitting and crochet design, DROPS Design offers one of the most extensive collections of free patterns on the internet - translated to 17 languages. As of today we count 304 catalogues and 11422 patterns - 11422 of which are translated into English (UK/cm).
We work hard to bring you the best knitting and crochet have to offer, inspiration and advice as well as great quality yarns at incredible prices! Would you like to use our patterns for other than personal use? You can read what you are allowed to do in the Copyright text at the bottom of all our patterns. Happy crafting!
Comments / Questions (126)
Ik snap het kopje meerderen niet ik wil de xxxl maat maken die staat onder A1 ,maar dan lees ik iets onder het kopje meerderen waar ik echt niks van snap bijv. Brei A1 is 5steken over de eerste 10 st.en dan staat er =in totaal 2x enz maar ik heb geen idee wat er hier bedoelt wordt. De teltekening is geen probleem maar de geschreven tekst snap ik helemaal niks van.☹️ Help AUB
14.03.2024 - 22:12DROPS Design answered:
Dag Marlies,
Je leest het telpatroon van onder naar boven, dus A.1 begint voor jou met 5 steken. Je breit A.1 over de eerste 10 steken. Dat betekent dus 2 herhalingen in de breedte van A.1.
20.03.2024 - 12:48Bonjour , j ai acheté le fils flora pour la réalisation de ce modèle. ce modèle est-il tricoté en fils double ? Le fils Flora est à tricoter avec des aiguilles plus fines .
28.02.2024 - 00:43DROPS Design answered:
Bonjour Mme Lecomte, en fait Flora appartient au groupe de fils A alors que ce pull a été réalisé dans un fil du groupe B, autrement dit, pour utiliser Flora ici il faudrait entièrement recalculer les explications pour la tension correspondante; retrouvez ici tous les pulls que vous pouvez réaliser en ou avec Flora, ou bien utilisez notre convertisseur pour voir les alternatives possibles. Bon tricot!
28.02.2024 - 09:28Can I sell items made from any of your patterns, not commercially just for a Charity Craft Sale. Many thanks
23.02.2024 - 10:57DROPS Design answered:
Dear Mable, "The sale of garments based on DROPS patterns is permitted as long as they are sold as single items or per order. Further commercial use of the patterns is not permitted. It has to be clearly stated that the garment is made based on a design from DROPS DESIGN. " For further details, please see the framed text ("small print" ) below the pattern. Happy Knitting!
07.03.2024 - 22:47Maßtabelle.\r\nIch kann in der Anleitung die Maßtabelle nicht finden und weiß deshalb nicht, welche Größe für mich richtig wäre. Welchem Brustumfang entspricht Größe L?
11.10.2023 - 01:38DROPS Design answered:
Liebe Ute, messen Sie einen ähnlichen Pullover, den Sie gerne tragen und vergleichen Sie die Maßen mit den in der Skizze, so finden Sie die passende Größe - hier lesen Sie mehr. Viel Spaß beim stricken!
11.10.2023 - 08:41Hello, I would love to have this Sheep Happens pattern in crochet. Is it possible to convert it? Thanks!
14.03.2023 - 09:06DROPS Design answered:
Dear Mrs Sarno, it might be possible, but we unfortunately are not able to adapt every pattern to every request, please contact your yarn store or any crochet forum for any individual assistance. Thanks for your comprehension.
14.03.2023 - 10:14The sheep happens pattern in cm or inches what size is XXXL
16.02.2023 - 01:55DROPS Design answered:
Dear Mrs Callaghan, all measurements in the chart are taken in cm - convert into inches here if needed - and read more about charts and how to choose a size here. Happy knitting!
16.02.2023 - 12:15Bonjour Je cherche le chauffe épaules avec l intégration des moutons est-ce que vous pouvez me référer le numéro, serait grandement apprécié merci
01.01.2023 - 20:04DROPS Design answered:
Bonjour Marie-Louise, nous n'avons pas ce type de modèles, si vous l'avez vu réalisé, contactez directement la personne qui l'a tricoté, elle pourra probablement vous aider. Bon tricot!
02.01.2023 - 15:57Liebest Drops Team, ich stricke eure Anleitungen unheimlich gerne vor allem weil man wirklich immer Hilfe bekommt. Dafür möchte ich euch danken. Ich wünsche euch ein schönes Weihnachtsfest und alles gute fürs neue Jahr 🥂viele Grüße Margitta
17.12.2022 - 06:02Liebes Drops Team,wenn die Diagramme 2x bzw 8 x hintereinander gestrickt werden .wie hier z.b. A1 .werden dann auch jeweils die Zunahmen jeweils wiederholt.wenn es also heißt 8x ,dann werden auch 8 Zunahmen gemacht? Ich Danke euch im vorraus und liebe Grüße
16.12.2022 - 16:15DROPS Design answered:
Liebe Margitta, die Diagramme sollen Sie genau wie beschrieben stricken und wiederholen, dh wenn A.1 2 Mal gestrickt wird, stricken Sie jedes A.1 mit den jeweilgen Zunahmen und wenn A.2 8 x wiederholt muss, dann stricken Sie das Diagram genau wie beschrieben und 8x (dh mit den jeweiligen Zunahmen), bei jedem Diagram sollen Sie dieselbe Maschenanzahl bei jeder Runde haben. Viel Spaß beim stricken!
16.12.2022 - 16:21Thanks for your quick reply. Can you advise if there is a comparable pattern (top-down with round yoke) with an elevated back that I can use as guidance? I have tried searching but haven’t found anything, and there are so many patterns. Thanks
28.11.2022 - 11:05DROPS Design answered:
Dear Mo, please find all our jumpers worked top down with a yarn group B (such as this one) here - including jumpers with or without elevation (and yarn group B). Happy knitting!
28.11.2022 - 11:28